How to Use Rain Sensor Module: Examples, Pinouts, and Specs
Introduction
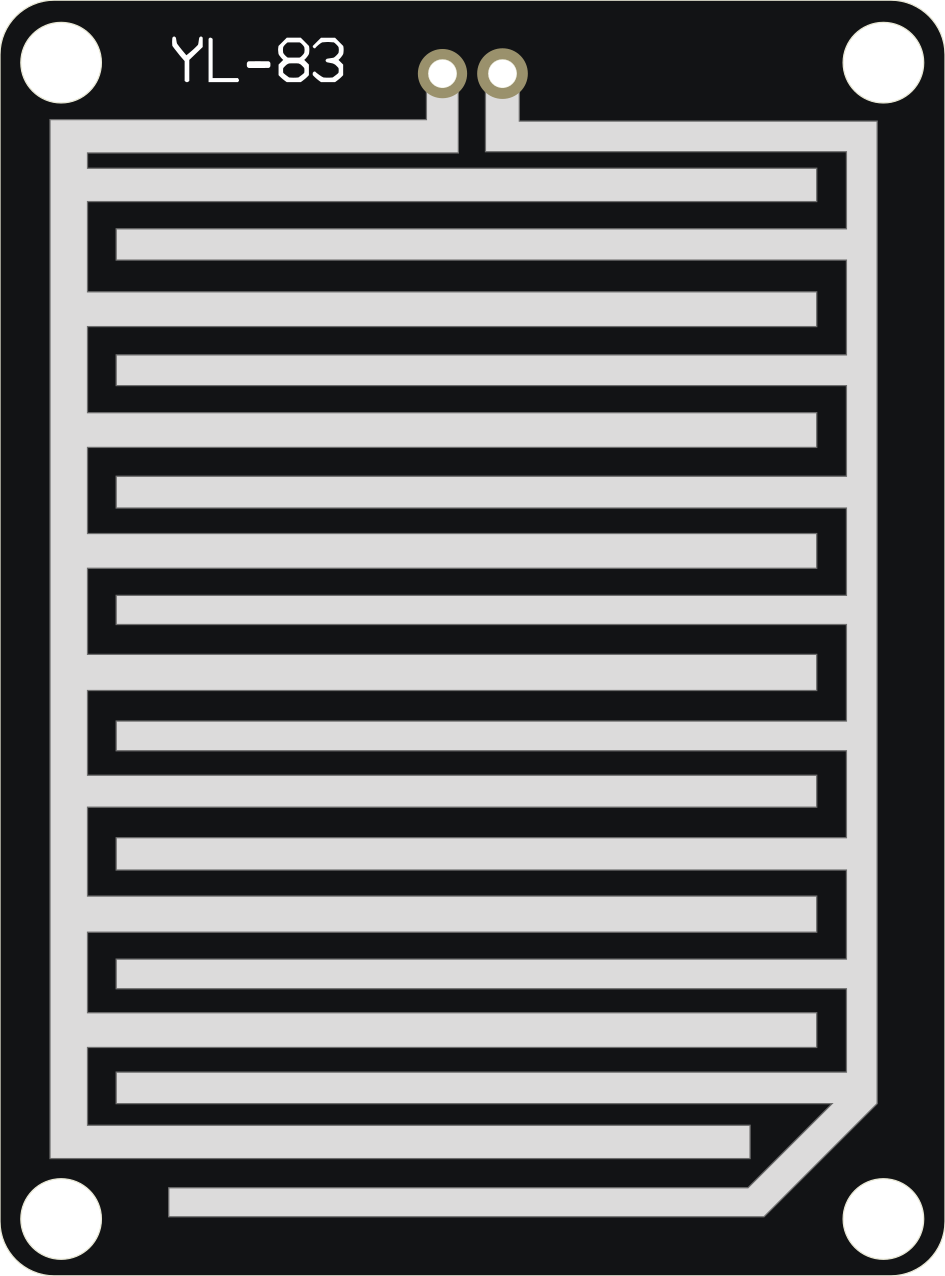
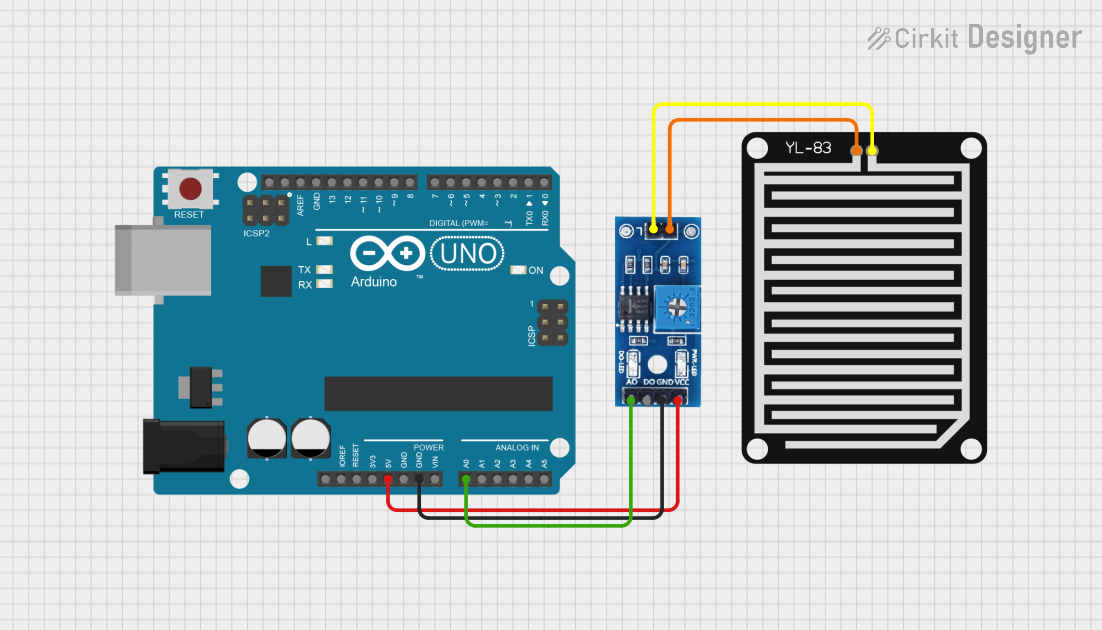
The Rain Sensor Module (Manufacturer Part ID: FC-37 or YL-83) is a simple and cost-effective device designed to detect the presence of rain. It consists of a rain detection board and a control module. The rain detection board has a series of exposed conductive traces that act as a variable resistor. When water droplets make contact with the board, the resistance changes, and the control module processes this signal to determine the presence of rain.
Explore Projects Built with Rain Sensor Module
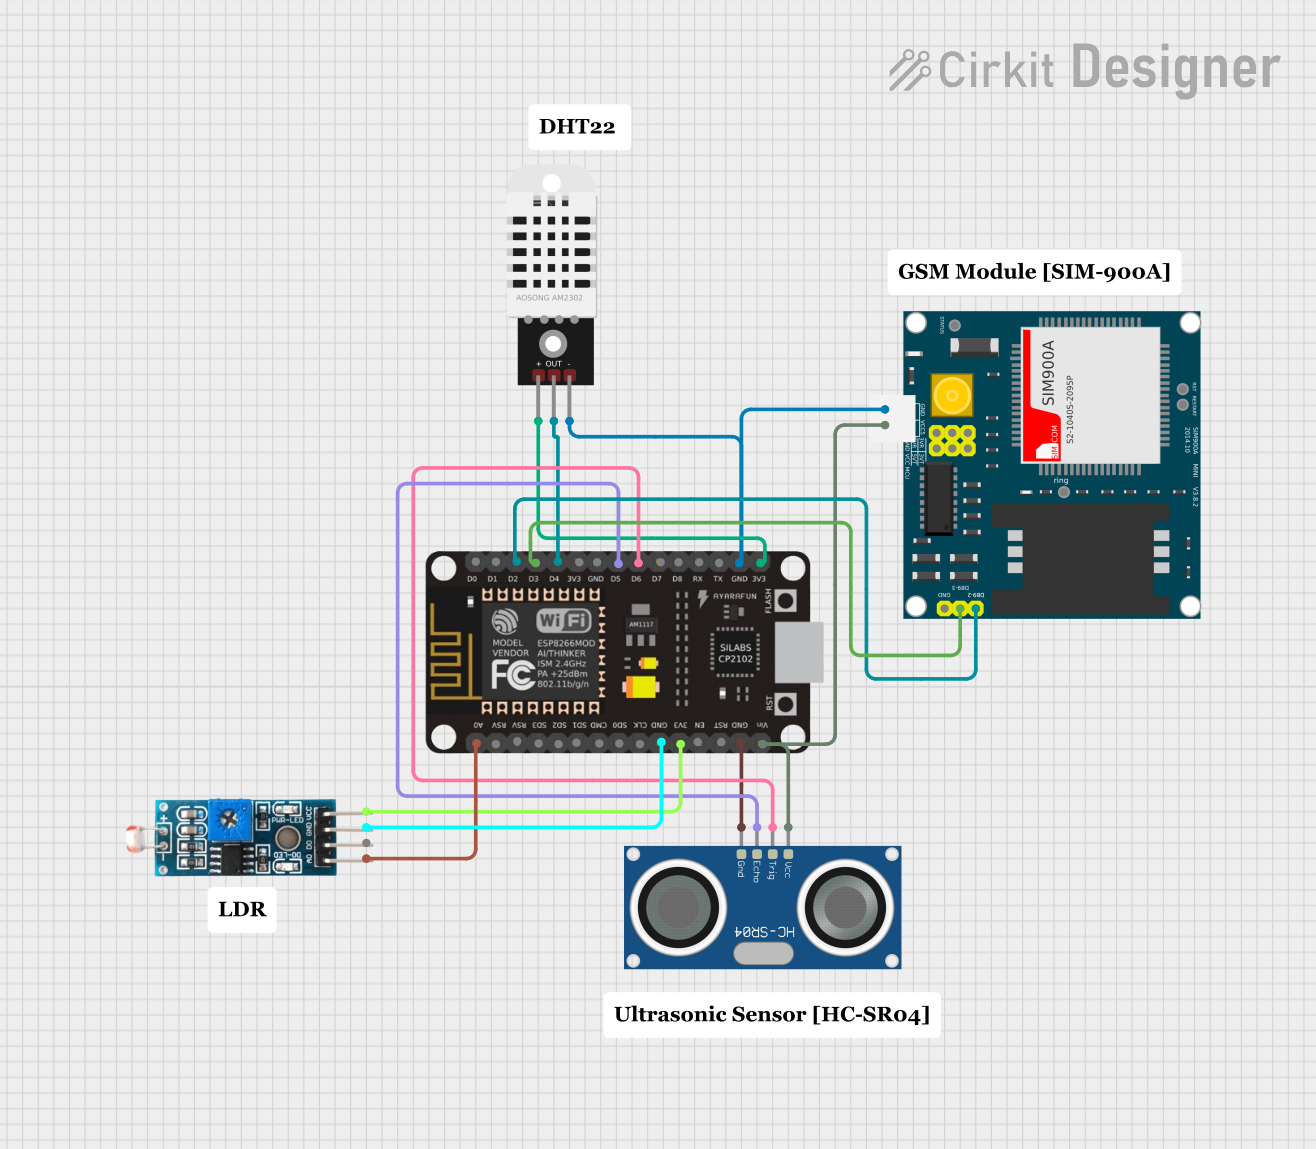
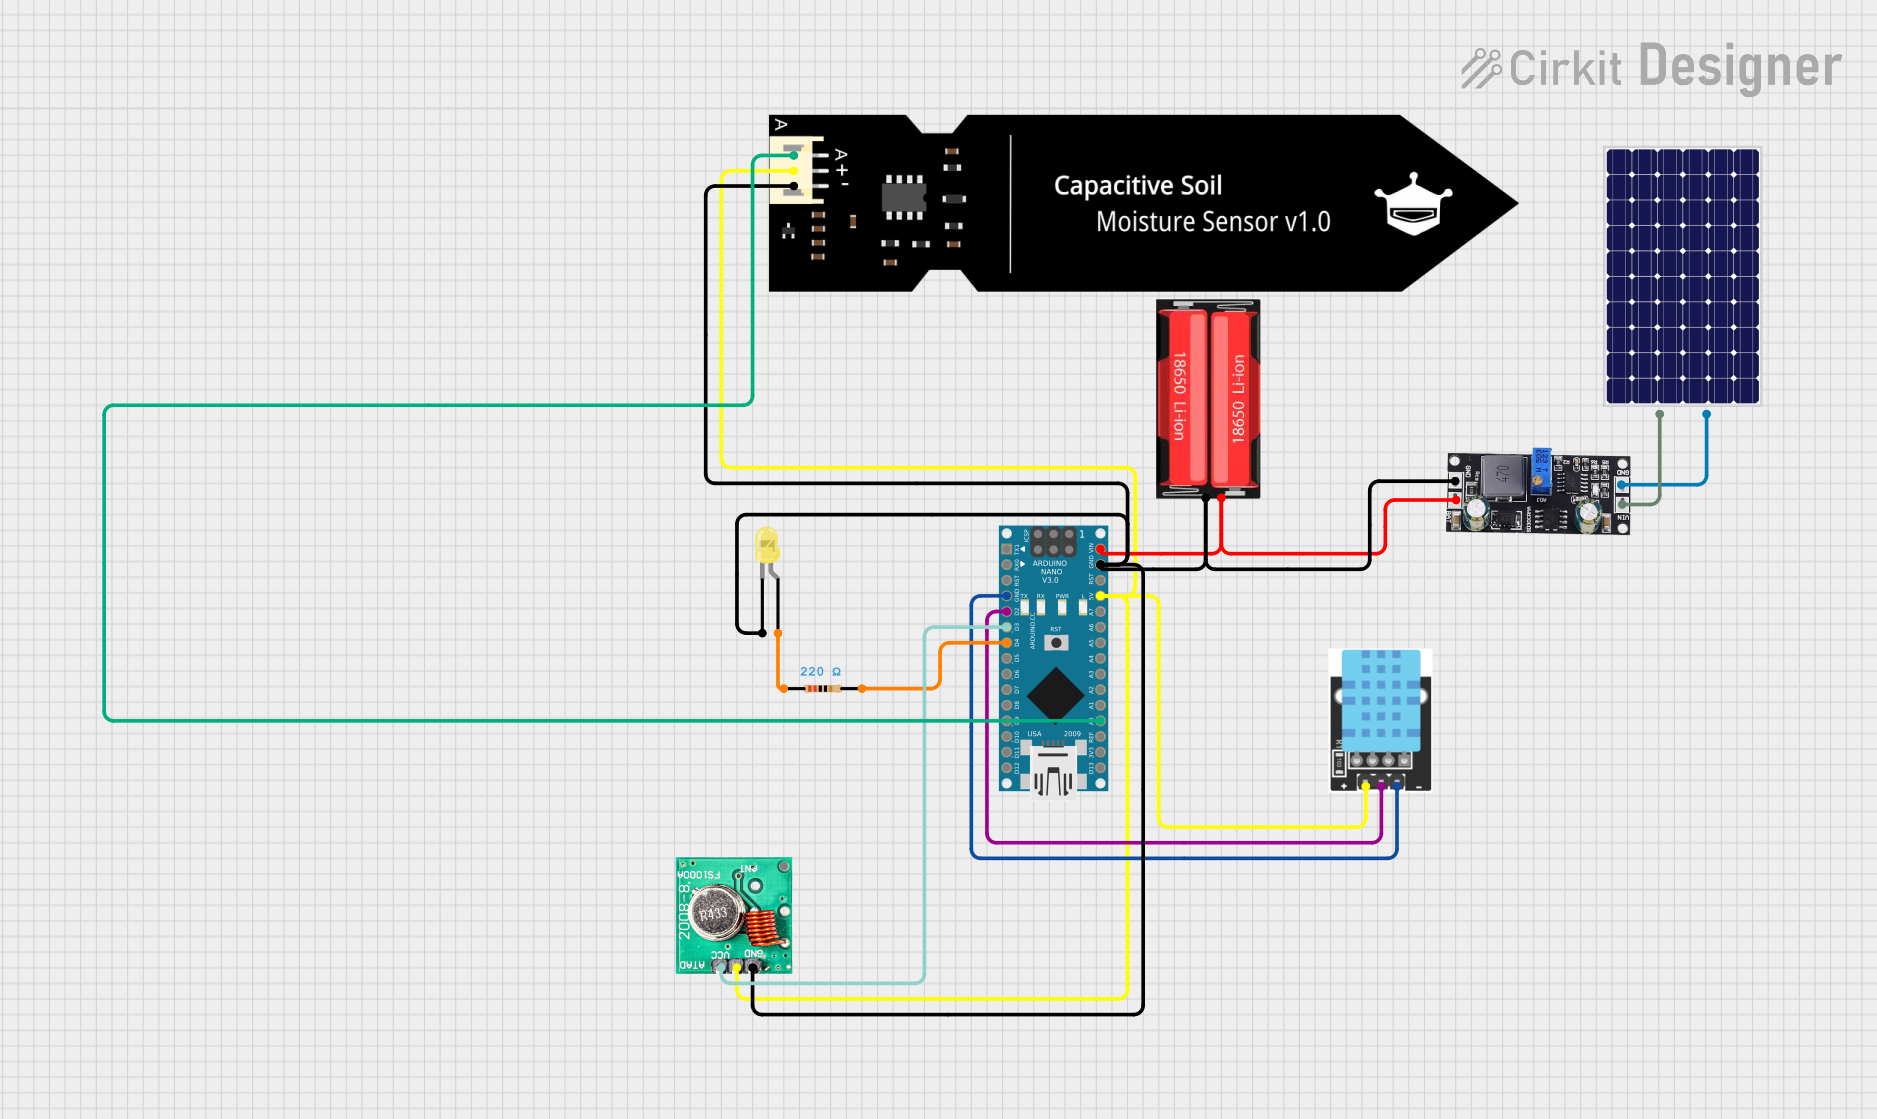
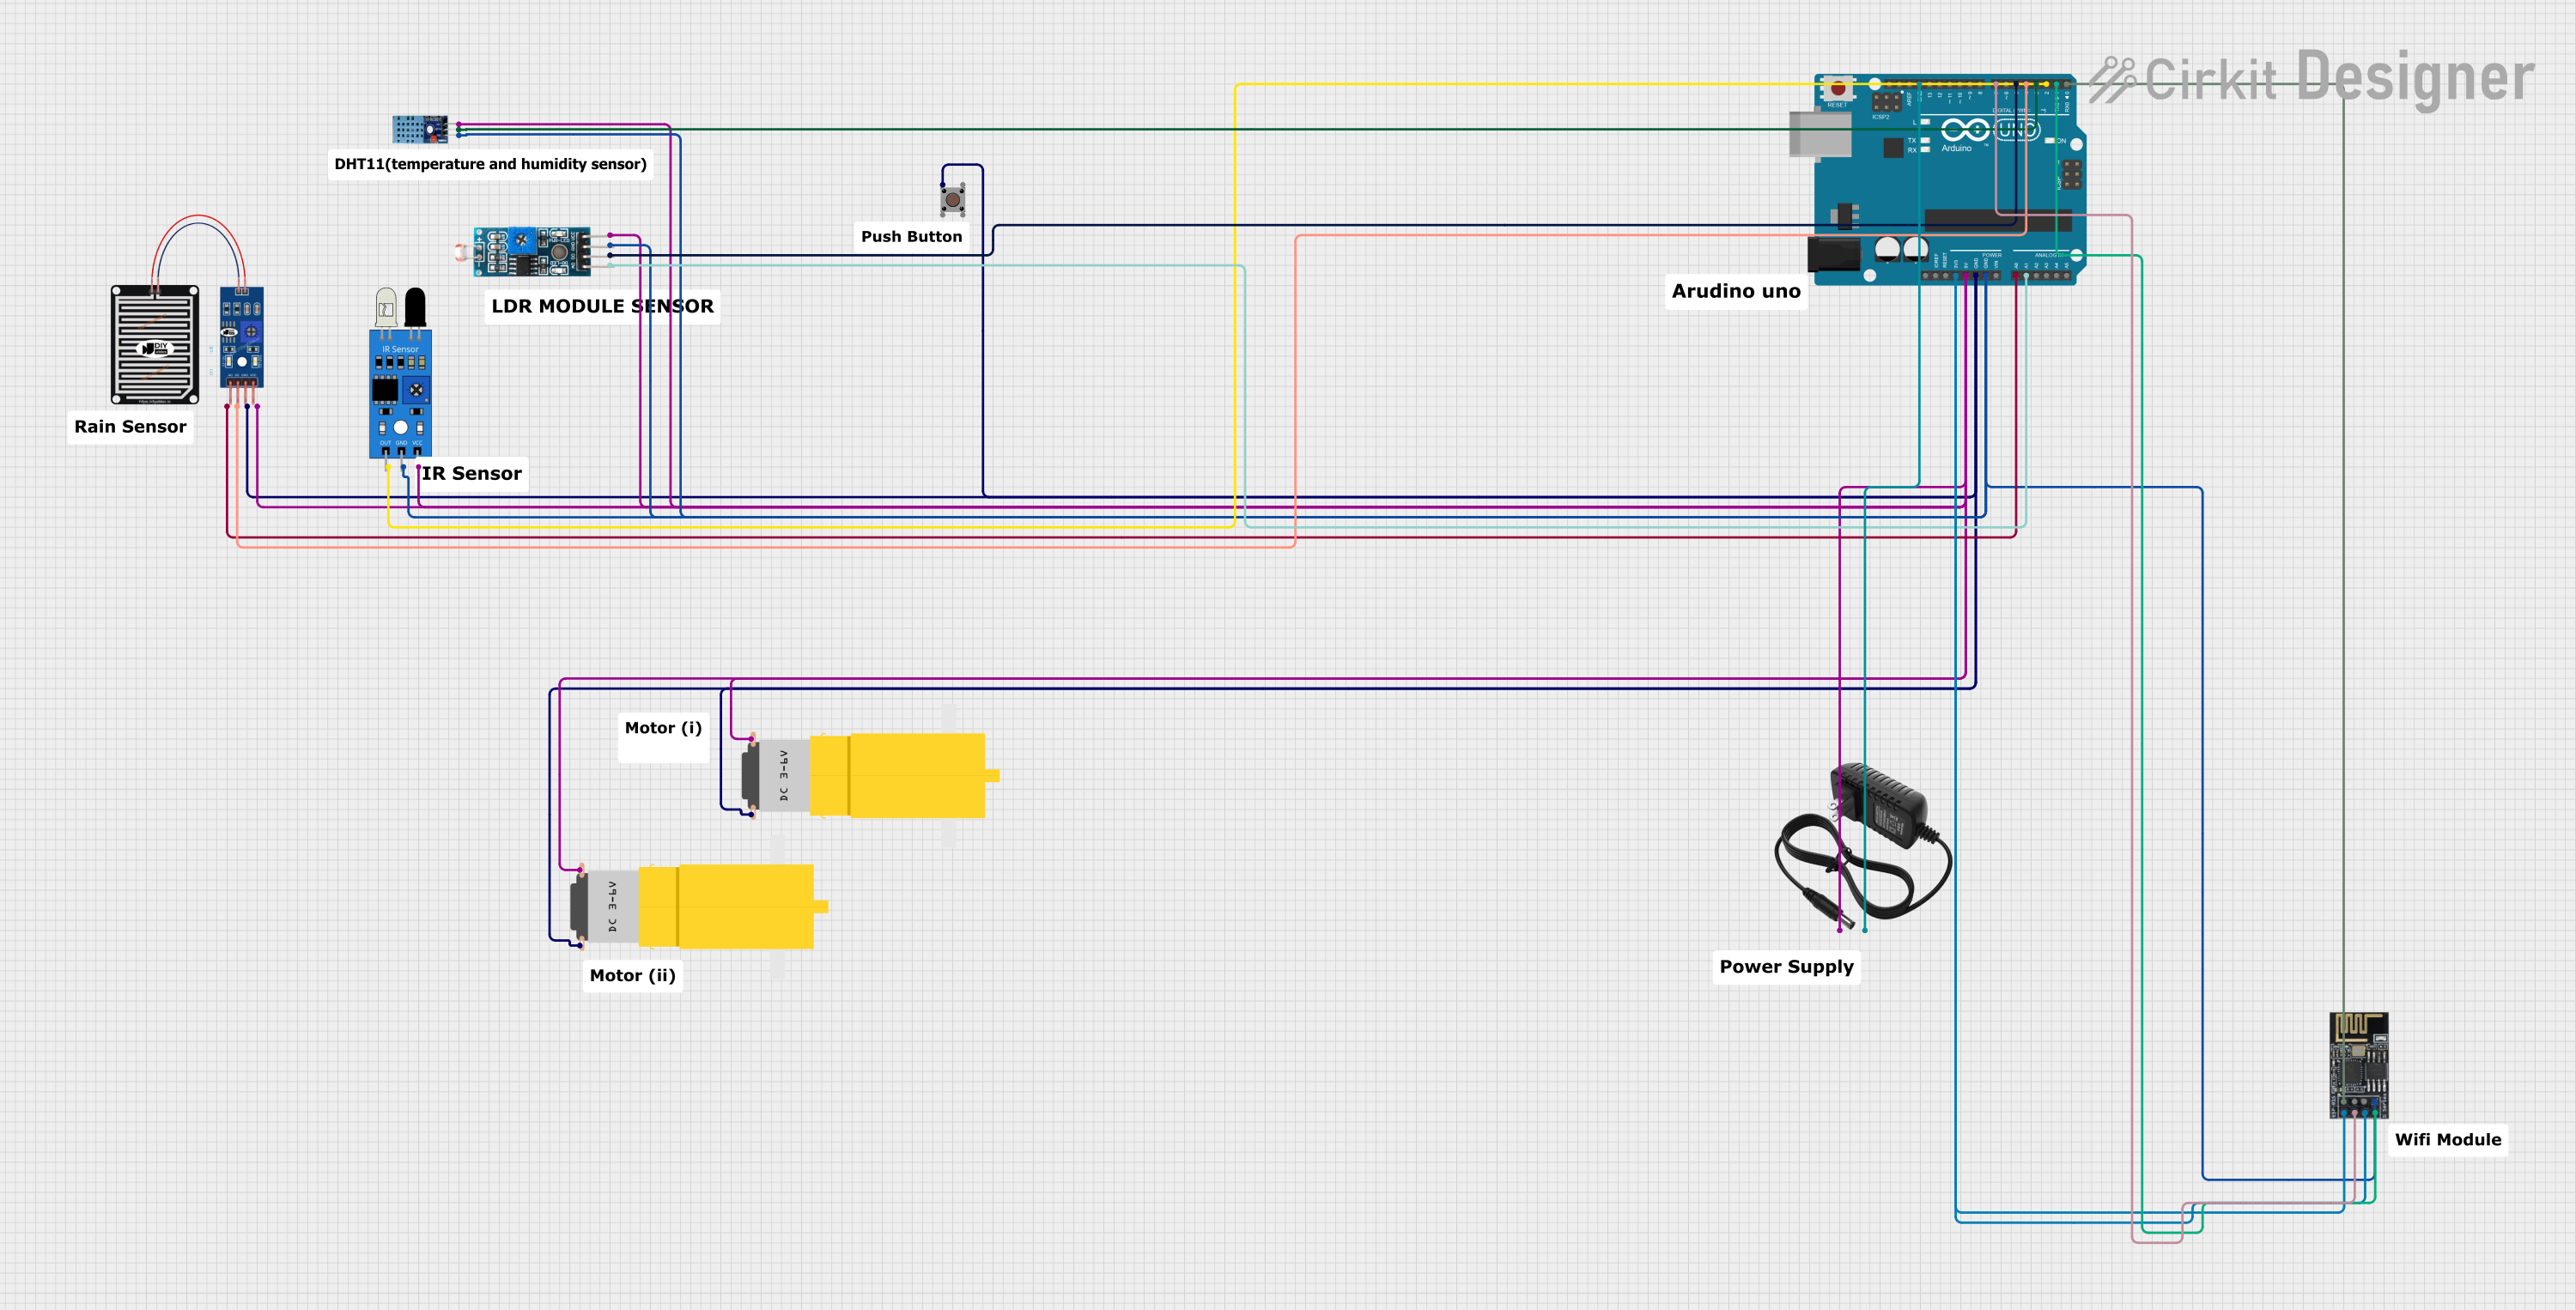
Explore Projects Built with Rain Sensor Module
Common Applications and Use Cases
- Automated irrigation systems: Activates or deactivates watering systems based on rainfall.
- Weather monitoring systems: Detects rain for meteorological purposes.
- Automotive systems: Automates windshield wipers in vehicles.
- Home automation: Triggers alerts or actions when rain is detected.
Technical Specifications
Key Technical Details
| Parameter | Specification |
|---|---|
| Operating Voltage | 3.3V to 5V |
| Output Type | Digital (D0) and Analog (A0) |
| Digital Output Voltage | 0V (rain detected), 5V (no rain) |
| Analog Output Voltage | Proportional to water intensity |
| Current Consumption | < 20mA |
| Dimensions (Control Board) | 30mm x 16mm |
| Dimensions (Sensor Board) | 54mm x 40mm |
Pin Configuration and Descriptions
Control Module Pinout
| Pin Name | Type | Description |
|---|---|---|
| VCC | Power Input | Connect to 3.3V or 5V power supply. |
| GND | Ground | Connect to the ground of the power supply. |
| D0 | Digital Out | Outputs HIGH (5V) when no rain is detected, |
| and LOW (0V) when rain is detected. | ||
| A0 | Analog Out | Outputs an analog voltage proportional to the |
| amount of water on the sensor board. |
Rain Detection Board
The rain detection board connects to the control module via two pins:
- S (Signal): Connects to the control module for signal transmission.
- - (Ground): Connects to the ground pin of the control module.
Usage Instructions
How to Use the Component in a Circuit
- Connect the Power Supply:
- Connect the
VCCpin of the control module to a 3.3V or 5V power source. - Connect the
GNDpin to the ground of the power source.
- Connect the
- Connect the Output Pins:
- Use the
D0pin for digital output if you only need to detect the presence of rain. - Use the
A0pin for analog output if you need to measure the intensity of rainfall.
- Use the
- Attach the Rain Detection Board:
- Connect the rain detection board to the control module using the provided pins.
- Integrate with a Microcontroller (Optional):
- Connect the
D0orA0pin to an input pin on a microcontroller (e.g., Arduino UNO).
- Connect the
Important Considerations and Best Practices
- Placement: Ensure the rain detection board is placed outdoors where it can directly come into contact with rain. Avoid placing it under obstructions like roofs or trees.
- Waterproofing: The control module is not waterproof. Protect it from exposure to rain by housing it in a waterproof enclosure.
- Cleaning: Periodically clean the rain detection board to remove dirt or debris that may affect its sensitivity.
- Power Supply: Use a stable power supply to avoid erratic readings.
Example Code for Arduino UNO
// Rain Sensor Module Example Code for Arduino UNO
// This code reads both digital and analog outputs from the rain sensor module
// and prints the results to the Serial Monitor.

#define RAIN_SENSOR_DIGITAL_PIN 2  // Connect D0 to digital pin 2
#define RAIN_SENSOR_ANALOG_PIN A0 // Connect A0 to analog pin A0

void setup() {
  pinMode(RAIN_SENSOR_DIGITAL_PIN, INPUT); // Set digital pin as input
  Serial.begin(9600); // Initialize serial communication at 9600 baud
}

void loop() {
  // Read digital output (D0)
  int rainDetected = digitalRead(RAIN_SENSOR_DIGITAL_PIN);

  // Read analog output (A0)
  int rainIntensity = analogRead(RAIN_SENSOR_ANALOG_PIN);

  // Print results to Serial Monitor
  if (rainDetected == LOW) {
    Serial.println("Rain detected!");
  } else {
    Serial.println("No rain detected.");
  }

  Serial.print("Rain Intensity (Analog Value): ");
  Serial.println(rainIntensity);

  delay(1000); // Wait for 1 second before next reading
}
Troubleshooting and FAQs
Common Issues and Solutions
No Output from the Module:
- Cause: Incorrect wiring or loose connections.
- Solution: Double-check all connections, ensuring the power supply is stable and the rain detection board is properly connected to the control module.
Erratic Readings:
- Cause: Dirt or debris on the rain detection board.
- Solution: Clean the rain detection board with a soft cloth and ensure it is free of contaminants.
Digital Output Always HIGH (No Rain Detected):
- Cause: Insufficient water on the sensor board or faulty module.
- Solution: Test the module by applying a small amount of water to the rain detection board. If the issue persists, consider replacing the module.
Analog Output Not Changing:
- Cause: Faulty analog pin or damaged sensor board.
- Solution: Test the analog pin with a known voltage source to verify its functionality. Replace the sensor board if necessary.
FAQs
Q: Can the rain sensor module detect the intensity of rainfall?
A: Yes, the analog output (A0) provides a voltage proportional to the amount of water on the sensor board, which can be used to estimate rainfall intensity.Q: Is the rain detection board waterproof?
A: The rain detection board is designed to be exposed to rain, but the control module is not waterproof and must be protected.Q: Can I use this module with a 3.3V microcontroller?
A: Yes, the module operates at 3.3V to 5V, making it compatible with 3.3V microcontrollers like ESP32 or 5V microcontrollers like Arduino UNO.Q: How do I increase the sensitivity of the module?
A: The control module has a potentiometer that can be adjusted to change the sensitivity of the digital output (D0).
By following this documentation, you can effectively integrate and troubleshoot the Rain Sensor Module in your projects.