How to Use 3.7V Li Po 1200mAh: Examples, Pinouts, and Specs
3.7V LiPo 1200mAh Battery Documentation
1. Introduction
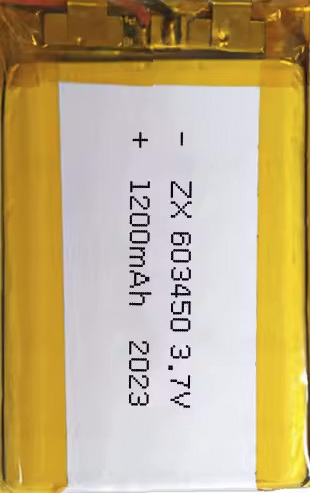
The 3.7V LiPo 1200mAh Battery is a lightweight, high-energy-density rechargeable lithium polymer battery. With a nominal voltage of 3.7V and a capacity of 1200mAh, this battery is widely used in portable electronic devices, including drones, RC vehicles, IoT devices, wearables, and DIY electronics projects. Its compact size and reliable performance make it an ideal power source for applications requiring portability and efficiency.
Common Applications:
- Drones and RC Vehicles: Provides lightweight power for extended operation.
- Wearable Devices: Powers smartwatches, fitness trackers, and other compact electronics.
- IoT Devices: Supplies energy to sensors, microcontrollers, and wireless modules.
- DIY Electronics Projects: Commonly used with development boards like Arduino and Raspberry Pi.
- Portable Gadgets: Powers small devices such as Bluetooth speakers, LED lights, and handheld tools.
2. Technical Specifications
The following table outlines the key technical details of the 3.7V LiPo 1200mAh battery:
| Parameter | Value |
|---|---|
| Nominal Voltage | 3.7V |
| Capacity | 1200mAh |
| Maximum Charge Voltage | 4.2V |
| Minimum Discharge Voltage | 3.0V |
| Continuous Discharge Current | 1C (1.2A) |
| Peak Discharge Current | 2C (2.4A) |
| Charging Current | Standard: 0.5C (600mA) |
| Battery Chemistry | Lithium Polymer (LiPo) |
| Dimensions | ~50mm x 30mm x 8mm |
| Weight | ~25g |
| Connector Type | JST (commonly JST-PH 2.0) |
Pin Configuration and Description
The battery typically comes with a JST-PH 2.0 connector with two pins. The pinout is as follows:
| Pin | Name | Description |
|---|---|---|
| 1 | Positive (+) | Connects to the positive terminal of the circuit. |
| 2 | Negative (-) | Connects to the ground or negative terminal. |
3. Usage Instructions
Connecting the Battery
- Check Polarity: Ensure the positive and negative terminals of the battery match the polarity of the device or circuit.
- Use a Compatible Connector: The battery typically uses a JST-PH 2.0 connector. Ensure your device or charging module supports this connector type.
- Avoid Overcharging/Overdischarging: Use a LiPo-compatible charging circuit to prevent damage to the battery.
Charging the Battery
- Use a LiPo battery charger with a constant current/constant voltage (CC/CV) charging profile.
- Set the charging voltage to 4.2V and the current to 600mA (0.5C) for safe charging.
- Monitor the charging process and disconnect the battery once fully charged.
Using the Battery in a Circuit
- Ensure the load does not exceed the maximum continuous discharge current (1.2A).
- Use a battery protection circuit to prevent over-discharge (below 3.0V) and overcurrent conditions.
- If connecting to an Arduino or similar microcontroller, use a voltage regulator or step-up/step-down converter if the circuit requires a voltage other than 3.7V.
Best Practices
- Store the battery at room temperature and at a charge level of ~50% for long-term storage.
- Avoid puncturing, bending, or exposing the battery to high temperatures.
- Do not short-circuit the terminals, as this can cause overheating or damage.
4. Example Circuit with Arduino UNO
The 3.7V LiPo battery can be used to power an Arduino UNO via a boost converter to step up the voltage to 5V. Below is an example setup:
Components Required:
- 3.7V LiPo 1200mAh Battery
- Boost Converter (3.7V to 5V)
- Arduino UNO
- JST Connector
Circuit Diagram:
[LiPo Battery] --(JST Connector)--> [Boost Converter] --> [Arduino UNO VIN Pin]
Arduino Code Example:
The following code demonstrates reading the battery voltage using an analog pin (with a voltage divider circuit to scale the voltage):
// Define analog pin for voltage measurement
const int voltagePin = A0;

// Voltage divider resistors (e.g., R1 = 10k, R2 = 10k)
const float R1 = 10000.0; // Resistor 1 value in ohms
const float R2 = 10000.0; // Resistor 2 value in ohms

// Reference voltage of Arduino (5V for UNO)
const float referenceVoltage = 5.0;

void setup() {
  Serial.begin(9600); // Initialize serial communication
}

void loop() {
  int rawValue = analogRead(voltagePin); // Read analog value
  float voltage = (rawValue / 1023.0) * referenceVoltage; // Convert to voltage
  voltage = voltage * ((R1 + R2) / R2); // Adjust for voltage divider

  Serial.print("Battery Voltage: ");
  Serial.print(voltage);
  Serial.println(" V");

  delay(1000); // Wait 1 second before next reading
}
Note: Use a voltage divider to scale the battery voltage (3.7V to 4.2V) to a range readable by the Arduino (0-5V). Ensure the resistors are chosen appropriately.
5. Troubleshooting and FAQs
Common Issues and Solutions
| Issue | Possible Cause | Solution |
|---|---|---|
| Battery not charging | Faulty charger or incorrect connection | Verify charger compatibility and polarity. |
| Battery overheating during charge | Overcharging or high charging current | Use a LiPo-compatible charger and limit current to 0.5C. |
| Device not powering on | Battery voltage too low | Recharge the battery or check for over-discharge. |
| Short battery life | Over-discharge or improper storage | Avoid discharging below 3.0V and store at ~50% charge. |
FAQs
Can I use this battery directly with a 5V device?
- No, you will need a boost converter to step up the voltage to 5V.
How long will the battery last on a full charge?
- Battery life depends on the load. For example, at a 600mA load, the battery will last approximately 2 hours (1200mAh ÷ 600mA).
Is it safe to leave the battery connected to the charger?
- No, disconnect the battery once fully charged to prevent overcharging.
Can I use this battery in parallel or series configurations?
- Yes, but ensure proper balancing and use a battery management system (BMS) for safety.
This documentation provides a comprehensive guide to using the 3.7V LiPo 1200mAh battery effectively and safely. Always follow best practices to ensure optimal performance and longevity.
Explore Projects Built with 3.7V Li Po 1200mAh


Explore Projects Built with 3.7V Li Po 1200mAh