How to Use MPPT 5A 100W: Examples, Pinouts, and Specs
Introduction
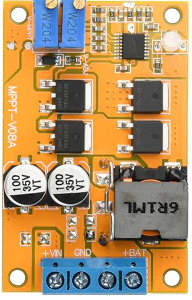
The MPPT 5A 100W by PCBFun is a Maximum Power Point Tracking (MPPT) controller designed to optimize the power output from solar panels. It ensures that the connected solar panel operates at its maximum power point, thereby improving efficiency and energy harvesting. This controller is capable of handling up to 5A of current and a maximum power of 100W, making it suitable for small to medium-sized solar energy systems.
Explore Projects Built with MPPT 5A 100W


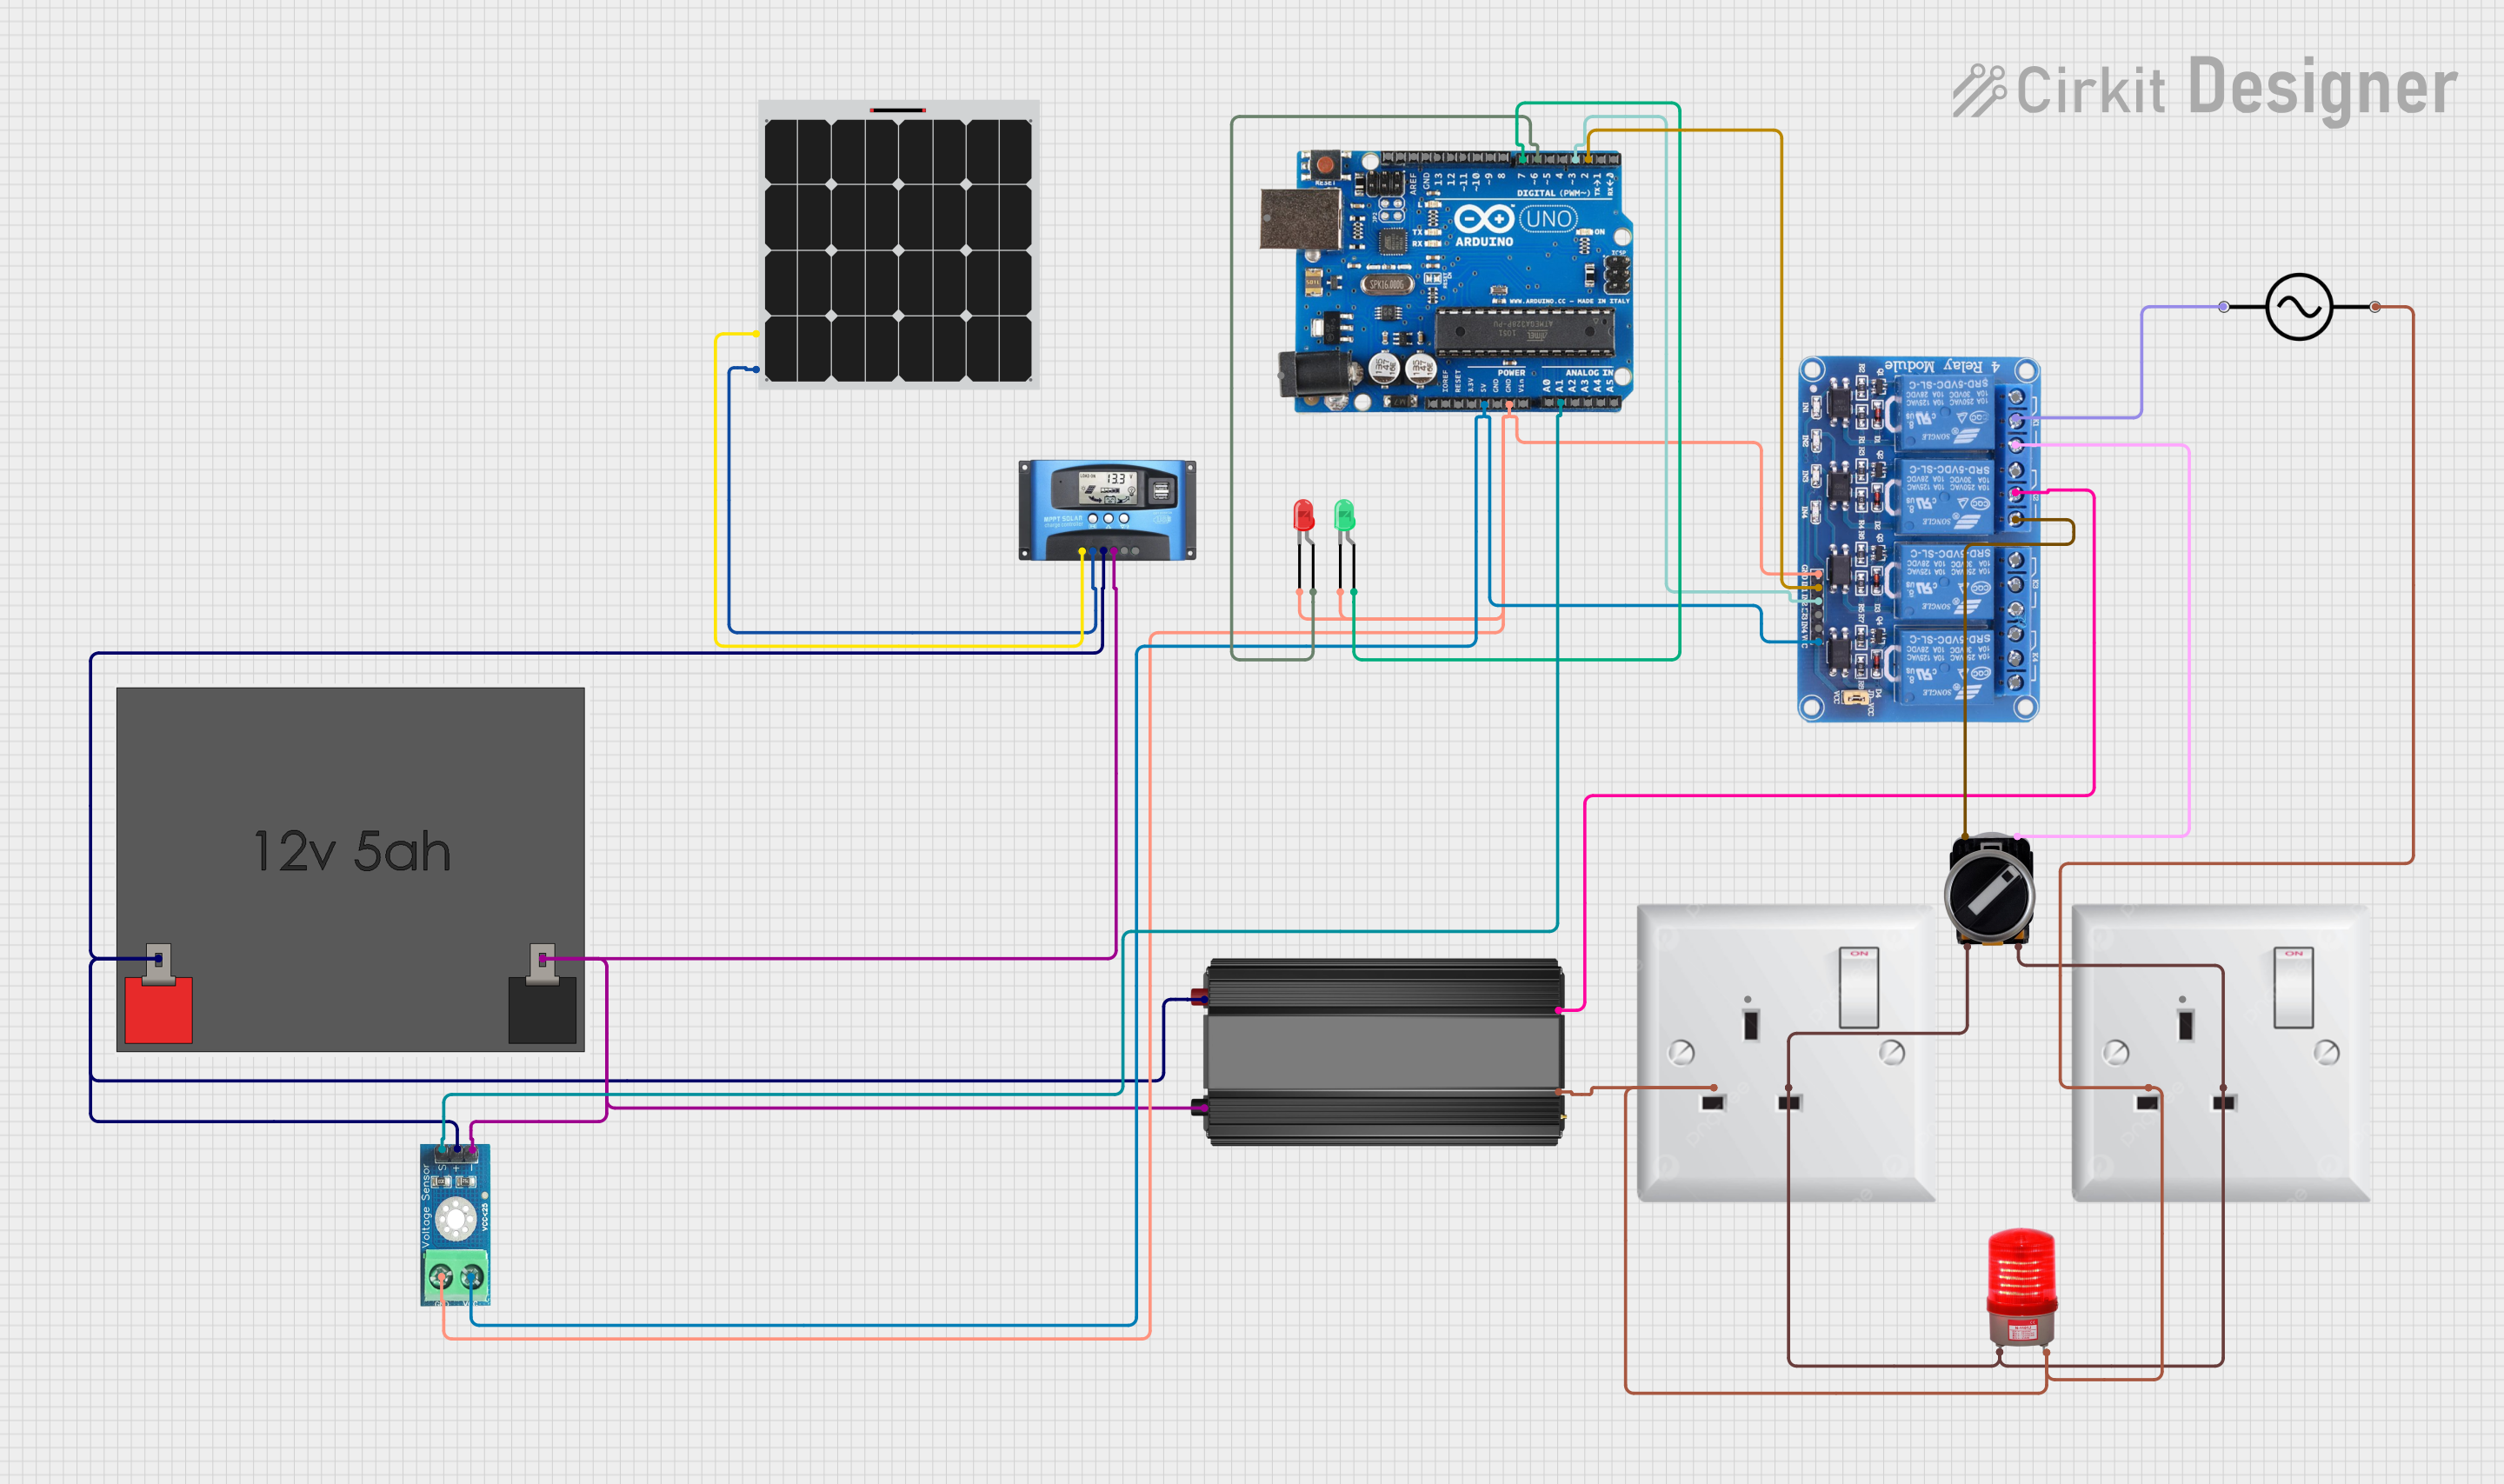
Explore Projects Built with MPPT 5A 100W
Common Applications and Use Cases
- Solar-powered battery charging systems
- Off-grid renewable energy setups
- Portable solar power banks
- IoT devices powered by solar energy
- Small-scale solar lighting systems
Technical Specifications
The MPPT 5A 100W controller is designed to deliver high efficiency and reliability. Below are its key technical details:
Key Technical Details
| Parameter | Value |
|---|---|
| Input Voltage Range | 6V to 28V |
| Output Voltage Range | 5V to 24V (adjustable) |
| Maximum Input Current | 5A |
| Maximum Power Handling | 100W |
| Efficiency | Up to 95% |
| Operating Temperature | -20°C to 60°C |
| Dimensions | 60mm x 40mm x 20mm |
| Weight | 50g |
Pin Configuration and Descriptions
| Pin Name | Description |
|---|---|
| VIN+ | Positive input terminal for the solar panel (6V to 28V). |
| VIN- | Negative input terminal for the solar panel (ground). |
| VOUT+ | Positive output terminal for the load or battery (5V to 24V adjustable). |
| VOUT- | Negative output terminal for the load or battery (ground). |
| ADJ | Voltage adjustment pin to set the output voltage. |
| LED Indicator | Built-in LED to indicate power and operational status. |
Usage Instructions
How to Use the MPPT 5A 100W in a Circuit
- Connect the Solar Panel:
- Attach the positive terminal of the solar panel to the
VIN+pin. - Attach the negative terminal of the solar panel to the
VIN-pin.
- Attach the positive terminal of the solar panel to the
- Connect the Load or Battery:
- Connect the positive terminal of the load or battery to the
VOUT+pin. - Connect the negative terminal of the load or battery to the
VOUT-pin.
- Connect the positive terminal of the load or battery to the
- Adjust the Output Voltage:
- Use the
ADJpin to fine-tune the output voltage to match the requirements of your load or battery. - Ensure the output voltage does not exceed the rated voltage of the connected load or battery.
- Use the
- Monitor the LED Indicator:
- The LED will light up to indicate that the MPPT controller is operational.
Important Considerations and Best Practices
- Input Voltage: Ensure the solar panel's voltage is within the 6V to 28V range.
- Output Voltage: Adjust the output voltage carefully to avoid overcharging batteries or damaging connected devices.
- Heat Dissipation: The controller may heat up during operation. Ensure proper ventilation or use a heatsink if necessary.
- Polarity: Double-check the polarity of all connections to avoid damage to the controller or connected devices.
- Load Compatibility: Ensure the connected load does not exceed the 5A or 100W rating.
Example: Connecting to an Arduino UNO
The MPPT 5A 100W can be used to power an Arduino UNO from a solar panel. Below is an example setup:
- Connect the solar panel to the
VIN+andVIN-pins. - Adjust the output voltage to 5V using the
ADJpin. - Connect the
VOUT+pin to the Arduino's5Vpin and theVOUT-pin to the Arduino'sGNDpin.
Here is a simple Arduino code snippet to monitor the voltage from the MPPT controller:
// Define the analog pin connected to the MPPT output
const int voltagePin = A0;

void setup() {
  Serial.begin(9600); // Initialize serial communication
}

void loop() {
  int sensorValue = analogRead(voltagePin); // Read the analog value
  float voltage = sensorValue * (5.0 / 1023.0); // Convert to voltage
  Serial.print("MPPT Output Voltage: ");
  Serial.print(voltage);
  Serial.println(" V");
  delay(1000); // Wait for 1 second before the next reading
}
Note: Ensure the Arduino's input voltage does not exceed 5V.
Troubleshooting and FAQs
Common Issues and Solutions
No Output Voltage:
- Check the input connections and ensure the solar panel is providing sufficient voltage.
- Verify that the polarity of the connections is correct.
- Ensure the output voltage is properly adjusted using the
ADJpin.
Overheating:
- Ensure the controller is not operating beyond its rated power (100W).
- Provide adequate ventilation or use a heatsink to dissipate heat.
LED Not Lighting Up:
- Check the input voltage and ensure it is within the 6V to 28V range.
- Inspect the connections for loose or faulty wiring.
Fluctuating Output Voltage:
- Verify that the solar panel is receiving consistent sunlight.
- Check the
ADJpin and ensure the output voltage is properly set.
FAQs
Q: Can I use this MPPT controller with a wind turbine?
A: This controller is specifically designed for solar panels. While it may work with other DC sources, it is optimized for the voltage and current characteristics of solar panels.
Q: How do I know if the MPPT is working correctly?
A: The LED indicator will light up when the controller is operational. You can also measure the output voltage and compare it to the set value.
Q: Can I connect multiple MPPT controllers in parallel?
A: It is not recommended to connect multiple MPPT controllers in parallel, as this may cause interference and reduce efficiency.
Q: What type of batteries can I charge with this controller?
A: The MPPT 5A 100W can charge most types of batteries, including Li-ion, LiFePO4, and lead-acid, as long as the output voltage is properly adjusted to match the battery's requirements.