How to Use 12v power supply: Examples, Pinouts, and Specs
12V Power Supply Documentation
1. Introduction
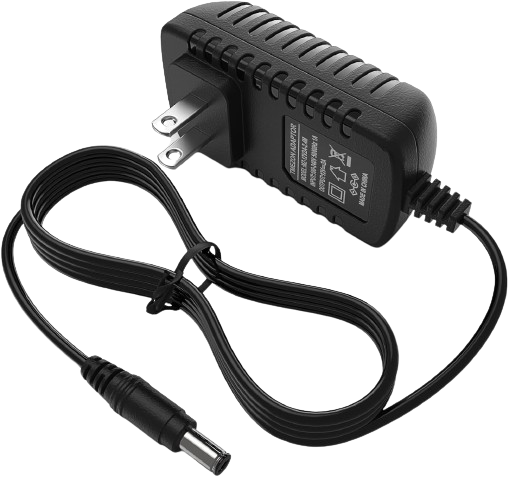
The 12V Power Supply is an essential electronic component designed to convert electrical energy from a source (such as an AC mains outlet or a DC input) into a stable 12-volt DC output. This regulated output is widely used to power various electronic circuits, devices, and systems, ensuring consistent performance and reliability.
Common Applications:
- Powering microcontrollers (e.g., Arduino, Raspberry Pi) and development boards.
- Driving DC motors, relays, and solenoids.
- Supplying power to LED strips, sensors, and other peripherals.
- Charging 12V batteries or acting as a power source for automotive electronics.
- Providing stable voltage for audio amplifiers and communication devices.
The 12V power supply is available in various forms, such as wall adapters, bench power supplies, and PCB-mounted modules, making it versatile for a wide range of applications.
2. Technical Specifications
Below are the key technical details and pin configurations for a typical 12V power supply module:
Key Technical Details
| Parameter | Specification |
|---|---|
| Input Voltage Range | 100-240V AC (for AC-DC adapters) or 9-24V DC |
| Output Voltage | 12V DC (regulated) |
| Output Current | 1A to 10A (varies by model) |
| Power Rating | 12W to 120W (depending on current rating) |
| Efficiency | ≥ 85% |
| Ripple Voltage | ≤ 50mV |
| Operating Temperature | -20°C to +60°C |
| Protection Features | Overvoltage, Overcurrent, Short Circuit |
Pin Configuration (for PCB-mounted 12V Power Supply Module)
| Pin Name | Description |
|---|---|
| VIN | Input voltage (DC input, typically 9-24V) |
| GND | Ground connection for input and output |
| VOUT | Regulated 12V DC output |
3. Usage Instructions
How to Use the 12V Power Supply in a Circuit
Connect the Input Voltage:
- For AC-DC adapters, plug the adapter into a standard AC mains outlet.
- For DC-DC modules, connect the input voltage (VIN) to a DC source within the specified range (e.g., 9-24V DC).
Connect the Output:
- Connect the VOUT pin or output terminals to the load (e.g., an Arduino, motor, or LED strip).
- Ensure the load does not exceed the maximum current rating of the power supply.
Verify Connections:
- Double-check all connections to avoid reverse polarity or short circuits.
- Use a multimeter to confirm the output voltage is 12V before connecting sensitive devices.
Power On:
- Turn on the power supply or connect it to the input source.
- Monitor the load to ensure proper operation.
Important Considerations and Best Practices
- Load Compatibility: Ensure the total current draw of the connected devices does not exceed the power supply's maximum current rating.
- Heat Dissipation: For high-current applications, ensure adequate ventilation or heat sinking to prevent overheating.
- Polarity: Always observe correct polarity when connecting the input and output terminals.
- Noise Filtering: If powering sensitive devices, consider adding capacitors or filters to reduce noise and ripple.
4. Example Application with Arduino UNO
The 12V power supply can be used to power an Arduino UNO and additional peripherals like motors or sensors. Below is an example of how to connect and use the 12V power supply with an Arduino UNO.
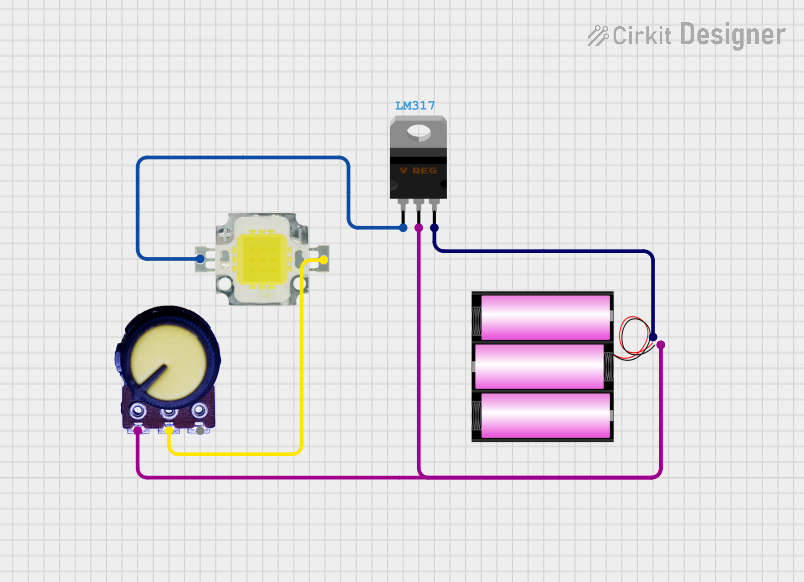
Circuit Diagram
- Connect the 12V power supply's output to the Arduino UNO's VIN pin and GND pin.
- Use the same 12V power supply to power other components, such as a DC motor, through a motor driver.
Sample Code
The following Arduino code demonstrates controlling a DC motor using a motor driver powered by the 12V power supply.
// Example: Controlling a DC motor with Arduino and 12V power supply

// Define motor control pins
const int motorPin1 = 9; // Motor driver input pin 1
const int motorPin2 = 10; // Motor driver input pin 2

void setup() {
  // Set motor pins as outputs
  pinMode(motorPin1, OUTPUT);
  pinMode(motorPin2, OUTPUT);
}

void loop() {
  // Rotate motor in one direction
  digitalWrite(motorPin1, HIGH); // Set pin 1 HIGH
  digitalWrite(motorPin2, LOW);  // Set pin 2 LOW
  delay(2000); // Run motor for 2 seconds

  // Stop the motor
  digitalWrite(motorPin1, LOW);  // Set pin 1 LOW
  digitalWrite(motorPin2, LOW);  // Set pin 2 LOW
  delay(1000); // Wait for 1 second

  // Rotate motor in the opposite direction
  digitalWrite(motorPin1, LOW);  // Set pin 1 LOW
  digitalWrite(motorPin2, HIGH); // Set pin 2 HIGH
  delay(2000); // Run motor for 2 seconds

  // Stop the motor
  digitalWrite(motorPin1, LOW);  // Set pin 1 LOW
  digitalWrite(motorPin2, LOW);  // Set pin 2 LOW
  delay(1000); // Wait for 1 second
}
Note: Ensure the motor driver is compatible with the 12V power supply and can handle the motor's current requirements.
5. Troubleshooting and FAQs
Common Issues and Solutions
| Issue | Possible Cause | Solution |
|---|---|---|
| No output voltage | Input voltage not connected or too low | Verify input voltage and connections |
| Output voltage fluctuates | Overloaded power supply | Reduce load or use a higher-rated supply |
| Device overheating | Insufficient ventilation or high load | Improve cooling or reduce load |
| Connected device not working | Incorrect polarity or insufficient current | Check polarity and ensure current rating |
Frequently Asked Questions
Q1: Can I use a 12V power supply to power a 5V device?
A1: No, you must use a voltage regulator or step-down converter to reduce the voltage to 5V.
Q2: Is it safe to use a 12V power supply with an Arduino UNO?
A2: Yes, the Arduino UNO can accept 12V through the VIN pin, but ensure the current draw of connected peripherals does not exceed the power supply's rating.
Q3: How do I know if my power supply is overloaded?
A3: Symptoms of overloading include voltage drops, overheating, or the power supply shutting down. Reduce the load to resolve the issue.
Q4: Can I use a 12V power supply for LED strips?
A4: Yes, most LED strips are designed to operate at 12V. Ensure the power supply can handle the total current draw of the LED strip.
This documentation provides a comprehensive guide to understanding, using, and troubleshooting a 12V power supply. Whether you're a beginner or an experienced user, following these guidelines will help you safely and effectively integrate the 12V power supply into your projects.
Explore Projects Built with 12v power supply


Explore Projects Built with 12v power supply