Cirkit Designer
Your all-in-one circuit design IDE
Home /
Component Documentation
How to Use KY-015 DHT11 Temperature-Humidity sensor module: Examples, Pinouts, and Specs
Introduction
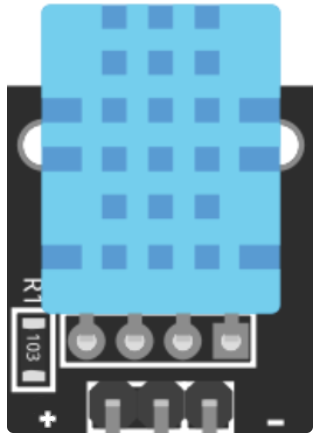
The KY-015 DHT11 is a sensor module designed to measure temperature and humidity. It provides a digital output, making it easy to interface with microcontrollers such as the Arduino UNO. This sensor is widely used in applications such as weather stations, environmental monitoring, and home automation systems due to its reliability and ease of use.
Explore Projects Built with KY-015 DHT11 Temperature-Humidity sensor module
ESP32 and DHT11 Wi-Fi Connected Temperature and Humidity Web Server
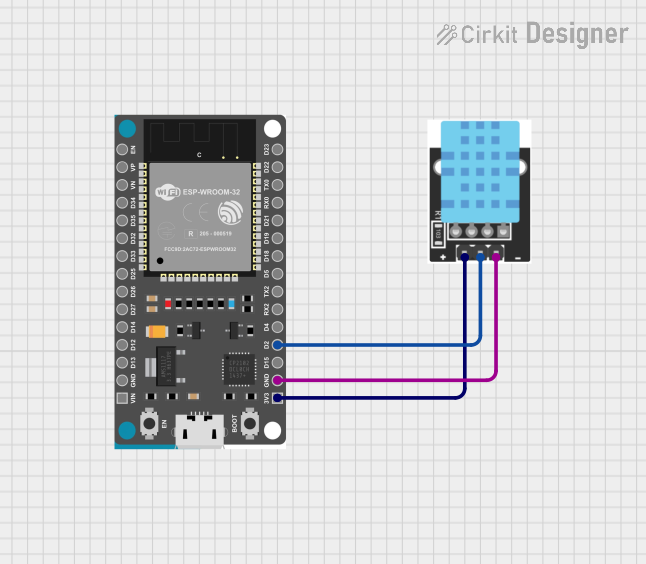
This circuit consists of an ESP32 Devkit V1 microcontroller connected to a KY-015 DHT11 Temperature-Humidity sensor module. The ESP32 reads temperature and humidity data from the DHT11 sensor and serves this data via a web server, allowing remote monitoring over WiFi.
Arduino UNO with DHT11 Temperature and Humidity Sensor
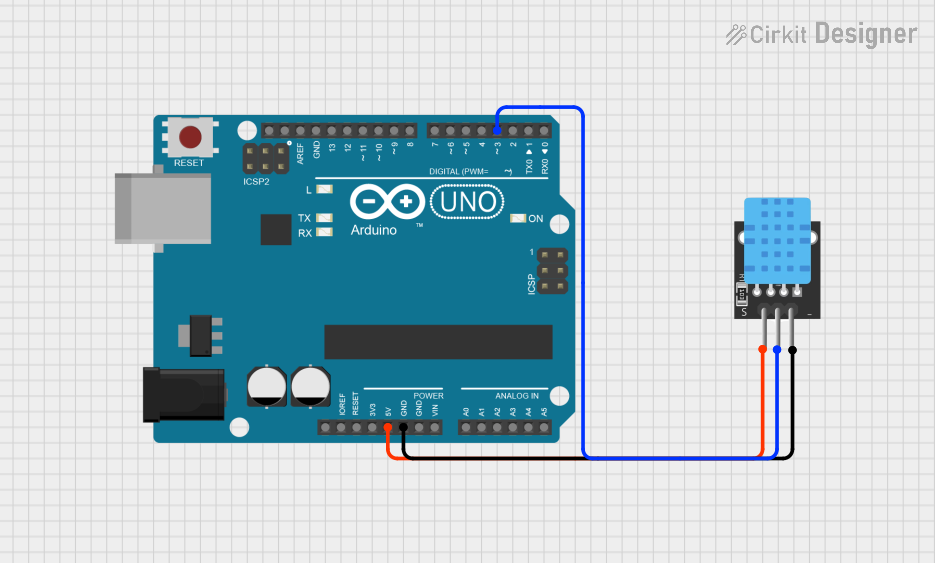
This circuit consists of an Arduino UNO microcontroller connected to a KY-015 DHT11 temperature and humidity sensor. The Arduino is programmed to read the temperature and humidity data from the DHT11 sensor via digital pin D3 and output the readings through its serial interface. The sensor is powered by the 5V and GND pins of the Arduino, ensuring it has the necessary operating voltage.
Arduino UNO with DHT11 Temperature and Humidity Sensor
This circuit consists of an Arduino UNO microcontroller connected to a KY-015 DHT11 temperature and humidity sensor. The Arduino provides 5V power and ground to the sensor and reads data from it through digital pin D7. The embedded code initializes the sensor and continuously reads temperature and humidity values, which can be processed or displayed as needed.
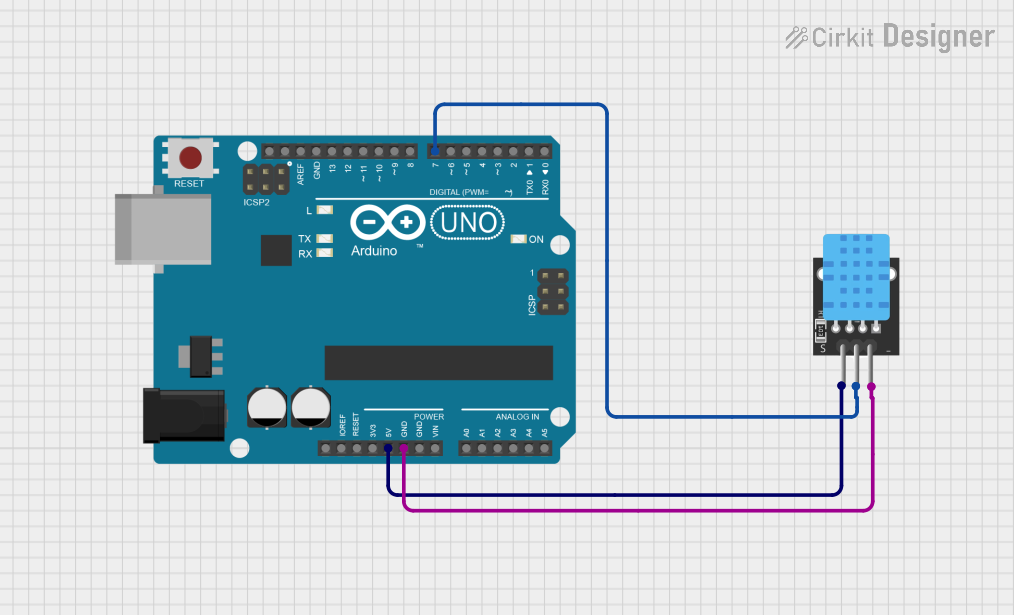
Arduino UNO with DHT11 Temperature and Humidity Sensor
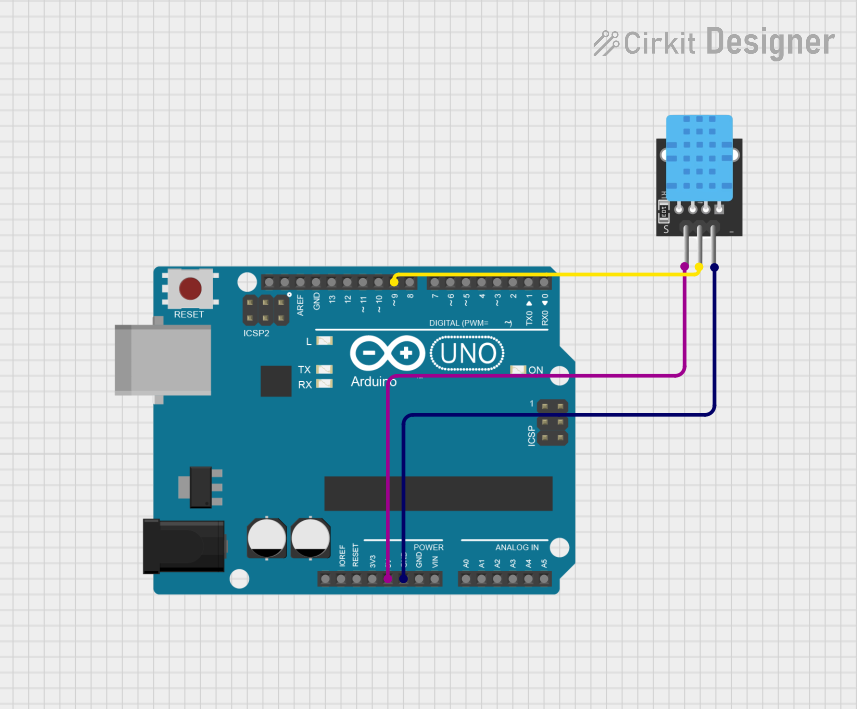
This circuit consists of an Arduino UNO microcontroller connected to a KY-015 DHT11 temperature and humidity sensor. The Arduino provides 5V power and ground to the sensor and reads the sensor's output from digital pin D9. The embedded code on the Arduino is configured to periodically read the temperature and humidity data from the DHT11 sensor and output the readings to the serial monitor.
Explore Projects Built with KY-015 DHT11 Temperature-Humidity sensor module
ESP32 and DHT11 Wi-Fi Connected Temperature and Humidity Web Server
This circuit consists of an ESP32 Devkit V1 microcontroller connected to a KY-015 DHT11 Temperature-Humidity sensor module. The ESP32 reads temperature and humidity data from the DHT11 sensor and serves this data via a web server, allowing remote monitoring over WiFi.
Arduino UNO with DHT11 Temperature and Humidity Sensor
This circuit consists of an Arduino UNO microcontroller connected to a KY-015 DHT11 temperature and humidity sensor. The Arduino is programmed to read the temperature and humidity data from the DHT11 sensor via digital pin D3 and output the readings through its serial interface. The sensor is powered by the 5V and GND pins of the Arduino, ensuring it has the necessary operating voltage.
Arduino UNO with DHT11 Temperature and Humidity Sensor
This circuit consists of an Arduino UNO microcontroller connected to a KY-015 DHT11 temperature and humidity sensor. The Arduino provides 5V power and ground to the sensor and reads data from it through digital pin D7. The embedded code initializes the sensor and continuously reads temperature and humidity values, which can be processed or displayed as needed.
Arduino UNO with DHT11 Temperature and Humidity Sensor
This circuit consists of an Arduino UNO microcontroller connected to a KY-015 DHT11 temperature and humidity sensor. The Arduino provides 5V power and ground to the sensor and reads the sensor's output from digital pin D9. The embedded code on the Arduino is configured to periodically read the temperature and humidity data from the DHT11 sensor and output the readings to the serial monitor.
Technical Specifications
Key Technical Details
| Parameter | Value |
|---|---|
| Operating Voltage | 3.3V to 5.5V |
| Temperature Range | 0°C to 50°C |
| Humidity Range | 20% to 90% RH |
| Temperature Accuracy | ±2°C |
| Humidity Accuracy | ±5% RH |
| Signal Output | Digital |
| Response Time | 1 second |
Pin Configuration and Descriptions
| Pin Number | Pin Name | Description |
|---|---|---|
| 1 | VCC | Power supply (3.3V to 5.5V) |
| 2 | Data | Digital signal output |
| 3 | NC | Not connected |
| 4 | GND | Ground |
Usage Instructions
How to Use the Component in a Circuit
- Connect the VCC Pin: Connect the VCC pin of the KY-015 DHT11 to the 5V pin on the Arduino UNO.
- Connect the Data Pin: Connect the Data pin of the KY-015 DHT11 to a digital input pin on the Arduino UNO (e.g., pin 2).
- Connect the GND Pin: Connect the GND pin of the KY-015 DHT11 to the GND pin on the Arduino UNO.
Important Considerations and Best Practices
- Power Supply: Ensure the sensor is powered within the specified voltage range (3.3V to 5.5V).
- Signal Stability: Use a pull-up resistor (10kΩ) on the Data pin to ensure stable signal transmission.
- Response Time: Allow at least 1 second between readings to ensure accurate data.
Sample Arduino Code
#include <DHT.h>

#define DHTPIN 2     // Pin where the data pin of the DHT11 is connected
#define DHTTYPE DHT11   // Define the type of sensor used

DHT dht(DHTPIN, DHTTYPE);

void setup() {
  Serial.begin(9600);
  dht.begin();
}

void loop() {
  delay(2000);  // Wait a few seconds between measurements

  float humidity = dht.readHumidity();
  float temperature = dht.readTemperature();

  // Check if any reads failed and exit early (to try again).
  if (isnan(humidity) || isnan(temperature)) {
    Serial.println("Failed to read from DHT sensor!");
    return;
  }

  Serial.print("Humidity: ");
  Serial.print(humidity);
  Serial.print(" %\t");
  Serial.print("Temperature: ");
  Serial.print(temperature);
  Serial.println(" *C");
}
Troubleshooting and FAQs
Common Issues Users Might Face
- No Data Output: Ensure all connections are secure and the sensor is powered correctly.
- Incorrect Readings: Verify the sensor is not exposed to conditions outside its specified range.
- Intermittent Data: Check the pull-up resistor on the Data pin and ensure it is correctly connected.
Solutions and Tips for Troubleshooting
- Check Connections: Double-check all wiring and ensure there are no loose connections.
- Verify Code: Ensure the correct pin number is defined in the code and the DHT library is properly installed.
- Environmental Factors: Ensure the sensor is placed in an environment within its operating range for accurate readings.
By following this documentation, users can effectively integrate the KY-015 DHT11 Temperature-Humidity Sensor Module into their projects, ensuring accurate and reliable measurements.