How to Use Heating Plate: Examples, Pinouts, and Specs

Introduction
A heating plate is an electronic device designed to uniformly heat substances placed on its surface. It is widely used in laboratories for heating samples, in industrial settings for manufacturing processes, and in culinary applications for food preparation. The heating plate ensures precise temperature control, which is critical for consistent results in experiments and production.
Explore Projects Built with Heating Plate

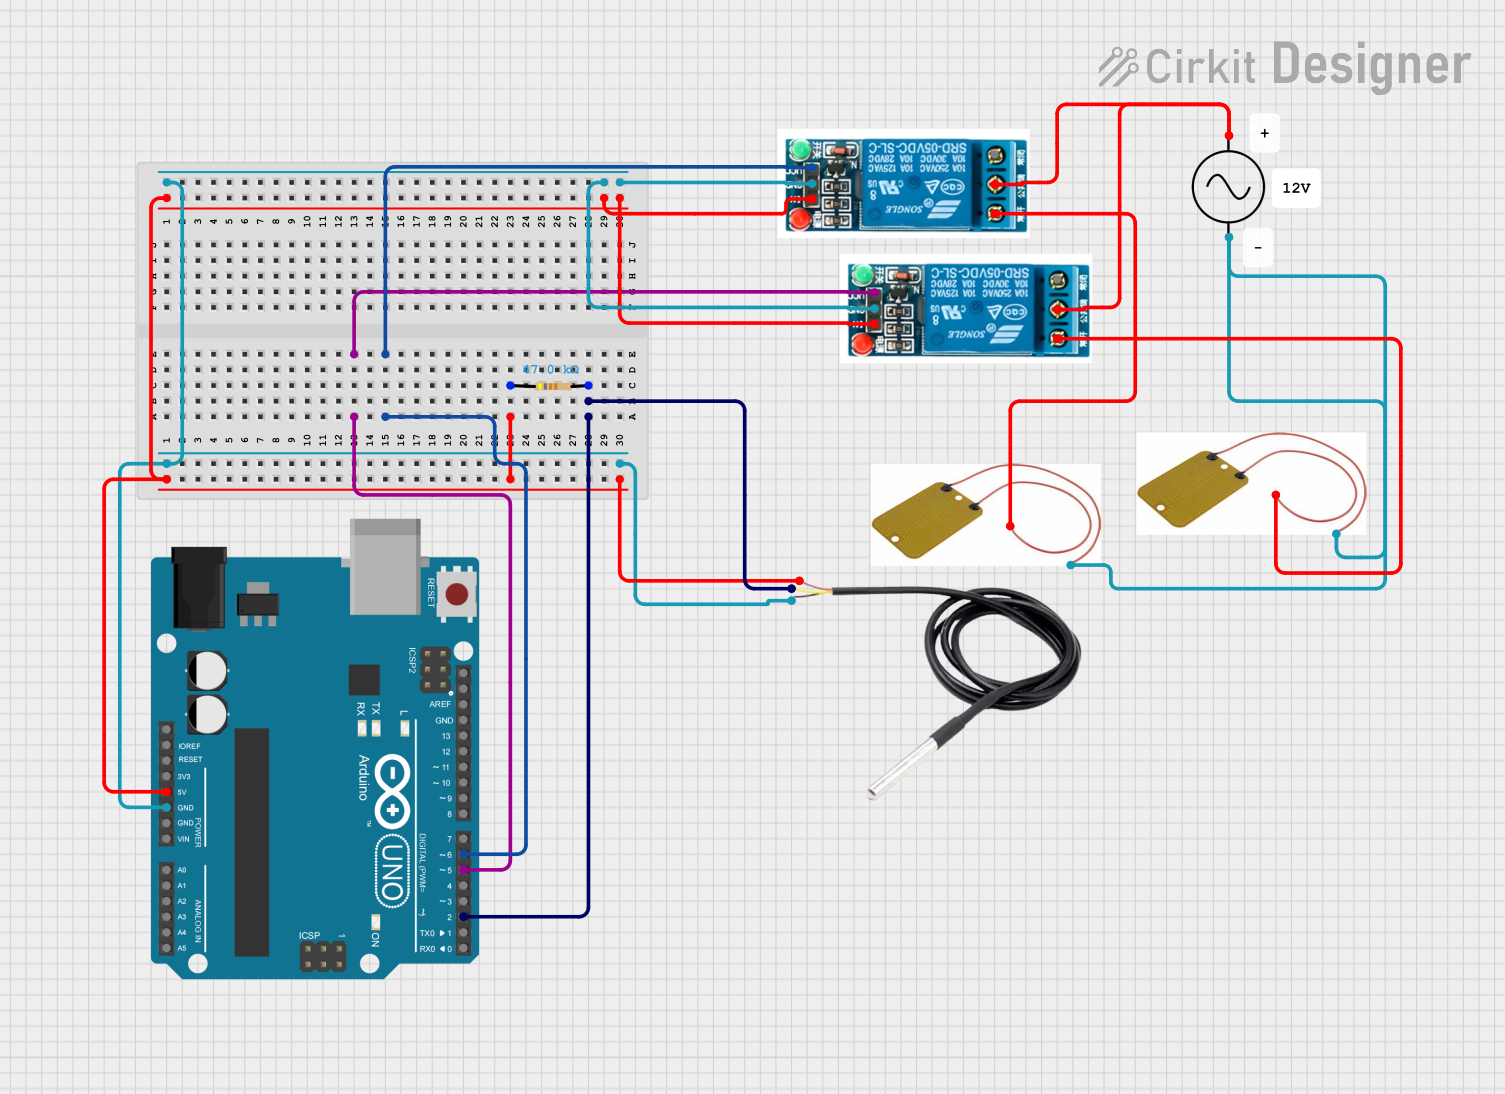

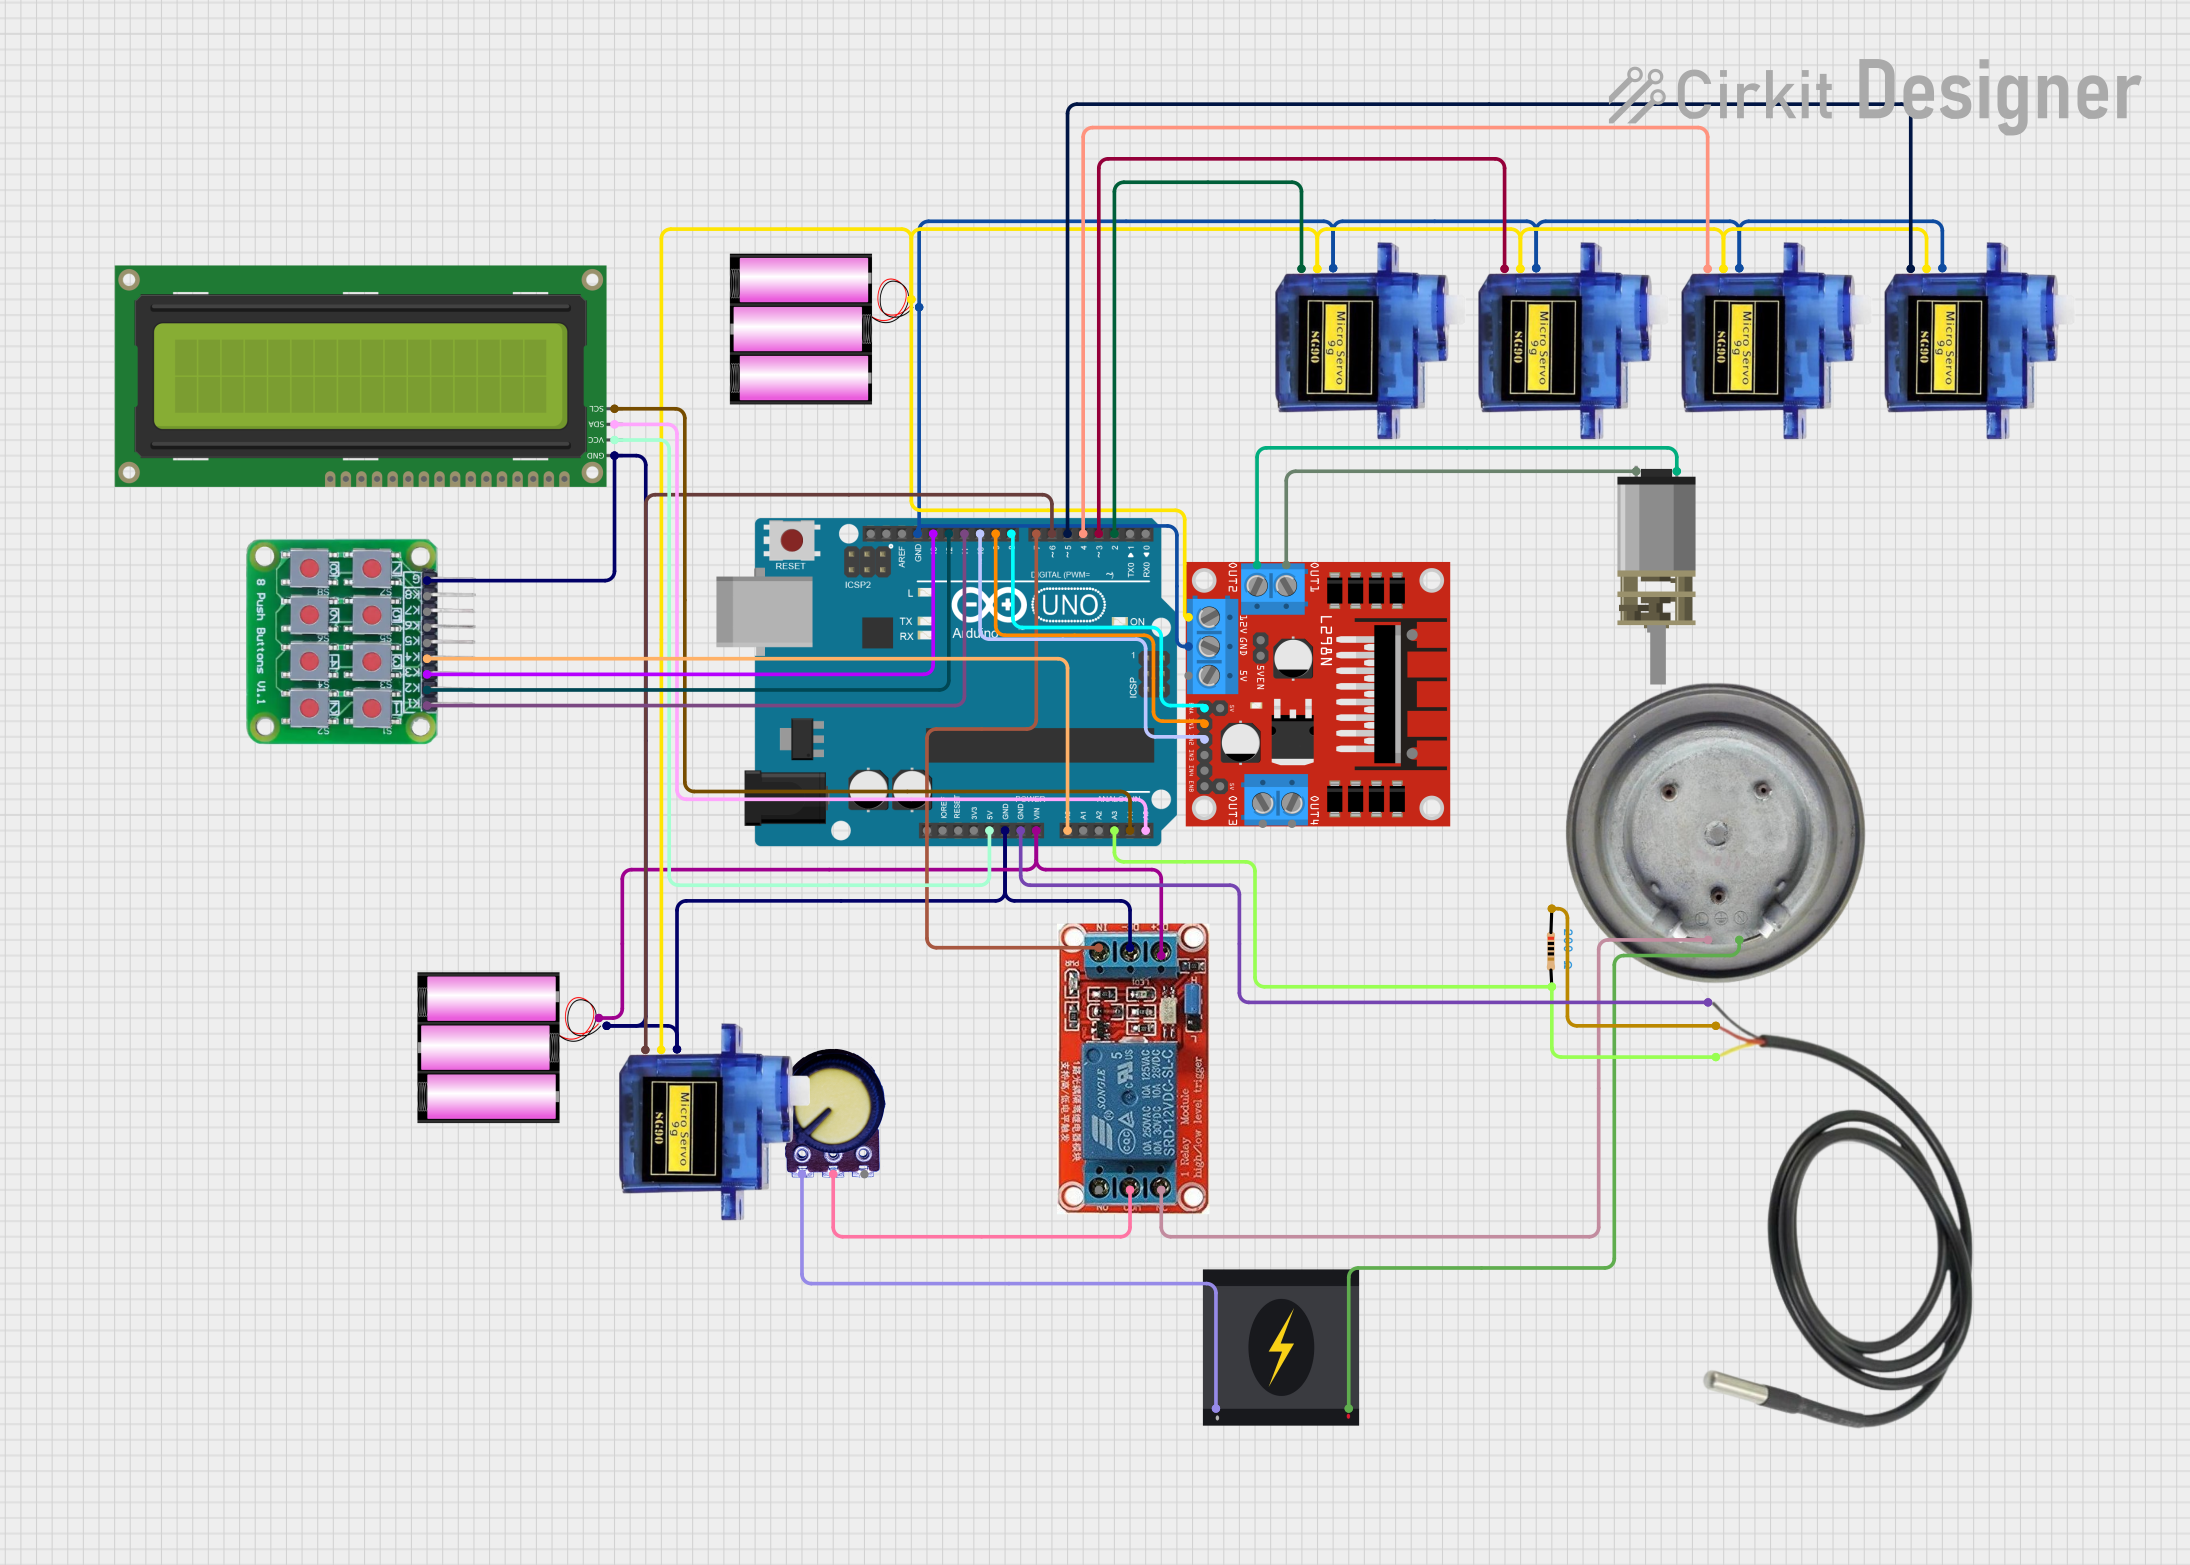
Explore Projects Built with Heating Plate
Common Applications and Use Cases:
- Laboratory Research: For heating chemical reagents, biological samples, or performing controlled reactions.
- Industrial Manufacturing: Used in processes that require consistent heat application, such as curing, drying, or softening materials.
- Culinary Arts: Employed in kitchens to keep food warm or to cook with a controlled heat source.
Technical Specifications
Key Technical Details:
- Operating Voltage: Typically ranges from 110V to 240V AC, depending on the model.
- Power Ratings: Can vary widely, from a few watts to several kilowatts.
- Temperature Range: Usually from room temperature up to 300°C or more.
- Temperature Stability: ±1°C or better, depending on the control mechanism.
- Surface Material: Often made of ceramic, metal, or glass.
Pin Configuration and Descriptions:
| Pin Number | Description | Notes |
|---|---|---|
| 1 | Live (L) | Connects to phase voltage |
| 2 | Neutral (N) | Connects to neutral line |
| 3 | Ground (⏚) | Safety earth ground connection |
| 4 | Temperature Sensor | Optional for feedback control |
| 5 | Control Input | For external temperature control |
Usage Instructions
How to Use the Heating Plate in a Circuit:
Connect Power: Ensure the heating plate is connected to an appropriate power source with the correct voltage rating. The live and neutral wires should be connected to pins 1 and 2, respectively, and the ground wire to pin 3.
Temperature Control: If the heating plate has an integrated temperature control, set the desired temperature using the onboard controls. For models with an external control input (pin 5), connect a temperature controller that can modulate the power to the heating plate to maintain the set temperature.
Safety Precautions: Always use the heating plate in a well-ventilated area and on a heat-resistant surface. Do not leave the heating plate unattended while in operation.
Important Considerations and Best Practices:
- Insulation: Ensure that the heating plate is properly insulated to prevent heat loss and protect users from burns.
- Monitoring: Use a separate, calibrated thermometer to verify the temperature of the heating plate if precise temperature measurements are required.
- Maintenance: Keep the surface of the heating plate clean and free of debris to ensure uniform heating and prevent contamination.
Troubleshooting and FAQs
Common Issues Users Might Face:
- Heating Plate Not Reaching Desired Temperature: Check the power supply and ensure that the voltage and current ratings are adequate. Inspect the temperature sensor and control circuitry if applicable.
- Uneven Heating: Ensure that the heating plate is level and that the surface is clean. Check for proper insulation and verify that the temperature control system is functioning correctly.
- Electrical Safety Concerns: Always ensure that the heating plate is properly grounded. If there are any signs of damaged wiring or components, discontinue use immediately and consult a professional.
Solutions and Tips for Troubleshooting:
- No Power: Verify that the power cord is plugged in and that the outlet is functioning. Check for blown fuses or tripped circuit breakers.
- Inaccurate Temperature Control: Calibrate the temperature sensor if possible, or replace it if it is faulty. Ensure that the control input is receiving the correct signal.
- Surface Cleaning: Use appropriate cleaning agents for the surface material of the heating plate. Avoid abrasive materials that could damage the surface.
FAQs:
Q: Can I use the heating plate with a different voltage than specified? A: No, using a heating plate with a voltage other than what is specified can be dangerous and may damage the device.
Q: How do I know if my heating plate is calibrated correctly? A: Use an external calibrated thermometer to compare the temperature reading of the heating plate with the actual temperature.
Q: Is it safe to leave the heating plate on for extended periods? A: While some heating plates are designed for continuous operation, it is important to follow the manufacturer's guidelines and never leave the heating plate unattended for safety reasons.
Note: If you are connecting the heating plate to an Arduino UNO for temperature control, ensure that you use a relay or a solid-state relay to handle the high-power requirements, as the Arduino cannot directly control high-power devices.
// Example Arduino code to control a heating plate using a relay module
const int relayPin = 2; // Relay connected to digital pin 2
const int tempSensorPin = A0; // Temperature sensor connected to analog pin A0
const float desiredTemp = 50.0; // Desired temperature in Celsius

void setup() {
  pinMode(relayPin, OUTPUT); // Set the relay pin as an output
  Serial.begin(9600); // Start serial communication at 9600 baud
}

void loop() {
  int sensorValue = analogRead(tempSensorPin); // Read the temperature sensor
  float temperature = convertToTemperature(sensorValue); // Convert to temperature
  Serial.print("Current Temperature: ");
  Serial.println(temperature);

  if (temperature < desiredTemp) {
    digitalWrite(relayPin, HIGH); // Turn on heating plate
  } else {
    digitalWrite(relayPin, LOW); // Turn off heating plate
  }

  delay(1000); // Wait for 1 second before reading the temperature again
}

float convertToTemperature(int sensorValue) {
  // Convert the analog reading (which goes from 0 - 1023) to a voltage (0 - 5V):
  float voltage = sensorValue * (5.0 / 1023.0);
  // Convert the voltage to temperature in Celsius
  // This conversion will depend on the specific sensor used
  float temperature = (voltage - 0.5) * 100;
  return temperature;
}
Note: The above code is a simple example and assumes the use of a temperature sensor with a linear voltage-temperature relationship. The convertToTemperature function must be adapted to the specific sensor used. Always ensure that the relay used can handle the current and voltage requirements of the heating plate.