How to Use 4D System Gen 4 Touch Screen 4.3" Resistive: Examples, Pinouts, and Specs
4D Systems gen4-uLCD-43DT-AR Documentation
1. Introduction
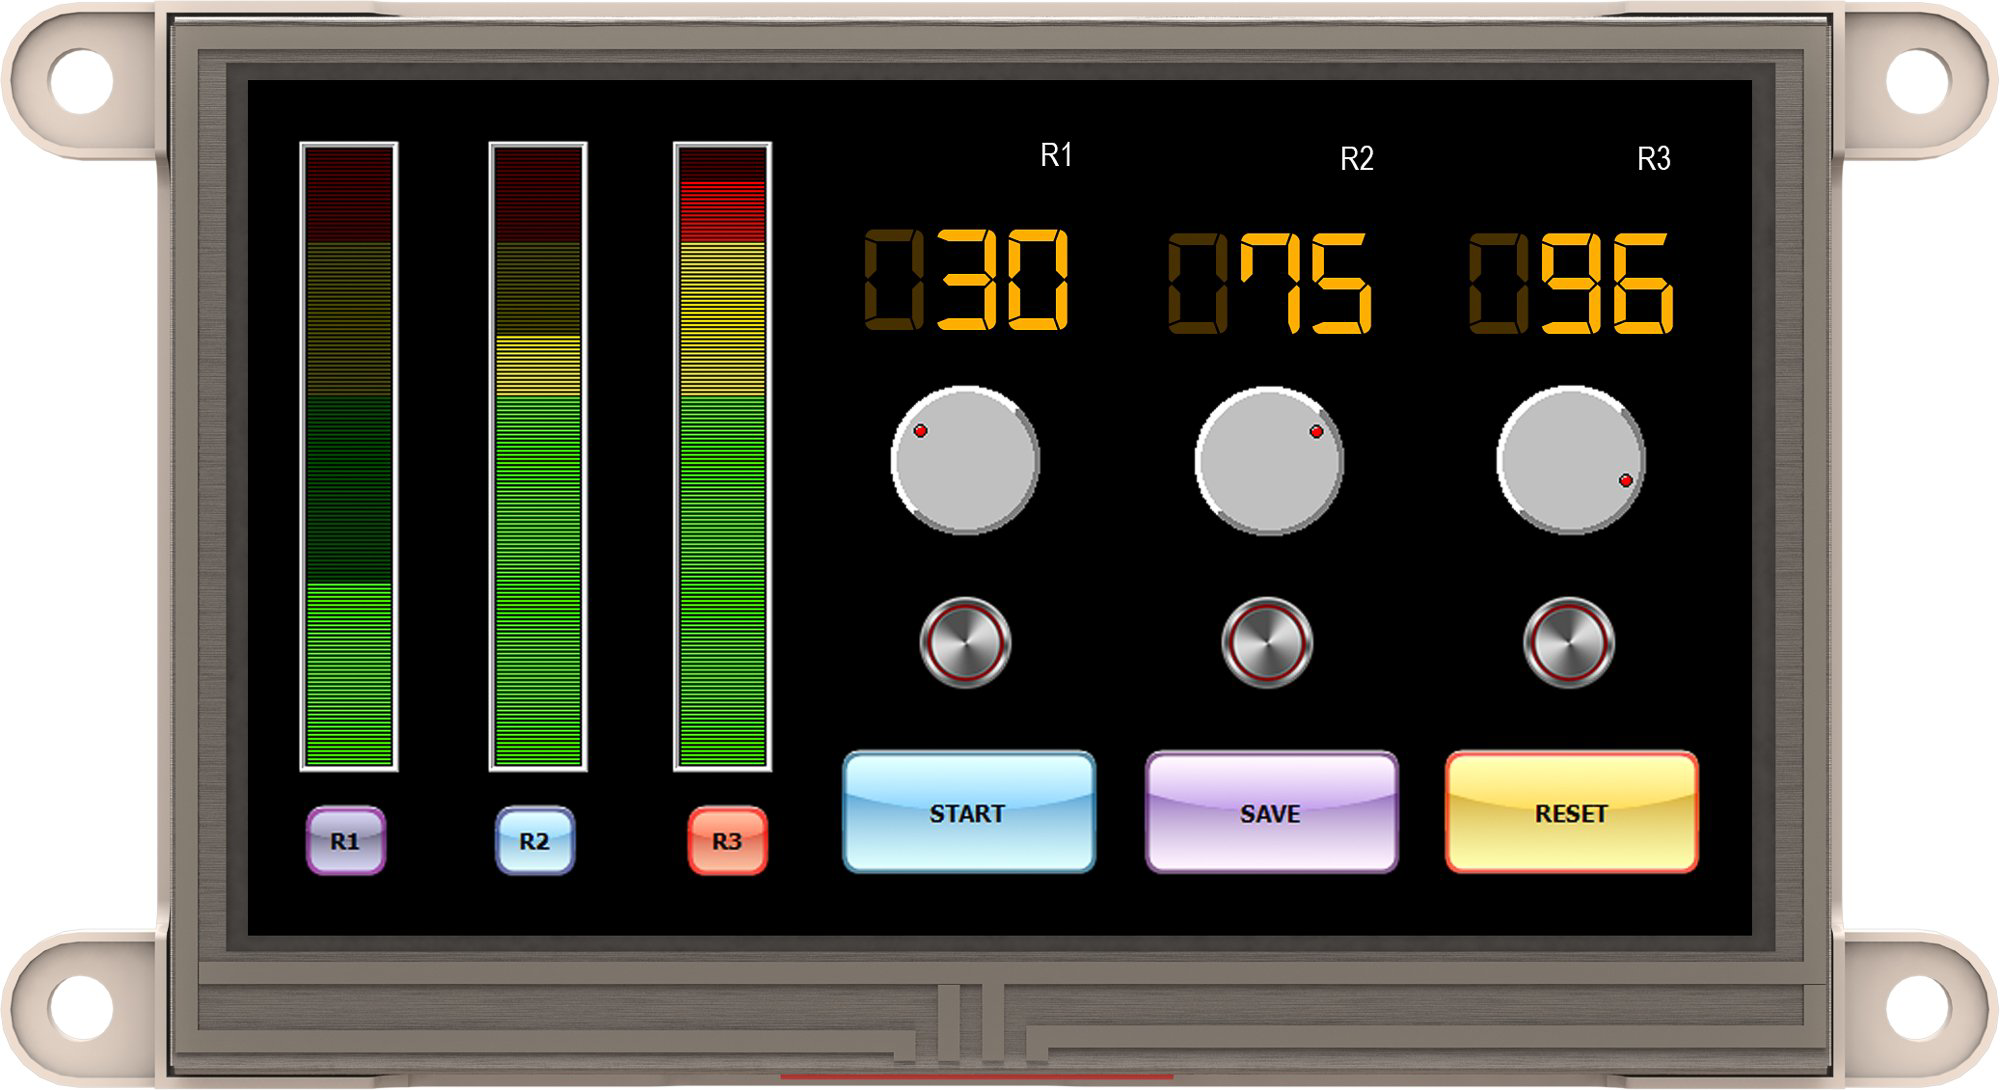
The 4D Systems gen4-uLCD-43DT-AR is a 4.3-inch resistive touch screen display designed for embedded applications. It features a Gen 4 architecture that simplifies integration with microcontrollers, such as the Arduino UNO, and supports a wide range of graphical interfaces. This display module is ideal for creating interactive user interfaces in projects requiring touch input and graphical output.
Common Applications
- Home automation systems
- Industrial control panels
- Medical devices
- IoT dashboards
- Educational and prototyping projects
- Consumer electronics
The gen4-uLCD-43DT-AR is part of 4D Systems' advanced display solutions, offering high performance, ease of use, and compatibility with various development platforms.
2. Technical Specifications
The following table outlines the key technical details of the gen4-uLCD-43DT-AR:
| Parameter | Specification |
|---|---|
| Display Type | 4.3-inch resistive touch screen (TFT LCD) |
| Resolution | 480 x 272 pixels |
| Touch Technology | Resistive touch |
| Processor | Diablo16 Graphics Processor |
| Flash Memory | 16MB (expandable via microSD card) |
| Interface | UART, I2C, SPI |
| Operating Voltage | 4.0V to 5.5V |
| Typical Current Draw | 150mA (at 5V) |
| Backlight | LED backlight with adjustable brightness |
| Operating Temperature | -10°C to +70°C |
| Dimensions | 120mm x 67mm x 13mm |
| Weight | 100g |
Pin Configuration
The gen4-uLCD-43DT-AR features a 30-pin FPC connector. Below is a summary of the key pins:
| Pin Number | Pin Name | Description |
|---|---|---|
| 1 | GND | Ground connection |
| 2 | VCC | Power supply input (4.0V to 5.5V) |
| 3 | TX | UART Transmit |
| 4 | RX | UART Receive |
| 5 | RESET | Module reset (active low) |
| 6 | GPIO1 | General-purpose I/O pin |
| 7 | GPIO2 | General-purpose I/O pin |
| 8 | SPI_CLK | SPI Clock signal |
| 9 | SPI_MOSI | SPI Master Out Slave In |
| 10 | SPI_MISO | SPI Master In Slave Out |
| 11 | I2C_SCL | I2C Clock signal |
| 12 | I2C_SDA | I2C Data signal |
| 13-30 | Reserved | Reserved for advanced configurations |
3. Usage Instructions
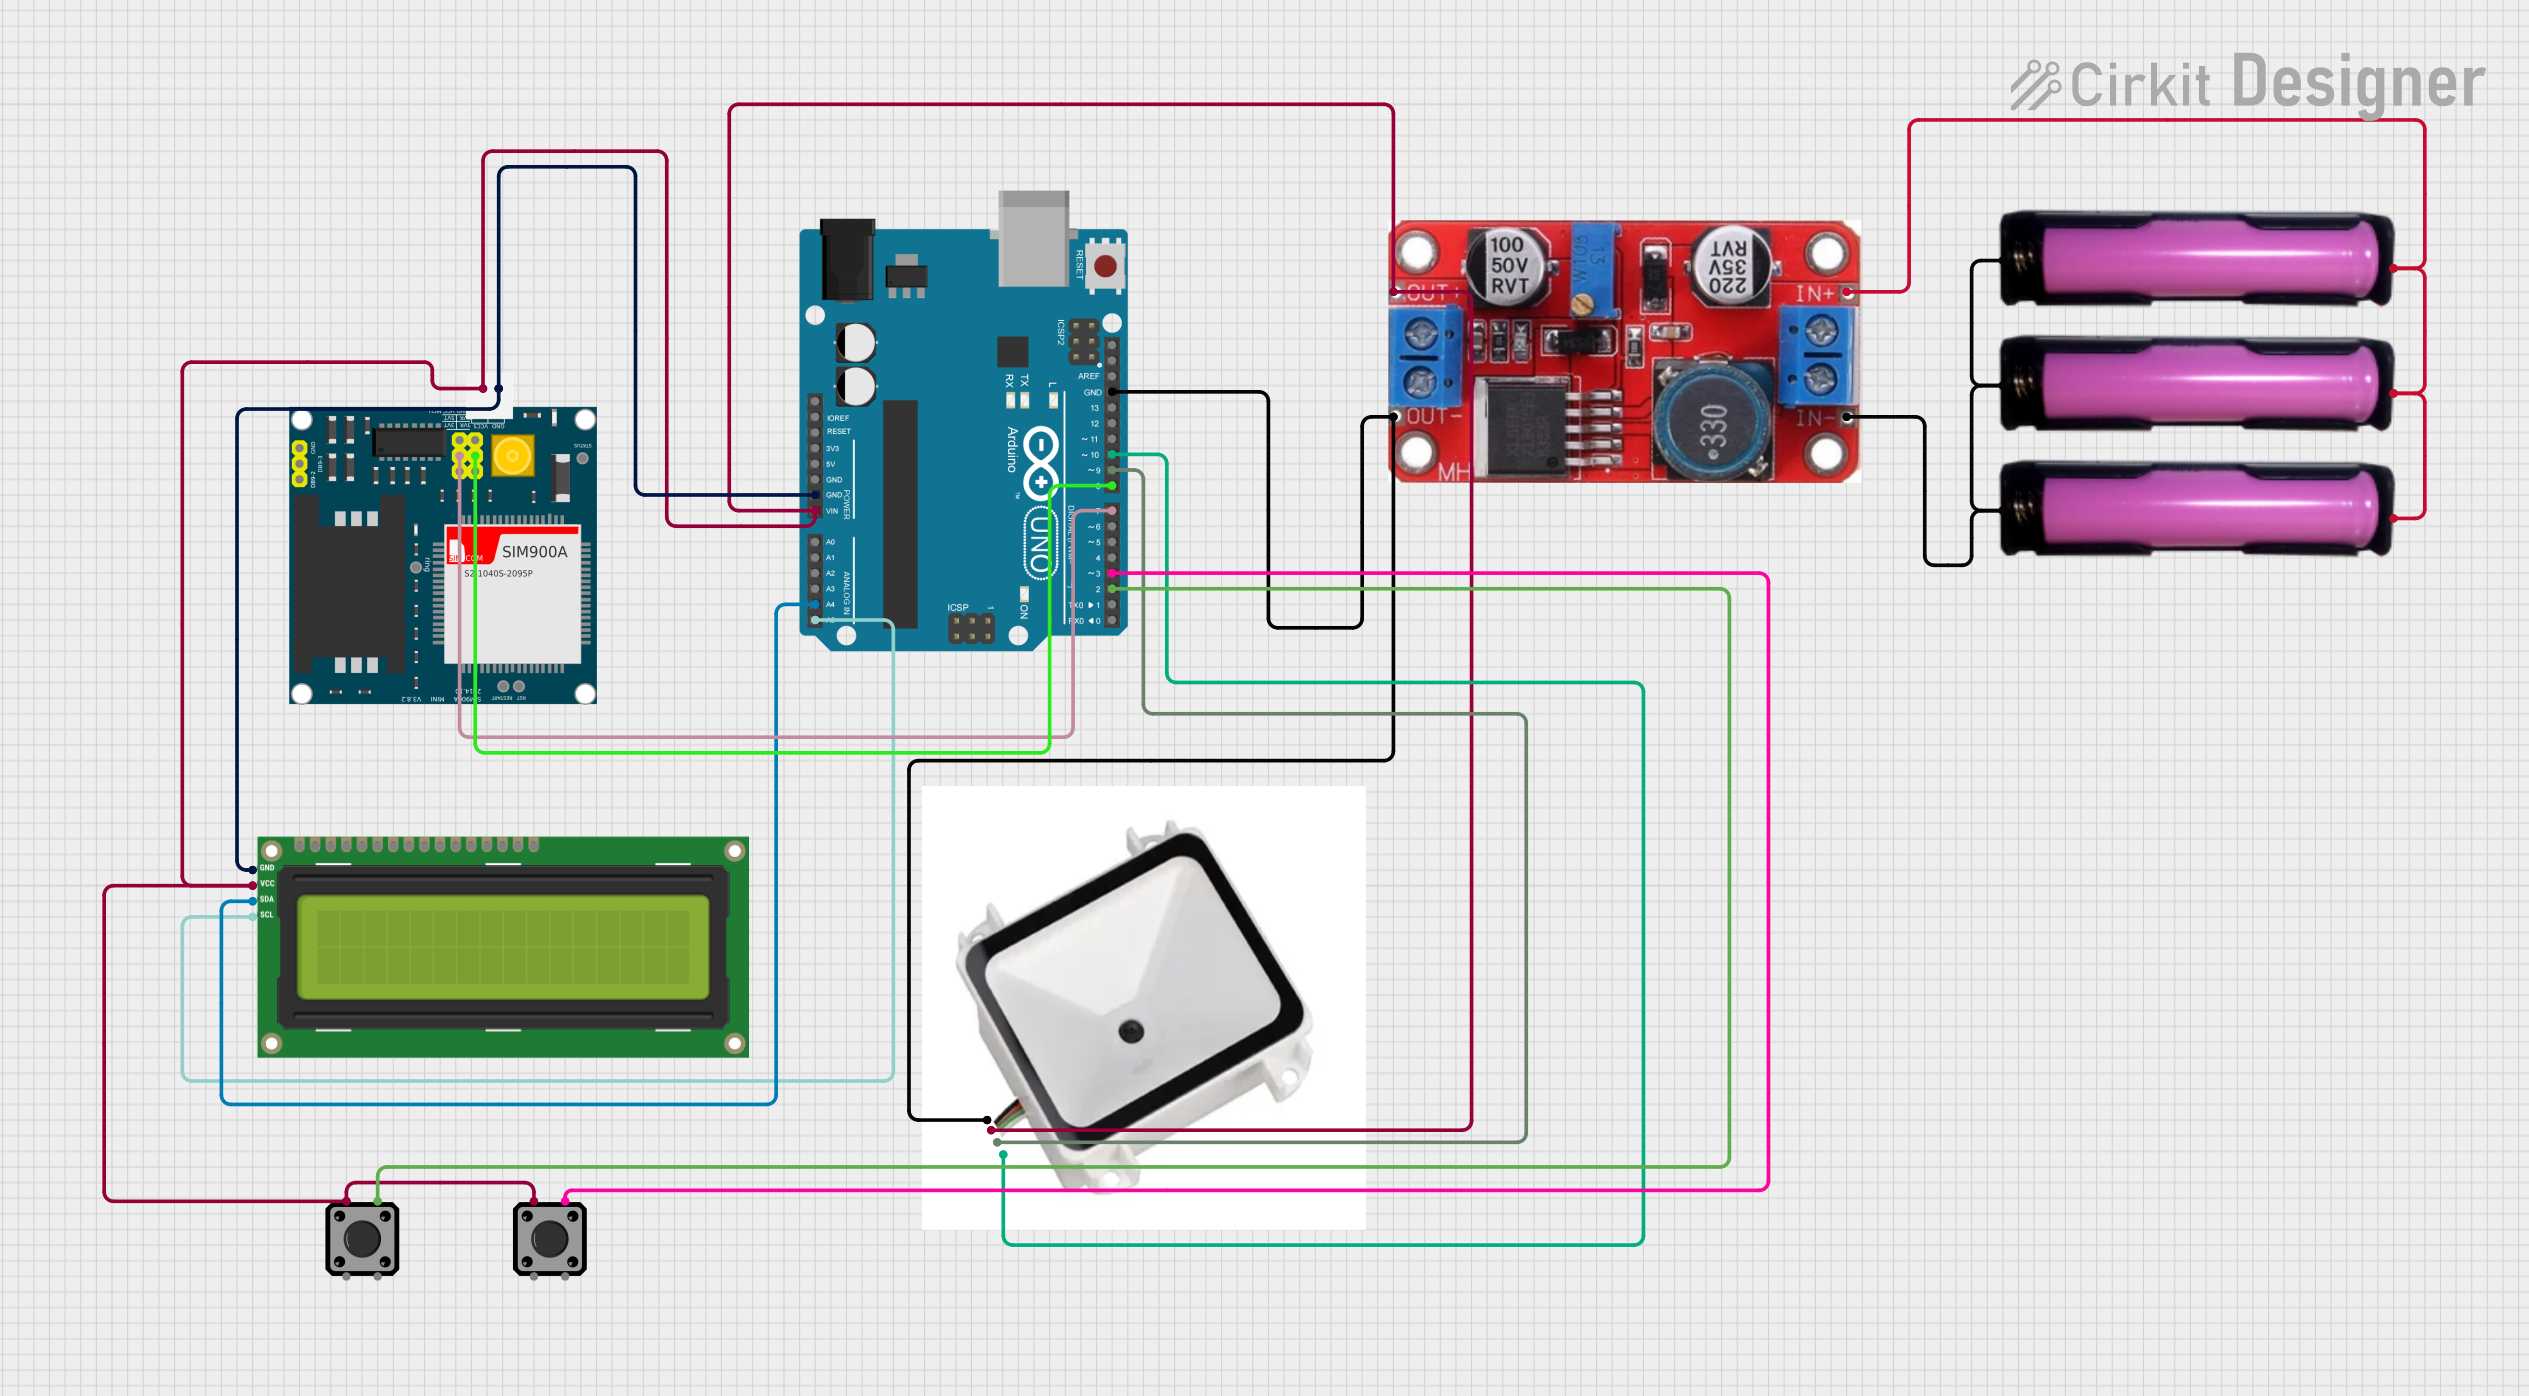
Connecting the gen4-uLCD-43DT-AR to an Arduino UNO
To use the gen4-uLCD-43DT-AR with an Arduino UNO, follow these steps:
- Power Supply: Connect the VCC pin of the display to the 5V pin on the Arduino UNO and the GND pin to the Arduino's GND.
- UART Communication: Connect the TX pin of the display to the RX pin of the Arduino (pin 0) and the RX pin of the display to the TX pin of the Arduino (pin 1).
- Reset Pin: Connect the RESET pin of the display to a digital pin on the Arduino (e.g., pin 7) for software-controlled resets.
- Install Libraries: Download and install the 4D Systems Arduino library from their official website or GitHub.
- Upload Code: Use the Arduino IDE to upload the code to the Arduino UNO.
Sample Arduino Code
Below is a simple example to display "Hello, World!" on the gen4-uLCD-43DT-AR:
#include <gen4-uLCD-43DT.h> // Include the 4D Systems library

// Define the reset pin
#define RESET_PIN 7

// Create an instance of the display
gen4_uLCD_43DT display(RESET_PIN);

void setup() {
  // Initialize the display
  display.begin(9600); // Set baud rate to 9600
  display.clearScreen(); // Clear the screen

  // Display a message
  display.setFont(1); // Set font size
  display.setTextColor(WHITE, BLACK); // Set text color (white on black background)
  display.print("Hello, World!"); // Print message
}

void loop() {
  // No actions in the loop
}
Important Considerations
- Ensure the display is powered within the specified voltage range (4.0V to 5.5V).
- Use level shifters if interfacing with a 3.3V microcontroller.
- Avoid touching the resistive screen with sharp objects to prevent damage.
- Use the 4D Workshop IDE for advanced graphical design and programming.
4. Troubleshooting and FAQs
Common Issues and Solutions
| Issue | Possible Cause | Solution |
|---|---|---|
| Display does not power on | Incorrect wiring or insufficient power | Verify connections and ensure a stable 5V power supply. |
| No response to touch input | Faulty touch screen or improper calibration | Recalibrate the touch screen using the 4D Workshop IDE. |
| UART communication not working | Incorrect baud rate or wiring | Check the baud rate and ensure TX/RX pins are correctly connected. |
| Screen flickering | Insufficient power supply | Use a regulated power source with sufficient current capacity. |
| Arduino code not uploading | TX/RX pins interfering with upload process | Disconnect the display's TX/RX pins during code upload to the Arduino. |
FAQs
Can I use this display with a 3.3V microcontroller?
- Yes, but you must use level shifters to convert the 3.3V logic to 5V.
How do I update the firmware of the display?
- Use the 4D Workshop IDE and a USB-to-serial adapter to update the firmware.
Can I use this display with SPI or I2C instead of UART?
- Yes, the gen4-uLCD-43DT-AR supports SPI and I2C communication. Refer to the 4D Systems documentation for configuration details.
What is the maximum microSD card size supported?
- The display supports microSD cards up to 32GB.
Is the display compatible with Raspberry Pi?
- Yes, the display can be used with Raspberry Pi via UART, SPI, or I2C interfaces.
5. Additional Resources
- 4D Systems Official Website
- 4D Workshop IDE
- Arduino Library for gen4 Displays
- Datasheet for gen4-uLCD-43DT-AR
This documentation provides a comprehensive guide to using the gen4-uLCD-43DT-AR. For further assistance, refer to the official 4D Systems support channels.
Explore Projects Built with 4D System Gen 4 Touch Screen 4.3" Resistive


Explore Projects Built with 4D System Gen 4 Touch Screen 4.3" Resistive