How to Use IR 3W 940nm COB: Examples, Pinouts, and Specs
Introduction
The IR 3W 940nm COB is a high-power infrared LED module designed for applications requiring invisible infrared light. This component emits light at a wavelength of 940 nanometers, making it ideal for night vision systems, remote control devices, and various sensing technologies such as proximity sensors and security cameras. Its chip-on-board (COB) design ensures high efficiency, excellent heat dissipation, and compact size, making it suitable for both industrial and consumer applications.
Explore Projects Built with IR 3W 940nm COB
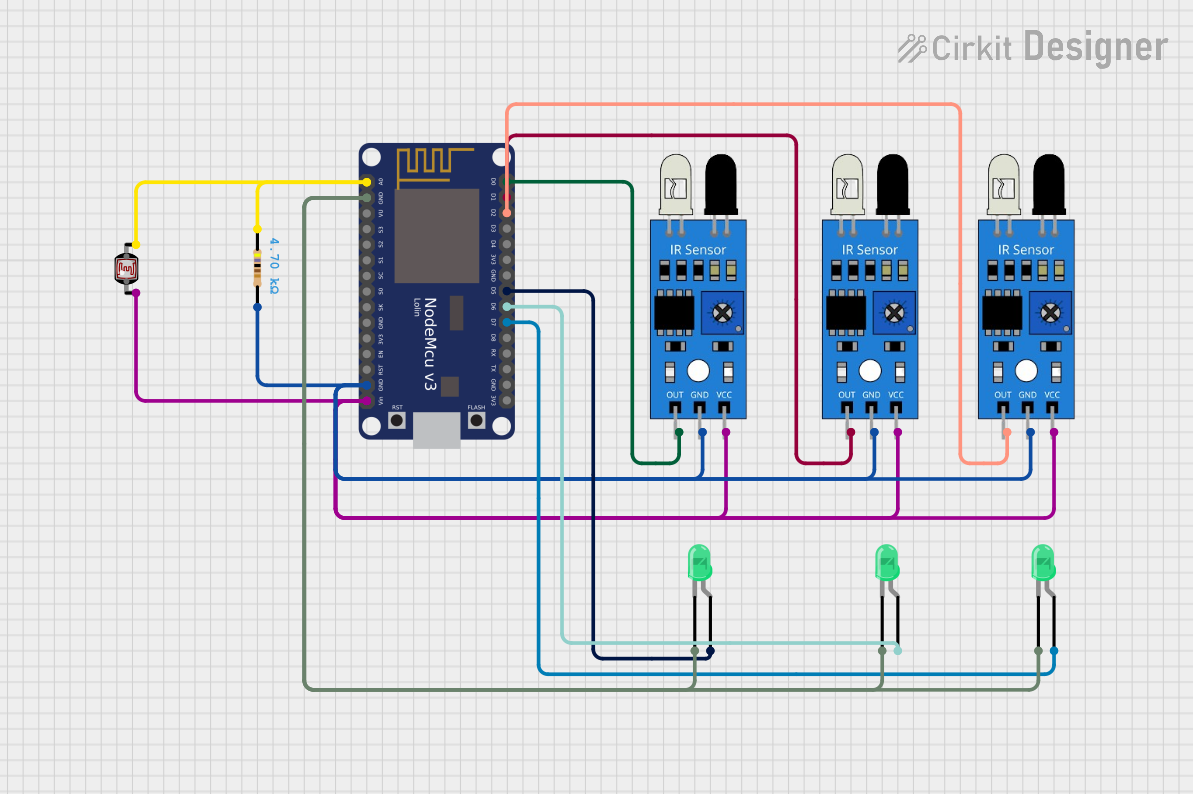


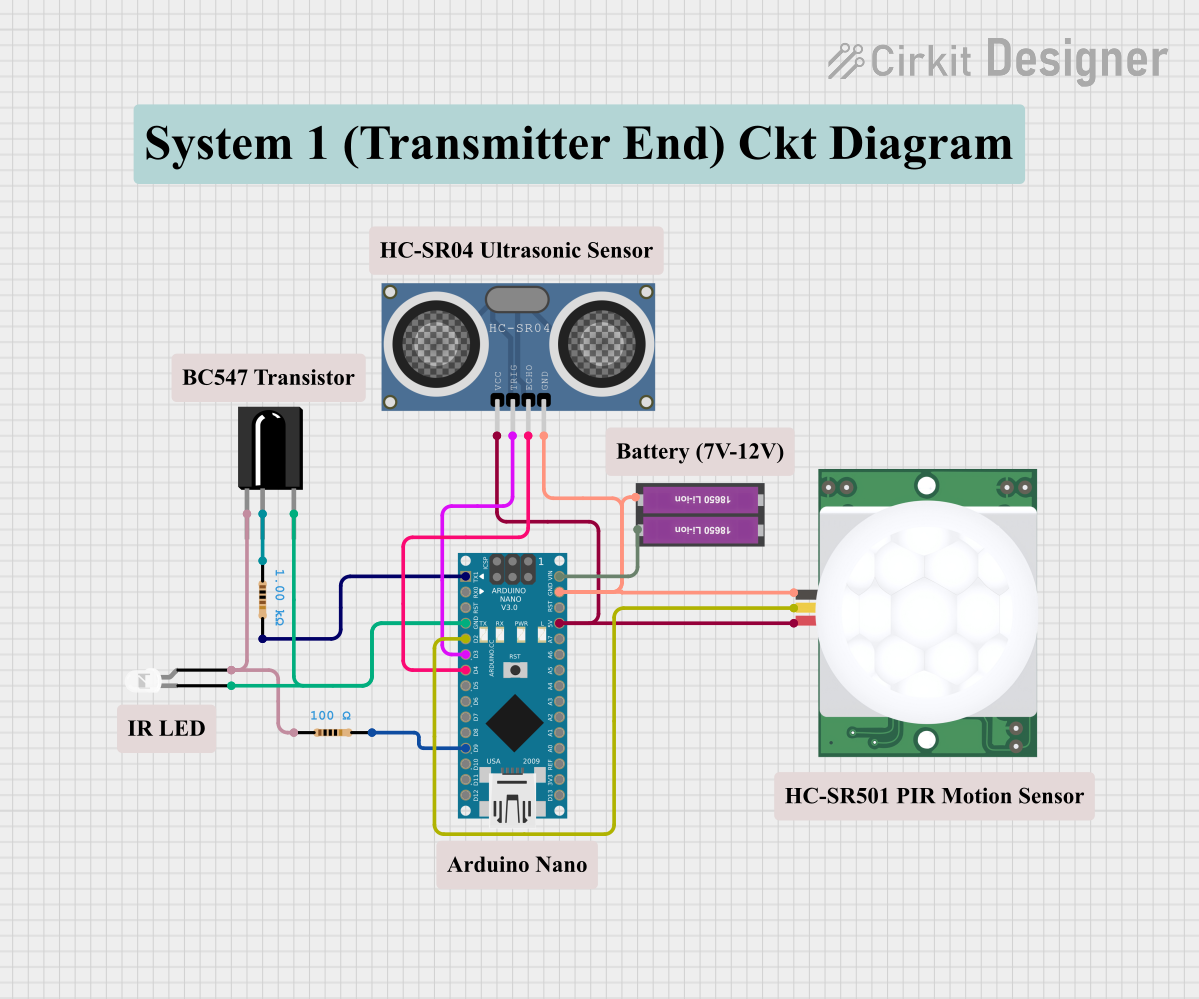
Explore Projects Built with IR 3W 940nm COB
Technical Specifications
Below are the key technical details of the IR 3W 940nm COB:
| Parameter | Value |
|---|---|
| Wavelength | 940 nm |
| Power Output | 3 W |
| Forward Voltage (Vf) | 1.8V - 2.4V |
| Forward Current (If) | 700 mA (typical) |
| Viewing Angle | 120° |
| Thermal Resistance | ≤ 10°C/W |
| Operating Temperature | -40°C to +85°C |
| Storage Temperature | -40°C to +100°C |
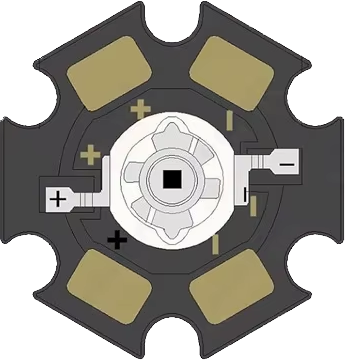
Pin Configuration and Descriptions
The IR 3W 940nm COB typically has two solder pads for electrical connections:
| Pin | Label | Description |
|---|---|---|
| 1 | Anode (+) | Positive terminal for power input |
| 2 | Cathode (-) | Negative terminal for power input |
Usage Instructions
How to Use the IR 3W 940nm COB in a Circuit
- Power Supply: Use a constant current LED driver to power the IR 3W 940nm COB. Ensure the driver provides a forward current of 700 mA and a voltage range of 1.8V to 2.4V.
- Heat Dissipation: Mount the COB on a heat sink or a thermally conductive surface to prevent overheating. Proper thermal management is critical for maintaining performance and longevity.
- Polarity: Connect the positive terminal of the power supply to the anode (+) and the negative terminal to the cathode (-). Reversing the polarity may damage the component.
- Current Limiting: If using a simple power supply, include a current-limiting resistor in series with the COB to prevent overcurrent. Calculate the resistor value using Ohm's Law:
[ R = \frac{V_{supply} - V_f}{I_f} ] where (V_{supply}) is the supply voltage, (V_f) is the forward voltage, and (I_f) is the forward current.
Example: Connecting to an Arduino UNO
The IR 3W 940nm COB can be controlled using an Arduino UNO and a transistor as a switch. Below is an example circuit and code:
Circuit Setup
- Connect the anode (+) of the COB to the collector of an NPN transistor (e.g., 2N2222).
- Connect the cathode (-) of the COB to the ground (GND).
- Connect the emitter of the transistor to GND.
- Use a 1 kΩ resistor to connect the base of the transistor to a PWM-capable pin on the Arduino (e.g., pin 9).
- Power the COB with an external constant current driver or a 5V power supply with a current-limiting resistor.
Arduino Code
// Example code to control the IR 3W 940nm COB with PWM
// Pin 9 is used to control the COB brightness

const int cobPin = 9; // PWM pin connected to the transistor base

void setup() {
  pinMode(cobPin, OUTPUT); // Set pin 9 as an output
}

void loop() {
  // Gradually increase brightness
  for (int brightness = 0; brightness <= 255; brightness++) {
    analogWrite(cobPin, brightness); // Set PWM duty cycle
    delay(10); // Small delay for smooth transition
  }

  // Gradually decrease brightness
  for (int brightness = 255; brightness >= 0; brightness--) {
    analogWrite(cobPin, brightness); // Set PWM duty cycle
    delay(10); // Small delay for smooth transition
  }
}
Important Considerations
- Infrared Light: The emitted light is not visible to the human eye. Use an IR-sensitive camera or sensor to verify operation.
- Eye Safety: Avoid direct exposure to the IR light source, as it may cause damage to the eyes.
- Heat Management: Always use a heat sink or thermal paste to dissipate heat effectively.
Troubleshooting and FAQs
Common Issues and Solutions
The COB does not light up:
- Check the polarity of the connections. Ensure the anode (+) and cathode (-) are correctly connected.
- Verify the power supply voltage and current. Ensure it matches the COB's specifications.
- Inspect for loose or damaged connections.
The COB overheats:
- Ensure proper heat dissipation by using a heat sink or thermally conductive material.
- Check if the current exceeds the recommended 700 mA. Use a constant current driver or a current-limiting resistor.
The COB flickers:
- Verify the stability of the power supply. Use a regulated power source.
- Check for loose connections or faulty solder joints.
The COB is dim:
- Ensure the power supply provides sufficient current (700 mA).
- Inspect for any obstructions or dirt on the COB surface.
FAQs
Q: Can I power the IR 3W 940nm COB directly from a 5V power supply?
A: No, you must use a current-limiting resistor or a constant current driver to prevent overcurrent, which can damage the COB.
Q: How can I test if the COB is working?
A: Use an IR-sensitive camera or sensor to detect the emitted infrared light, as it is invisible to the human eye.
Q: Can I use the COB without a heat sink?
A: No, proper heat dissipation is essential to prevent overheating and ensure the longevity of the component.
Q: Is the COB compatible with PWM dimming?
A: Yes, the IR 3W 940nm COB can be dimmed using PWM signals, provided the power supply or driver supports it.
This concludes the documentation for the IR 3W 940nm COB.