
How to Use TLE9252V: Examples, Pinouts, and Specs
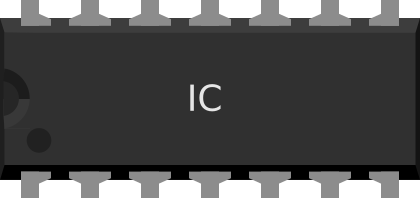
 Design with TLE9252V in Cirkit Designer
Introduction
The TLE9252V is a high-speed CAN (Controller Area Network) transceiver designed specifically for automotive applications. It enables robust and reliable communication between electronic control units (ECUs) in vehicles, even in harsh environmental conditions. With support for data rates up to 1 Mbps and low power consumption, the TLE9252V is ideal for modern vehicle networks, including body control modules, powertrain systems, and advanced driver-assistance systems (ADAS).
Explore Projects Built with TLE9252V
 Open Project in Cirkit Designer
 Open Project in Cirkit Designer
 Open Project in Cirkit Designer
 Open Project in Cirkit Designer
Explore Projects Built with TLE9252V
Open Project in Cirkit DesignerOpen Project in Cirkit DesignerOpen Project in Cirkit DesignerOpen Project in Cirkit DesignerCommon Applications:
- Automotive ECUs for body and chassis systems
- Powertrain and engine control systems
- Advanced driver-assistance systems (ADAS)
- Industrial automation and robotics
- Communication in harsh environments requiring CAN protocol
Technical Specifications
Key Features:
- Supply Voltage (Vcc): 4.5V to 5.5V
- Data Rate: Up to 1 Mbps
- Operating Temperature Range: -40°C to +150°C
- Standby Current: < 10 µA (low-power mode)
- Bus Pin Protection: ±8 kV ESD (HBM)
- CAN Protocol Compatibility: ISO 11898-2:2016
- Fail-Safe Features: Over-temperature protection, TXD dominant timeout, and bus failure management
Pin Configuration and Descriptions:
The TLE9252V is typically available in an 8-pin package. Below is the pinout and description:
| Pin Number | Pin Name | Description |
|---|---|---|
| 1 | TXD | Transmit Data Input: Controls the data sent to the CAN bus. |
| 2 | GND | Ground: Connect to the system ground. |
| 3 | Vcc | Supply Voltage: Connect to a 5V power supply. |
| 4 | RXD | Receive Data Output: Outputs the data received from the CAN bus. |
| 5 | CANL | CAN Low Line: Connect to the CAN bus low line. |
| 6 | CANH | CAN High Line: Connect to the CAN bus high line. |
| 7 | STB | Standby Mode Control: Enables low-power standby mode when set high. |
| 8 | n.c. | Not Connected: Leave unconnected or use as a mechanical support pin if needed. |
Usage Instructions
How to Use the TLE9252V in a Circuit:
Power Supply:
- Connect the Vcc pin to a regulated 5V power supply.
- Connect the GND pin to the system ground.
CAN Bus Connection:
- Connect the CANH and CANL pins to the respective high and low lines of the CAN bus.
- Use a 120-ohm termination resistor between CANH and CANL at each end of the bus for proper signal integrity.
Data Transmission and Reception:
- Connect the TXD pin to the microcontroller's CAN transmit pin.
- Connect the RXD pin to the microcontroller's CAN receive pin.
Standby Mode:
- To enable low-power standby mode, set the STB pin high.
- To exit standby mode, set the STB pin low.
Fail-Safe Features:
- The TLE9252V includes built-in protection features such as over-temperature shutdown and TXD dominant timeout. Ensure proper thermal management and avoid prolonged dominant states on the TXD pin.
Example Arduino UNO Code:
Below is an example of how to use the TLE9252V with an Arduino UNO for basic CAN communication. This example assumes the use of an external CAN controller (e.g., MCP2515) connected to the TLE9252V.
#include <SPI.h>
#include <mcp_can.h>

// Define the SPI CS pin for the MCP2515 CAN controller
#define CAN_CS_PIN 10

// Initialize the MCP2515 CAN controller
MCP_CAN CAN(CAN_CS_PIN);

void setup() {
  Serial.begin(9600);

  // Initialize the CAN bus at 500 kbps
  if (CAN.begin(MCP_ANY, CAN_500KBPS, MCP_8MHZ) == CAN_OK) {
    Serial.println("CAN bus initialized successfully!");
  } else {
    Serial.println("Error initializing CAN bus.");
    while (1);
  }

  // Set the CAN transceiver to normal mode
  CAN.setMode(MCP_NORMAL);
  Serial.println("CAN transceiver set to normal mode.");
}

void loop() {
  // Example: Send a CAN message
  byte data[8] = {0x01, 0x02, 0x03, 0x04, 0x05, 0x06, 0x07, 0x08};

  if (CAN.sendMsgBuf(0x100, 0, 8, data) == CAN_OK) {
    Serial.println("Message sent successfully!");
  } else {
    Serial.println("Error sending message.");
  }

  delay(1000); // Wait 1 second before sending the next message
}
Important Considerations:
- Ensure proper grounding to avoid noise and signal integrity issues.
- Use appropriate decoupling capacitors (e.g., 100 nF) near the Vcc pin to stabilize the power supply.
- Avoid exceeding the maximum voltage and current ratings to prevent damage to the component.
- Place the TLE9252V as close as possible to the CAN bus connector to minimize signal degradation.
Troubleshooting and FAQs
Common Issues and Solutions:
No Communication on the CAN Bus:
- Cause: Missing or incorrect termination resistors.
- Solution: Ensure 120-ohm resistors are placed at both ends of the CAN bus.
High Standby Current:
- Cause: STB pin not set correctly.
- Solution: Verify that the STB pin is set high for standby mode or low for normal operation.
Overheating of the Transceiver:
- Cause: Prolonged dominant state on the TXD pin or excessive current draw.
- Solution: Check the TXD signal and ensure proper thermal management.
Data Corruption or Noise:
- Cause: Poor grounding or long bus lines.
- Solution: Use a proper grounding scheme and minimize the length of the CAN bus lines.
FAQs:
Q1: Can the TLE9252V be used with 3.3V microcontrollers?
A1: Yes, but a level shifter or voltage divider is required to interface the 3.3V logic levels with the 5V TXD and RXD pins.
Q2: What is the maximum bus length supported by the TLE9252V?
A2: The maximum bus length depends on the data rate. For 1 Mbps, the recommended maximum length is approximately 40 meters.
Q3: How do I protect the TLE9252V from ESD?
A3: The TLE9252V has built-in ESD protection on the CANH and CANL pins. However, additional TVS diodes can be used for enhanced protection in extreme environments.
Q4: Can the TLE9252V operate in a multi-node CAN network?
A4: Yes, the TLE9252V is designed for multi-node CAN networks and supports up to 120 nodes as per the CAN standard.
By following this documentation, users can effectively integrate the TLE9252V into their automotive or industrial CAN-based systems.