How to Use AHT10: Examples, Pinouts, and Specs
Introduction
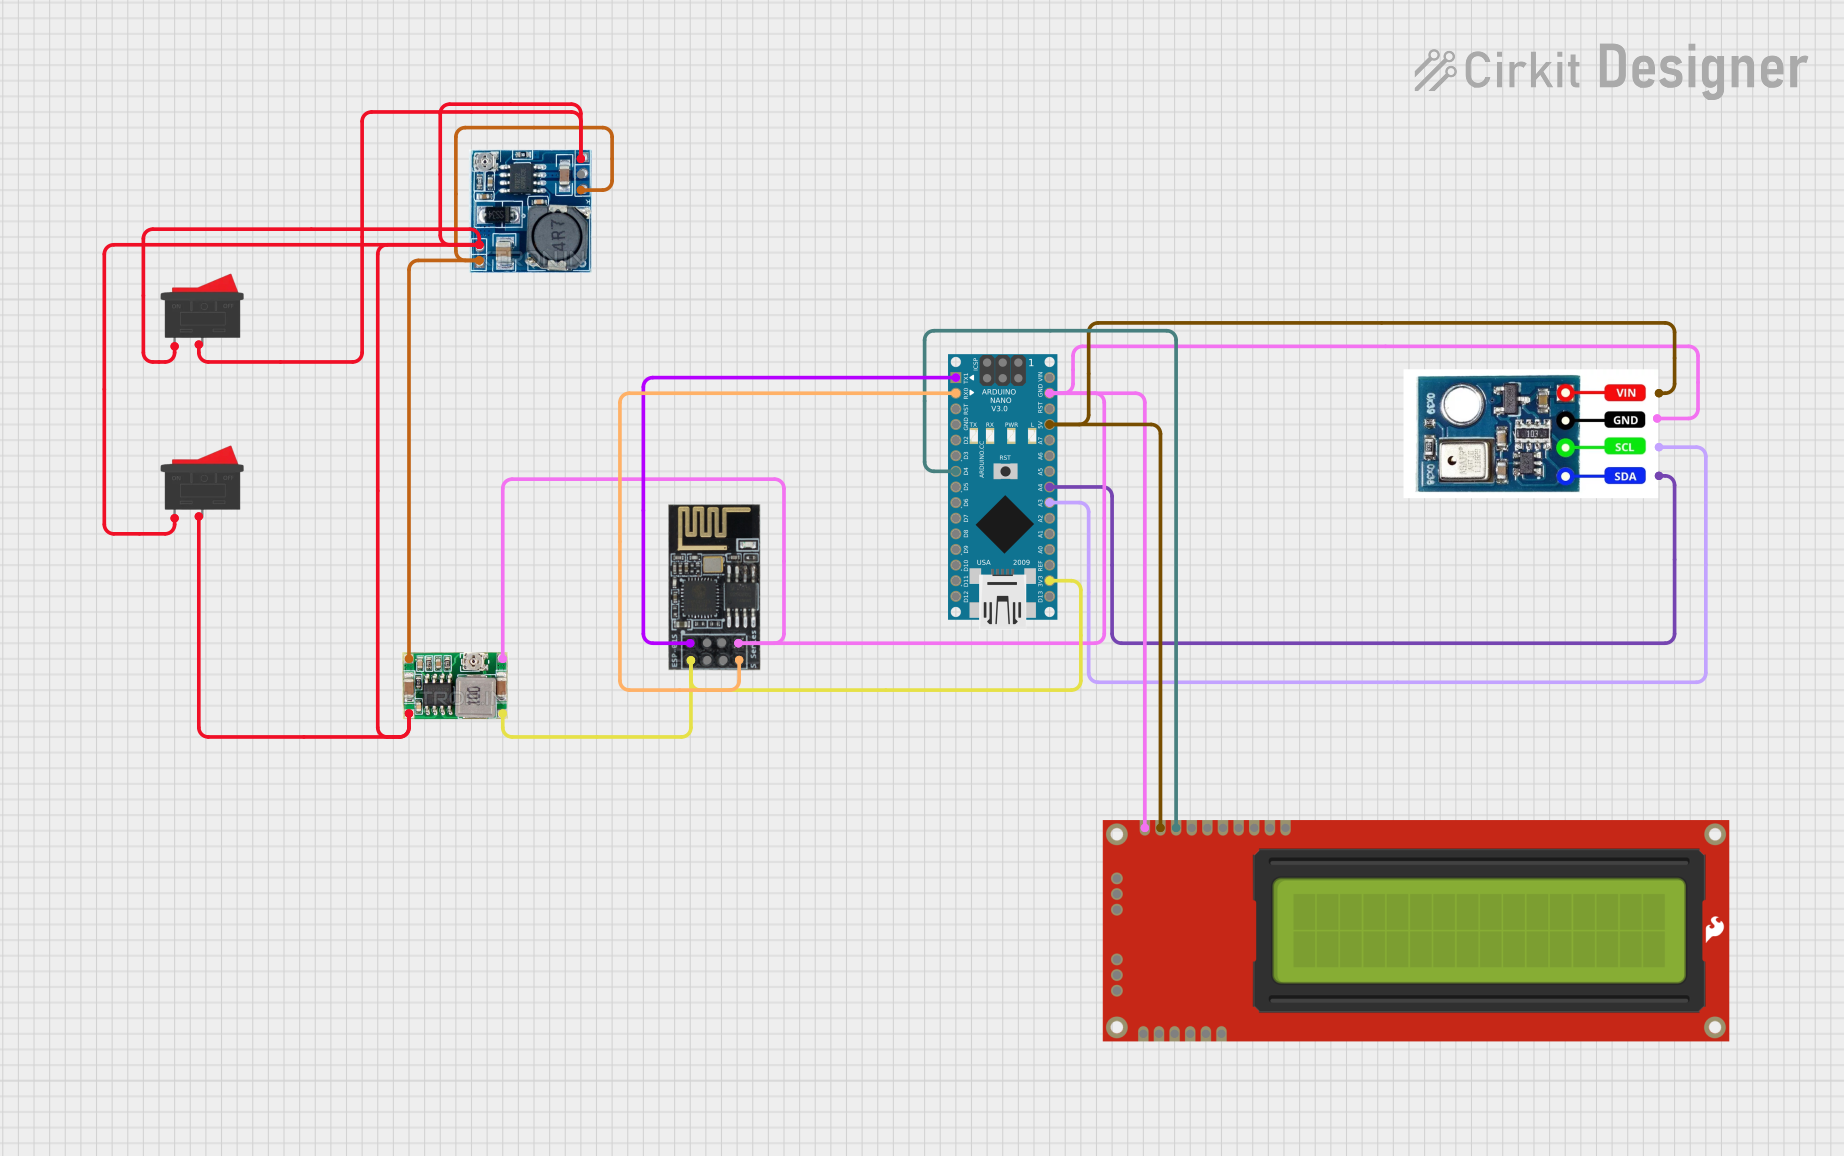
The AHT10 is a high-precision digital sensor that measures relative humidity and temperature, offering reliable performance in a compact form factor. Manufactured by Sensor, the AHT10 utilizes a capacitive polymer sensing element to provide accurate and stable readings. This sensor is commonly used in environmental monitoring, HVAC systems, consumer electronics, and weather stations.
Explore Projects Built with AHT10
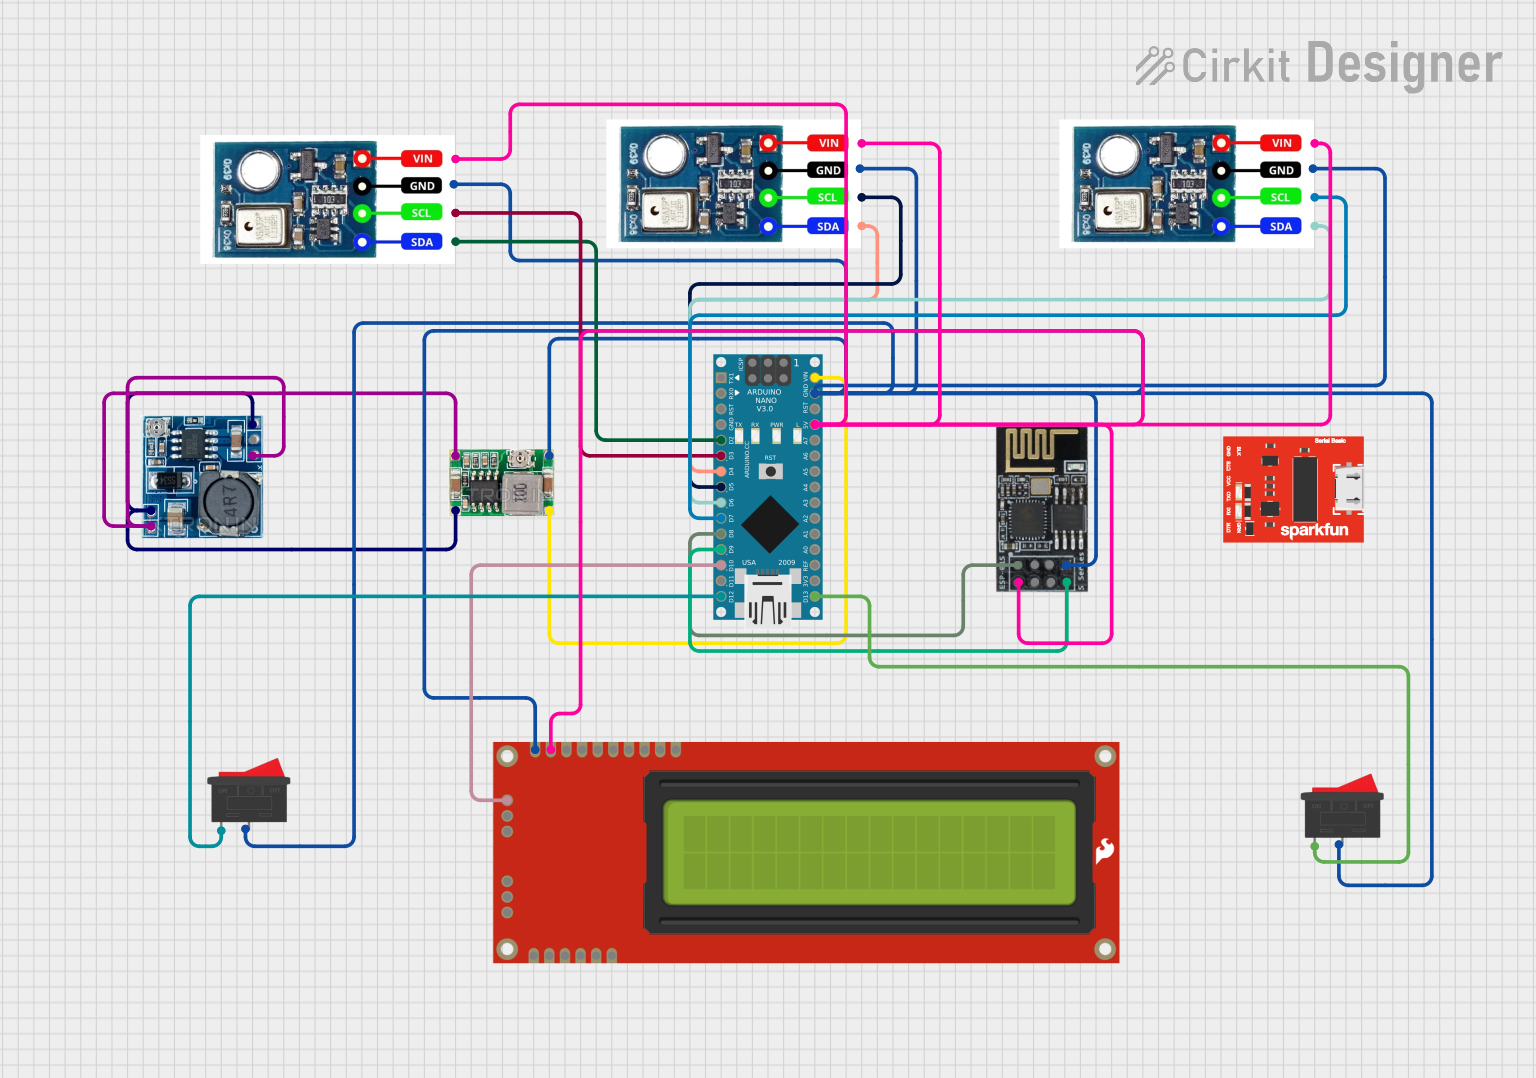
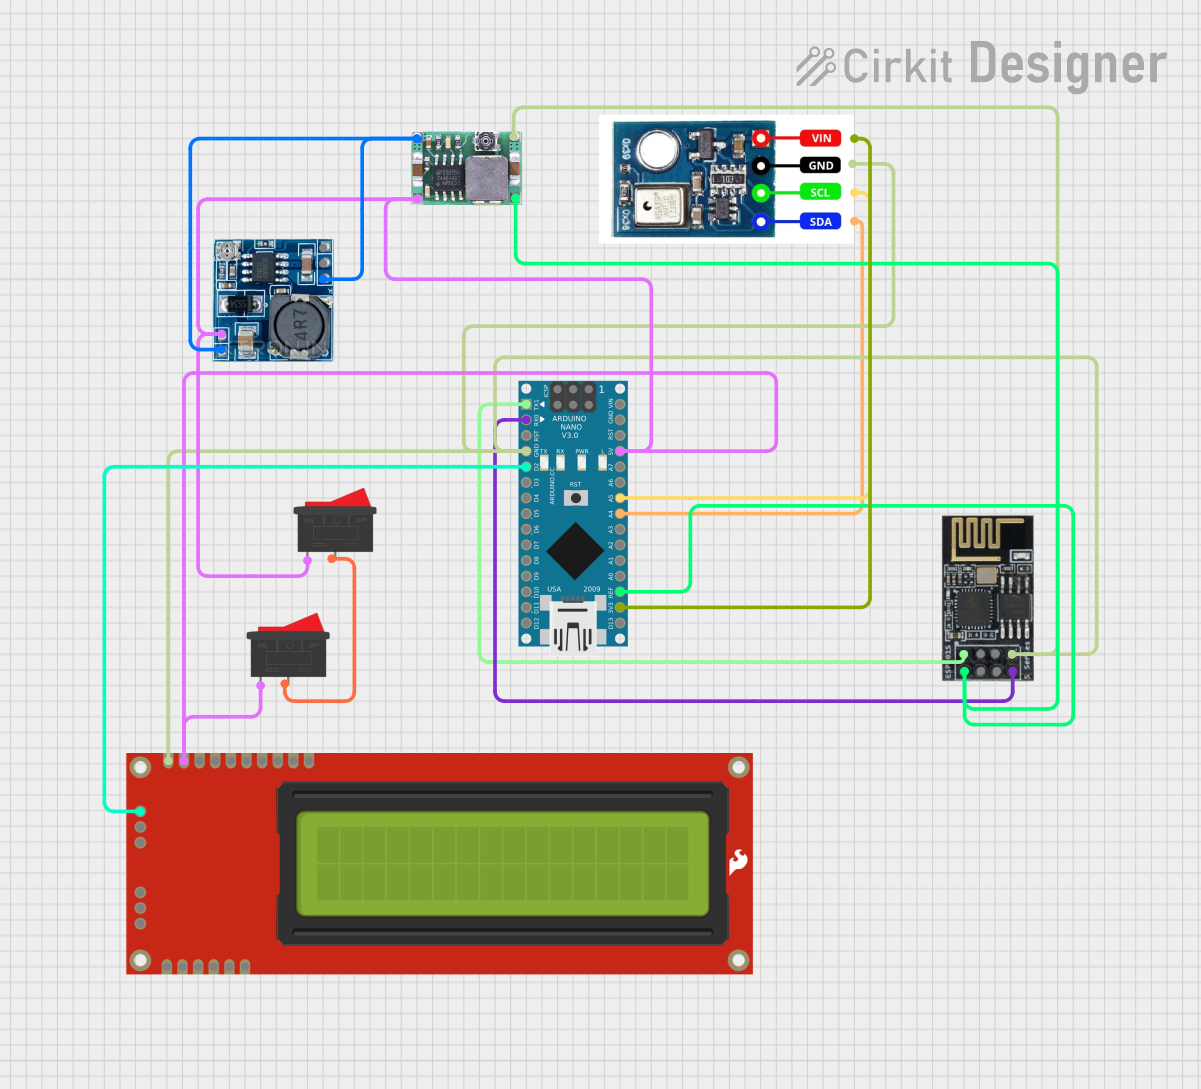
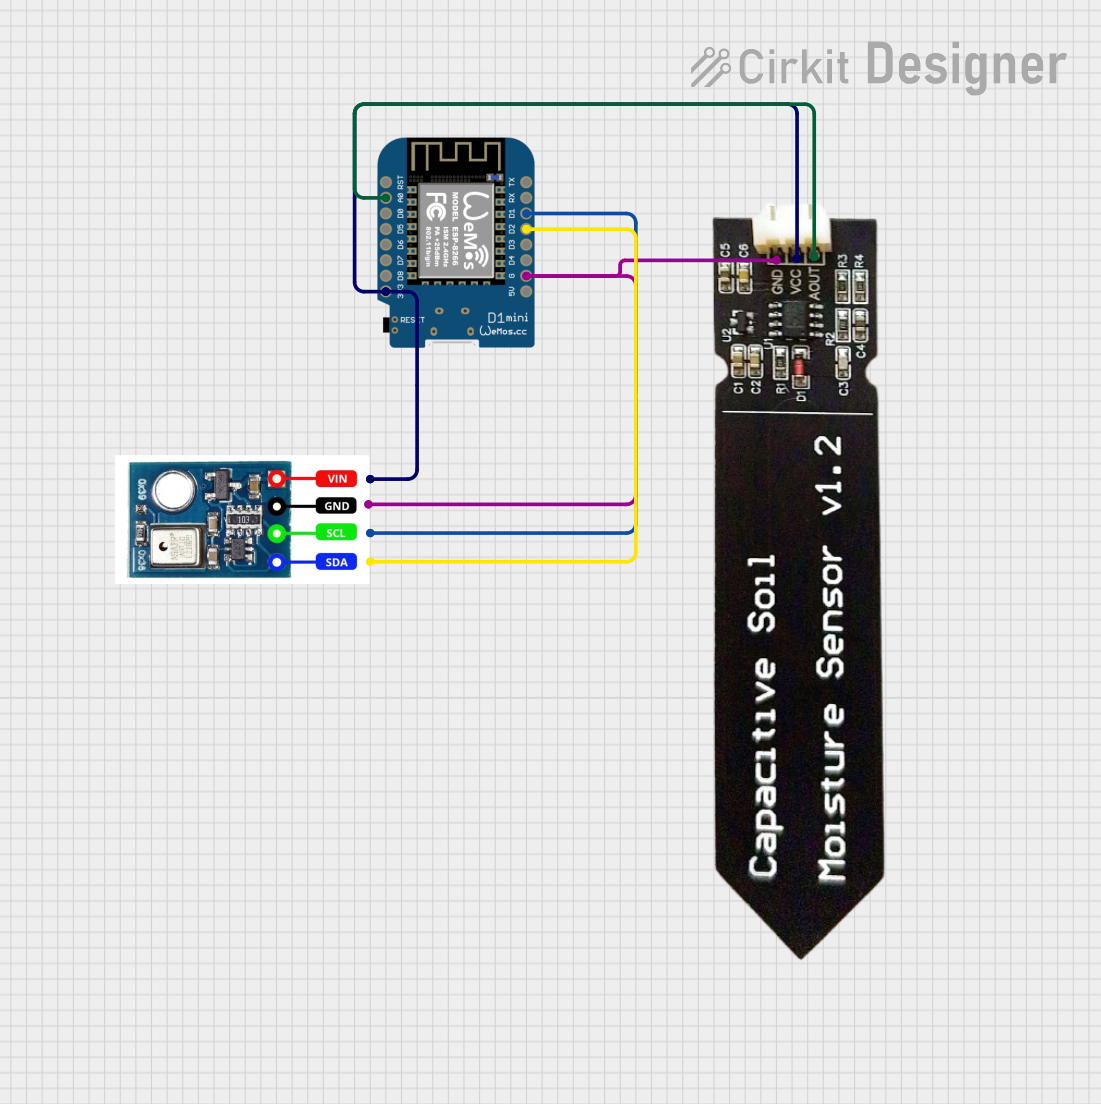
Explore Projects Built with AHT10
Common Applications and Use Cases
- Home and building automation for climate control
- Environmental monitoring and data logging
- Consumer electronics for indoor air quality devices
- Weather stations and meteorological equipment
Technical Specifications
Key Technical Details
- Supply Voltage: 2.2V to 5.5V
- Measurement Range (Humidity): 0% to 100% RH
- Measurement Range (Temperature): -40°C to +85°C
- Humidity Accuracy: ±2% RH
- Temperature Accuracy: ±0.3°C
- Interface: I2C
- I2C Address: 0x38 (fixed)
Pin Configuration and Descriptions
| Pin Number | Name | Description |
|---|---|---|
| 1 | VDD | Power supply (2.2V to 5.5V) |
| 2 | SDA | I2C Data line |
| 3 | GND | Ground |
| 4 | SCL | I2C Clock line |
Usage Instructions
How to Use the AHT10 in a Circuit
- Connect the VDD pin to a 2.2V to 5.5V power supply.
- Connect the GND pin to the ground of the power supply.
- Connect the SDA and SCL pins to the I2C data and clock lines, respectively.
- If necessary, use pull-up resistors on the SDA and SCL lines as per I2C specifications.
Important Considerations and Best Practices
- Ensure that the power supply voltage does not exceed the specified maximum of 5.5V.
- Avoid exposing the sensor to condensing humidity conditions.
- Place the sensor away from heat sources for accurate temperature readings.
- Implement proper I2C communication handling to prevent data corruption.
Example Code for Arduino UNO
#include <Wire.h>

// AHT10 I2C address
#define AHT10_ADDRESS 0x38

// AHT10 registers
#define AHT10_INIT_CMD 0xE1
#define AHT10_MEASURE_CMD 0xAC
#define AHT10_RESET_CMD 0xBA

void setup() {
  Wire.begin(); // Initialize I2C
  Serial.begin(9600); // Start serial communication at 9600 baud rate

  // Initialize AHT10 sensor
  Wire.beginTransmission(AHT10_ADDRESS);
  Wire.write(AHT10_INIT_CMD);
  Wire.endTransmission();
  delay(20); // Wait for sensor initialization
}

void loop() {
  // Trigger a measurement
  Wire.beginTransmission(AHT10_ADDRESS);
  Wire.write(AHT10_MEASURE_CMD);
  Wire.write(0x33);
  Wire.write(0x00);
  Wire.endTransmission();
  delay(100); // Measurement time

  // Read the data (6 bytes)
  Wire.requestFrom(AHT10_ADDRESS, 6);
  if (Wire.available() == 6) {
    uint8_t data[6];
    for (int i = 0; i < 6; i++) {
      data[i] = Wire.read();
    }

    // Convert the data to actual humidity and temperature
    unsigned long humidity_raw = ((unsigned long)data[1] << 12) | ((unsigned long)data[2] << 4) | (data[3] >> 4);
    unsigned long temp_raw = (((unsigned long)data[3] & 0x0F) << 16) | ((unsigned long)data[4] << 8) | data[5];

    float humidity = humidity_raw * (100.0 / 1048576.0);
    float temperature = (temp_raw * (200.0 / 1048576.0)) - 50;

    // Output the results to serial monitor
    Serial.print("Humidity: ");
    Serial.print(humidity);
    Serial.println("%");
    Serial.print("Temperature: ");
    Serial.print(temperature);
    Serial.println("C");
  }

  delay(2000); // Delay between measurements
}
Troubleshooting and FAQs
Common Issues
- Inaccurate Readings: Ensure the sensor is not placed near heat sources or in direct sunlight.
- No Data on I2C: Check connections and pull-up resistors on the SDA and SCL lines.
- Sensor Not Responding: Try resetting the sensor using the AHT10_RESET_CMD command.
Solutions and Tips for Troubleshooting
- Verify the power supply voltage and connections.
- Ensure that the I2C address in your code matches the sensor's address.
- Use a logic analyzer or oscilloscope to debug I2C communication issues.
- Check for soldering issues on the sensor pins if using a breakout board.
FAQs
Q: Can the AHT10 sensor be used with a 3.3V system? A: Yes, the AHT10 can operate with a supply voltage as low as 2.2V.
Q: How often should I calibrate the sensor? A: The AHT10 is factory-calibrated and typically does not require additional calibration.
Q: Is the AHT10 waterproof? A: No, the AHT10 is not waterproof and should be protected from moisture and condensation.
Q: Can I use multiple AHT10 sensors on the same I2C bus? A: No, the AHT10 has a fixed I2C address, so you cannot use multiple AHT10 sensors on the same I2C bus without additional hardware to change the address lines.