How to Use Adafruit SGP30: Examples, Pinouts, and Specs
Introduction
The Adafruit SGP30 is an advanced sensor that measures the levels of Total Volatile Organic Compounds (TVOC) and equivalent Carbon Dioxide (eCO2) in the air. It is designed for indoor air quality monitoring and can be used in various applications such as smart homes, HVAC systems, and air purifiers. The sensor is known for its high accuracy, reliability, and long-term stability.
Explore Projects Built with Adafruit SGP30
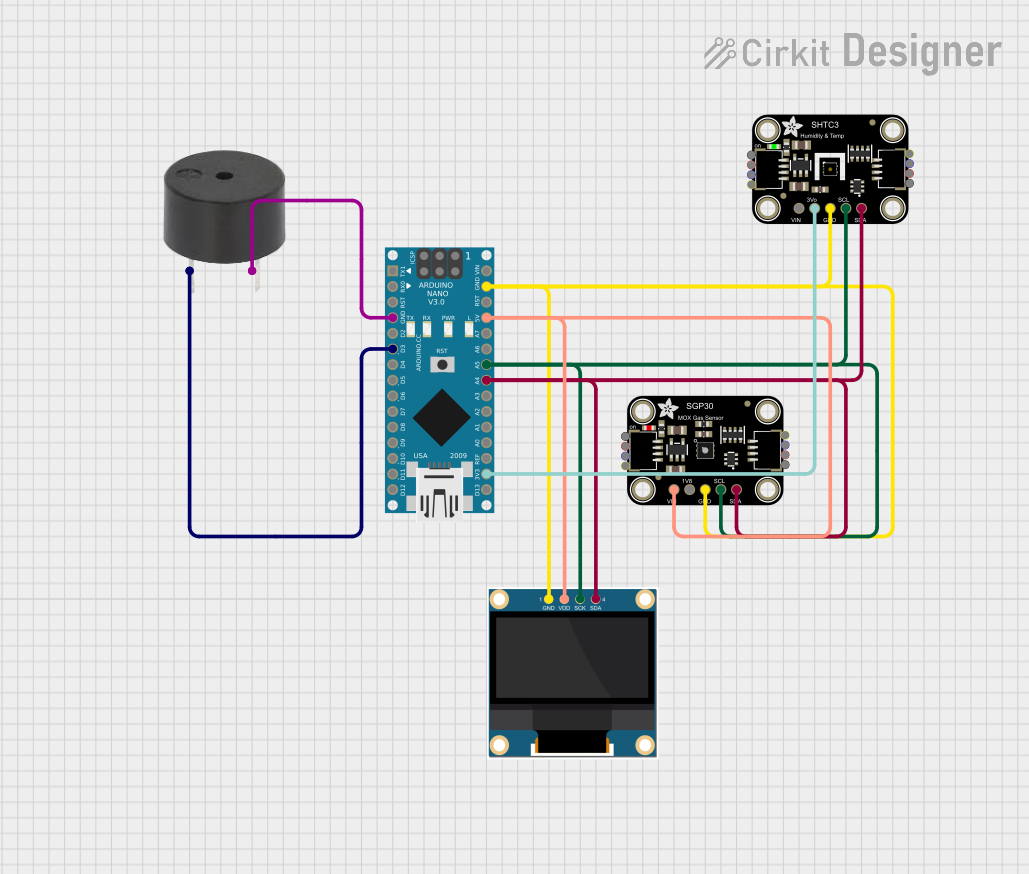
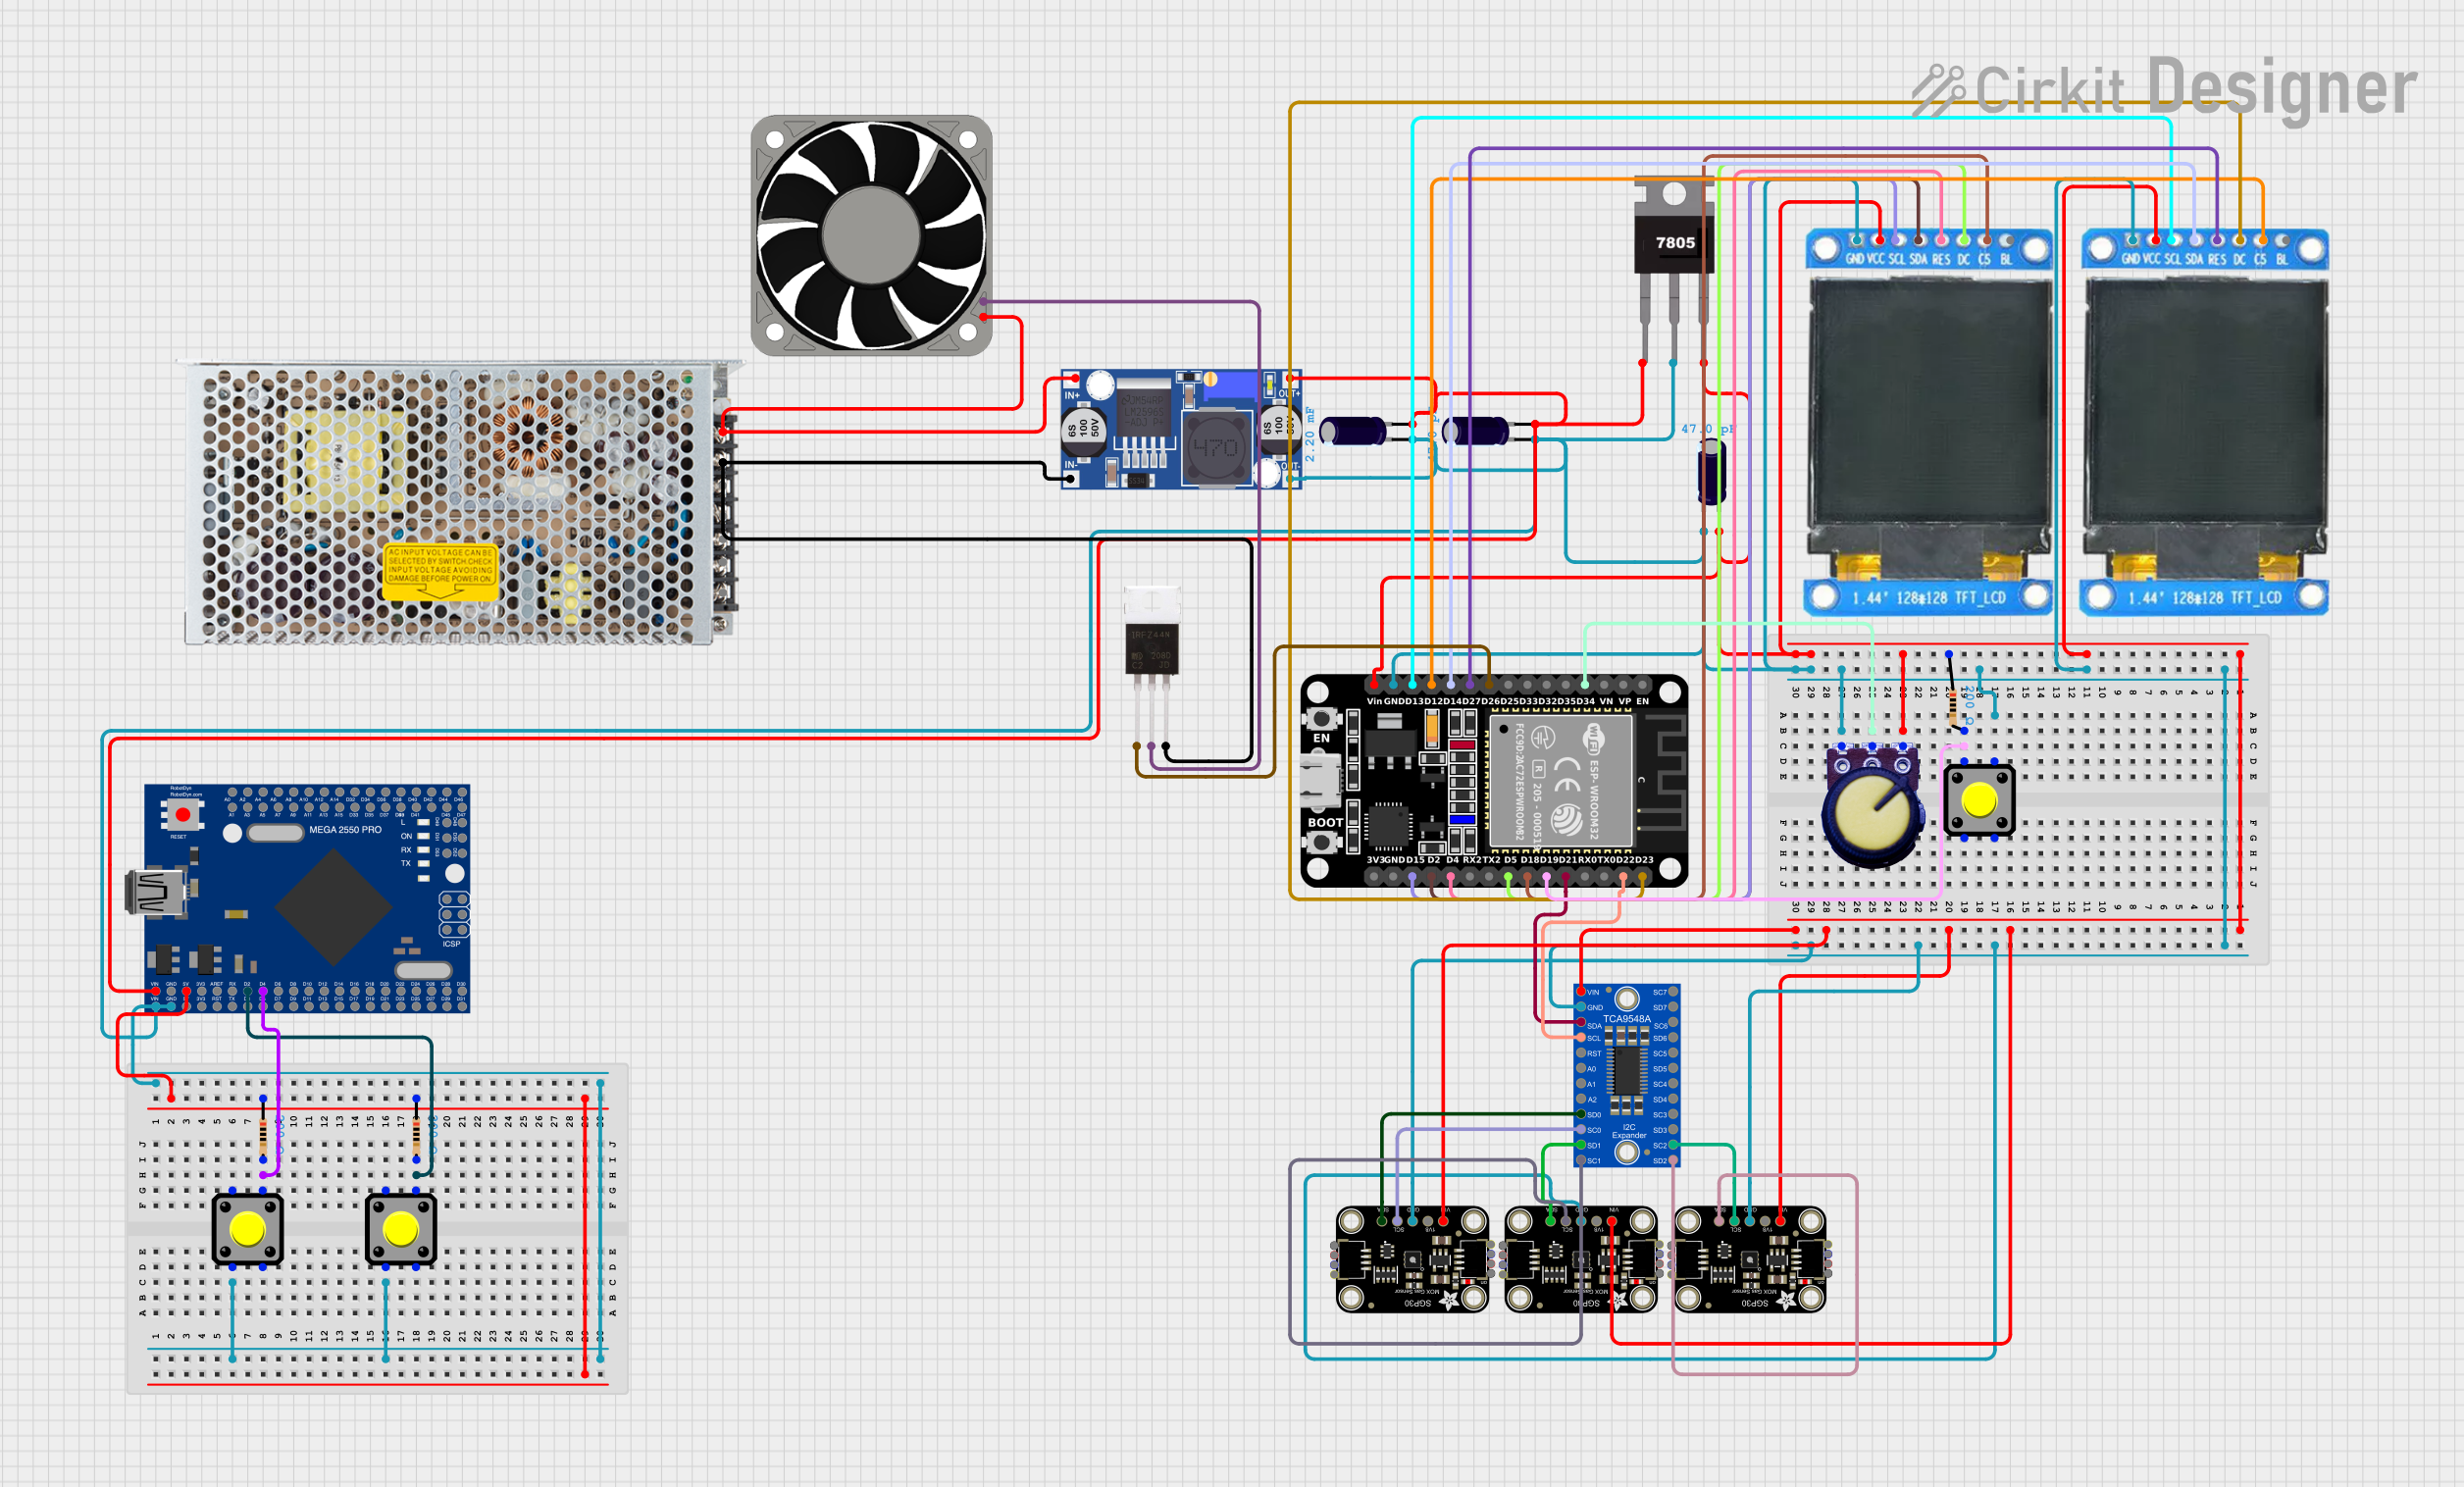


Explore Projects Built with Adafruit SGP30
Technical Specifications
Key Technical Details
- Measurement Range:
- TVOC: 0 ppb to 60000 ppb
- eCO2: 400 ppm to 60000 ppm
- Interface: I2C
- Supply Voltage: 1.62V to 1.98V
- Peak Current: 48 mA
- Operating Temperature Range: -10°C to 50°C
- Humidity Range: 0% to 90% RH, non-condensing
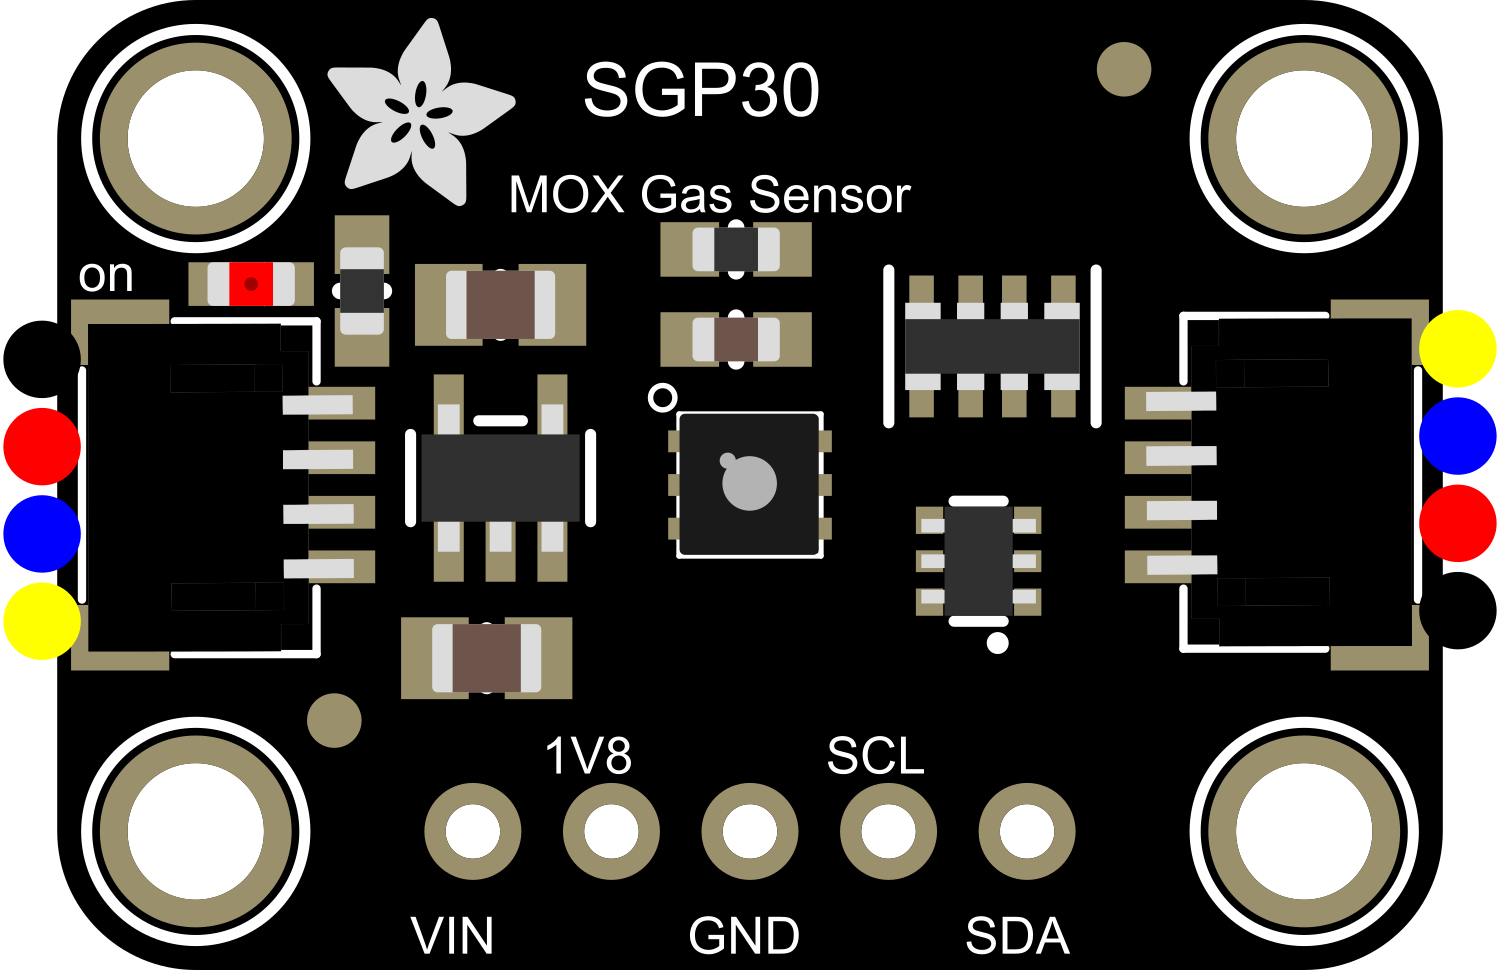
Pin Configuration and Descriptions
| Pin Number | Name | Description |
|---|---|---|
| 1 | VDD | Power supply (1.62V to 1.98V) |
| 2 | GND | Ground |
| 3 | SDA | I2C Data |
| 4 | SCL | I2C Clock |
| 5 | SEL | Interface select (tied to GND for I2C) |
| 6 | NC | No Connection (do not connect) |
Usage Instructions
Connecting to an Arduino UNO
Power Connections:
- Connect the VDD pin to the 3.3V output on the Arduino UNO.
- Connect the GND pin to one of the GND pins on the Arduino UNO.
I2C Connections:
- Connect the SDA pin to the A4 pin (SDA) on the Arduino UNO.
- Connect the SCL pin to the A5 pin (SCL) on the Arduino UNO.
Interface Select:
- Ensure the SEL pin is connected to GND if it is not already hardwired on the sensor board.
Arduino Code Example
#include <Wire.h>
#include "Adafruit_SGP30.h"

Adafruit_SGP30 sgp;

void setup() {
  Serial.begin(9600);
  if (!sgp.begin()){
    Serial.println("Sensor not found :(");
    while (1);
  }
  Serial.print("Found SGP30 serial #");
  Serial.print(sgp.serialnumber[0], HEX);
  Serial.print(sgp.serialnumber[1], HEX);
  Serial.println(sgp.serialnumber[2], HEX);
}

void loop() {
  if (!sgp.IAQmeasure()) {
    Serial.println("Measurement failed");
    return;
  }
  Serial.print("TVOC ");
  Serial.print(sgp.TVOC);
  Serial.print(" ppb\t");
  Serial.print("eCO2 ");
  Serial.println(sgp.eCO2);
  delay(1000);
}
Important Considerations and Best Practices
- Calibration: The SGP30 sensor requires periodic calibration to maintain accuracy. Follow the manufacturer's guidelines for calibration procedures.
- Power Supply: Ensure that the power supply is stable and within the specified voltage range to avoid damaging the sensor.
- Environmental Conditions: Avoid exposing the sensor to extreme temperatures and humidity levels outside the specified range.
Troubleshooting and FAQs
Common Issues
- Sensor Not Responding: Ensure that the I2C connections are secure and that the correct I2C address is being used in the code.
- Inaccurate Readings: If the sensor provides inconsistent or inaccurate readings, it may require recalibration or may be affected by environmental factors such as sudden changes in temperature or humidity.
Solutions and Tips
- I2C Address Conflict: Make sure no other devices on the I2C bus have a conflicting address.
- Proper Ventilation: Ensure the sensor has access to fresh air and is not obstructed by other components or enclosures.
FAQs
Q: How often should the sensor be calibrated? A: The manufacturer recommends recalibrating the sensor every six months or as needed based on usage and environmental conditions.
Q: Can the sensor measure CO2 directly? A: No, the sensor measures eCO2, which is an estimation of CO2 levels based on the detected TVOCs.
Q: Is the sensor suitable for outdoor use? A: The SGP30 is designed primarily for indoor use and may not perform accurately or reliably outdoors.
For further assistance, consult the manufacturer's datasheet and resources, or contact technical support.