How to Use Adafruit BME680: Examples, Pinouts, and Specs

Introduction
The Adafruit BME680 is a cutting-edge environmental sensor module that combines measurements of temperature, humidity, barometric pressure, and volatile organic compounds (VOCs) to assess indoor air quality. This sensor is ideal for a wide range of applications, including IoT devices, weather stations, and environmental monitoring systems. Its small form factor and low power consumption make it suitable for portable and battery-powered devices.
Explore Projects Built with Adafruit BME680
Explore Projects Built with Adafruit BME680
Common Applications and Use Cases
- IoT Devices: Integration into smart home systems for monitoring and controlling indoor air quality.
- Weather Stations: Real-time tracking of environmental conditions.
- Environmental Monitoring: Data collection for climate research and analysis.
- HVAC Systems: Regulation of air conditions in buildings.
- Health and Safety: Monitoring air quality to ensure a healthy indoor environment.
Technical Specifications
Key Technical Details
- Supply Voltage: 3.3V to 5V
- Average Current Consumption: 2.1 µA (at 1 Hz humidity and temperature)
- Peak Current Consumption: 12 mA (during gas measurement)
- Operating Range:
- Temperature: -40°C to +85°C
- Humidity: 0-100% RH
- Pressure: 300 to 1100 hPa
- Gas Resistance: 0 to 50 kΩ
- I2C Address: 0x77 (default) or 0x76 (if SDO is connected to GND)
- Interface: I2C/SPI
Pin Configuration and Descriptions
| Pin Number | Pin Name | Description |
|---|---|---|
| 1 | VDD | Power supply (3.3V-5V) |
| 2 | GND | Ground |
| 3 | SCK/SCL | Serial Clock for SPI/I2C |
| 4 | SDI/SDA | Serial Data In for SPI / Serial Data for I2C |
| 5 | SDO | Serial Data Out for SPI / I2C Address Select |
| 6 | CS | Chip Select for SPI |
Usage Instructions
How to Use the Component in a Circuit
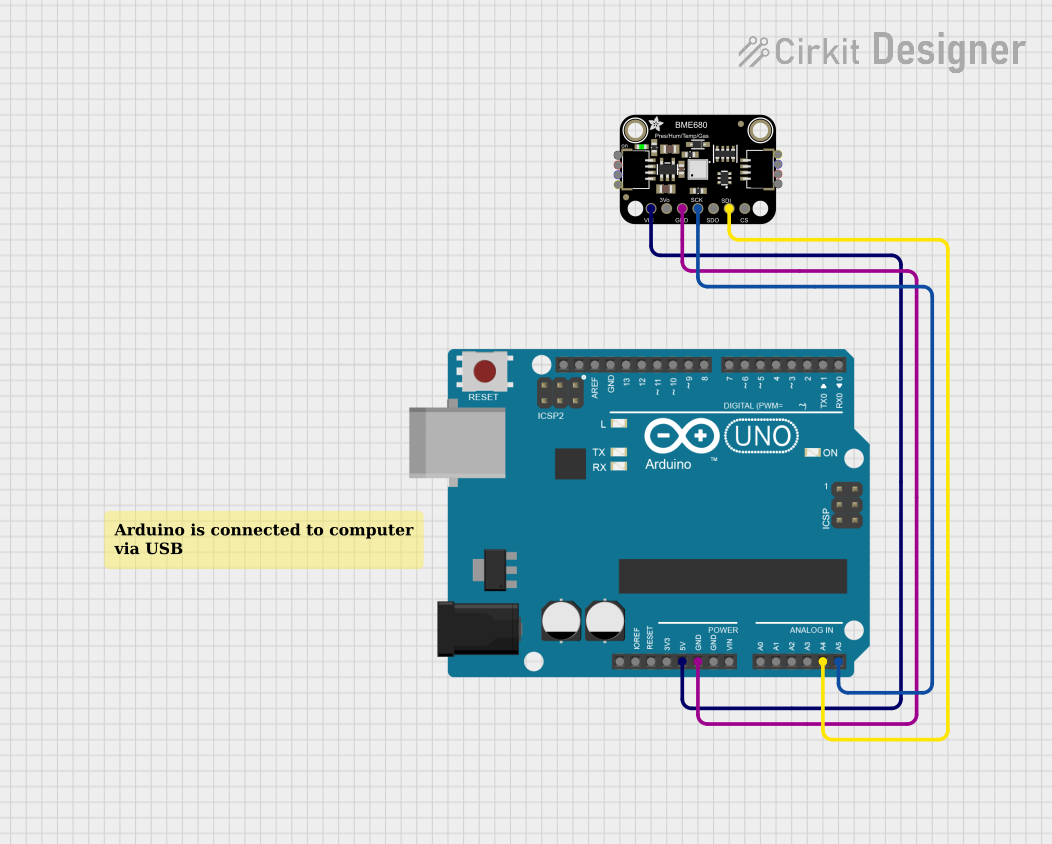
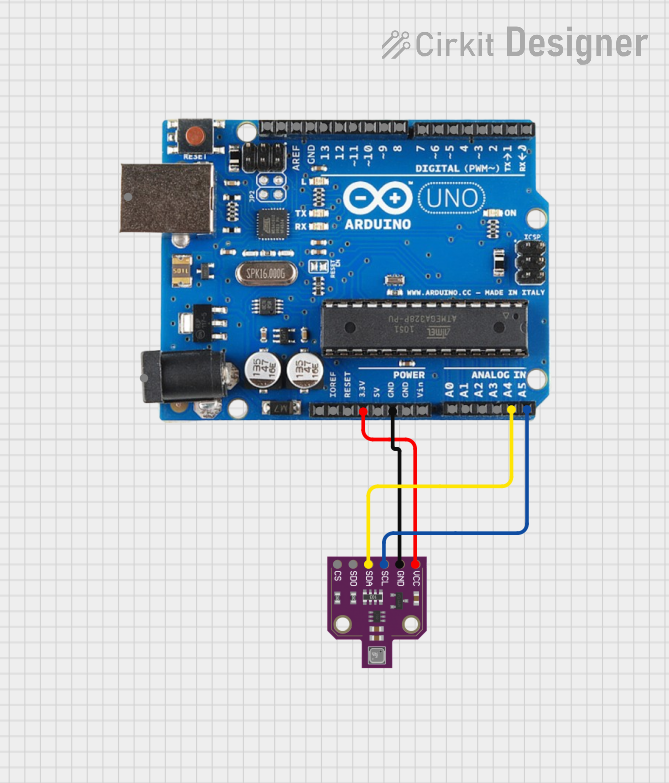
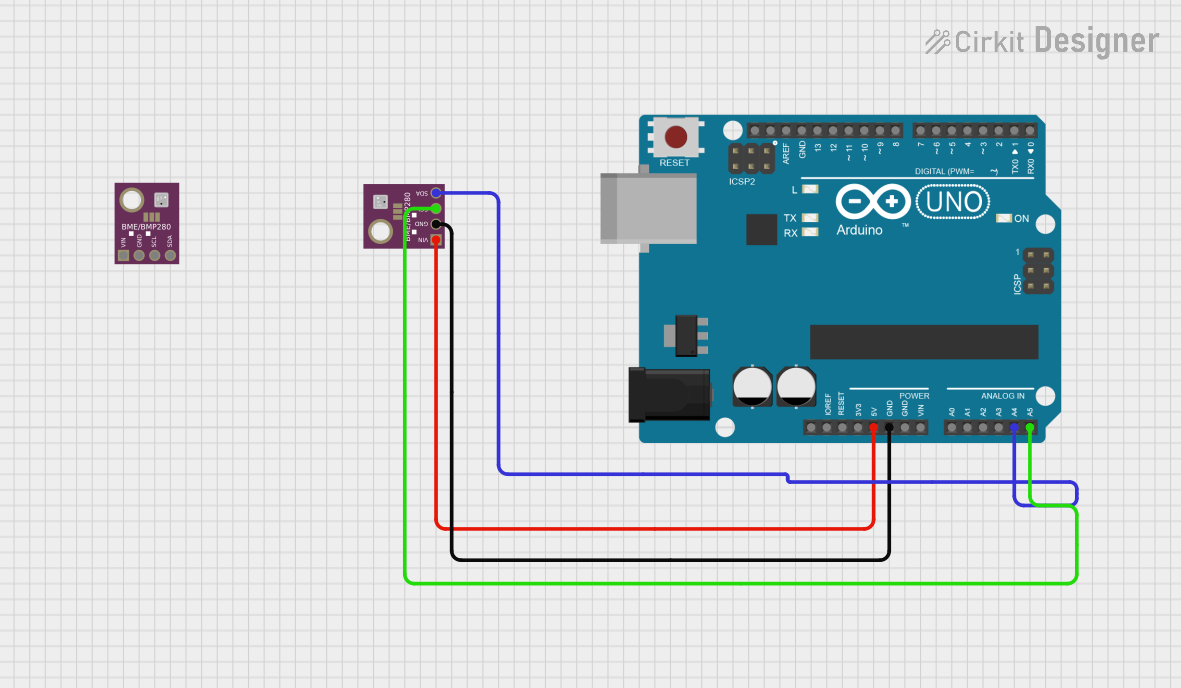
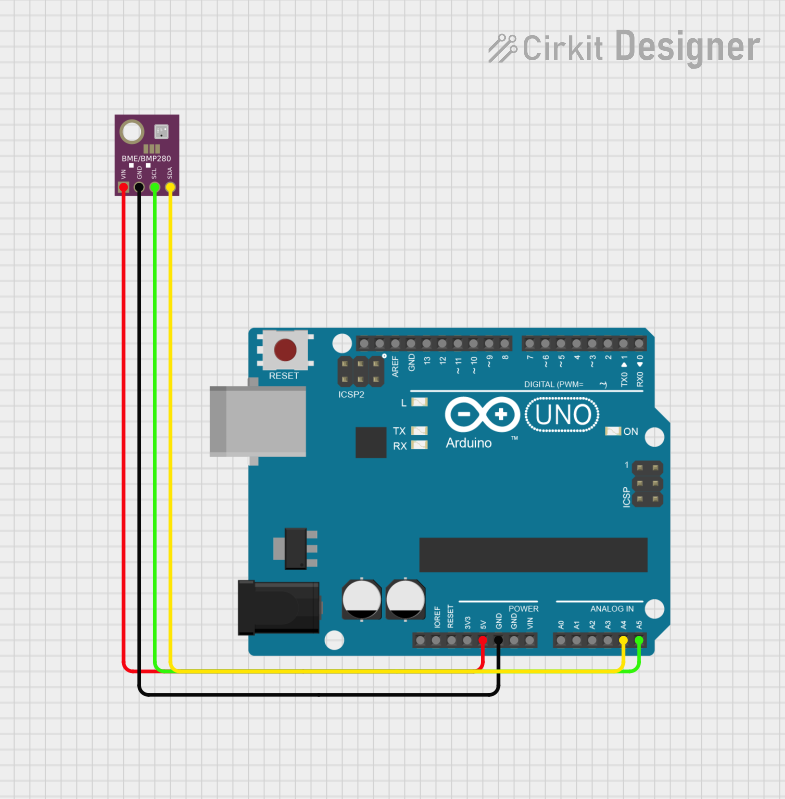
- Powering the Sensor: Connect the VDD pin to a 3.3V or 5V power supply and the GND pin to ground.
- I2C Communication: Connect the SCK/SCL pin to the I2C clock line and the SDI/SDA pin to the I2C data line. If using the default I2C address (0x77), leave the SDO pin unconnected. For the alternative address (0x76), connect SDO to ground.
- SPI Communication: Connect SCK to the SPI clock, SDI to MOSI, SDO to MISO, and CS to the chip select pin. Ensure that the CS pin is driven low to initiate communication and high to end it.
Important Considerations and Best Practices
- Level Shifting: If you're using a 5V microcontroller with the BME680, ensure that the I2C or SPI lines are level-shifted to 3.3V to avoid damaging the sensor.
- Decoupling Capacitor: Place a 0.1 µF capacitor close to the sensor's power supply pins to filter out power supply noise.
- Pull-up Resistors: For I2C communication, ensure that there are pull-up resistors on the SCL and SDA lines. Many development boards include these already.
- Library and Driver: Use the Adafruit BME680 library and install the required driver for easy interfacing with the sensor.
Example Arduino Code
#include <Wire.h>
#include <Adafruit_Sensor.h>
#include <Adafruit_BME680.h>

// Create an instance of the Adafruit_BME680 class
Adafruit_BME680 bme;

void setup() {
  Serial.begin(9600);
  while (!Serial);
  Serial.println(F("BME680 test"));

  if (!bme.begin()) {   // Start the sensor
    Serial.println(F("Could not find a valid BME680 sensor, check wiring!"));
    while (1);
  }

  // Set up oversampling and filter initialization
  bme.setTemperatureOversampling(BME680_OS_8X);
  bme.setHumidityOversampling(BME680_OS_2X);
  bme.setPressureOversampling(BME680_OS_4X);
  bme.setIIRFilterSize(BME680_FILTER_SIZE_3);
  bme.setGasHeater(320, 150); // 320*C for 150 ms
}

void loop() {
  // Tell BME680 to begin measurement.
  unsigned long startTime = millis();
  if (!bme.performReading()) {
    Serial.println(F("Failed to perform reading :("));
    return;
  }
  Serial.print(F("Temperature = "));
  Serial.print(bme.temperature);
  Serial.println(F(" *C"));

  Serial.print(F("Pressure = "));
  Serial.print(bme.pressure / 100.0);
  Serial.println(F(" hPa"));

  Serial.print(F("Humidity = "));
  Serial.print(bme.humidity);
  Serial.println(F(" %"));

  Serial.print(F("Gas = "));
  Serial.print(bme.gas_resistance / 1000.0);
  Serial.println(F(" KOhms"));

  Serial.print(F("Approx. Altitude = "));
  Serial.print(bme.readAltitude(SEALEVELPRESSURE_HPA));
  Serial.println(F(" m"));

  Serial.println();
  delay(2000); // Delay between readings
}
Troubleshooting and FAQs
Common Issues Users Might Face
- Sensor Not Detected: Ensure that the wiring is correct and that the sensor is properly powered. Check the I2C address and the connections to the SDA and SCL lines.
- Inaccurate Readings: Calibrate the sensor by comparing its readings with a known reference. Ensure that the sensor is not exposed to direct sunlight or other heat sources that could affect its readings.
- No Response from Sensor: Check for proper soldering and connections. Ensure that the microcontroller's pins are configured correctly for I2C or SPI communication.
Solutions and Tips for Troubleshooting
- Check Connections: Double-check all the wiring and solder joints.
- Use Example Code: Start with the example code provided by the Adafruit library to ensure the basic functionality.
- Serial Output: Use Serial.print statements to debug and track down where the issue might be occurring in your code.
- Library Updates: Make sure you have the latest version of the Adafruit BME680 library.
FAQs
Q: Can the BME680 sensor measure outdoor air quality? A: While the BME680 is capable of measuring a wide range of environmental parameters, it is not specifically designed for outdoor air quality monitoring and may not be as effective in detecting large-scale pollutants.
Q: How long does the sensor need to warm up? A: The BME680 includes a built-in heater for the gas sensor. The heating time can be configured, but a typical warm-up time is around 150 milliseconds.
Q: Is the sensor waterproof? A: No, the BME680 is not waterproof and should be protected from moisture and water exposure to prevent damage.
Q: How can I extend the life of the sensor? A: Avoid exposing the sensor to extreme conditions, such as high temperatures and humidity levels, beyond its specified operating range. Also, avoid using the gas sensor continuously at high heater temperatures.