How to Use A02YYUW ultrasonic sensor: Examples, Pinouts, and Specs
Introduction
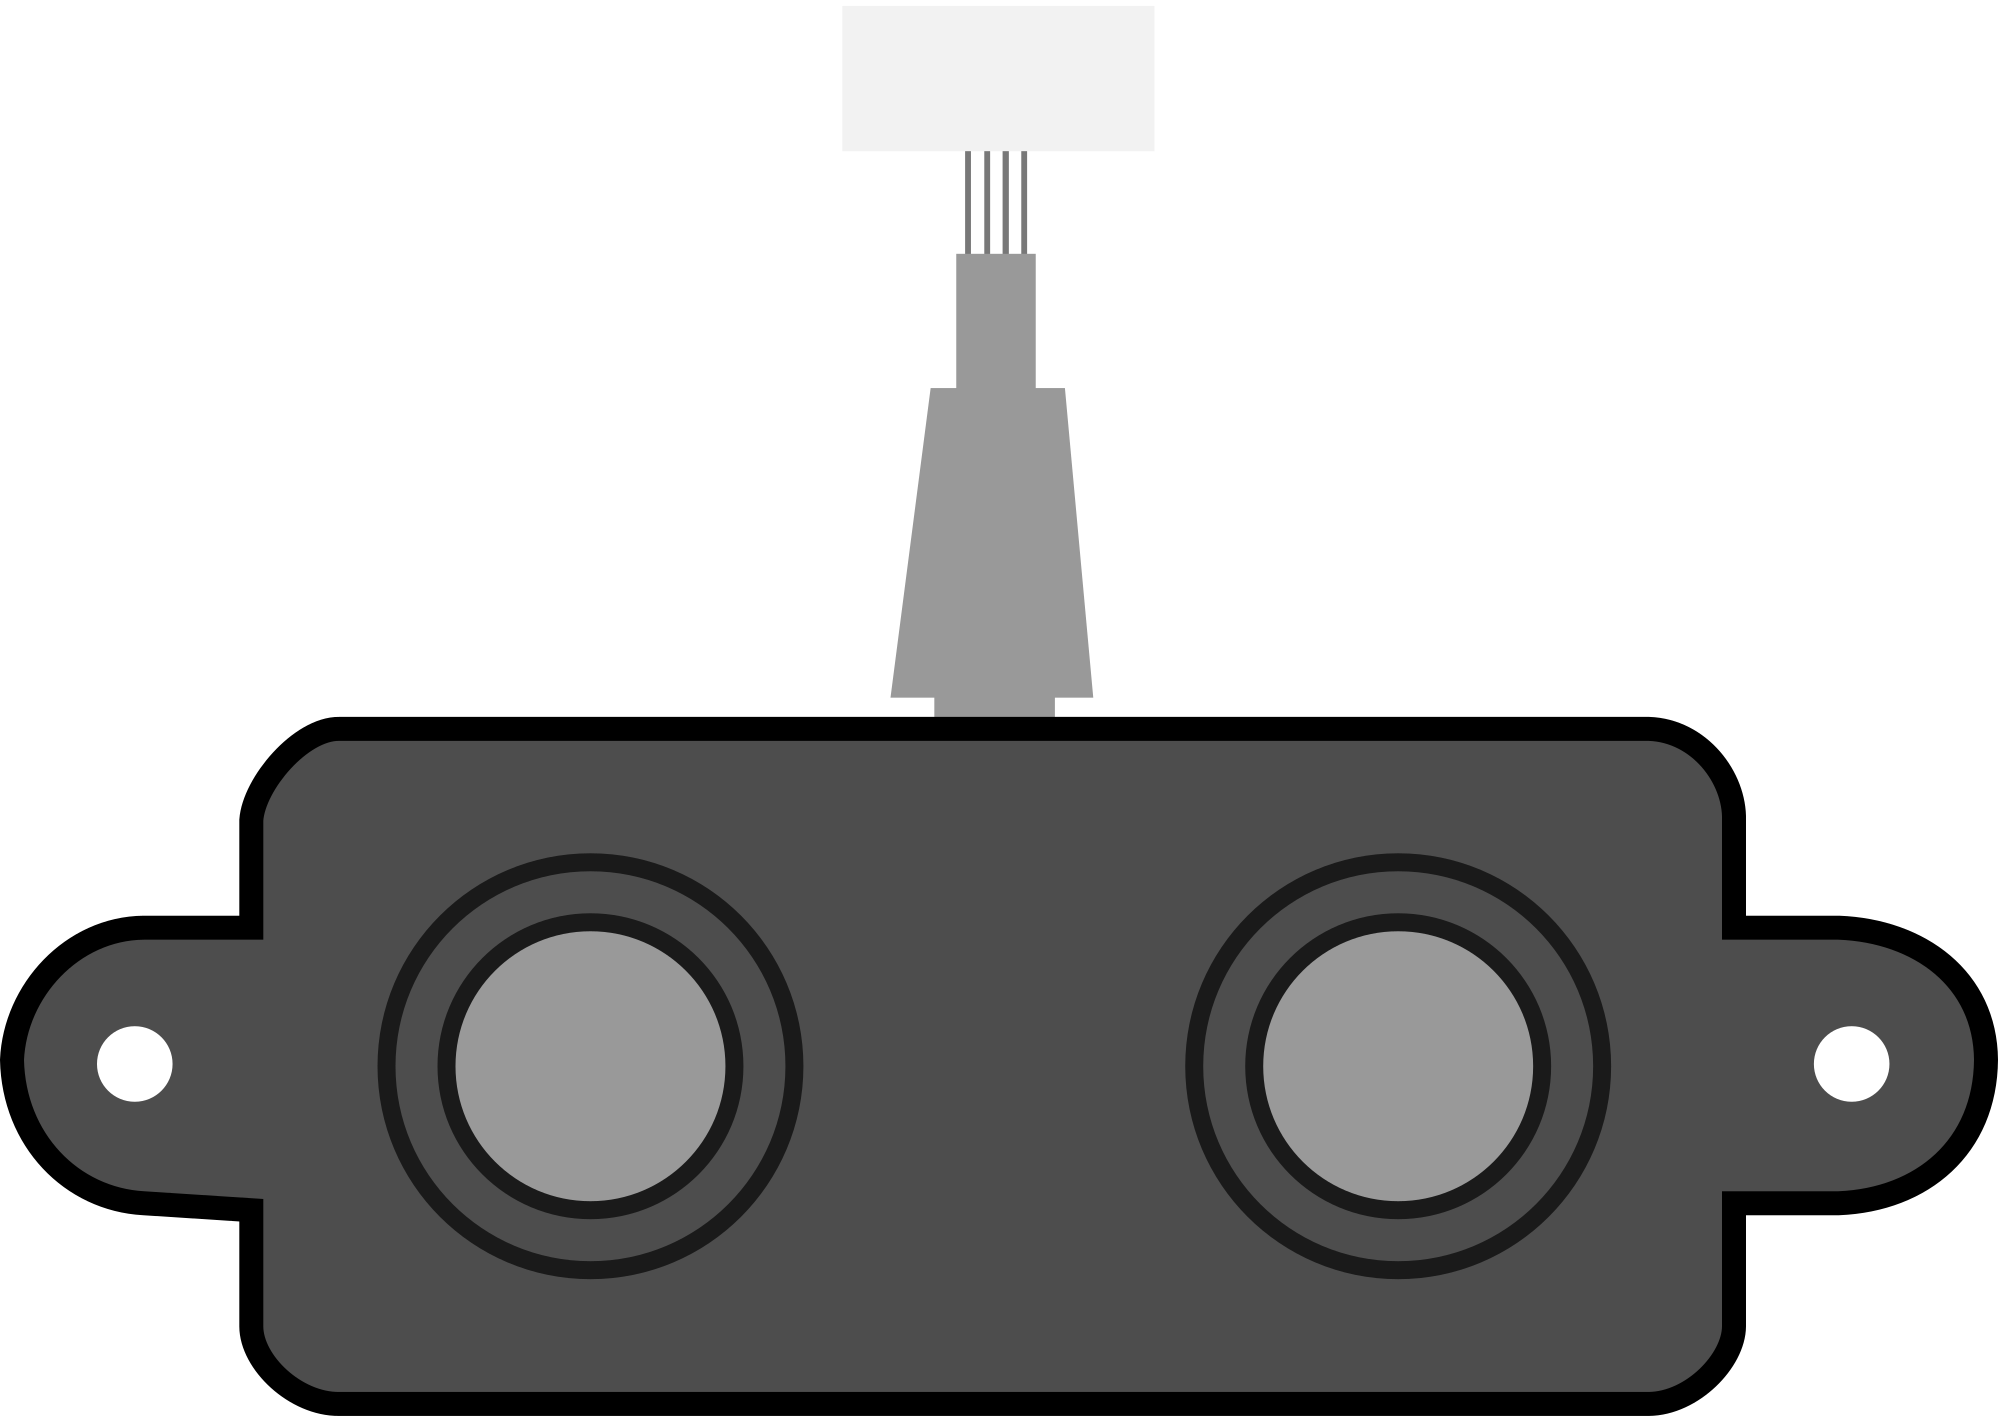
The A02YYUW ultrasonic sensor is a device that measures distance by emitting ultrasonic waves and calculating the time it takes for the waves to return after bouncing off an object. This sensor is highly reliable and accurate, making it ideal for a variety of applications. It is commonly used in robotics, automation systems, and IoT projects for obstacle detection, distance measurement, and level sensing.
Explore Projects Built with A02YYUW ultrasonic sensor
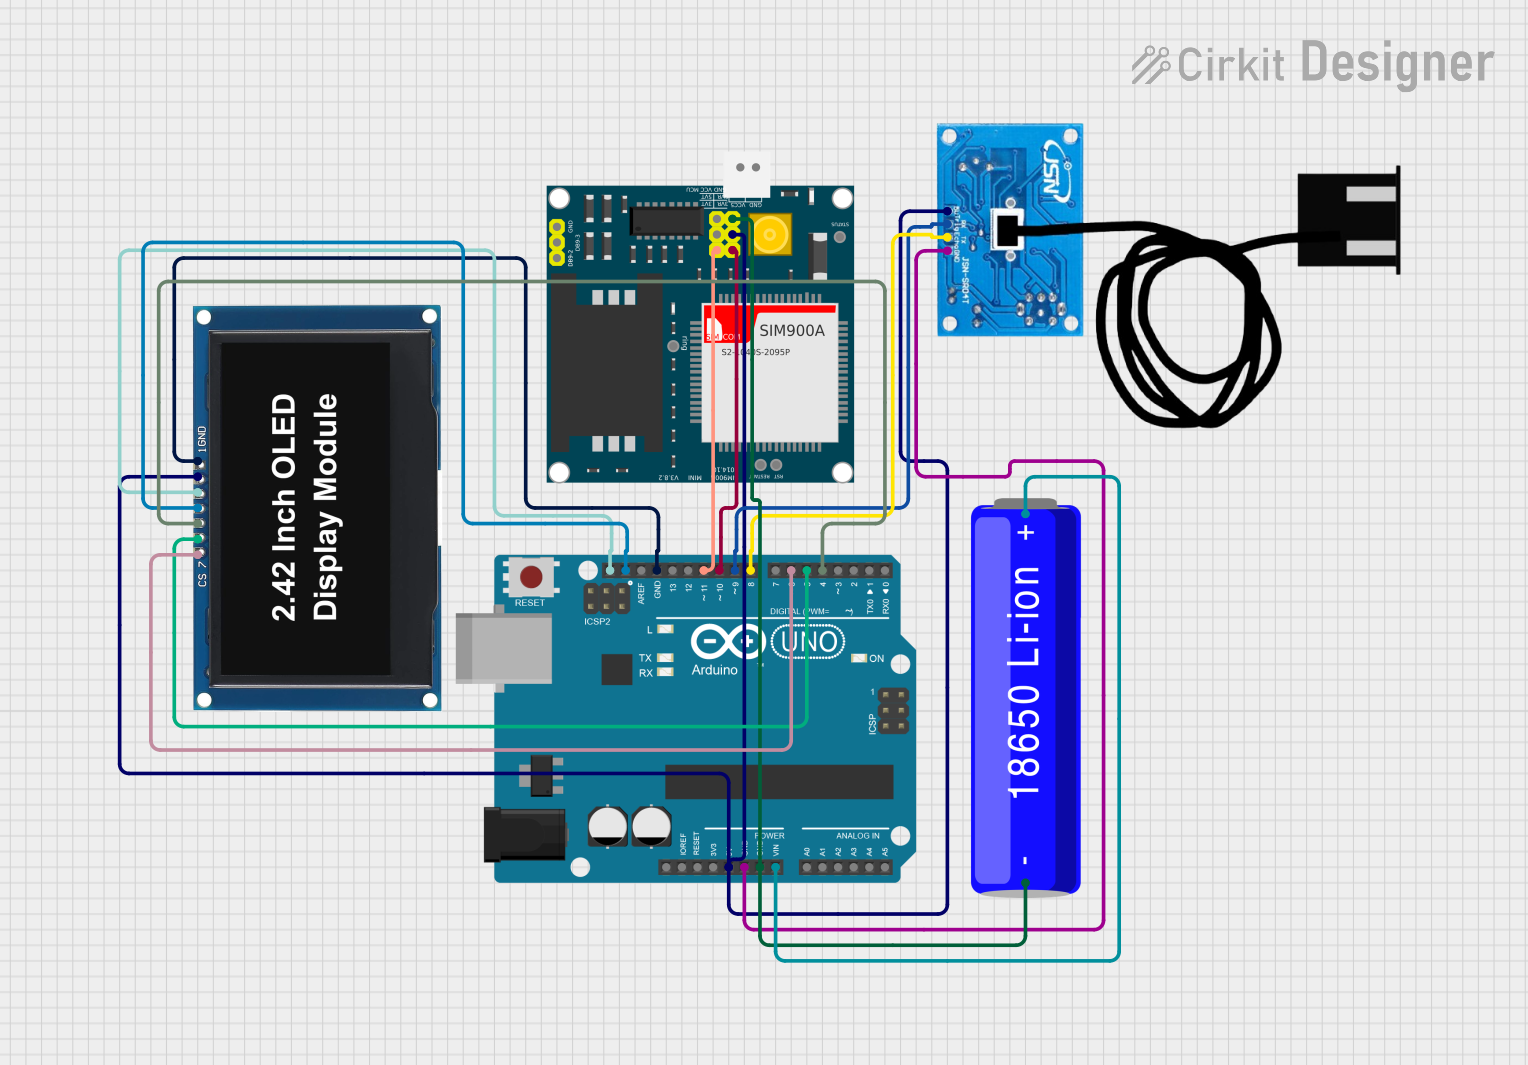
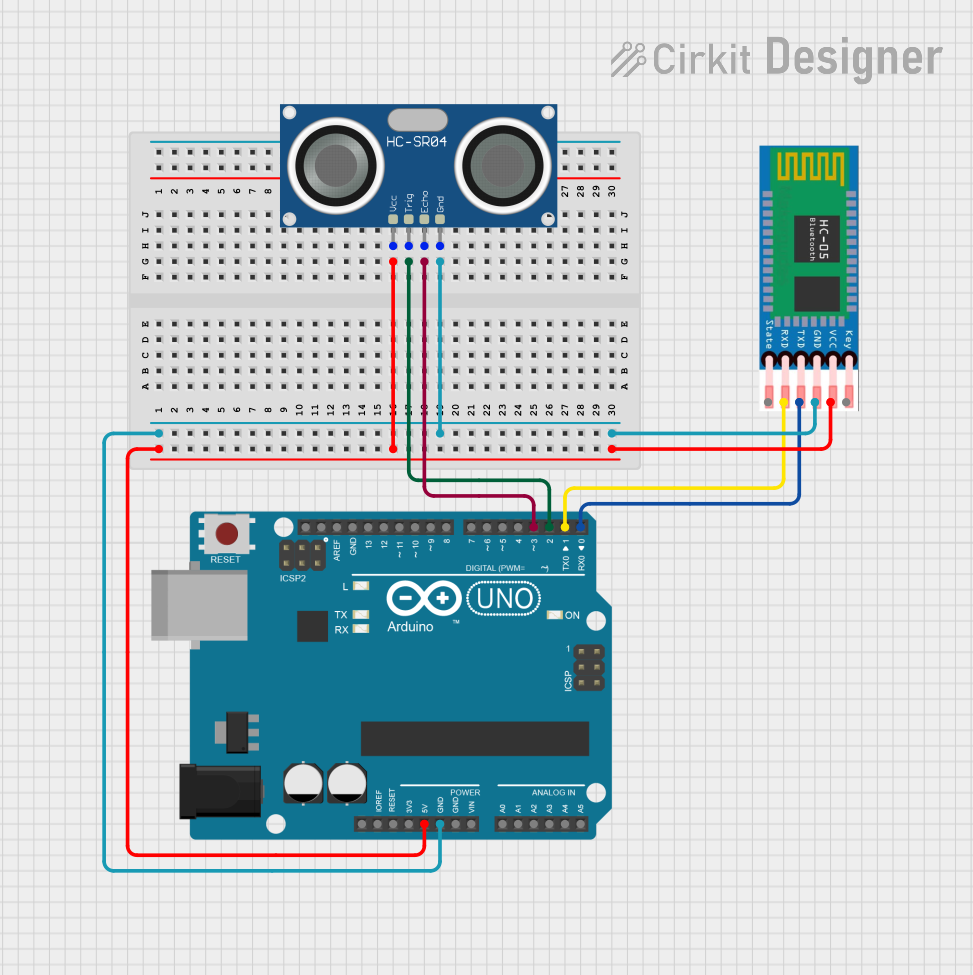
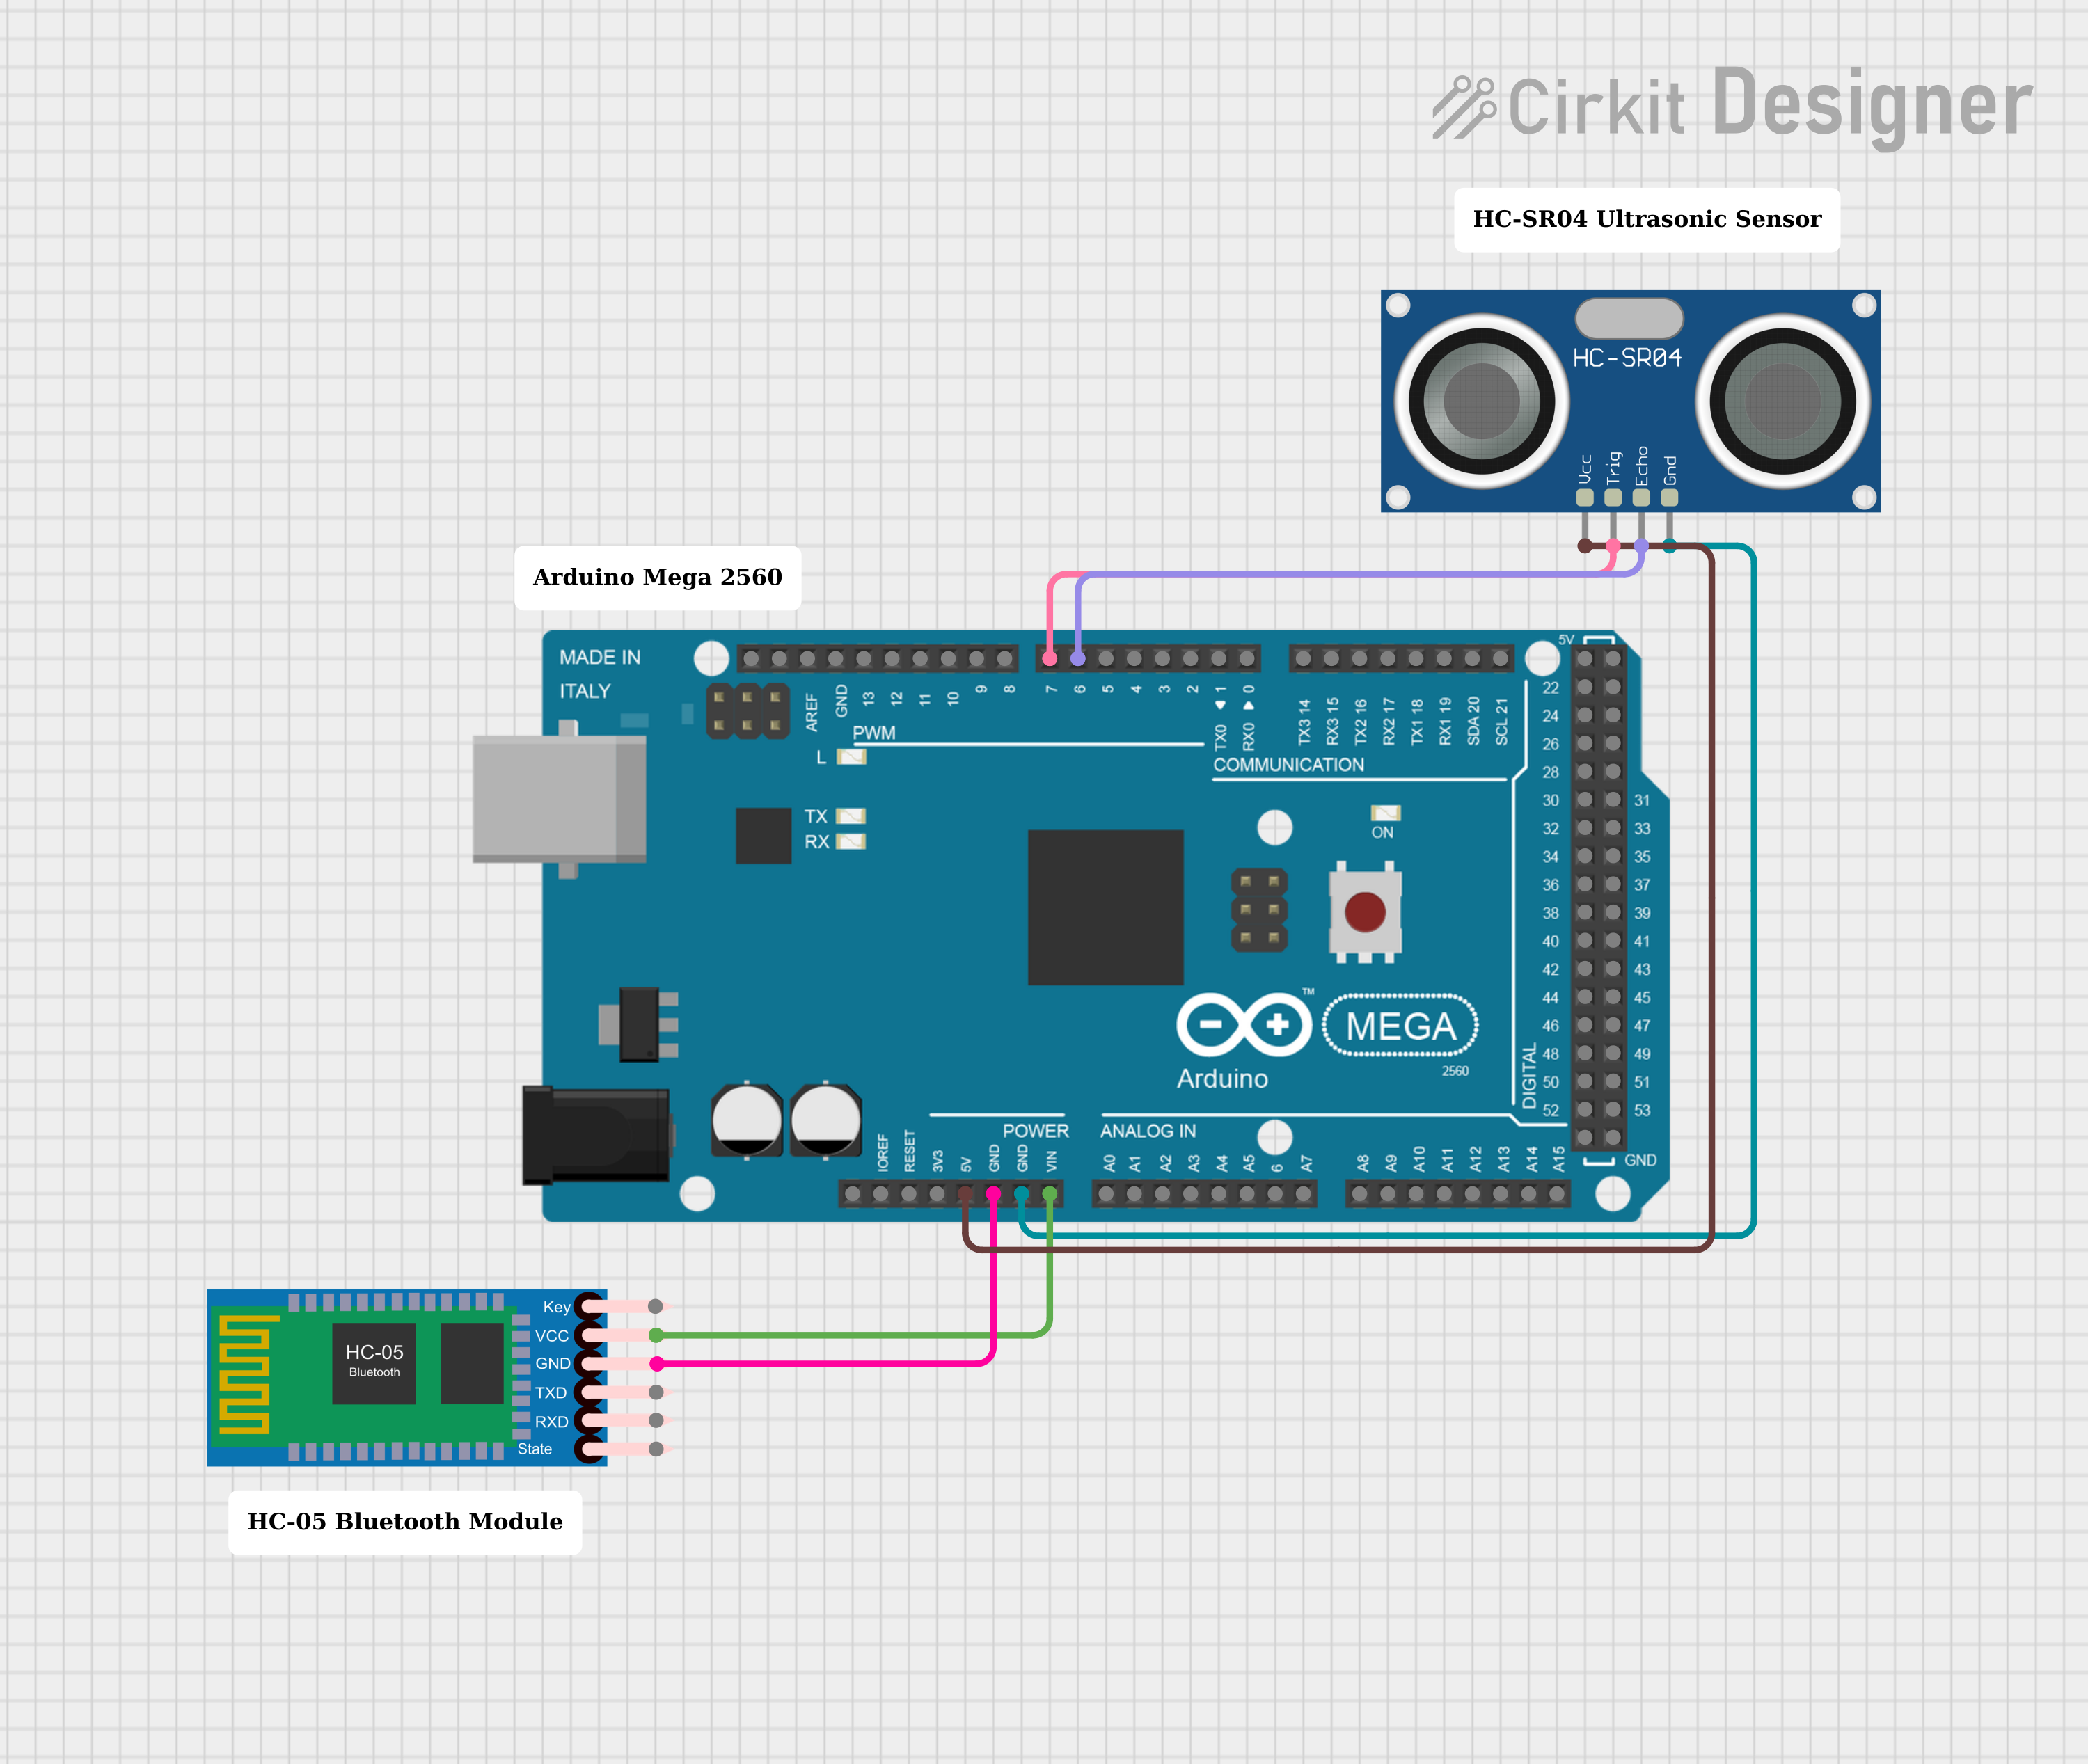

Explore Projects Built with A02YYUW ultrasonic sensor
Common Applications:
- Obstacle detection in robotics
- Distance measurement in automation systems
- Liquid level sensing in tanks
- Parking assistance systems
- Proximity detection in security systems
Technical Specifications
The A02YYUW ultrasonic sensor is designed for high performance and ease of integration into electronic systems. Below are its key technical details:
Key Specifications:
| Parameter | Value |
|---|---|
| Operating Voltage | 3.3V to 5.0V |
| Operating Current | ≤ 8mA |
| Measuring Range | 3cm to 450cm |
| Accuracy | ±1% |
| Output Signal | UART (9600 baud rate) |
| Operating Frequency | 40kHz |
| Operating Temperature | -15°C to +60°C |
| Waterproof Rating | IP67 |
Pin Configuration:
The A02YYUW ultrasonic sensor has a 4-pin interface. Below is the pinout description:
| Pin Number | Pin Name | Description |
|---|---|---|
| 1 | VCC | Power supply input (3.3V to 5.0V) |
| 2 | GND | Ground connection |
| 3 | TX | UART transmit pin (sends distance data) |
| 4 | RX | UART receive pin (not commonly used) |
Usage Instructions
The A02YYUW ultrasonic sensor is straightforward to use in a circuit. It communicates via UART, making it compatible with microcontrollers like Arduino, Raspberry Pi, and other development boards.
Steps to Use:
- Power the Sensor: Connect the VCC pin to a 3.3V or 5.0V power source and the GND pin to ground.
- Connect UART Pins: Connect the TX pin of the sensor to the RX pin of your microcontroller. The RX pin of the sensor is optional and can be left unconnected in most cases.
- Read Data: The sensor continuously sends distance data via the TX pin in the form of a UART signal. The data format is a 4-byte packet:
- Byte 1: 0xFF (Start byte)
- Byte 2: High byte of distance (in mm)
- Byte 3: Low byte of distance (in mm)
- Byte 4: Checksum (sum of bytes 2 and 3, lower 8 bits)
Example Arduino Code:
Below is an example of how to use the A02YYUW ultrasonic sensor with an Arduino UNO:
// A02YYUW Ultrasonic Sensor Example Code
// This code reads distance data from the sensor via UART and prints it to the Serial Monitor.

#include <SoftwareSerial.h>

// Define the RX and TX pins for SoftwareSerial
SoftwareSerial mySerial(10, 11); // RX = 10, TX = 11

void setup() {
  Serial.begin(9600);          // Initialize Serial Monitor at 9600 baud
  mySerial.begin(9600);        // Initialize SoftwareSerial at 9600 baud
  Serial.println("A02YYUW Ultrasonic Sensor Test");
}

void loop() {
  if (mySerial.available() >= 4) { // Check if at least 4 bytes are available
    if (mySerial.read() == 0xFF) { // Check for the start byte (0xFF)
      int highByte = mySerial.read(); // Read the high byte of distance
      int lowByte = mySerial.read();  // Read the low byte of distance
      int checksum = mySerial.read(); // Read the checksum byte

      // Calculate the distance in mm
      int distance = (highByte << 8) + lowByte;

      // Verify checksum
      if (checksum == ((highByte + lowByte) & 0xFF)) {
        Serial.print("Distance: ");
        Serial.print(distance);
        Serial.println(" mm");
      } else {
        Serial.println("Checksum error");
      }
    }
  }
}
Important Considerations:
- Ensure the sensor is powered within its operating voltage range (3.3V to 5.0V).
- Avoid placing the sensor in environments with extreme temperatures or high humidity beyond its IP67 rating.
- Ensure there are no obstructions in front of the sensor for accurate distance measurement.
- Use a level shifter if connecting the sensor to a 3.3V microcontroller to avoid voltage mismatches.
Troubleshooting and FAQs
Common Issues and Solutions:
No Data Received:
- Ensure the TX pin of the sensor is correctly connected to the RX pin of the microcontroller.
- Verify that the sensor is powered and the ground connection is secure.
- Check the baud rate (9600) in your code.
Incorrect Distance Measurements:
- Ensure there are no obstructions or reflective surfaces near the sensor.
- Verify that the sensor is mounted perpendicular to the target surface.
Checksum Errors:
- Ensure the UART connection is stable and free from noise.
- Double-check the code logic for checksum verification.
Sensor Not Working:
- Confirm that the operating voltage is within the specified range (3.3V to 5.0V).
- Test the sensor in a different environment to rule out interference.
FAQs:
Q: Can the A02YYUW sensor measure distances underwater?
A: Yes, the sensor is waterproof (IP67 rated) and can measure distances in wet environments, but its performance may vary underwater.
Q: What is the maximum range of the sensor?
A: The sensor can measure distances up to 450cm (4.5 meters).
Q: Can I use the RX pin of the sensor?
A: The RX pin is typically unused in most applications. It is reserved for advanced configurations or firmware updates.
Q: Is the sensor compatible with 3.3V microcontrollers?
A: Yes, the sensor works with both 3.3V and 5.0V systems. However, ensure proper connections to avoid voltage mismatches.
This concludes the documentation for the A02YYUW ultrasonic sensor.