How to Use finger print sensor: Examples, Pinouts, and Specs
Introduction
The Keyestudio Fingerprint Sensor is a biometric device designed to capture and verify an individual's fingerprint for authentication purposes. It is widely used in security systems, access control, and mobile devices to enhance security and provide a convenient, password-free user experience. This sensor uses optical technology to scan and store fingerprints, making it a reliable and efficient solution for biometric identification.
Explore Projects Built with finger print sensor

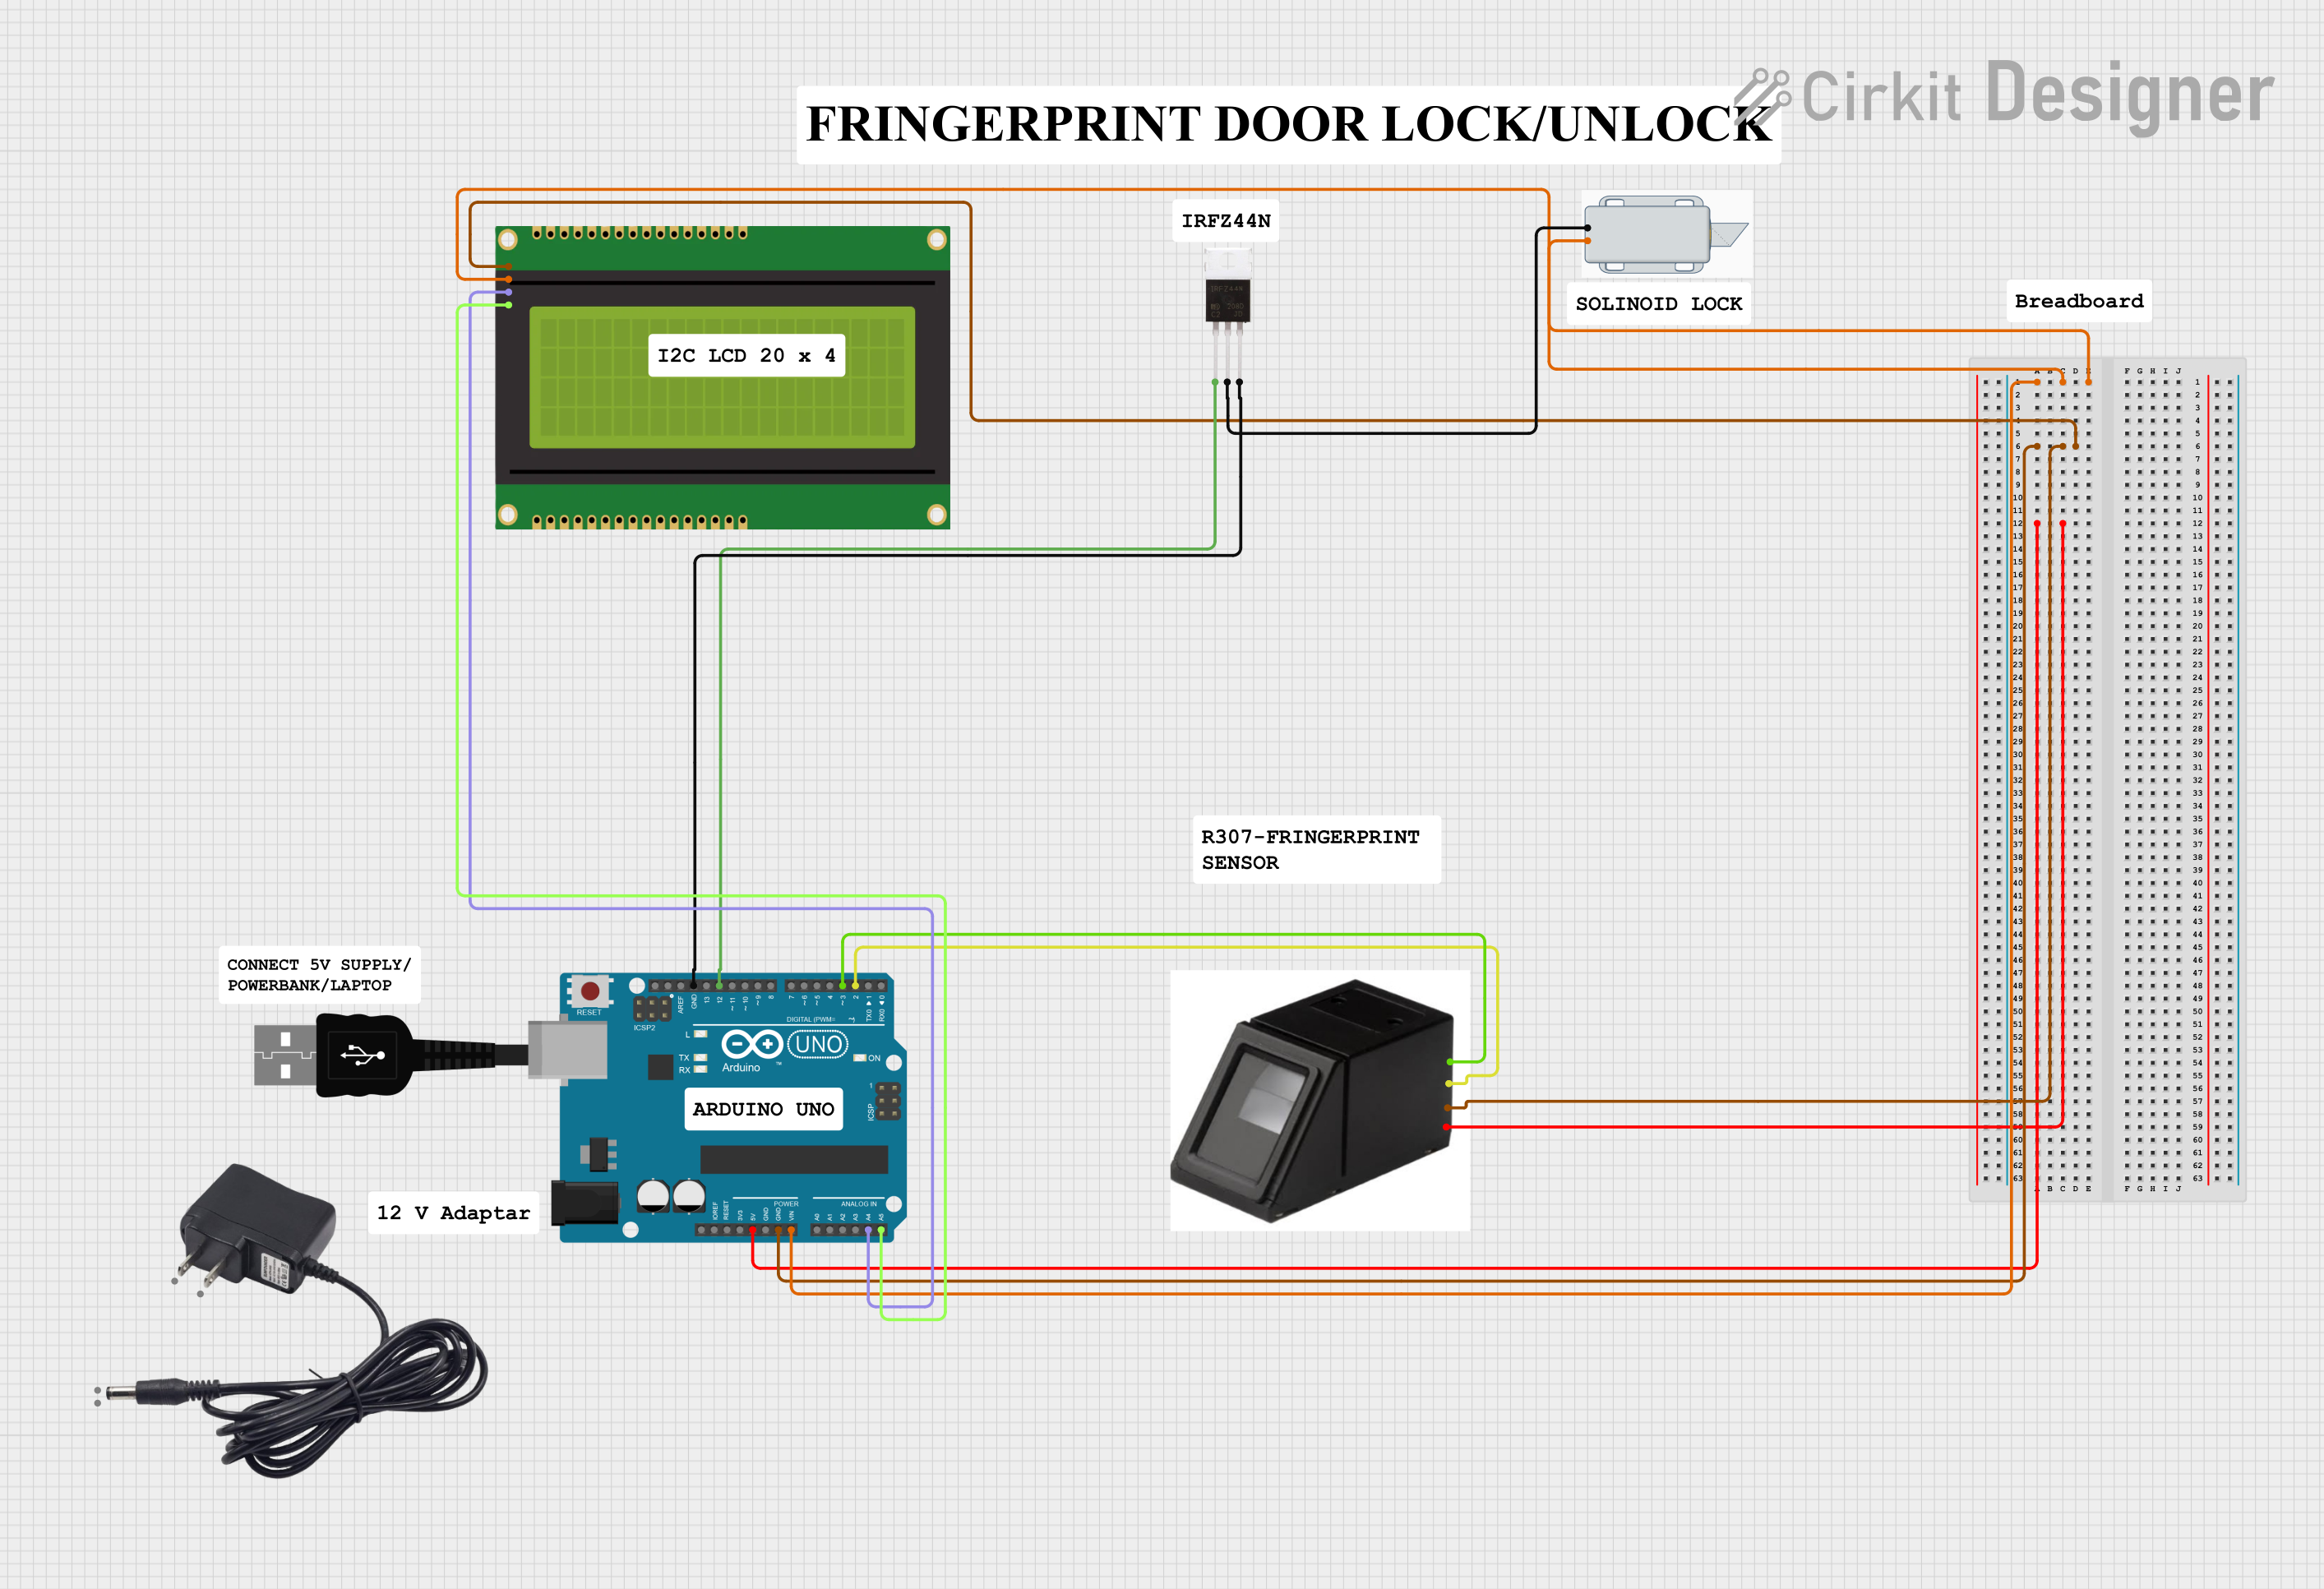

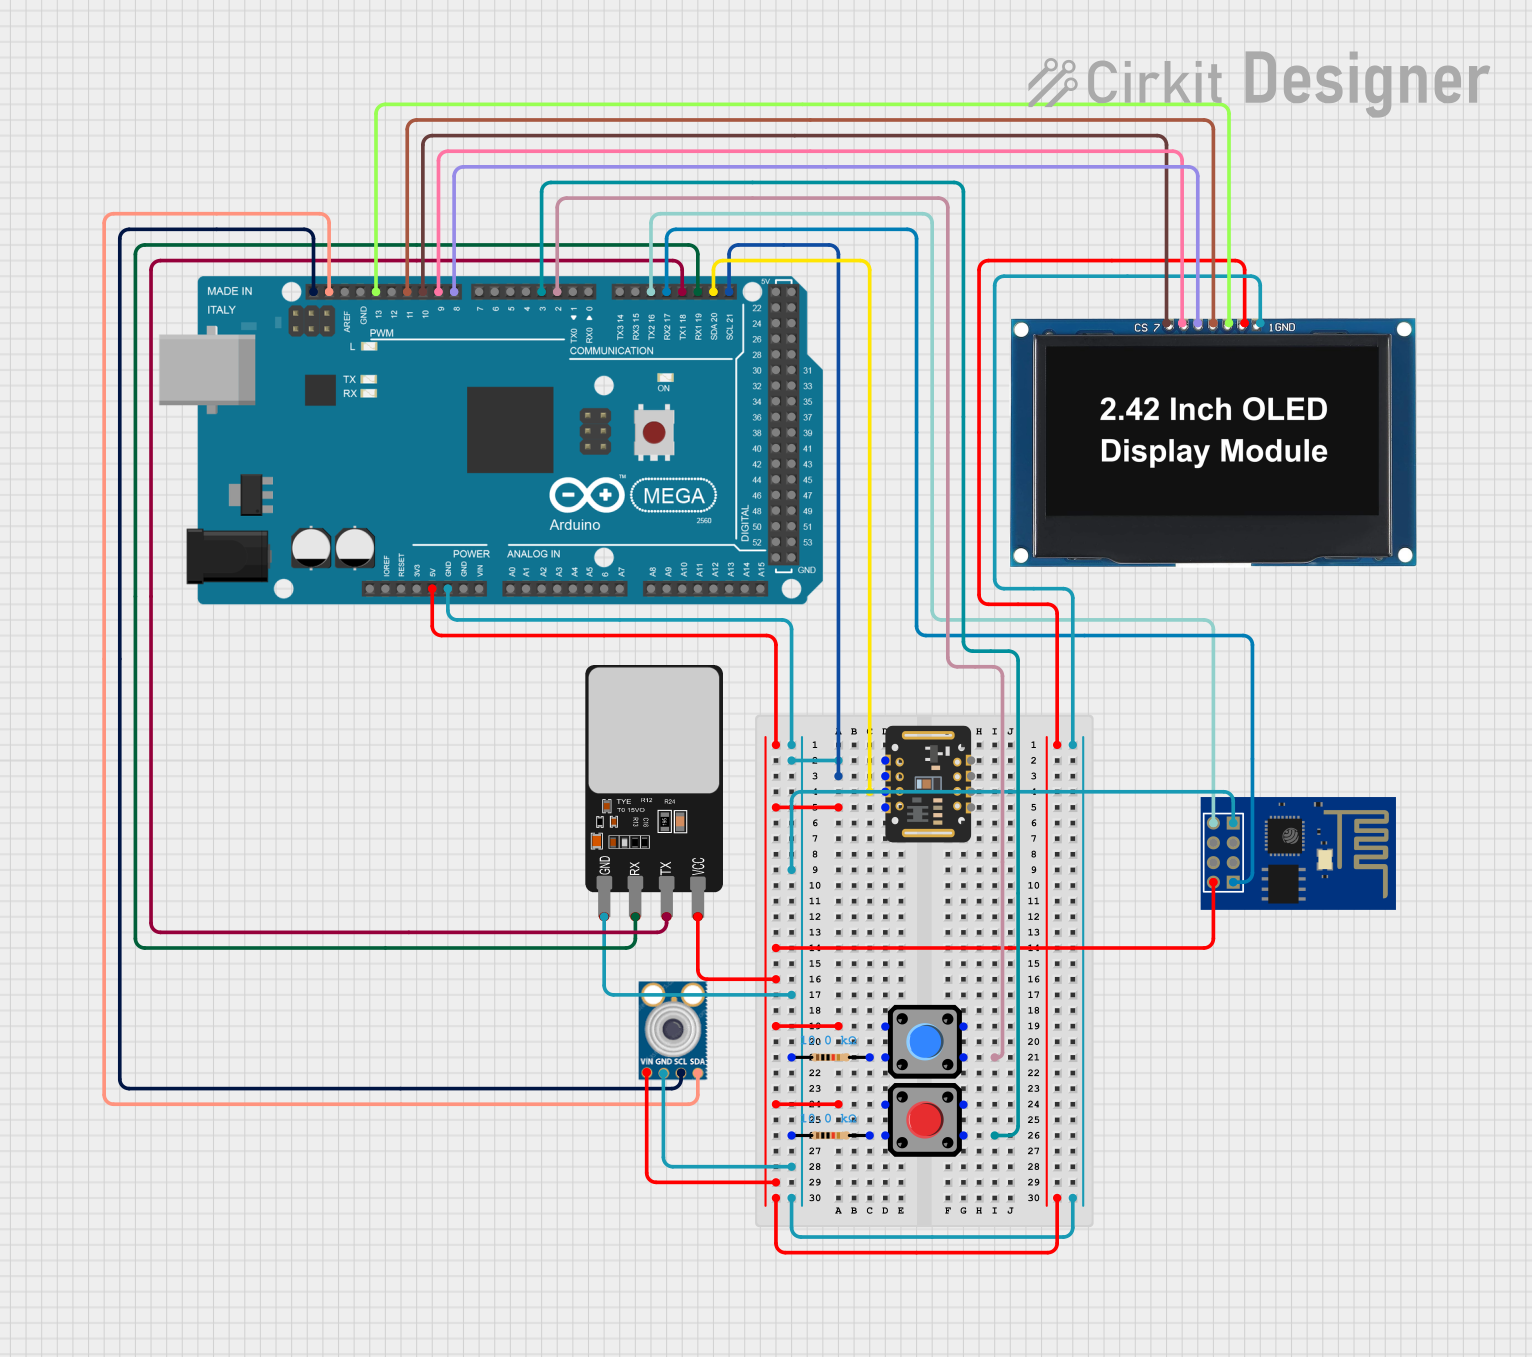
Explore Projects Built with finger print sensor
Common Applications and Use Cases
- Door lock systems for secure access control
- Time and attendance tracking systems
- Biometric authentication for embedded systems
- Integration with Arduino and other microcontrollers for DIY projects
- Security enhancements in IoT devices
Technical Specifications
The Keyestudio Fingerprint Sensor is equipped with the following technical features:
| Parameter | Specification |
|---|---|
| Operating Voltage | 3.3V - 6V DC |
| Operating Current | 50mA (typical), 80mA (peak) |
| Interface Type | UART (TTL logic level) |
| Baud Rate | 9600 bps (default, adjustable) |
| Fingerprint Capacity | 1000 fingerprints |
| Image Resolution | 500 DPI |
| Scanning Time | < 1 second |
| Working Temperature | -20°C to 50°C |
| Dimensions | 56mm x 20mm x 21.5mm |
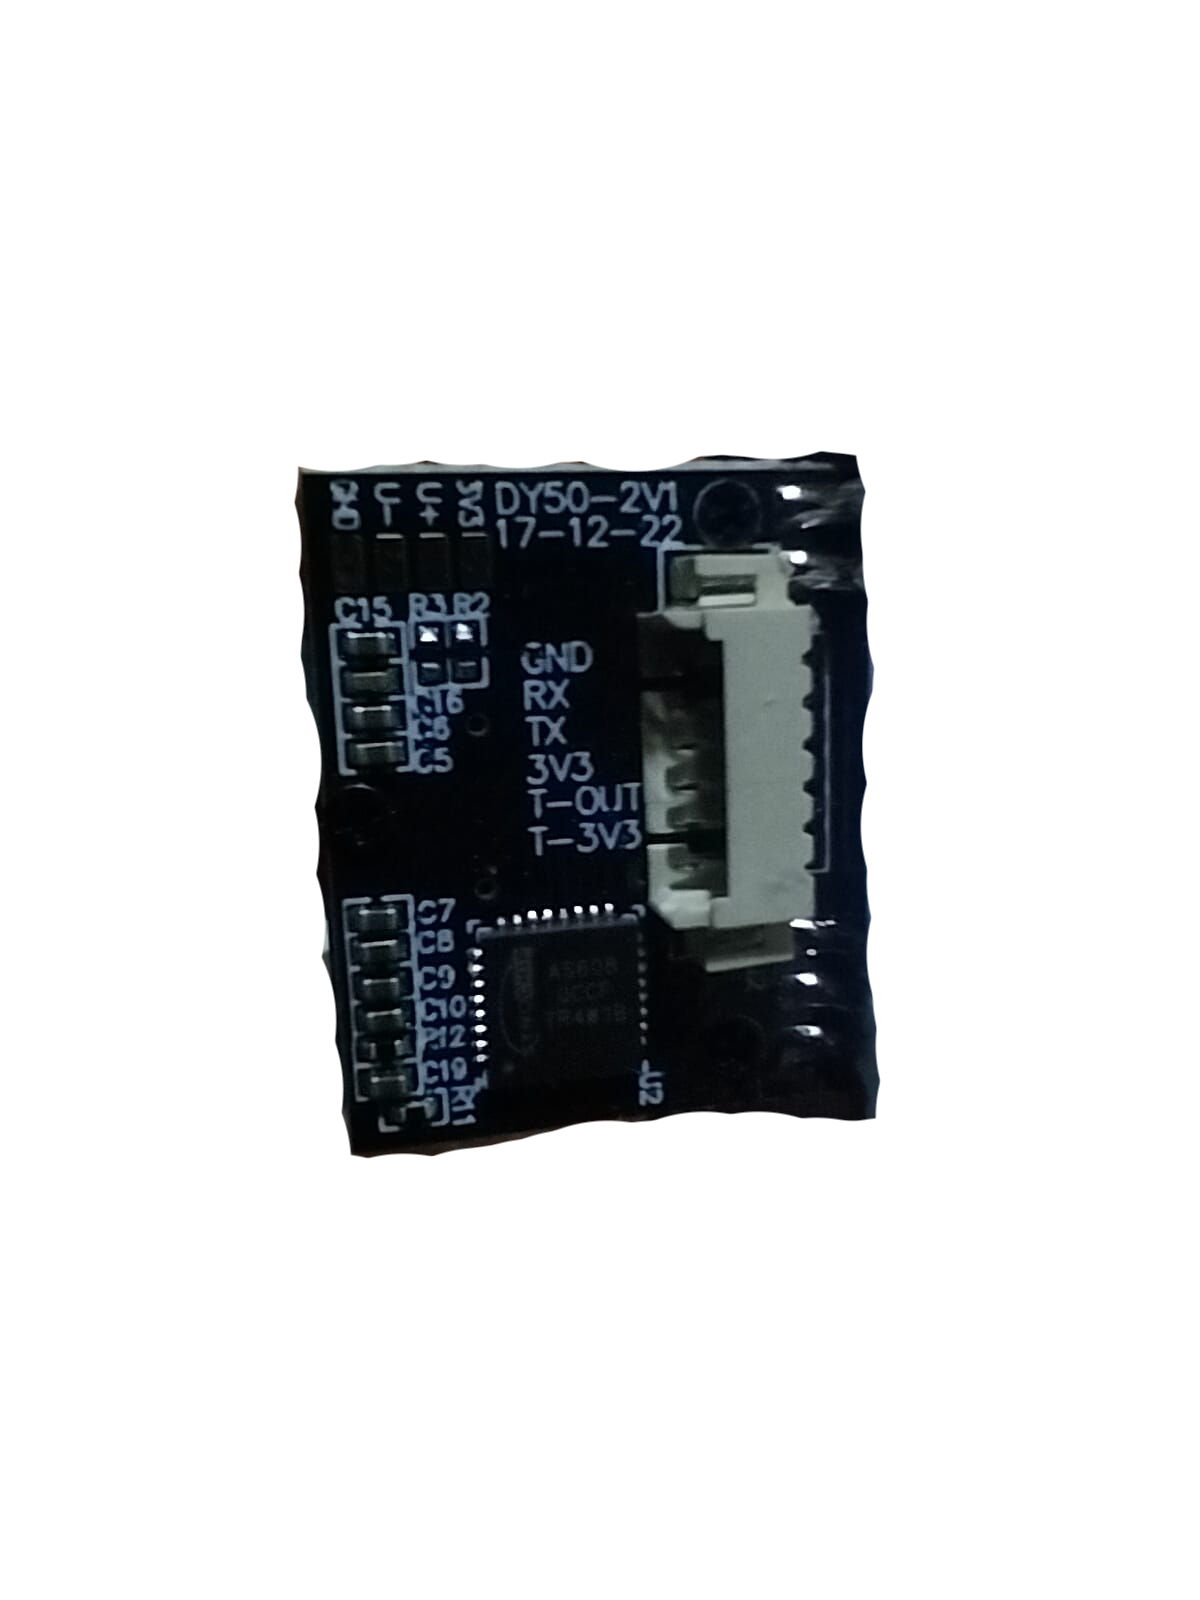
Pin Configuration and Descriptions
The fingerprint sensor has a 4-pin interface for communication and power:
| Pin | Name | Description |
|---|---|---|
| 1 | VCC | Power supply input (3.3V - 6V DC) |
| 2 | GND | Ground connection |
| 3 | TX | UART Transmit pin (sends data to the microcontroller) |
| 4 | RX | UART Receive pin (receives data from the microcontroller) |
Usage Instructions
How to Use the Component in a Circuit
Wiring the Sensor:
- Connect the
VCCpin of the sensor to the 5V pin of your microcontroller (e.g., Arduino UNO). - Connect the
GNDpin to the ground (GND) of the microcontroller. - Connect the
TXpin of the sensor to theRXpin of the microcontroller. - Connect the
RXpin of the sensor to theTXpin of the microcontroller.
- Connect the
Library Installation:
- Download and install the
Adafruit Fingerprint Sensor Libraryfrom the Arduino Library Manager. - This library simplifies communication with the fingerprint sensor.
- Download and install the
Enrolling a Fingerprint:
- Use the example sketch provided in the library (
Enrollexample) to register fingerprints. - Follow the serial monitor prompts to place and remove your finger for enrollment.
- Use the example sketch provided in the library (
Verifying a Fingerprint:
- Use the
Fingerprintexample sketch to verify fingerprints. - The sensor will compare the scanned fingerprint with the stored templates.
- Use the
Important Considerations and Best Practices
- Ensure the sensor is clean and free of dust or smudges for accurate readings.
- Avoid exposing the sensor to direct sunlight or strong light sources, as this may interfere with optical scanning.
- Use a stable power supply to prevent communication errors.
- When connecting to an Arduino UNO, ensure the baud rate in the code matches the sensor's default baud rate (9600 bps).
Example Code for Arduino UNO
Below is an example code snippet to enroll and verify fingerprints using the Keyestudio Fingerprint Sensor:
#include <Adafruit_Fingerprint.h>
#include <SoftwareSerial.h>

// Define the RX and TX pins for the fingerprint sensor
SoftwareSerial mySerial(2, 3); // RX = pin 2, TX = pin 3

Adafruit_Fingerprint finger(&mySerial);

void setup() {
  Serial.begin(9600); // Initialize serial communication with the PC
  while (!Serial);    // Wait for the serial monitor to open
  delay(100);

  Serial.println("Initializing fingerprint sensor...");
  mySerial.begin(9600); // Initialize communication with the sensor

  if (finger.begin()) {
    Serial.println("Fingerprint sensor detected!");
  } else {
    Serial.println("Fingerprint sensor not detected. Check connections.");
    while (1); // Halt the program if the sensor is not found
  }

  Serial.println("Place your finger on the sensor to enroll.");
}

void loop() {
  // Check if a fingerprint is detected
  if (finger.getImage() == FINGERPRINT_OK) {
    Serial.println("Fingerprint detected!");
    // Additional code for enrollment or verification can be added here
  } else {
    Serial.println("No fingerprint detected. Try again.");
  }

  delay(1000); // Wait 1 second before the next scan
}
Notes:
- Replace
2and3inSoftwareSerialwith the pins you are using forRXandTXif different. - Use the
EnrollandFingerprintexamples in the Adafruit library for more advanced functionality.
Troubleshooting and FAQs
Common Issues and Solutions
Sensor Not Detected:
- Cause: Incorrect wiring or loose connections.
- Solution: Double-check the wiring and ensure the
VCC,GND,TX, andRXpins are properly connected.
Fingerprint Not Recognized:
- Cause: Fingerprint not enrolled or poor-quality scan.
- Solution: Ensure the finger is clean and properly placed on the sensor. Re-enroll the fingerprint if necessary.
Communication Errors:
- Cause: Mismatched baud rate or unstable power supply.
- Solution: Verify that the baud rate in the code matches the sensor's default baud rate (9600 bps). Use a stable power source.
Slow Response Time:
- Cause: High number of stored fingerprints or poor-quality scans.
- Solution: Optimize the number of stored fingerprints and ensure the sensor is clean.
FAQs
Q1: Can the sensor store multiple fingerprints?
Yes, the Keyestudio Fingerprint Sensor can store up to 1000 fingerprints in its internal memory.
Q2: Can I use this sensor with a Raspberry Pi?
Yes, the sensor can be used with a Raspberry Pi by connecting it to the GPIO pins and using a UART communication library.
Q3: What is the default baud rate of the sensor?
The default baud rate is 9600 bps, but it can be adjusted if needed.
Q4: How do I reset the sensor to factory settings?
You can use the deleteModel() function in the Adafruit library to delete all stored fingerprints and reset the sensor.
Q5: Can the sensor work outdoors?
The sensor is designed for indoor use. Outdoor use may affect its performance due to environmental factors like sunlight and dust.