How to Use PX4: Examples, Pinouts, and Specs
Introduction
The PX4, developed by Holybro, is an open-source flight control platform designed for drones and other unmanned vehicles. It combines robust hardware and software to enable autonomous flight, navigation, and control. The PX4 is widely used in applications such as aerial photography, surveying, delivery drones, and research projects. Its modular design and extensive community support make it a popular choice for both hobbyists and professionals.
Explore Projects Built with PX4

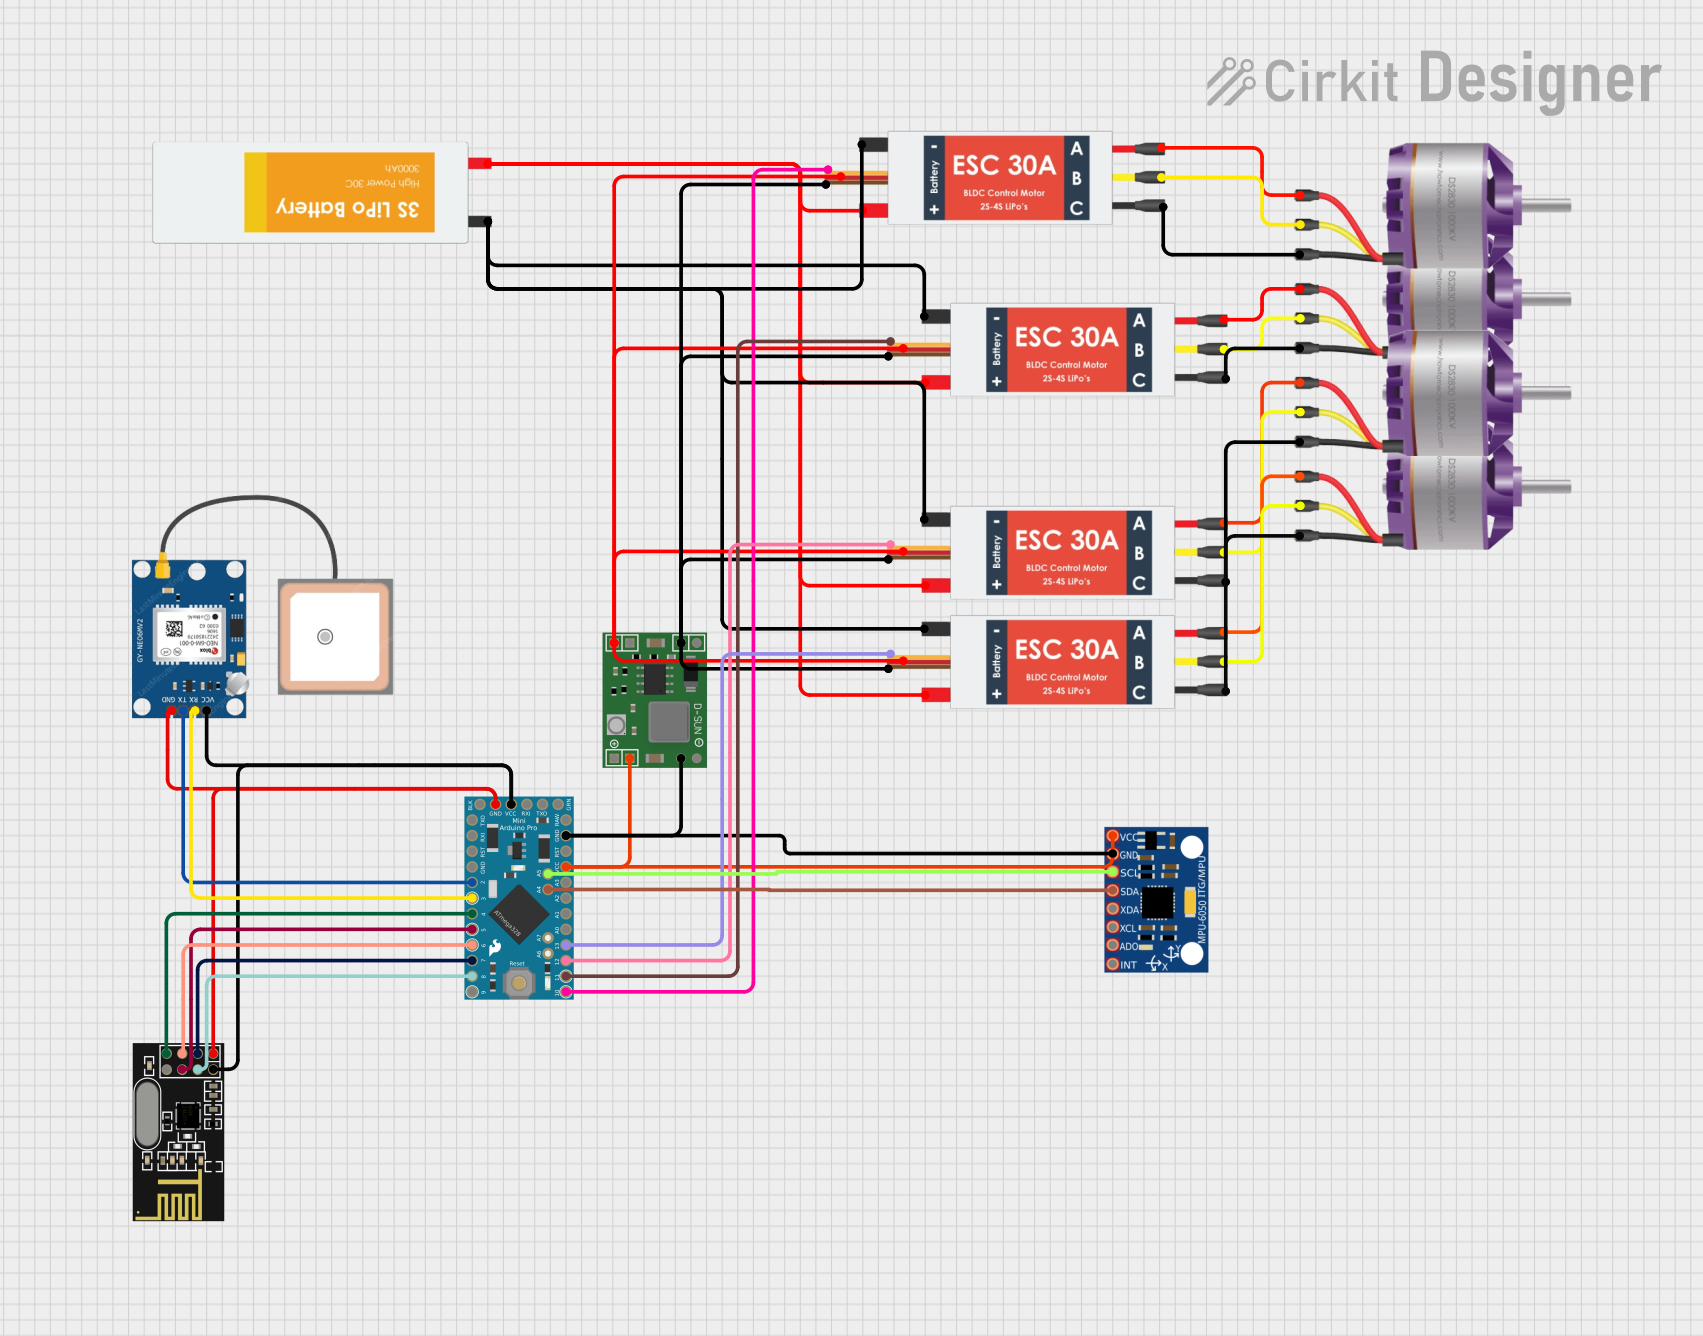
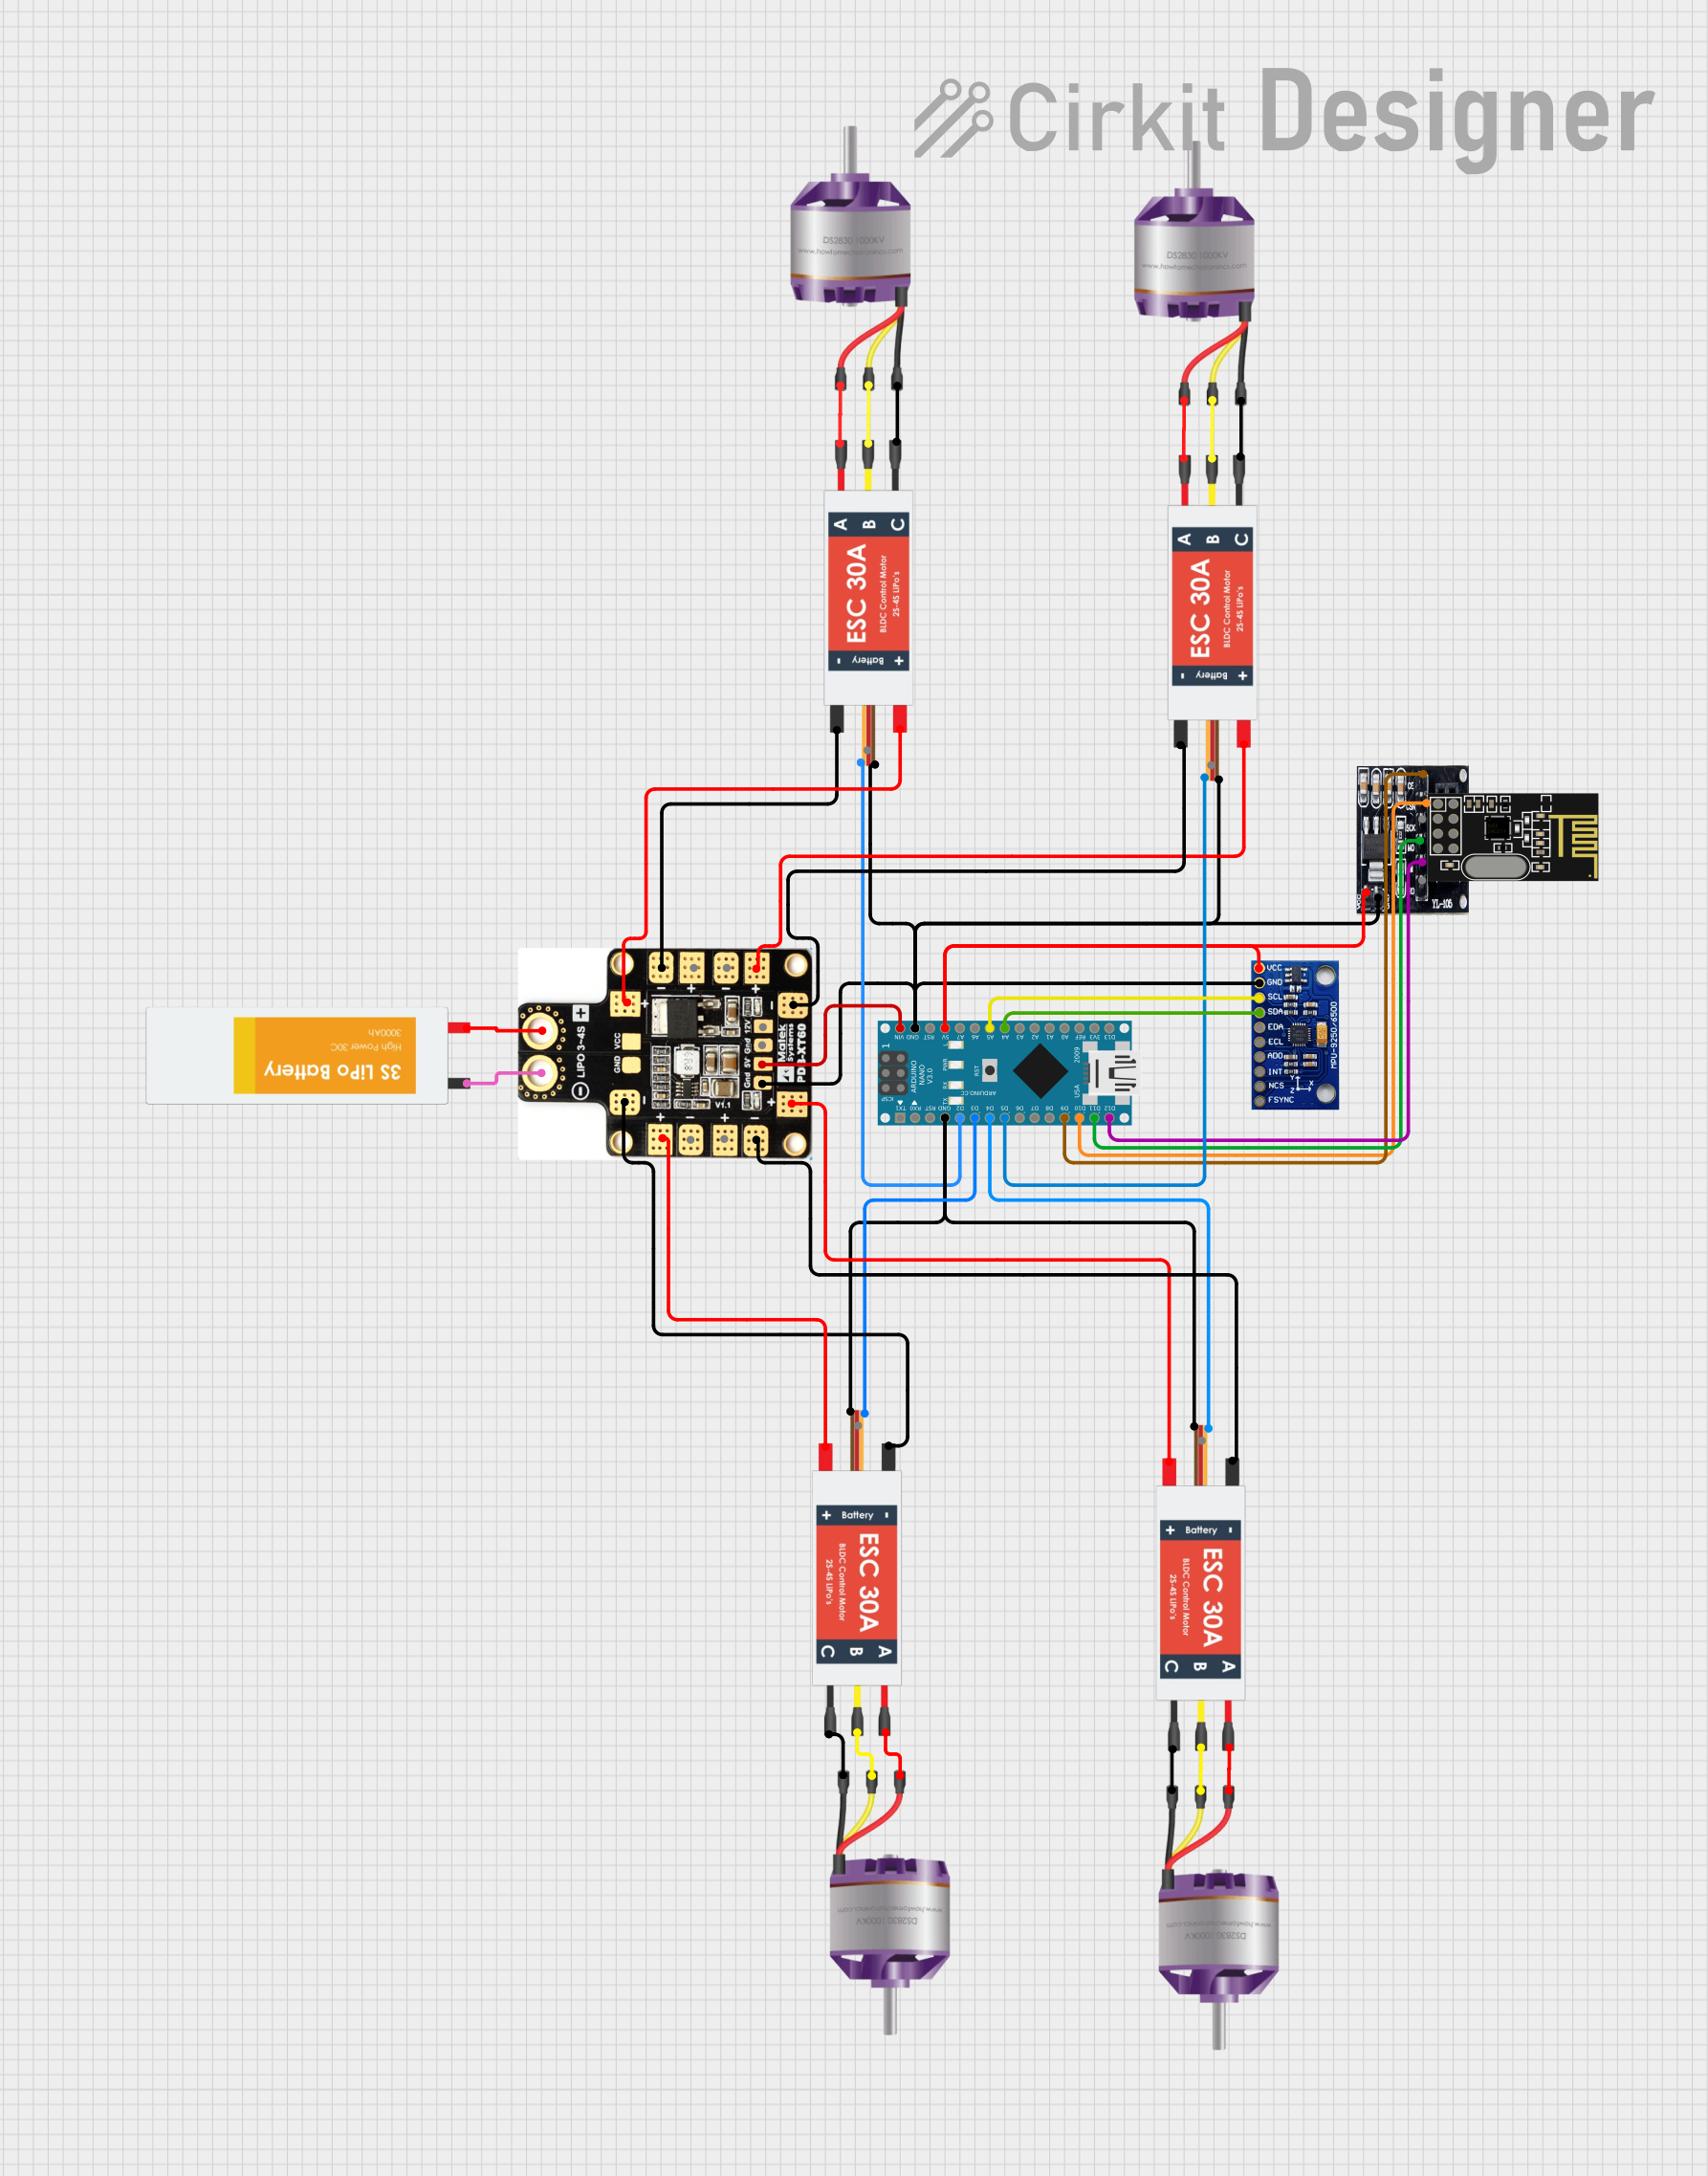

Explore Projects Built with PX4
Common Applications
- Autonomous drones for aerial photography and videography
- Delivery drones for logistics and transportation
- Research and development in robotics and unmanned systems
- Agricultural drones for crop monitoring and spraying
- Search and rescue operations using UAVs
Technical Specifications
Key Technical Details
- Manufacturer: Holybro
- Part ID: PX4
- Processor: STM32F7 series microcontroller (32-bit ARM Cortex-M7)
- IMU (Inertial Measurement Unit): Triple redundant IMUs for enhanced reliability
- Barometer: High-precision barometer for altitude measurement
- GPS Support: Compatible with multiple GPS modules for accurate positioning
- Power Supply: 4.5V to 5.5V input voltage range
- Communication Interfaces: UART, I2C, SPI, CAN, PWM, and ADC
- Dimensions: 38mm x 55mm x 15mm
- Weight: Approximately 15g
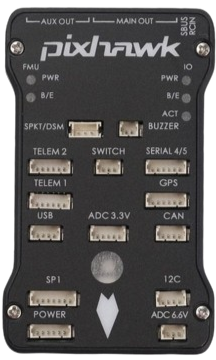
Pin Configuration and Descriptions
The PX4 features multiple connectors for interfacing with peripherals. Below is a table summarizing the key pin configurations:
| Pin/Port | Description |
|---|---|
| Power Input | Connects to the power module (4.5V to 5.5V input range). |
| PWM Outputs | Outputs for motor control (up to 8 PWM channels). |
| UART Ports | Serial communication ports for telemetry, GPS, and other peripherals. |
| I2C Ports | Interface for external sensors such as magnetometers and rangefinders. |
| CAN Bus | Communication interface for UAVCAN-compatible devices. |
| SPI Ports | High-speed interface for external sensors or peripherals. |
| ADC Inputs | Analog-to-digital converter inputs for voltage and current sensing. |
| USB Port | Micro-USB for firmware updates, configuration, and debugging. |
| SD Card Slot | For logging flight data and storing mission plans. |
| LED Port | Connects to external status LEDs for visual feedback. |
Usage Instructions
How to Use the PX4 in a Circuit
Powering the PX4:
Connect the PX4 to a compatible power module that provides a stable voltage between 4.5V and 5.5V. Ensure the power module is capable of supplying sufficient current for the connected peripherals.Connecting Peripherals:
- Attach motors to the PWM output pins.
- Connect a GPS module to one of the UART ports.
- Attach additional sensors (e.g., magnetometer, rangefinder) to the I2C or SPI ports.
- Use the CAN bus for UAVCAN-compatible devices like ESCs or additional sensors.
Firmware Installation:
- Download the PX4 firmware from the official PX4 website.
- Connect the PX4 to your computer via the micro-USB port.
- Use the QGroundControl software to flash the firmware and configure the flight controller.
Calibrating Sensors:
- Use QGroundControl to calibrate the accelerometer, gyroscope, magnetometer, and barometer.
- Follow the on-screen instructions to ensure accurate sensor readings.
Mission Planning:
- Plan autonomous missions using QGroundControl.
- Upload the mission to the PX4 via USB or telemetry.
Important Considerations and Best Practices
- Power Supply: Always use a reliable power source to avoid voltage drops that could cause the PX4 to reset mid-flight.
- Firmware Updates: Regularly update the firmware to benefit from the latest features and bug fixes.
- Vibration Isolation: Mount the PX4 on vibration-dampening material to reduce noise in sensor readings.
- Pre-Flight Checks: Perform thorough pre-flight checks, including motor tests, sensor calibration, and GPS lock verification.
- Safety: Always test new configurations in a controlled environment before deploying in real-world scenarios.
Example Code for Arduino UNO Integration
The PX4 can communicate with an Arduino UNO via UART for custom applications. Below is an example of how to send and receive data between the PX4 and Arduino:
#include <SoftwareSerial.h>

// Define RX and TX pins for UART communication
SoftwareSerial px4Serial(10, 11); // RX = pin 10, TX = pin 11

void setup() {
  // Initialize serial communication
  Serial.begin(9600); // For debugging via Serial Monitor
  px4Serial.begin(57600); // Communication with PX4

  Serial.println("Arduino-PX4 Communication Initialized");
}

void loop() {
  // Send data to PX4
  px4Serial.println("Hello PX4!");

  // Check if data is available from PX4
  if (px4Serial.available()) {
    String dataFromPX4 = px4Serial.readString();
    Serial.print("Data from PX4: ");
    Serial.println(dataFromPX4);
  }

  delay(1000); // Delay for 1 second
}
Troubleshooting and FAQs
Common Issues and Solutions
PX4 Not Powering On:
- Cause: Insufficient or unstable power supply.
- Solution: Verify the power module output voltage and ensure it is within the 4.5V to 5.5V range.
No GPS Lock:
- Cause: Poor satellite visibility or incorrect GPS module connection.
- Solution: Move the drone to an open area with a clear view of the sky. Check the GPS wiring and configuration in QGroundControl.
Unstable Flight:
- Cause: Incorrect sensor calibration or PID tuning.
- Solution: Recalibrate the sensors and adjust the PID parameters in QGroundControl.
Firmware Update Fails:
- Cause: USB connection issues or incompatible firmware version.
- Solution: Ensure the USB cable is functional and use the latest firmware version from the PX4 website.
FAQs
Q: Can the PX4 be used with fixed-wing aircraft?
A: Yes, the PX4 supports fixed-wing, multirotor, VTOL, and other vehicle types.Q: What software is compatible with the PX4?
A: The PX4 is compatible with QGroundControl for configuration, mission planning, and monitoring.Q: How do I log flight data?
A: Insert an SD card into the PX4's SD card slot. Flight data will be automatically logged during operation.Q: Can I use the PX4 without GPS?
A: Yes, the PX4 can operate in manual or stabilized modes without GPS, but autonomous features require GPS.Q: Is the PX4 waterproof?
A: No, the PX4 is not waterproof. Protect it from water exposure during operation.