Cirkit Designer
Your all-in-one circuit design IDE
Home /
Component Documentation
How to Use Temperature Sensor : Examples, Pinouts, and Specs
Introduction
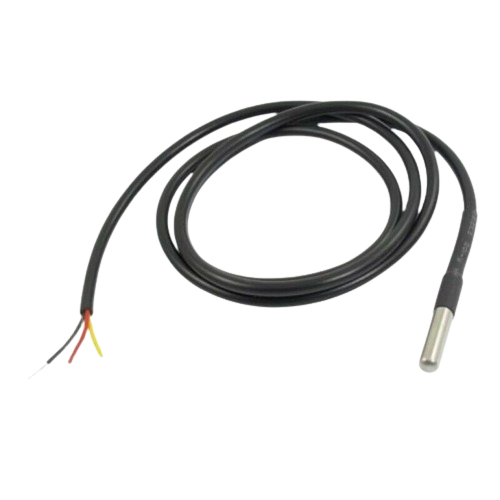
A temperature sensor is a device that measures temperature and converts it into a signal which can be read by an observer or by an instrument. These sensors are widely used in various applications, including environmental monitoring, industrial processes, and consumer electronics. They provide accurate and reliable temperature readings, making them essential components in many systems.
Explore Projects Built with Temperature Sensor
Arduino UNO Based Temperature Monitoring System with DS18B20 Sensor
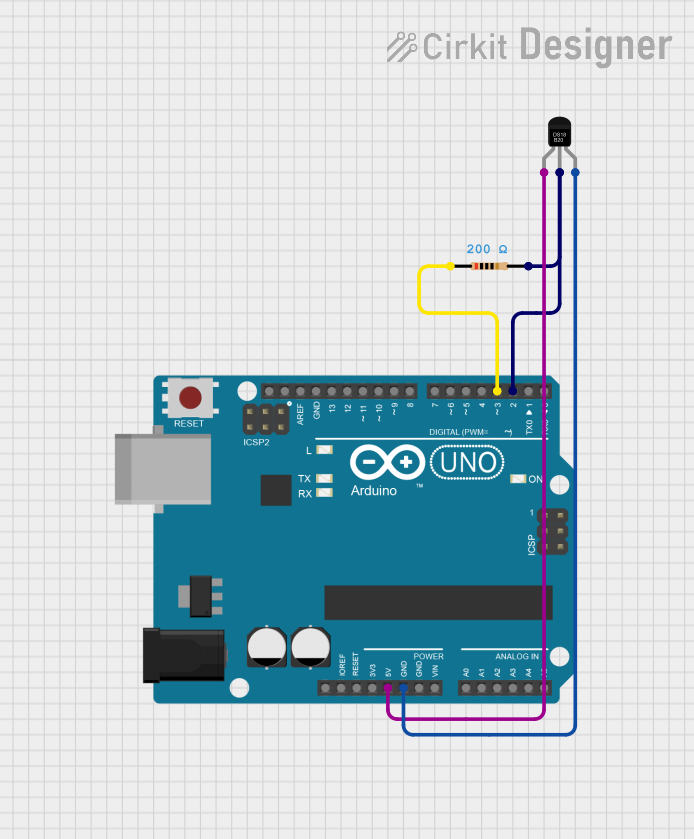
This circuit is designed to measure temperature using a DS18B20 sensor interfaced with an Arduino UNO. The Arduino reads temperature data from the sensor via a 1-Wire bus with a pull-up resistor and outputs the readings to the serial console.
Arduino UNO Based Temperature Monitoring with LM35 Sensor
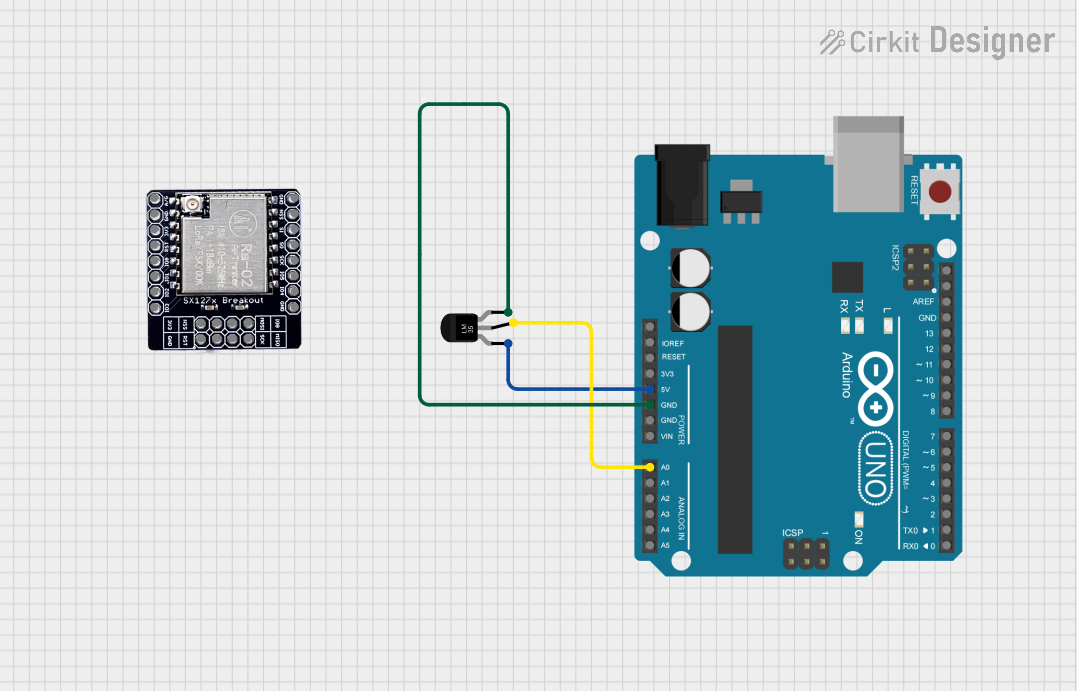
This circuit is designed to measure temperature using an LM35 temperature sensor and display the readings in degrees Celsius. The sensor's output voltage is read by an Arduino UNO's analog input, which then converts the voltage to a temperature value. The Arduino is programmed to serially output the temperature data, which can be monitored in real-time.
Arduino UNO Based LM35 Temperature Sensor Monitoring System
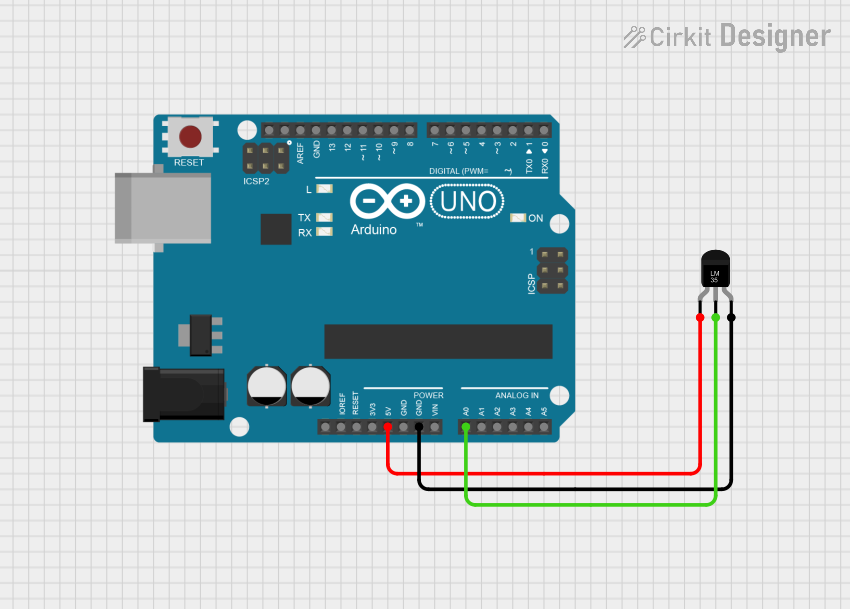
This circuit is designed to measure temperature using an LM35 temperature sensor interfaced with an Arduino UNO microcontroller. The sensor's output voltage, which is proportional to the temperature, is read by the Arduino's analog input A0. The embedded code on the Arduino processes this signal to calculate and output the temperature in both Celsius and Fahrenheit to the serial monitor.
Arduino UNO with DS18B20 Temperature Sensor Monitoring
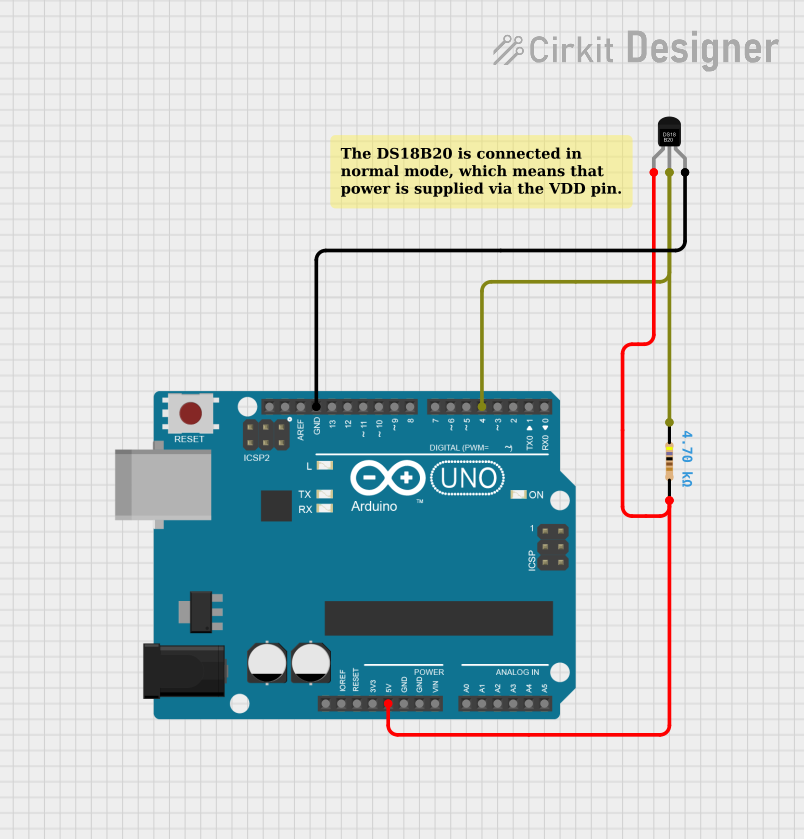
This circuit is designed to measure temperature using a DS18B20 temperature sensor interfaced with an Arduino UNO microcontroller. The sensor's data line is connected to digital pin 4 of the Arduino through a 4.7k Ohm pull-up resistor, and the Arduino runs a sketch that reads the temperature in Celsius and Fahrenheit, then outputs the readings to the serial monitor. The purpose of the circuit is to provide a digital temperature reading for monitoring or control applications.
Explore Projects Built with Temperature Sensor
Arduino UNO Based Temperature Monitoring System with DS18B20 Sensor
This circuit is designed to measure temperature using a DS18B20 sensor interfaced with an Arduino UNO. The Arduino reads temperature data from the sensor via a 1-Wire bus with a pull-up resistor and outputs the readings to the serial console.
Arduino UNO Based Temperature Monitoring with LM35 Sensor
This circuit is designed to measure temperature using an LM35 temperature sensor and display the readings in degrees Celsius. The sensor's output voltage is read by an Arduino UNO's analog input, which then converts the voltage to a temperature value. The Arduino is programmed to serially output the temperature data, which can be monitored in real-time.
Arduino UNO Based LM35 Temperature Sensor Monitoring System
This circuit is designed to measure temperature using an LM35 temperature sensor interfaced with an Arduino UNO microcontroller. The sensor's output voltage, which is proportional to the temperature, is read by the Arduino's analog input A0. The embedded code on the Arduino processes this signal to calculate and output the temperature in both Celsius and Fahrenheit to the serial monitor.
Arduino UNO with DS18B20 Temperature Sensor Monitoring
This circuit is designed to measure temperature using a DS18B20 temperature sensor interfaced with an Arduino UNO microcontroller. The sensor's data line is connected to digital pin 4 of the Arduino through a 4.7k Ohm pull-up resistor, and the Arduino runs a sketch that reads the temperature in Celsius and Fahrenheit, then outputs the readings to the serial monitor. The purpose of the circuit is to provide a digital temperature reading for monitoring or control applications.
Technical Specifications
Key Technical Details
| Parameter | Value |
|---|---|
| Operating Voltage | 3.3V to 5V |
| Operating Current | 10 µA to 1 mA |
| Temperature Range | -55°C to +150°C |
| Accuracy | ±0.5°C (at 25°C) |
| Output Type | Analog or Digital |
| Response Time | < 1 second |
Pin Configuration and Descriptions
Analog Temperature Sensor (e.g., LM35)
| Pin No. | Pin Name | Description |
|---|---|---|
| 1 | Vcc | Power supply (3.3V to 5V) |
| 2 | Vout | Analog output voltage proportional |
| to temperature | ||
| 3 | GND | Ground |
Digital Temperature Sensor (e.g., DS18B20)
| Pin No. | Pin Name | Description |
|---|---|---|
| 1 | GND | Ground |
| 2 | DQ | Data input/output |
| 3 | Vcc | Power supply (3.3V to 5V) |
Usage Instructions
How to Use the Component in a Circuit
Analog Temperature Sensor (e.g., LM35)
- Power the Sensor: Connect the Vcc pin to a 3.3V or 5V power supply.
- Connect Ground: Connect the GND pin to the ground of the circuit.
- Read the Output: Connect the Vout pin to an analog input pin of a microcontroller (e.g., Arduino UNO).
Digital Temperature Sensor (e.g., DS18B20)
- Power the Sensor: Connect the Vcc pin to a 3.3V or 5V power supply.
- Connect Ground: Connect the GND pin to the ground of the circuit.
- Data Line: Connect the DQ pin to a digital input/output pin of a microcontroller (e.g., Arduino UNO). Use a pull-up resistor (4.7kΩ) between the DQ pin and Vcc.
Important Considerations and Best Practices
- Power Supply: Ensure the sensor is powered within its specified voltage range to avoid damage.
- Calibration: For precise applications, calibrate the sensor to account for any offsets or inaccuracies.
- Placement: Place the sensor in a location where it can accurately measure the desired temperature without interference.
- Pull-up Resistor (Digital Sensors): Use a pull-up resistor on the data line to ensure reliable communication.
Example Code for Arduino UNO
Analog Temperature Sensor (e.g., LM35)
const int sensorPin = A0; // Analog input pin connected to the sensor

void setup() {
  Serial.begin(9600); // Initialize serial communication
}

void loop() {
  int sensorValue = analogRead(sensorPin); // Read the analog value
  float voltage = sensorValue * (5.0 / 1023.0); // Convert to voltage
  float temperatureC = voltage * 100.0; // Convert voltage to temperature
  Serial.print("Temperature: ");
  Serial.print(temperatureC);
  Serial.println(" °C");
  delay(1000); // Wait for 1 second before next reading
}
Digital Temperature Sensor (e.g., DS18B20)
#include <OneWire.h>
#include <DallasTemperature.h>

const int oneWireBus = 2; // Digital pin connected to the sensor

OneWire oneWire(oneWireBus);
DallasTemperature sensors(&oneWire);

void setup() {
  Serial.begin(9600); // Initialize serial communication
  sensors.begin(); // Start the DS18B20 sensor
}

void loop() {
  sensors.requestTemperatures(); // Send command to get temperatures
  float temperatureC = sensors.getTempCByIndex(0); // Read temperature
  Serial.print("Temperature: ");
  Serial.print(temperatureC);
  Serial.println(" °C");
  delay(1000); // Wait for 1 second before next reading
}
Troubleshooting and FAQs
Common Issues Users Might Face
No Output or Incorrect Readings:
- Solution: Check the power supply and ensure the sensor is connected correctly. Verify the connections and ensure the sensor is within its operating voltage range.
Fluctuating Readings:
- Solution: Ensure stable power supply and proper grounding. Use decoupling capacitors if necessary to filter out noise.
Sensor Not Detected (Digital Sensors):
- Solution: Check the pull-up resistor on the data line. Ensure the correct pin is used for communication and that the sensor library is properly included in the code.
Solutions and Tips for Troubleshooting
- Verify Connections: Double-check all connections and ensure they are secure.
- Use Serial Monitor: Utilize the serial monitor to debug and verify sensor readings.
- Library Documentation: Refer to the sensor library documentation for additional troubleshooting tips and advanced usage.
By following this documentation, users can effectively integrate and utilize temperature sensors in their projects, ensuring accurate and reliable temperature measurements.