How to Use DS18B20 Adapter: Examples, Pinouts, and Specs
Introduction
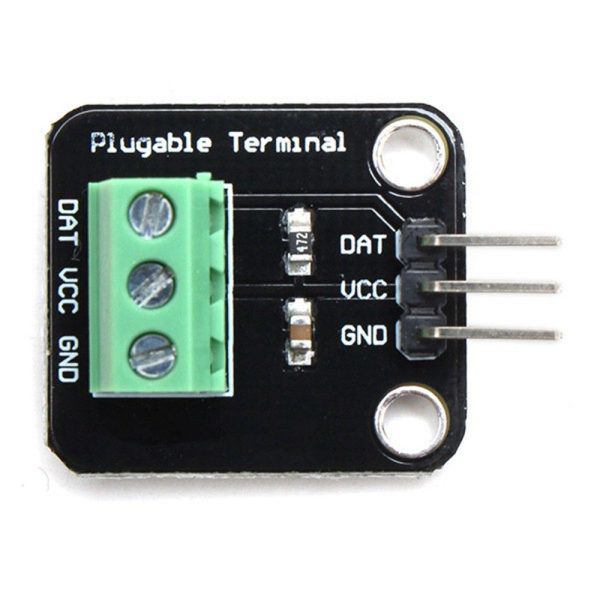
The DS18B20 Adapter is a specialized interface designed to connect the DS18B20 temperature sensor to a microcontroller or other digital systems. This adapter simplifies the integration process by providing the necessary connections and, in some cases, additional circuitry to ensure reliable communication. The DS18B20 temperature sensor is known for its precision and ease of use, making it a popular choice for temperature monitoring in various applications.
Explore Projects Built with DS18B20 Adapter
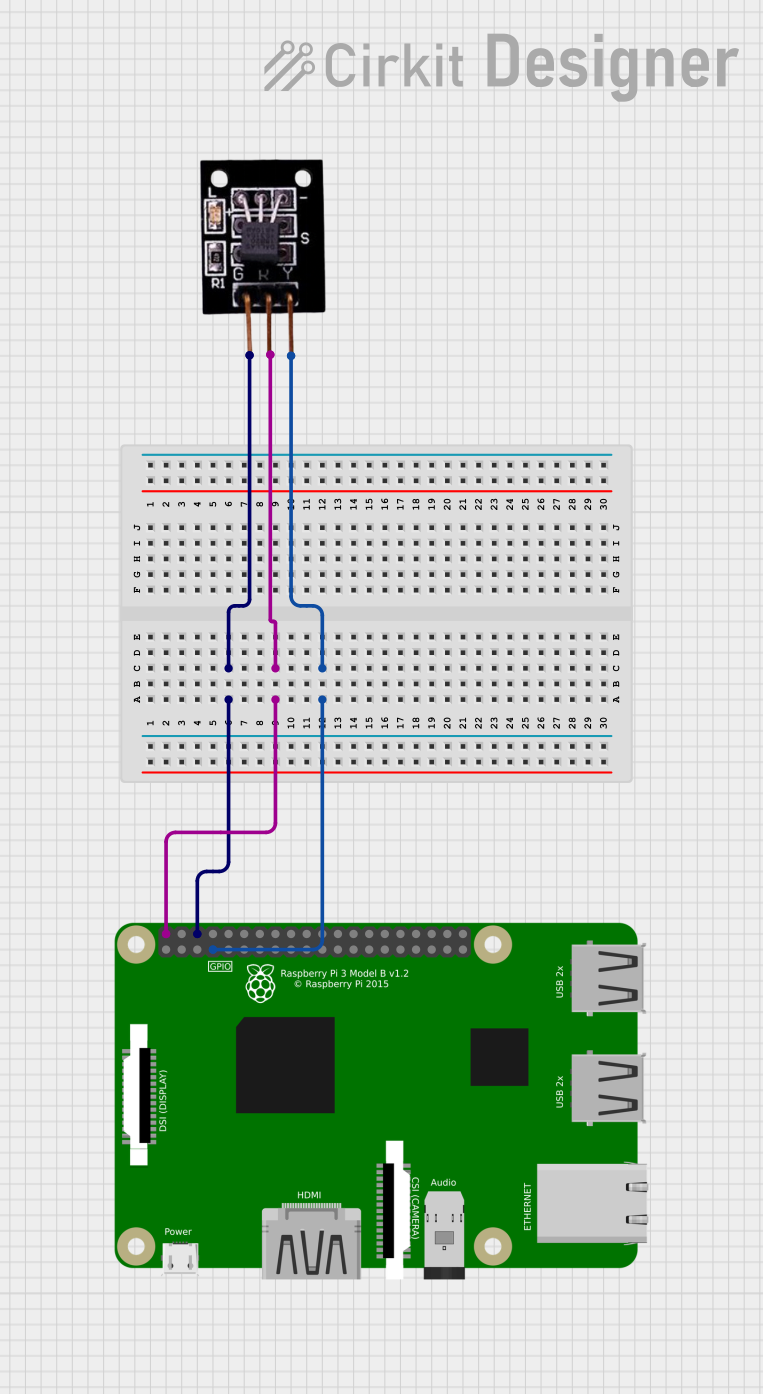
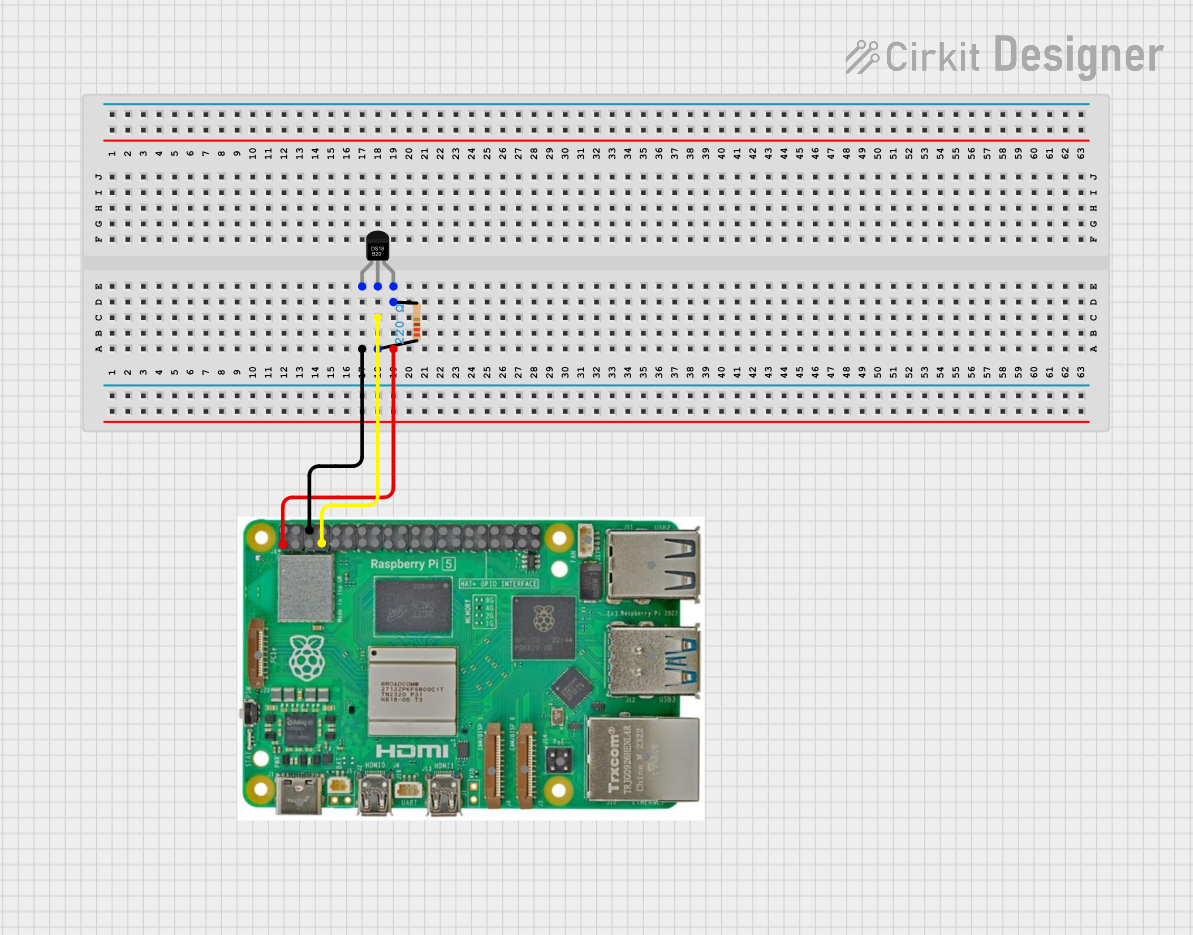
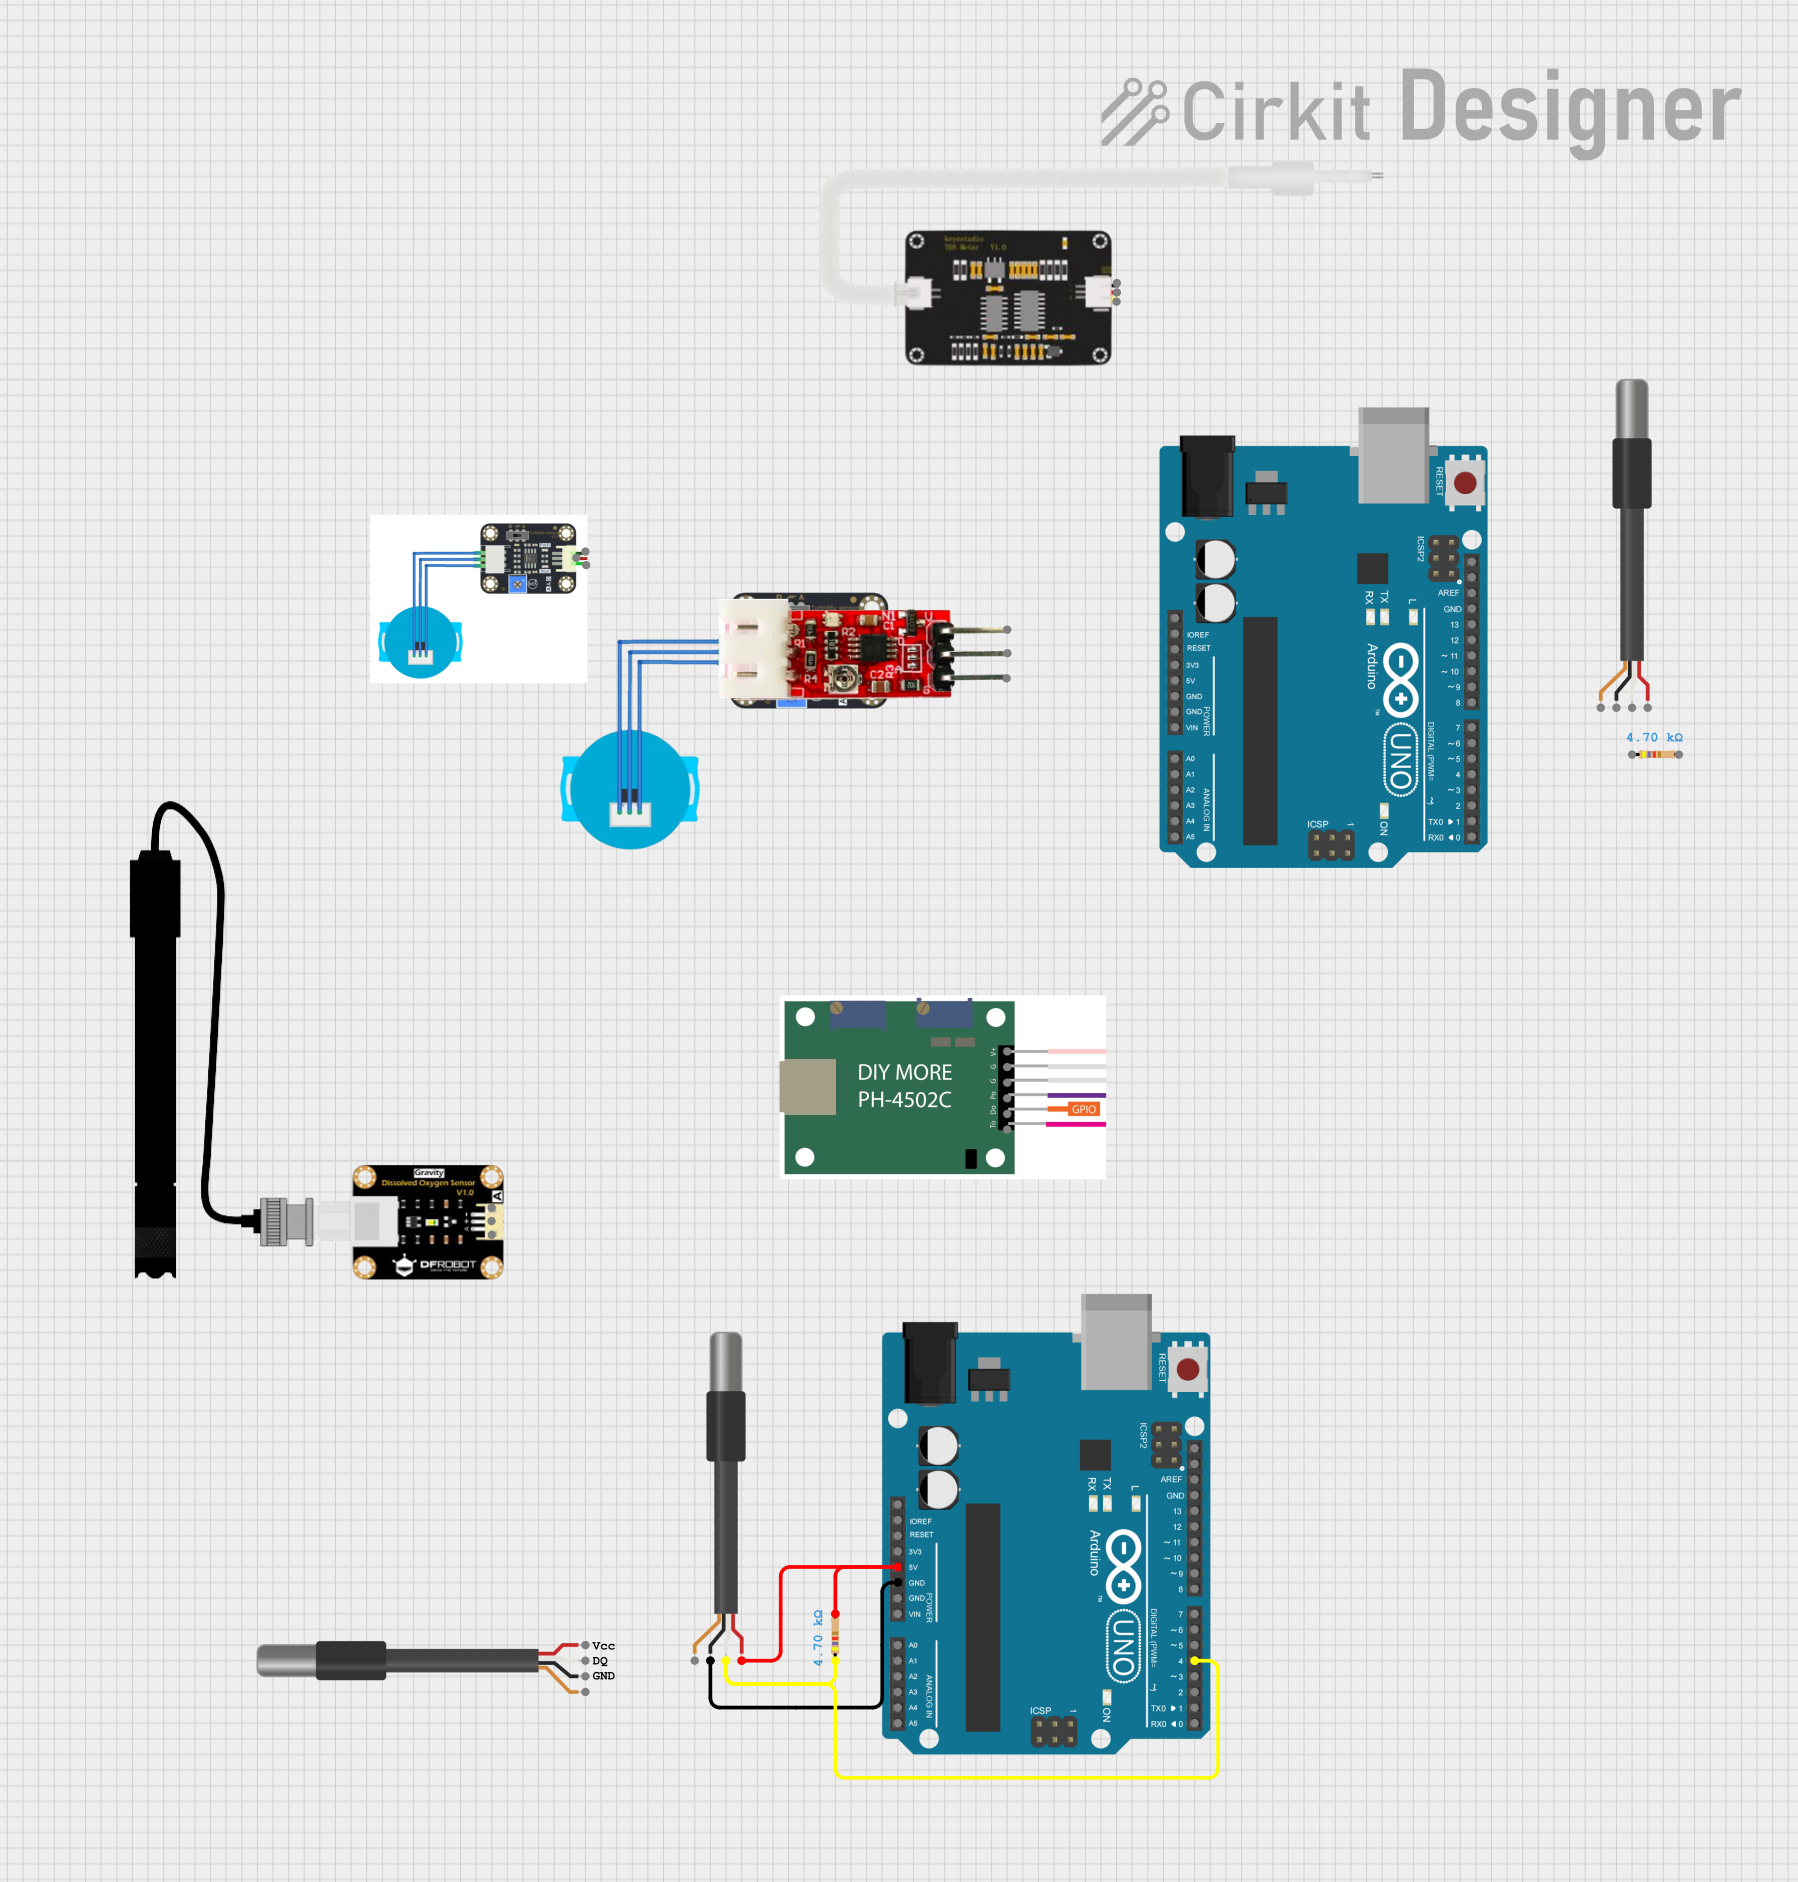
Explore Projects Built with DS18B20 Adapter
Common Applications and Use Cases
- Home Automation: Monitoring room temperature for smart thermostats.
- Industrial Systems: Temperature control in manufacturing processes.
- Weather Stations: Collecting environmental temperature data.
- Data Logging: Recording temperature variations over time.
- HVAC Systems: Ensuring optimal performance of heating, ventilation, and air conditioning systems.
Technical Specifications
Key Technical Details
| Parameter | Value |
|---|---|
| Operating Voltage | 3.0V to 5.5V |
| Communication | 1-Wire Protocol |
| Temperature Range | -55°C to +125°C |
| Accuracy | ±0.5°C (from -10°C to +85°C) |
| Resolution | 9 to 12 bits (configurable) |
Pin Configuration and Descriptions
| Pin Number | Pin Name | Description |
|---|---|---|
| 1 | GND | Ground |
| 2 | VCC | Power Supply (3.0V to 5.5V) |
| 3 | DQ | Data Line (1-Wire communication) |
| 4 | NC | Not Connected (may be used for additional circuitry) |
Usage Instructions
How to Use the Component in a Circuit
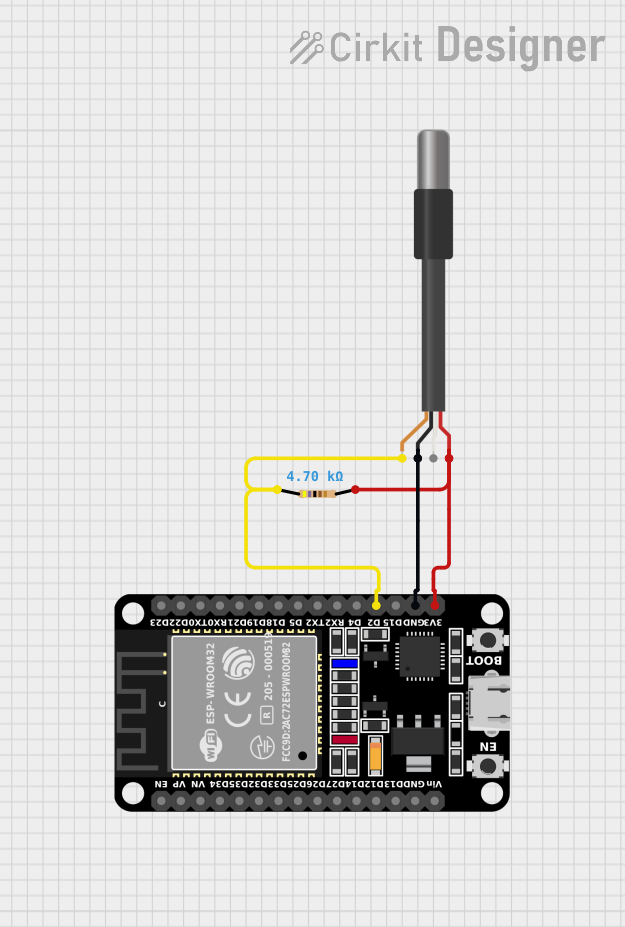
- Power Supply: Connect the VCC pin to a 3.0V to 5.5V power supply and the GND pin to the ground of your system.
- Data Line: Connect the DQ pin to a digital I/O pin on your microcontroller. A pull-up resistor (typically 4.7kΩ) should be connected between the DQ pin and VCC to ensure proper communication.
- Optional Connections: If your adapter includes additional circuitry, refer to the specific datasheet for further instructions.
Important Considerations and Best Practices
- Pull-Up Resistor: Ensure a 4.7kΩ pull-up resistor is connected between the DQ pin and VCC to maintain reliable communication.
- Cable Length: Keep the cable length between the DS18B20 sensor and the microcontroller as short as possible to minimize signal degradation.
- Power Supply: Ensure a stable power supply to avoid fluctuations that could affect sensor readings.
- Multiple Sensors: If using multiple DS18B20 sensors on the same data line, each sensor must have a unique 64-bit address.
Example Circuit Diagram

Arduino UNO Example Code
#include <OneWire.h>
#include <DallasTemperature.h>

// Data wire is connected to pin 2 on the Arduino
#define ONE_WIRE_BUS 2

// Setup a oneWire instance to communicate with any OneWire devices
OneWire oneWire(ONE_WIRE_BUS);

// Pass our oneWire reference to Dallas Temperature sensor
DallasTemperature sensors(&oneWire);

void setup(void) {
  // Start serial communication for debugging
  Serial.begin(9600);
  Serial.println("DS18B20 Temperature Sensor Example");

  // Start up the library
  sensors.begin();
}

void loop(void) {
  // Request temperature readings from all devices on the bus
  sensors.requestTemperatures();

  // Fetch and print the temperature in Celsius
  float temperatureC = sensors.getTempCByIndex(0);
  Serial.print("Temperature: ");
  Serial.print(temperatureC);
  Serial.println(" °C");

  // Wait 1 second before repeating the loop
  delay(1000);
}
Troubleshooting and FAQs
Common Issues Users Might Face
No Temperature Reading:
- Solution: Ensure the pull-up resistor is correctly connected between the DQ pin and VCC.
- Solution: Verify that the sensor is properly connected to the microcontroller.
Incorrect Temperature Reading:
- Solution: Check for stable power supply and proper grounding.
- Solution: Ensure the sensor is within its operating temperature range.
Multiple Sensors Not Detected:
- Solution: Ensure each sensor has a unique 64-bit address.
- Solution: Verify the wiring and connections for each sensor.
Solutions and Tips for Troubleshooting
- Check Connections: Ensure all connections are secure and correctly oriented.
- Use a Multimeter: Verify voltage levels and continuity of connections.
- Consult Datasheets: Refer to the DS18B20 and adapter datasheets for detailed information.
- Update Libraries: Ensure you are using the latest versions of the OneWire and DallasTemperature libraries.
By following this documentation, users should be able to effectively integrate and troubleshoot the DS18B20 Adapter in their projects. Whether you are a beginner or an experienced user, this guide provides the necessary information to get started and ensure reliable operation.