Cirkit Designer Logo
Cirkit Designer
Your all-in-one circuit design IDE
Home / 
Component Documentation

How to Use Mtiny Power: Examples, Pinouts, and Specs

Image of Mtiny Power
Cirkit Designer LogoDesign with Mtiny Power in Cirkit Designer

Introduction

The Mtiny Power module by Makerlabvn is a compact and efficient power source designed for low-power electronics projects. It is ideal for hobbyists, students, and professionals who require a reliable power supply for their devices or circuits. Common applications include powering microcontrollers, sensors, and small motors in projects such as DIY electronics, robotics, and portable gadgets.

Explore Projects Built with Mtiny Power

Use Cirkit Designer to design, explore, and prototype these projects online. Some projects support real-time simulation. Click "Open Project" to start designing instantly!
ATmega328P-Based Sensor Hub with OLED Display and LIDAR
Image of TILTPCB: A project utilizing Mtiny Power in a practical application
This circuit features an Mtiny Uno ATmega328P microcontroller as its central processing unit, interfacing with a variety of sensors and peripherals. It includes a 0.96" OLED display and an MPU6050 accelerometer/gyroscope for user interface and motion sensing, respectively. The circuit also integrates a TF LUNA LIDAR for distance measurement, a DHT11 sensor for temperature and humidity readings, and uses a 9V battery with a 7805 voltage regulator for power management. Communication with a computer for programming and data exchange is facilitated by an Adafruit FTDI Friend module.
Cirkit Designer LogoOpen Project in Cirkit Designer
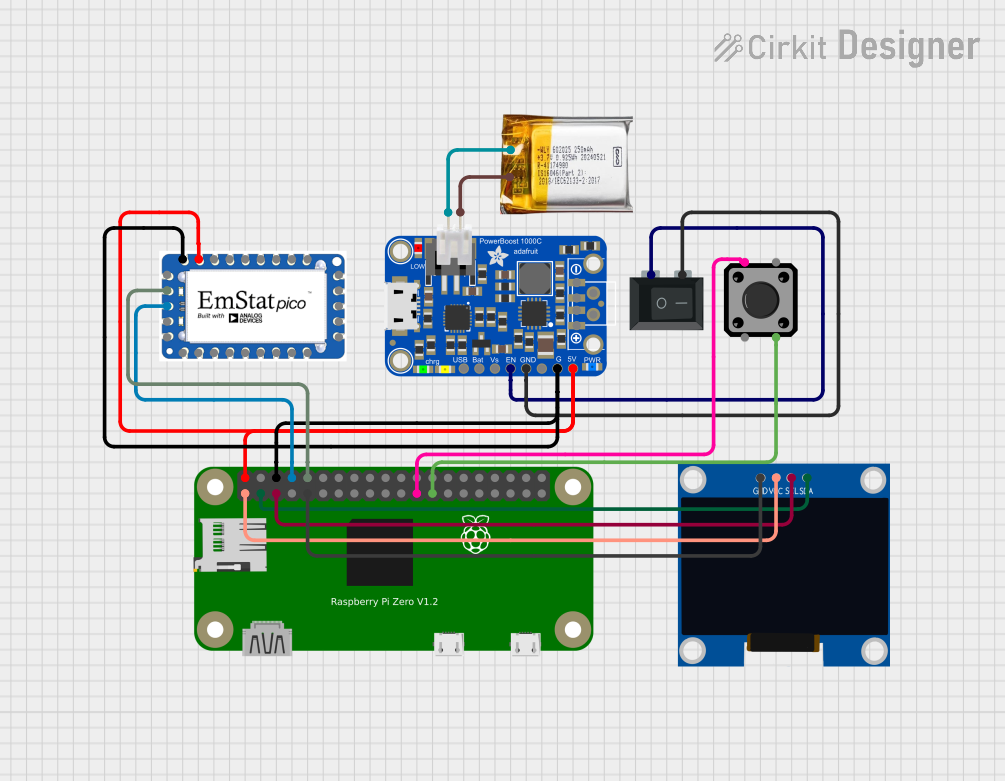
Battery-Powered Raspberry Pi Zero with OLED Display and EmStat Pico for Portable Data Acquisition
Image of RPI Zero Prototype: A project utilizing Mtiny Power in a practical application
This circuit is a portable system powered by a 3.7V LiPo battery, which is boosted to 5V using an Adafruit PowerBoost 1000C to power a Raspberry Pi Zero and an EmStat Pico. The Raspberry Pi Zero interfaces with an OLED display via I2C and a tactile switch for user input, while the EmStat Pico communicates with the Raspberry Pi over UART for data acquisition or control purposes.
Cirkit Designer LogoOpen Project in Cirkit Designer
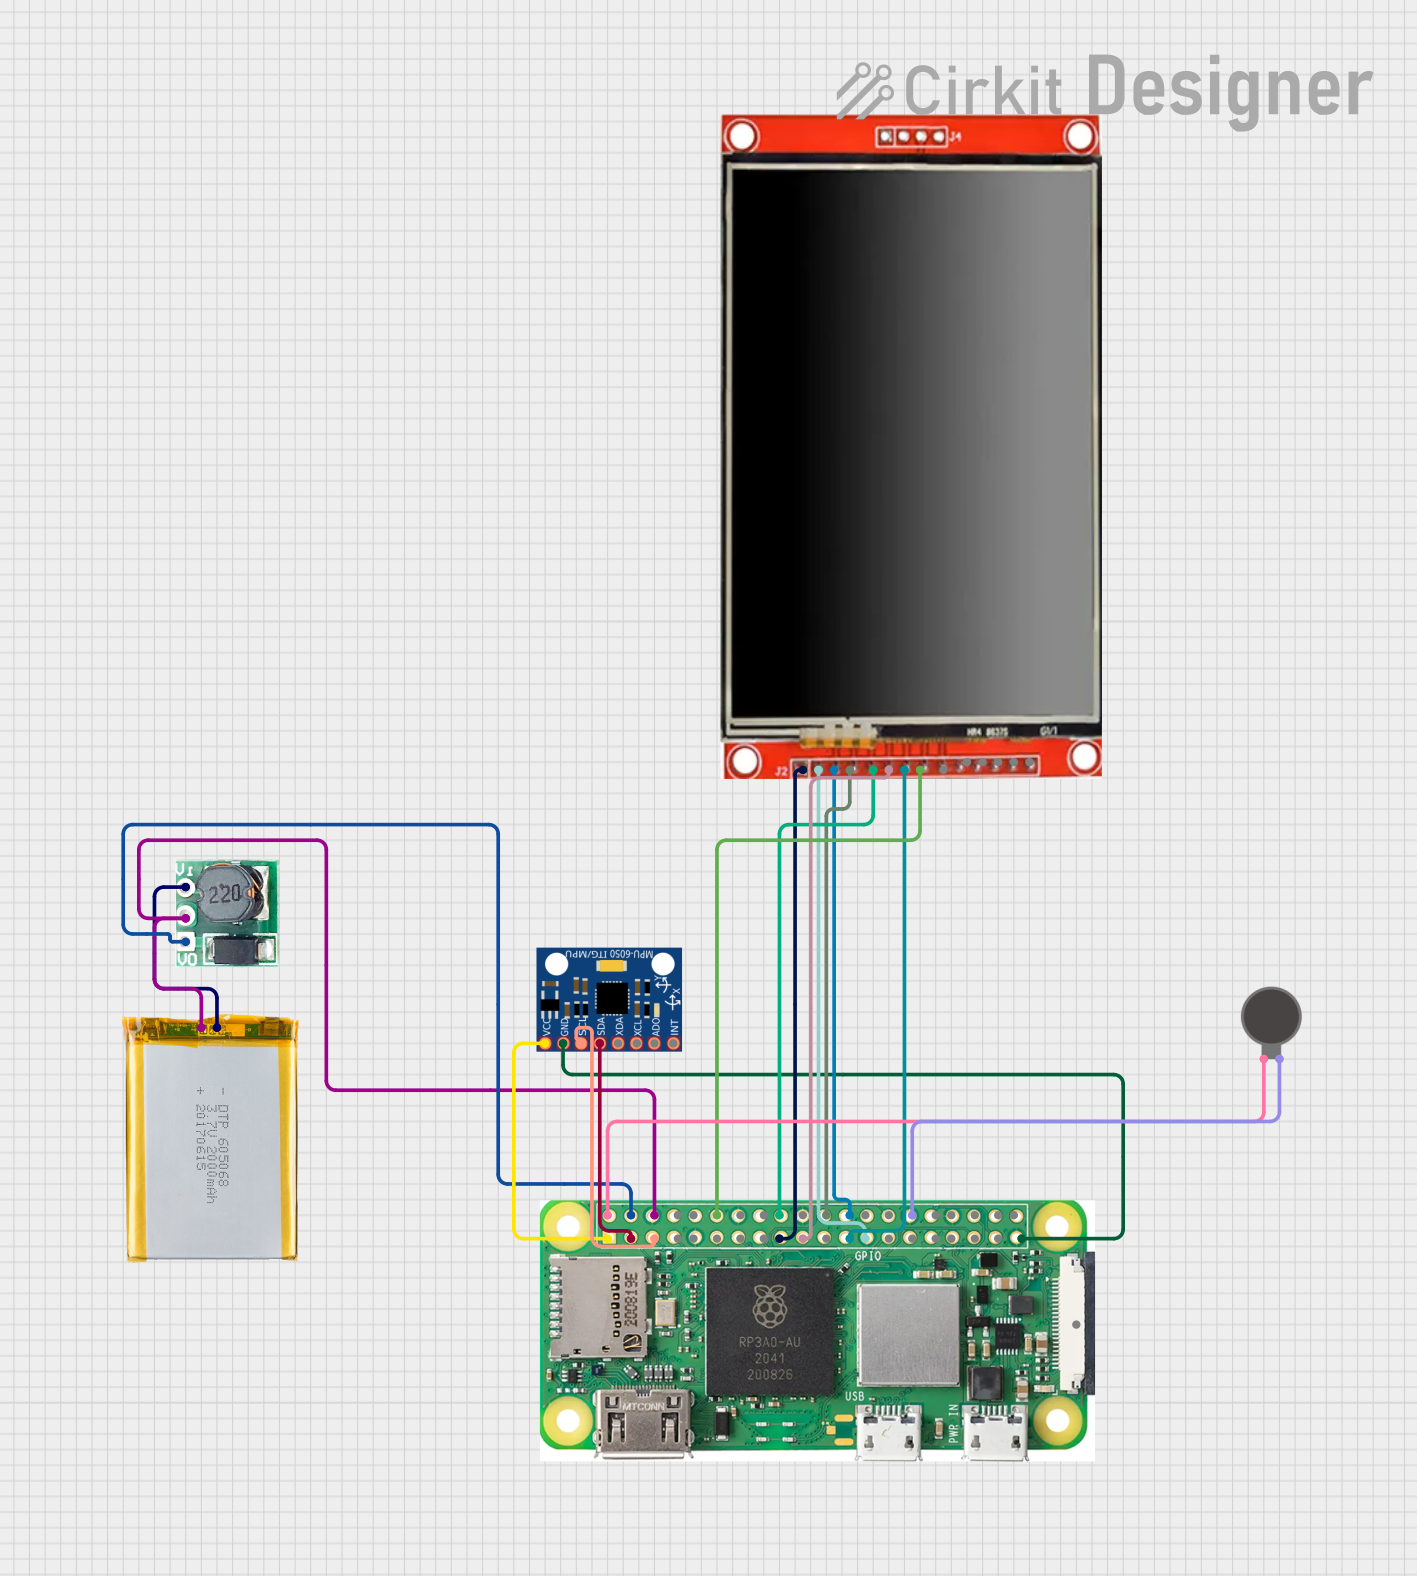
Battery-Powered Raspberry Pi Zero W with MPU-6050 and LCD Display
Image of Science Fair: A project utilizing Mtiny Power in a practical application
This circuit is a portable system powered by a 2000mAh battery, which is stepped up to 5V using a boost converter to power a Raspberry Pi Zero W. The Raspberry Pi interfaces with an MPU-6050 sensor for motion detection, an LCD TFT screen for display, and a vibration motor for haptic feedback.
Cirkit Designer LogoOpen Project in Cirkit Designer
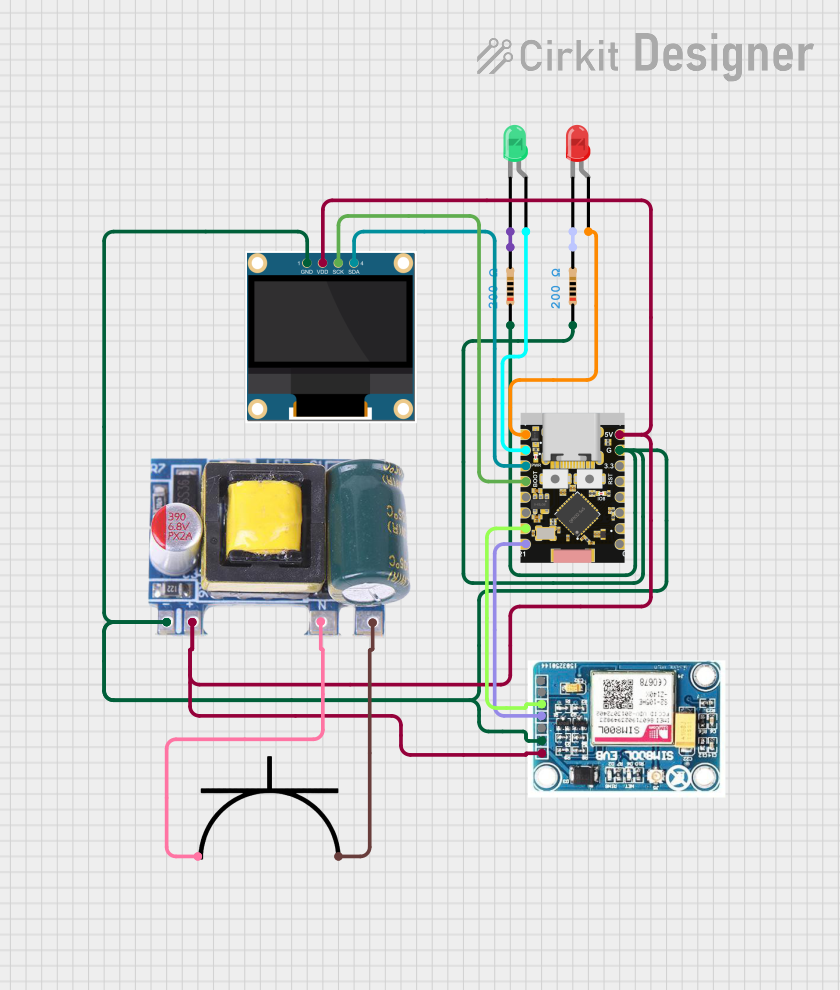
ESP32C3 and SIM800L Powered Smart Energy Monitor with OLED Display and Wi-Fi Connectivity
Image of master: A project utilizing Mtiny Power in a practical application
This circuit is a power monitoring system that uses an ESP32C3 microcontroller to collect power usage data from slave devices via WiFi and SMS. The collected data is displayed on a 0.96" OLED screen, and the system is powered by an AC-DC converter module. Additionally, the circuit includes a SIM800L GSM module for SMS communication and LEDs for status indication.
Cirkit Designer LogoOpen Project in Cirkit Designer

Explore Projects Built with Mtiny Power

Use Cirkit Designer to design, explore, and prototype these projects online. Some projects support real-time simulation. Click "Open Project" to start designing instantly!
Image of TILTPCB: A project utilizing Mtiny Power in a practical application
ATmega328P-Based Sensor Hub with OLED Display and LIDAR
This circuit features an Mtiny Uno ATmega328P microcontroller as its central processing unit, interfacing with a variety of sensors and peripherals. It includes a 0.96" OLED display and an MPU6050 accelerometer/gyroscope for user interface and motion sensing, respectively. The circuit also integrates a TF LUNA LIDAR for distance measurement, a DHT11 sensor for temperature and humidity readings, and uses a 9V battery with a 7805 voltage regulator for power management. Communication with a computer for programming and data exchange is facilitated by an Adafruit FTDI Friend module.
Cirkit Designer LogoOpen Project in Cirkit Designer
Image of RPI Zero Prototype: A project utilizing Mtiny Power in a practical application
Battery-Powered Raspberry Pi Zero with OLED Display and EmStat Pico for Portable Data Acquisition
This circuit is a portable system powered by a 3.7V LiPo battery, which is boosted to 5V using an Adafruit PowerBoost 1000C to power a Raspberry Pi Zero and an EmStat Pico. The Raspberry Pi Zero interfaces with an OLED display via I2C and a tactile switch for user input, while the EmStat Pico communicates with the Raspberry Pi over UART for data acquisition or control purposes.
Cirkit Designer LogoOpen Project in Cirkit Designer
Image of Science Fair: A project utilizing Mtiny Power in a practical application
Battery-Powered Raspberry Pi Zero W with MPU-6050 and LCD Display
This circuit is a portable system powered by a 2000mAh battery, which is stepped up to 5V using a boost converter to power a Raspberry Pi Zero W. The Raspberry Pi interfaces with an MPU-6050 sensor for motion detection, an LCD TFT screen for display, and a vibration motor for haptic feedback.
Cirkit Designer LogoOpen Project in Cirkit Designer
Image of master: A project utilizing Mtiny Power in a practical application
ESP32C3 and SIM800L Powered Smart Energy Monitor with OLED Display and Wi-Fi Connectivity
This circuit is a power monitoring system that uses an ESP32C3 microcontroller to collect power usage data from slave devices via WiFi and SMS. The collected data is displayed on a 0.96" OLED screen, and the system is powered by an AC-DC converter module. Additionally, the circuit includes a SIM800L GSM module for SMS communication and LEDs for status indication.
Cirkit Designer LogoOpen Project in Cirkit Designer

Technical Specifications

Key Technical Details

  • Input Voltage: 6V to 12V DC
  • Output Voltage: 5V DC
  • Maximum Output Current: 1A
  • Efficiency: Up to 85%
  • Operating Temperature: -20°C to 60°C
  • Dimensions: 25mm x 15mm x 10mm
  • Weight: 5 grams

Pin Configuration and Descriptions

Pin Number Name Description
1 VIN Input voltage (6V-12V DC)
2 GND Ground connection
3 VOUT Regulated 5V output
4 GND Ground connection for output

Usage Instructions

Integrating Mtiny Power into a Circuit

  1. Connecting Power Input:

    • Connect a DC power source with a voltage range between 6V and 12V to the VIN and GND pins.
    • Ensure the polarity is correct to prevent damage to the module.
  2. Accessing Regulated Power Output:

    • Connect your device or circuit to the VOUT and GND pins for a stable 5V supply.
    • Do not exceed the maximum output current of 1A to maintain optimal performance.
  3. Mounting:

    • Secure the module onto your project board or chassis, ensuring adequate ventilation for heat dissipation.

Best Practices

  • Always verify input voltage and polarity before connecting the module.
  • Avoid placing the module in environments with extreme temperatures or humidity.
  • Do not exceed the recommended electrical specifications to prevent overheating or failure.
  • Use appropriate wire gauge for connections to handle the current without excessive voltage drop.

Troubleshooting and FAQs

Common Issues and Solutions

  • Module not powering on:

    • Check the input voltage and connections.
    • Ensure the power source is within the specified voltage range.
  • Output voltage is unstable or incorrect:

    • Verify that the connected load does not exceed 1A.
    • Inspect for any short circuits or improper connections in your circuit.
  • Module overheats:

    • Reduce the load if it exceeds the maximum current rating.
    • Improve ventilation around the module or add a heat sink if necessary.

FAQs

Q: Can I use the Mtiny Power module to power an Arduino UNO? A: Yes, the Mtiny Power module can be used to power an Arduino UNO as it requires a 5V power supply.

Q: Is it possible to adjust the output voltage of the module? A: No, the Mtiny Power module provides a fixed 5V output.

Q: What should I do if the module stops working? A: Disconnect the module and check for any visible damage or incorrect wiring. If the issue persists, contact Makerlabvn support for assistance.

Example Arduino UNO Connection

// No specific code is required for power supply modules like the Mtiny Power.
// However, below is an example of how to connect it to an Arduino UNO.

// Connect the Mtiny Power module to the Arduino UNO as follows:
// Mtiny Power VIN to external power source (6V-12V)
// Mtiny Power GND to external power source ground
// Mtiny Power VOUT to Arduino UNO 5V pin
// Mtiny Power GND to Arduino UNO GND pin

void setup() {
  // Initialize digital pin LED_BUILTIN as an output.
  pinMode(LED_BUILTIN, OUTPUT);
}

void loop() {
  // Turn the LED on (HIGH is the voltage level)
  digitalWrite(LED_BUILTIN, HIGH);
  // Wait for a second
  delay(1000);
  // Turn the LED off by making the voltage LOW
  digitalWrite(LED_BUILTIN, LOW);
   // Wait for a second
  delay(1000);
}

// This simple blink code will run with the power supplied by the Mtiny Power module.

Note: The above code is a standard Arduino blink sketch and does not interact with the Mtiny Power module directly. It serves as an example of how an Arduino UNO can be powered using the Mtiny Power module.