Cirkit Designer Logo
Cirkit Designer
Your all-in-one circuit design IDE
Home / 
Component Documentation

How to Use Vacuum Pump - 12V: Examples, Pinouts, and Specs
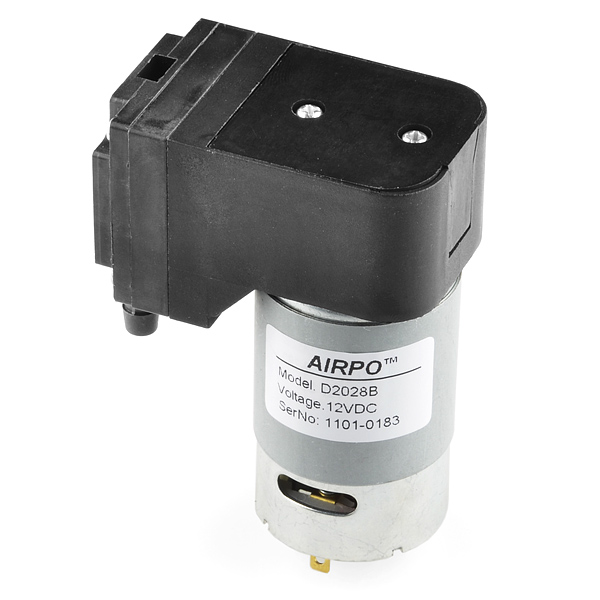
Image of Vacuum Pump - 12V
Cirkit Designer LogoDesign with Vacuum Pump - 12V in Cirkit Designer

Introduction

The Vacuum Pump - 12V (part ID: ROB-10398) is a compact and versatile component designed to create a vacuum by removing air from a specific area or container. This pump operates on a 12V DC supply, making it suitable for a wide range of applications including HVAC systems, laboratory equipment, automotive systems, and robotics. Its portability and ease of use make it a popular choice for hobbyists and professionals alike.

Explore Projects Built with Vacuum Pump - 12V
Use Cirkit Designer to design, explore, and prototype these projects online. Some projects support real-time simulation. Click "Open Project" to start designing instantly!
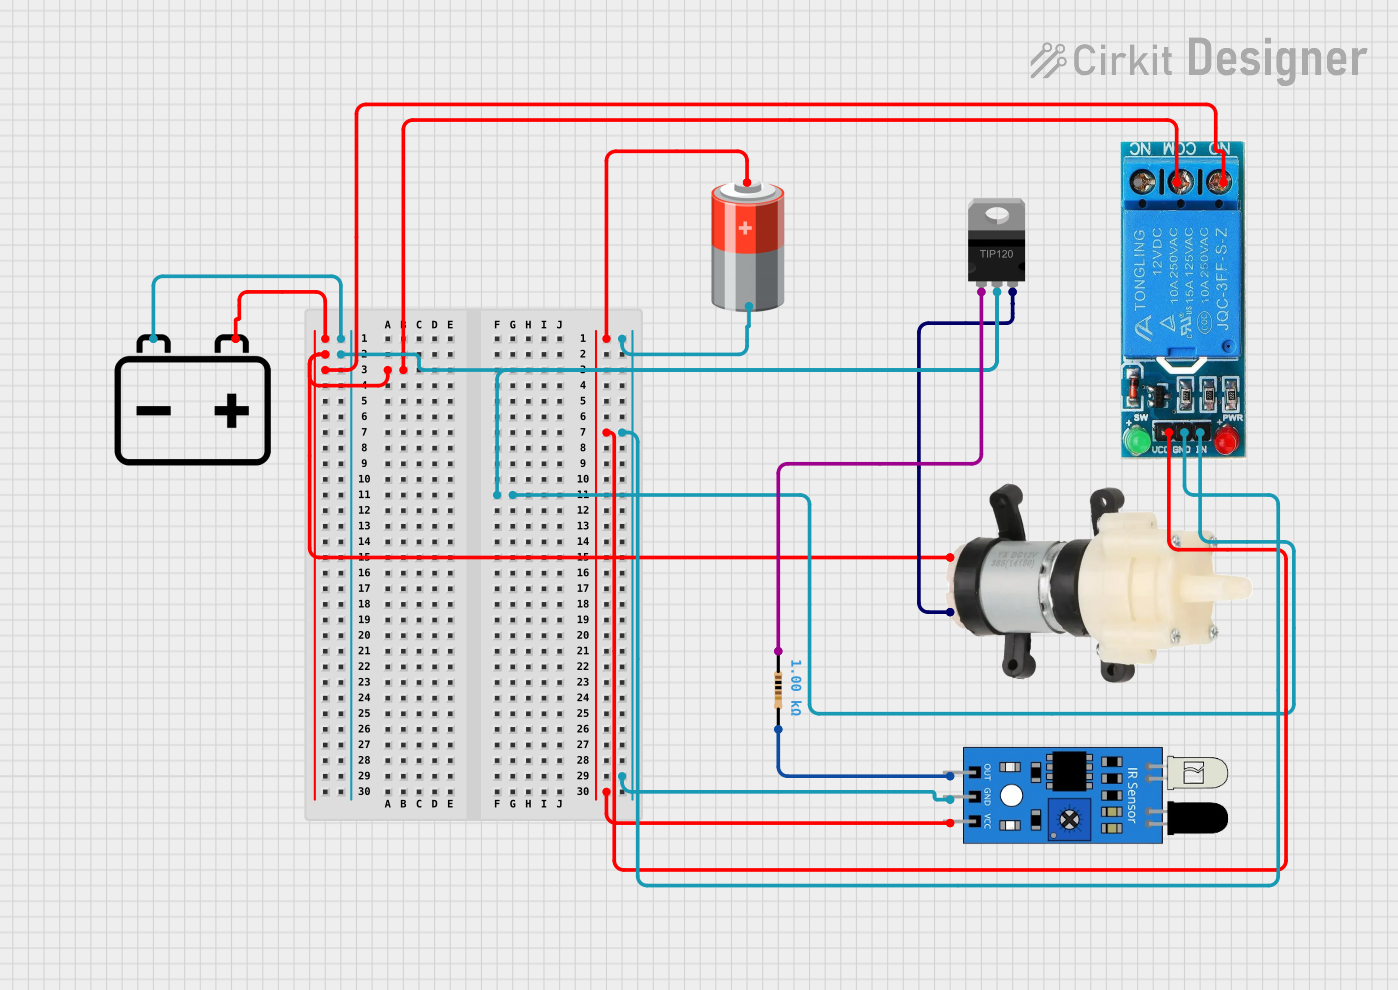
IR Sensor-Controlled Water Pump System
Image of Water Dispenser : A project utilizing Vacuum Pump - 12V in a practical application
This circuit is designed to automatically control a mini diaphragm water pump using an IR sensor. When the IR sensor detects the presence of an object, it activates the pump via a TIP120 transistor and a 12V relay. The system is powered by separate 12V and 5V batteries for the pump and sensor, respectively.
Cirkit Designer LogoOpen Project in Cirkit Designer
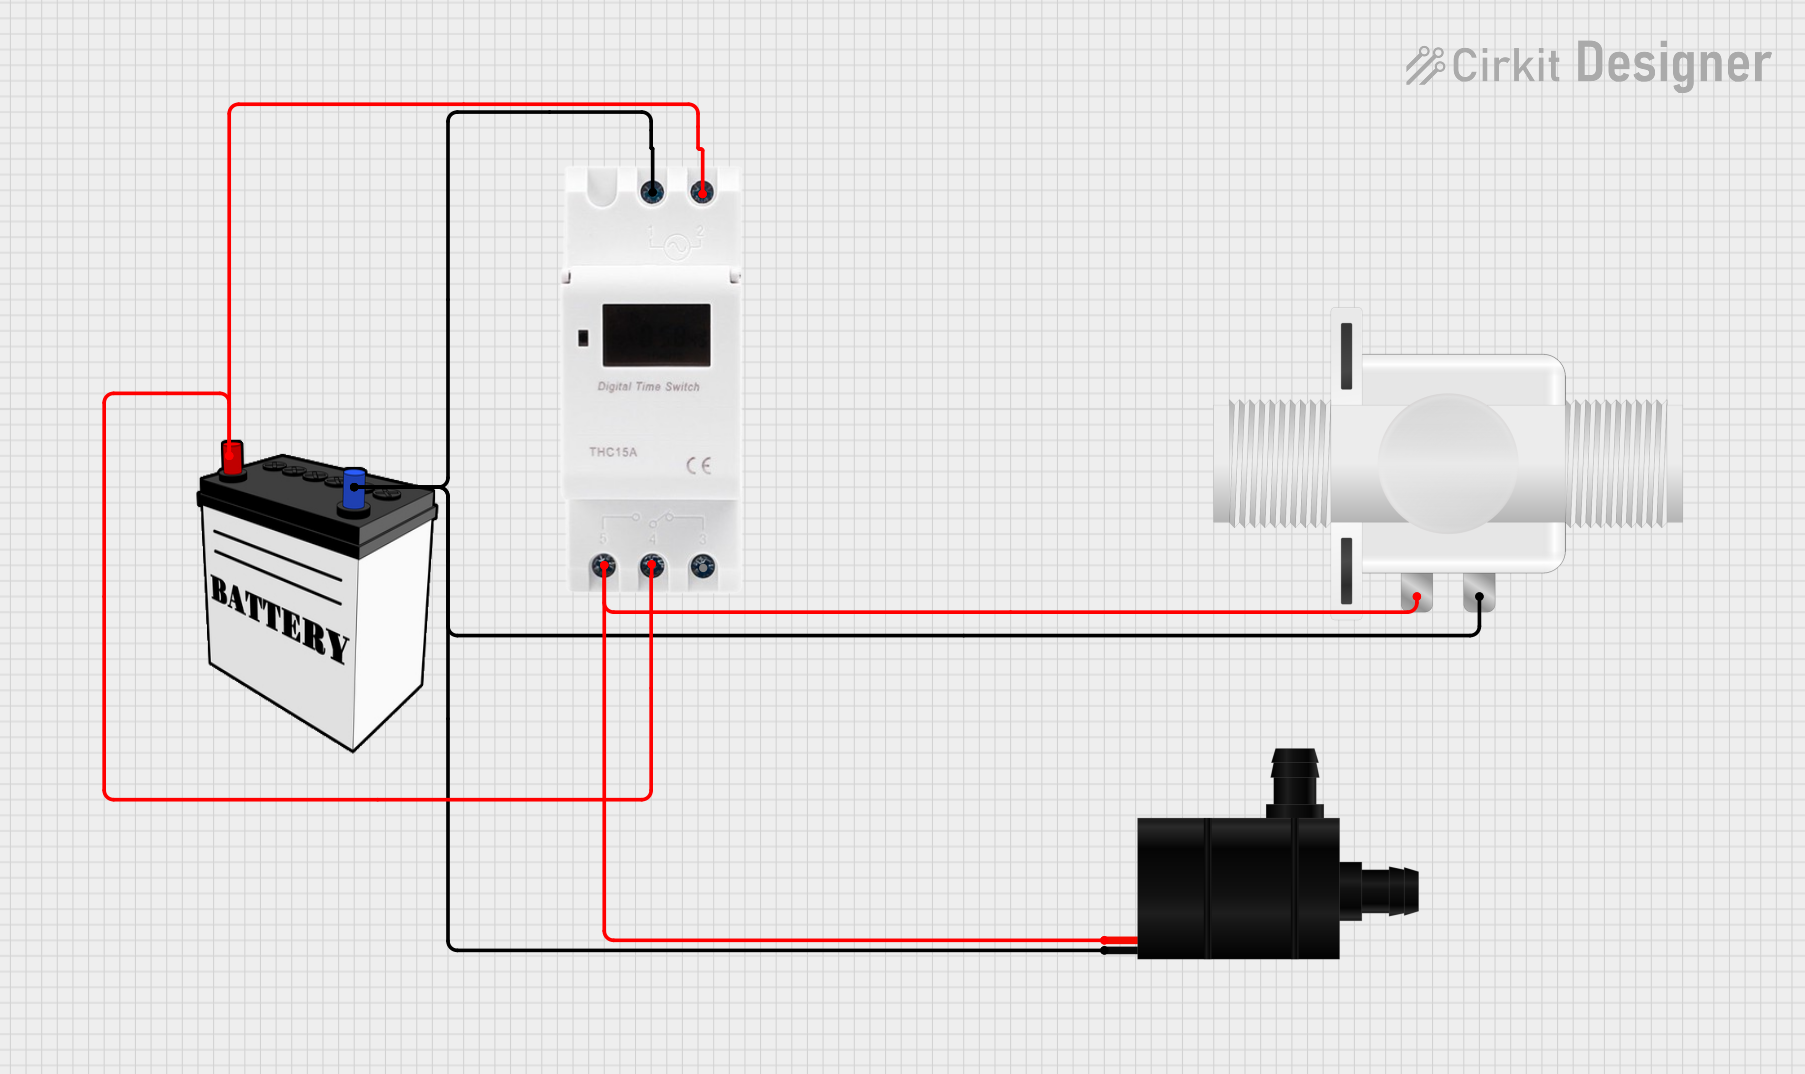
12V Battery-Powered Water Pump and Solenoid Valve Control Circuit with Timer Switch
Image of para sa tangkal: A project utilizing Vacuum Pump - 12V in a practical application
This circuit consists of a water pump and a plastic solenoid valve, both of which are controlled by a timer switch. The timer switch is powered by a 12V battery and is responsible for providing power to the pump and valve at timed intervals. There is no microcontroller code involved, indicating that the timing functions are likely handled by the timer switch hardware.
Cirkit Designer LogoOpen Project in Cirkit Designer
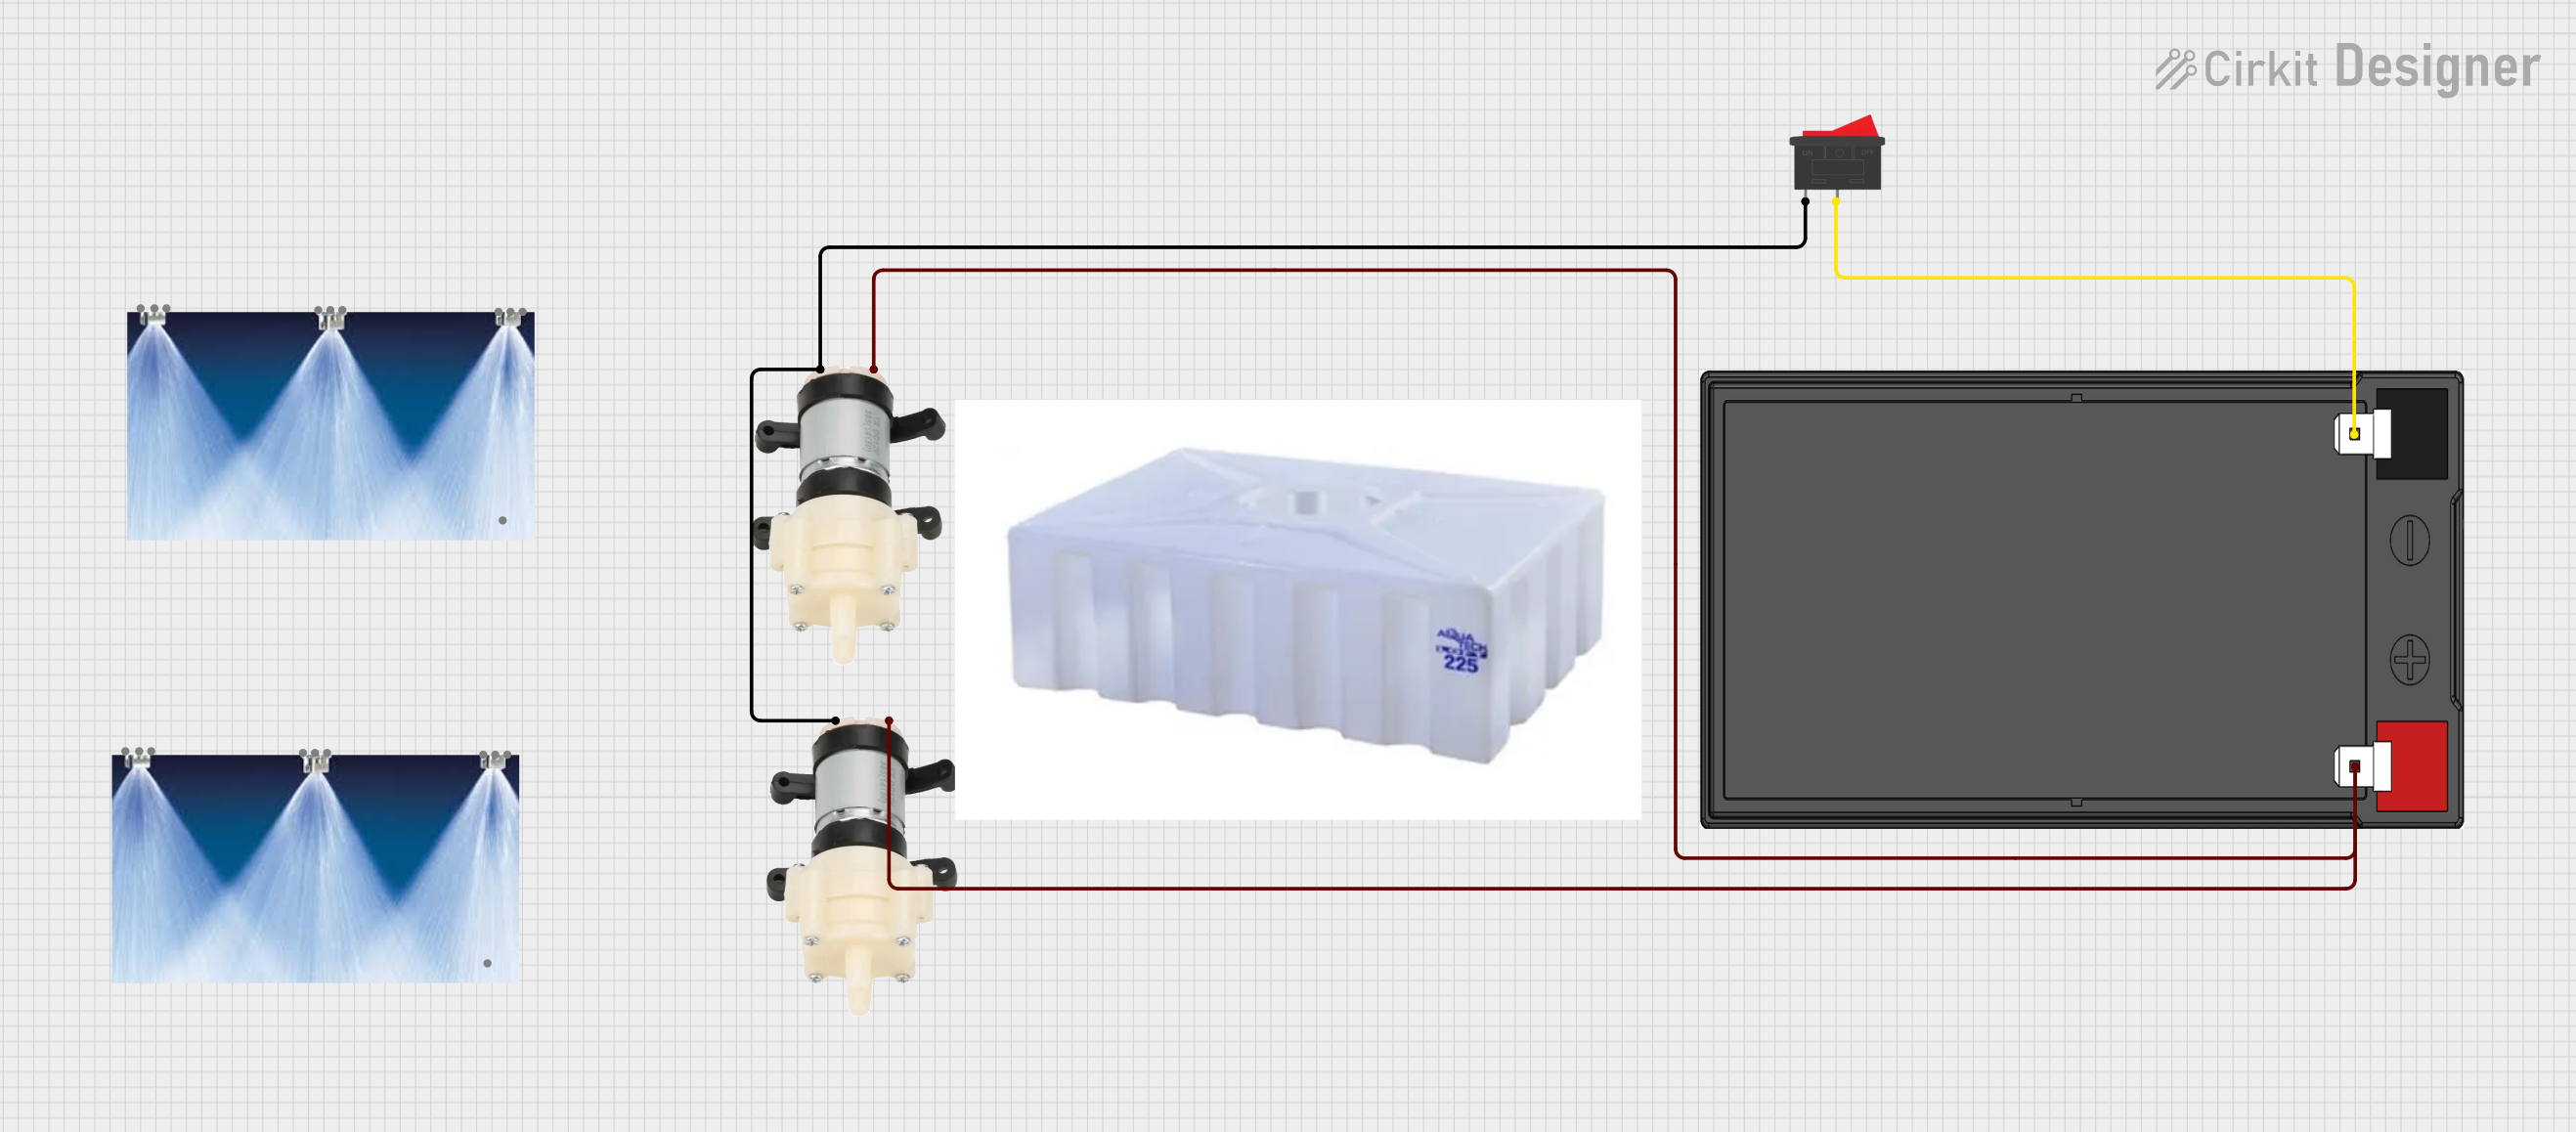
Dual Mini Diaphragm Water Pump System with Rocker Switch Control
Image of water pump: A project utilizing Vacuum Pump - 12V in a practical application
This circuit consists of two Mini Diaphragm Water Pumps connected in parallel to a 12v 7ah Battery through a Rocker Switch. The switch controls the power supply to both pumps, allowing them to be turned on or off simultaneously. The circuit is designed to pump water from a tank through nozzles when activated.
Cirkit Designer LogoOpen Project in Cirkit Designer
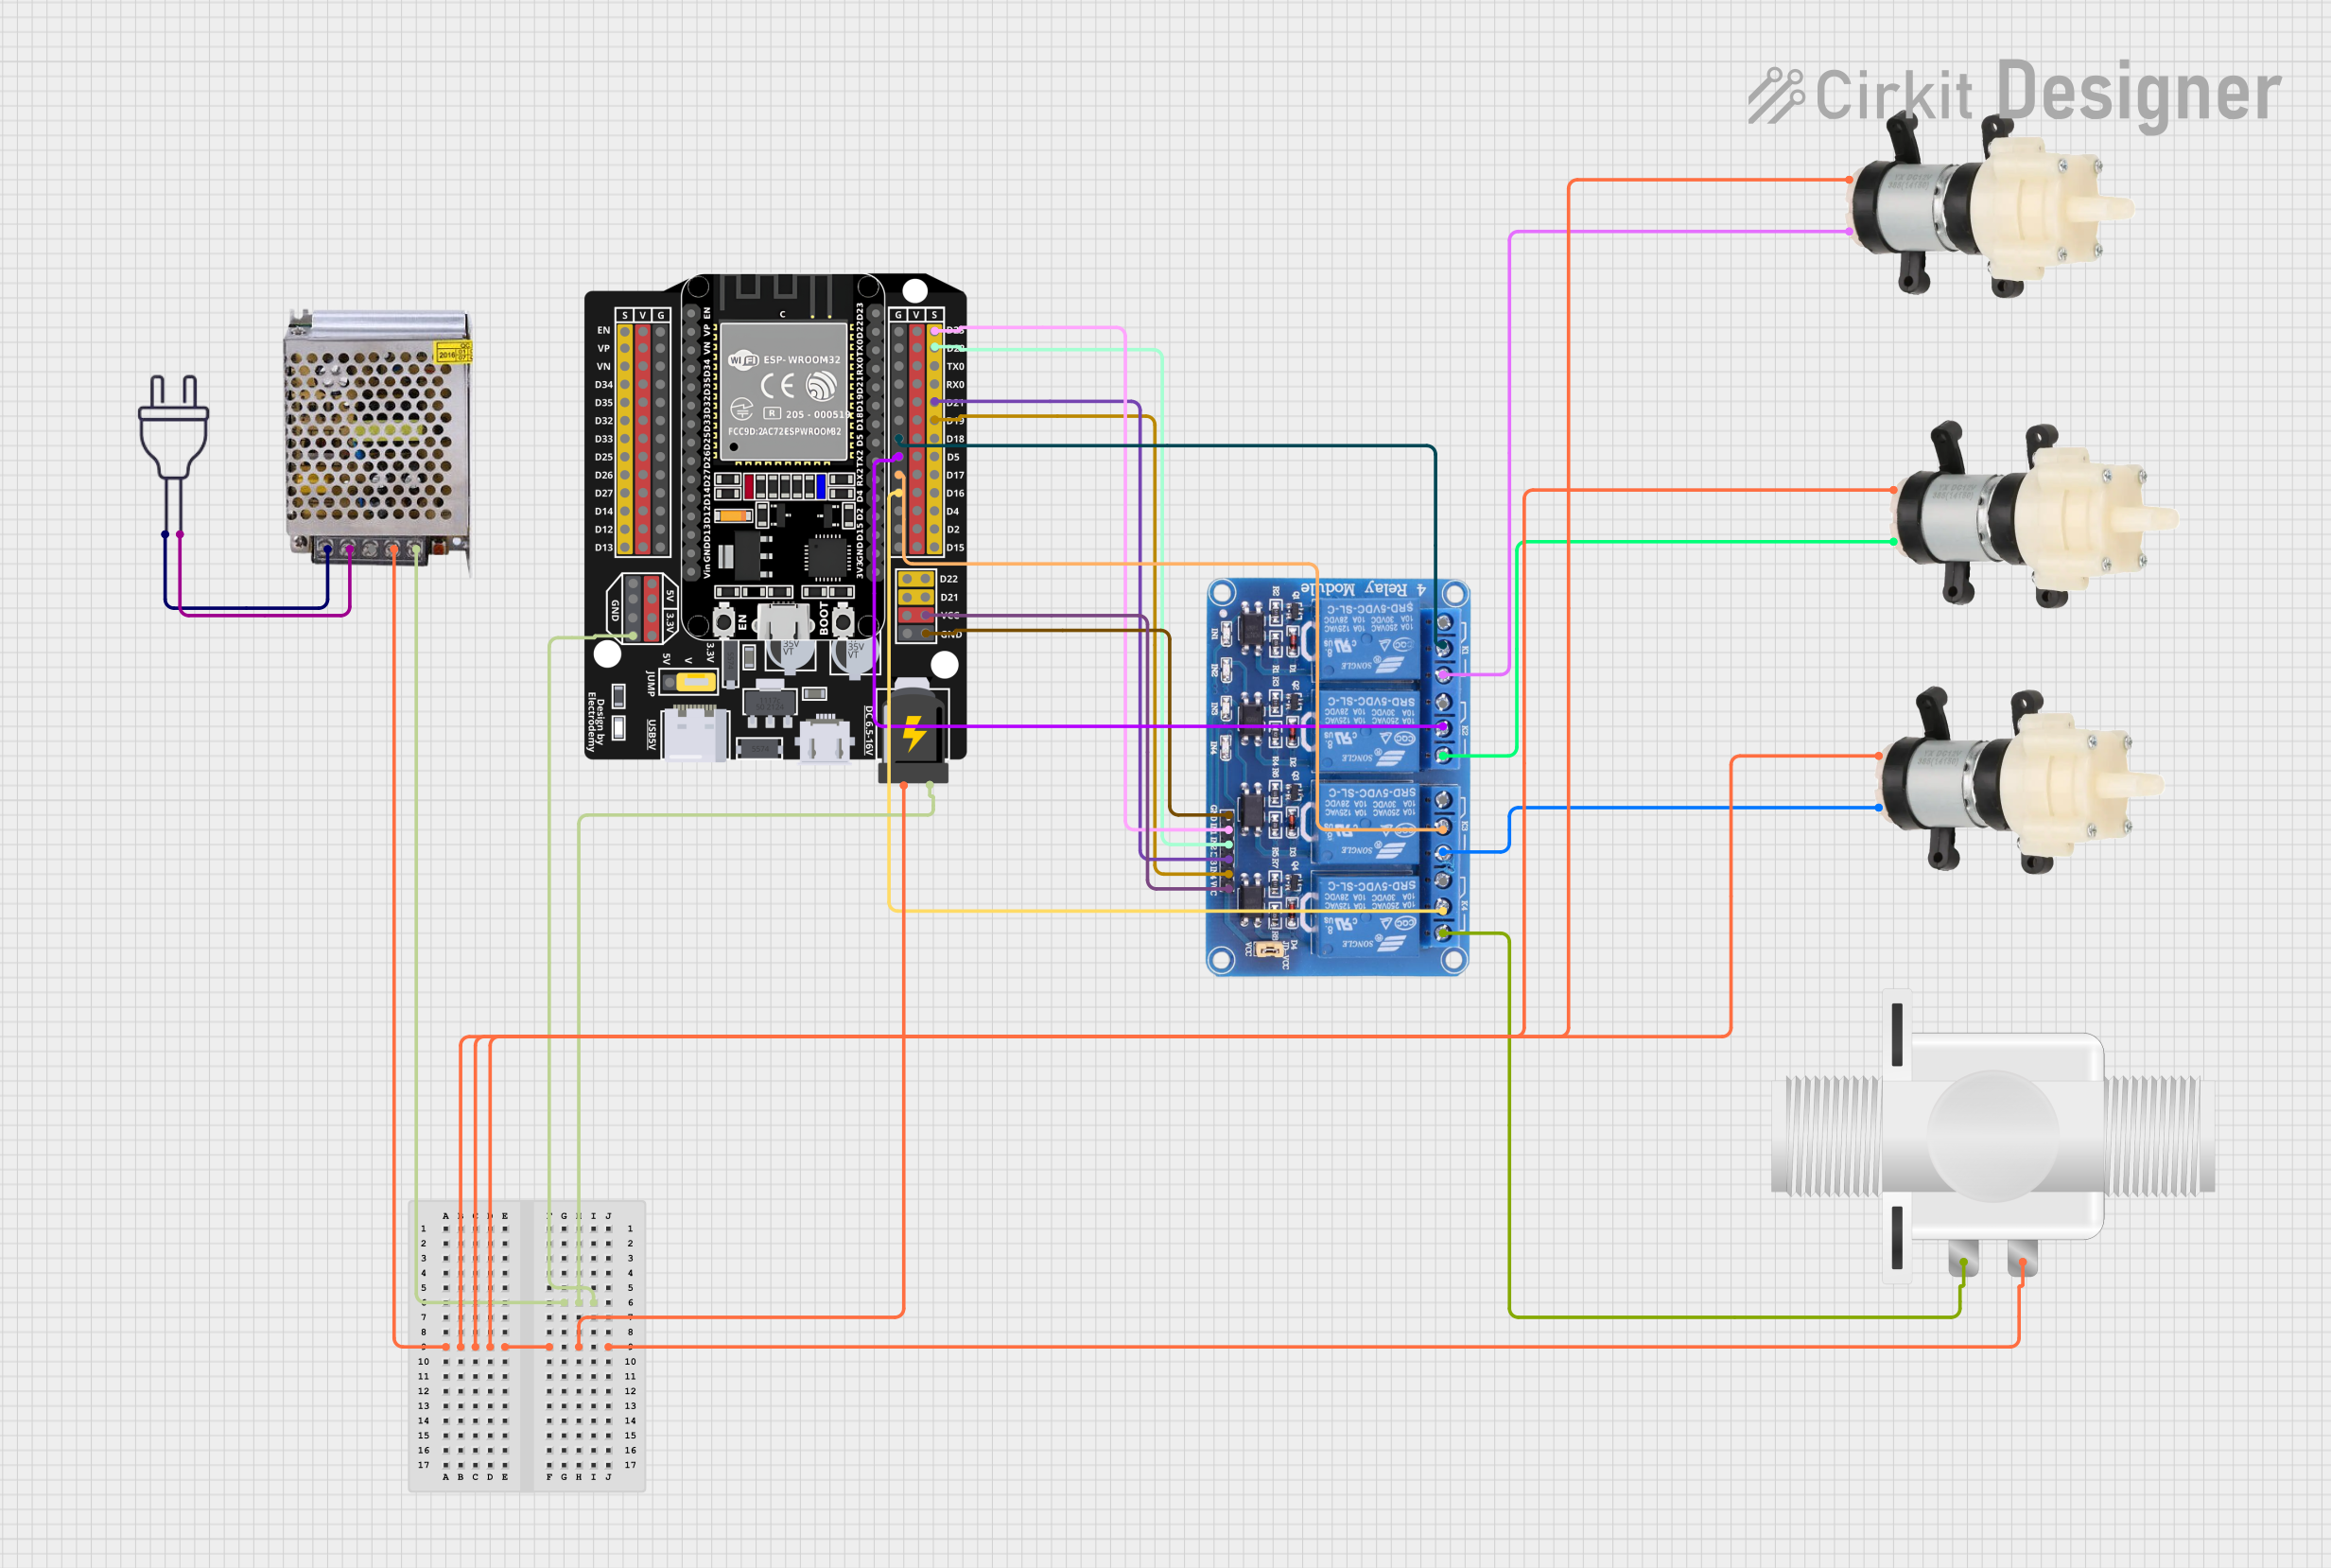
ESP32-Controlled Water Pump and Solenoid Valve System
Image of fertilizer mixer: A project utilizing Vacuum Pump - 12V in a practical application
This circuit is designed to control multiple Mini Diaphragm Water Pumps and a Plastic Solenoid Valve using an ESP32 microcontroller and a 4-channel relay module. The ESP32 is powered by a 12V power supply, and it can switch the relays to turn the pumps and the valve on or off. The power supply also provides 220V AC to 12V DC conversion for the system.
Cirkit Designer LogoOpen Project in Cirkit Designer

Explore Projects Built with Vacuum Pump - 12V

Use Cirkit Designer to design, explore, and prototype these projects online. Some projects support real-time simulation. Click "Open Project" to start designing instantly!
Image of Water Dispenser : A project utilizing Vacuum Pump - 12V in a practical application
IR Sensor-Controlled Water Pump System
This circuit is designed to automatically control a mini diaphragm water pump using an IR sensor. When the IR sensor detects the presence of an object, it activates the pump via a TIP120 transistor and a 12V relay. The system is powered by separate 12V and 5V batteries for the pump and sensor, respectively.
Cirkit Designer LogoOpen Project in Cirkit Designer
Image of para sa tangkal: A project utilizing Vacuum Pump - 12V in a practical application
12V Battery-Powered Water Pump and Solenoid Valve Control Circuit with Timer Switch
This circuit consists of a water pump and a plastic solenoid valve, both of which are controlled by a timer switch. The timer switch is powered by a 12V battery and is responsible for providing power to the pump and valve at timed intervals. There is no microcontroller code involved, indicating that the timing functions are likely handled by the timer switch hardware.
Cirkit Designer LogoOpen Project in Cirkit Designer
Image of water pump: A project utilizing Vacuum Pump - 12V in a practical application
Dual Mini Diaphragm Water Pump System with Rocker Switch Control
This circuit consists of two Mini Diaphragm Water Pumps connected in parallel to a 12v 7ah Battery through a Rocker Switch. The switch controls the power supply to both pumps, allowing them to be turned on or off simultaneously. The circuit is designed to pump water from a tank through nozzles when activated.
Cirkit Designer LogoOpen Project in Cirkit Designer
Image of fertilizer mixer: A project utilizing Vacuum Pump - 12V in a practical application
ESP32-Controlled Water Pump and Solenoid Valve System
This circuit is designed to control multiple Mini Diaphragm Water Pumps and a Plastic Solenoid Valve using an ESP32 microcontroller and a 4-channel relay module. The ESP32 is powered by a 12V power supply, and it can switch the relays to turn the pumps and the valve on or off. The power supply also provides 220V AC to 12V DC conversion for the system.
Cirkit Designer LogoOpen Project in Cirkit Designer

Technical Specifications

General Specifications:

  • Operating Voltage: 12V DC
  • Current Consumption: 400-600 mA (idle), up to 1A (under load)
  • Vacuum Pressure: Up to 15 inHg
  • Airflow: 13 L/min
  • Operating Temperature: -5°C to 50°C
  • Life Expectancy: 500 hours continuous use

Pin Configuration and Descriptions:

Pin Number Description Notes
1 Positive Supply (V+) Connect to 12V DC power source
2 Ground (GND) Connect to system ground

Usage Instructions

Integration into a Circuit:

  1. Power Supply: Ensure that the vacuum pump is connected to a 12V DC power supply capable of delivering sufficient current (up to 1A under load).
  2. Polarity: Observe correct polarity when connecting the pump to the power source. The positive lead should be connected to the V+ pin and the negative lead to the GND pin.
  3. Switching: Use a relay or an appropriate transistor to switch the pump on and off. This will allow for control via a microcontroller such as an Arduino UNO.
  4. Protection: Incorporate a diode across the pump terminals to protect against voltage spikes when the pump is turned off (flyback diode).

Best Practices:

  • Avoid running the pump continuously at high loads for extended periods to prevent overheating and to prolong its lifespan.
  • Ensure that the pump is securely mounted to minimize vibrations and noise.
  • Use appropriate tubing and fittings to ensure a good seal and to maintain the vacuum pressure.

Example Arduino Code

// Control a 12V Vacuum Pump with an Arduino UNO

const int pumpRelayPin = 2; // Relay connected to digital pin 2

void setup() {
  pinMode(pumpRelayPin, OUTPUT); // Set the relay pin as an output
}

void loop() {
  digitalWrite(pumpRelayPin, HIGH); // Turn on the vacuum pump
  delay(10000); // Keep the pump on for 10 seconds
  digitalWrite(pumpRelayPin, LOW); // Turn off the vacuum pump
  delay(20000); // Wait for 20 seconds before the next cycle
}

Troubleshooting and FAQs

Common Issues:

  • Pump does not start: Check the power supply and connections. Ensure the pump is receiving 12V and that the current rating is adequate.
  • Insufficient vacuum pressure: Verify that all connections are airtight. Check for leaks in the system.
  • Pump overheats: Reduce the duty cycle or provide additional cooling.

FAQs:

Q: Can I run the pump continuously? A: The pump is designed for intermittent use. Continuous operation at high loads may reduce its lifespan.

Q: What should I do if the pump is noisy? A: Ensure that the pump is securely mounted. Check for loose parts or obstructions in the pump.

Q: How do I control the vacuum pressure? A: The vacuum pressure can be controlled by modulating the power supply or by using a vacuum regulator in the system.

For further assistance, please refer to the manufacturer's datasheet or contact technical support.