How to Use blueIOT RevB: Examples, Pinouts, and Specs
Introduction
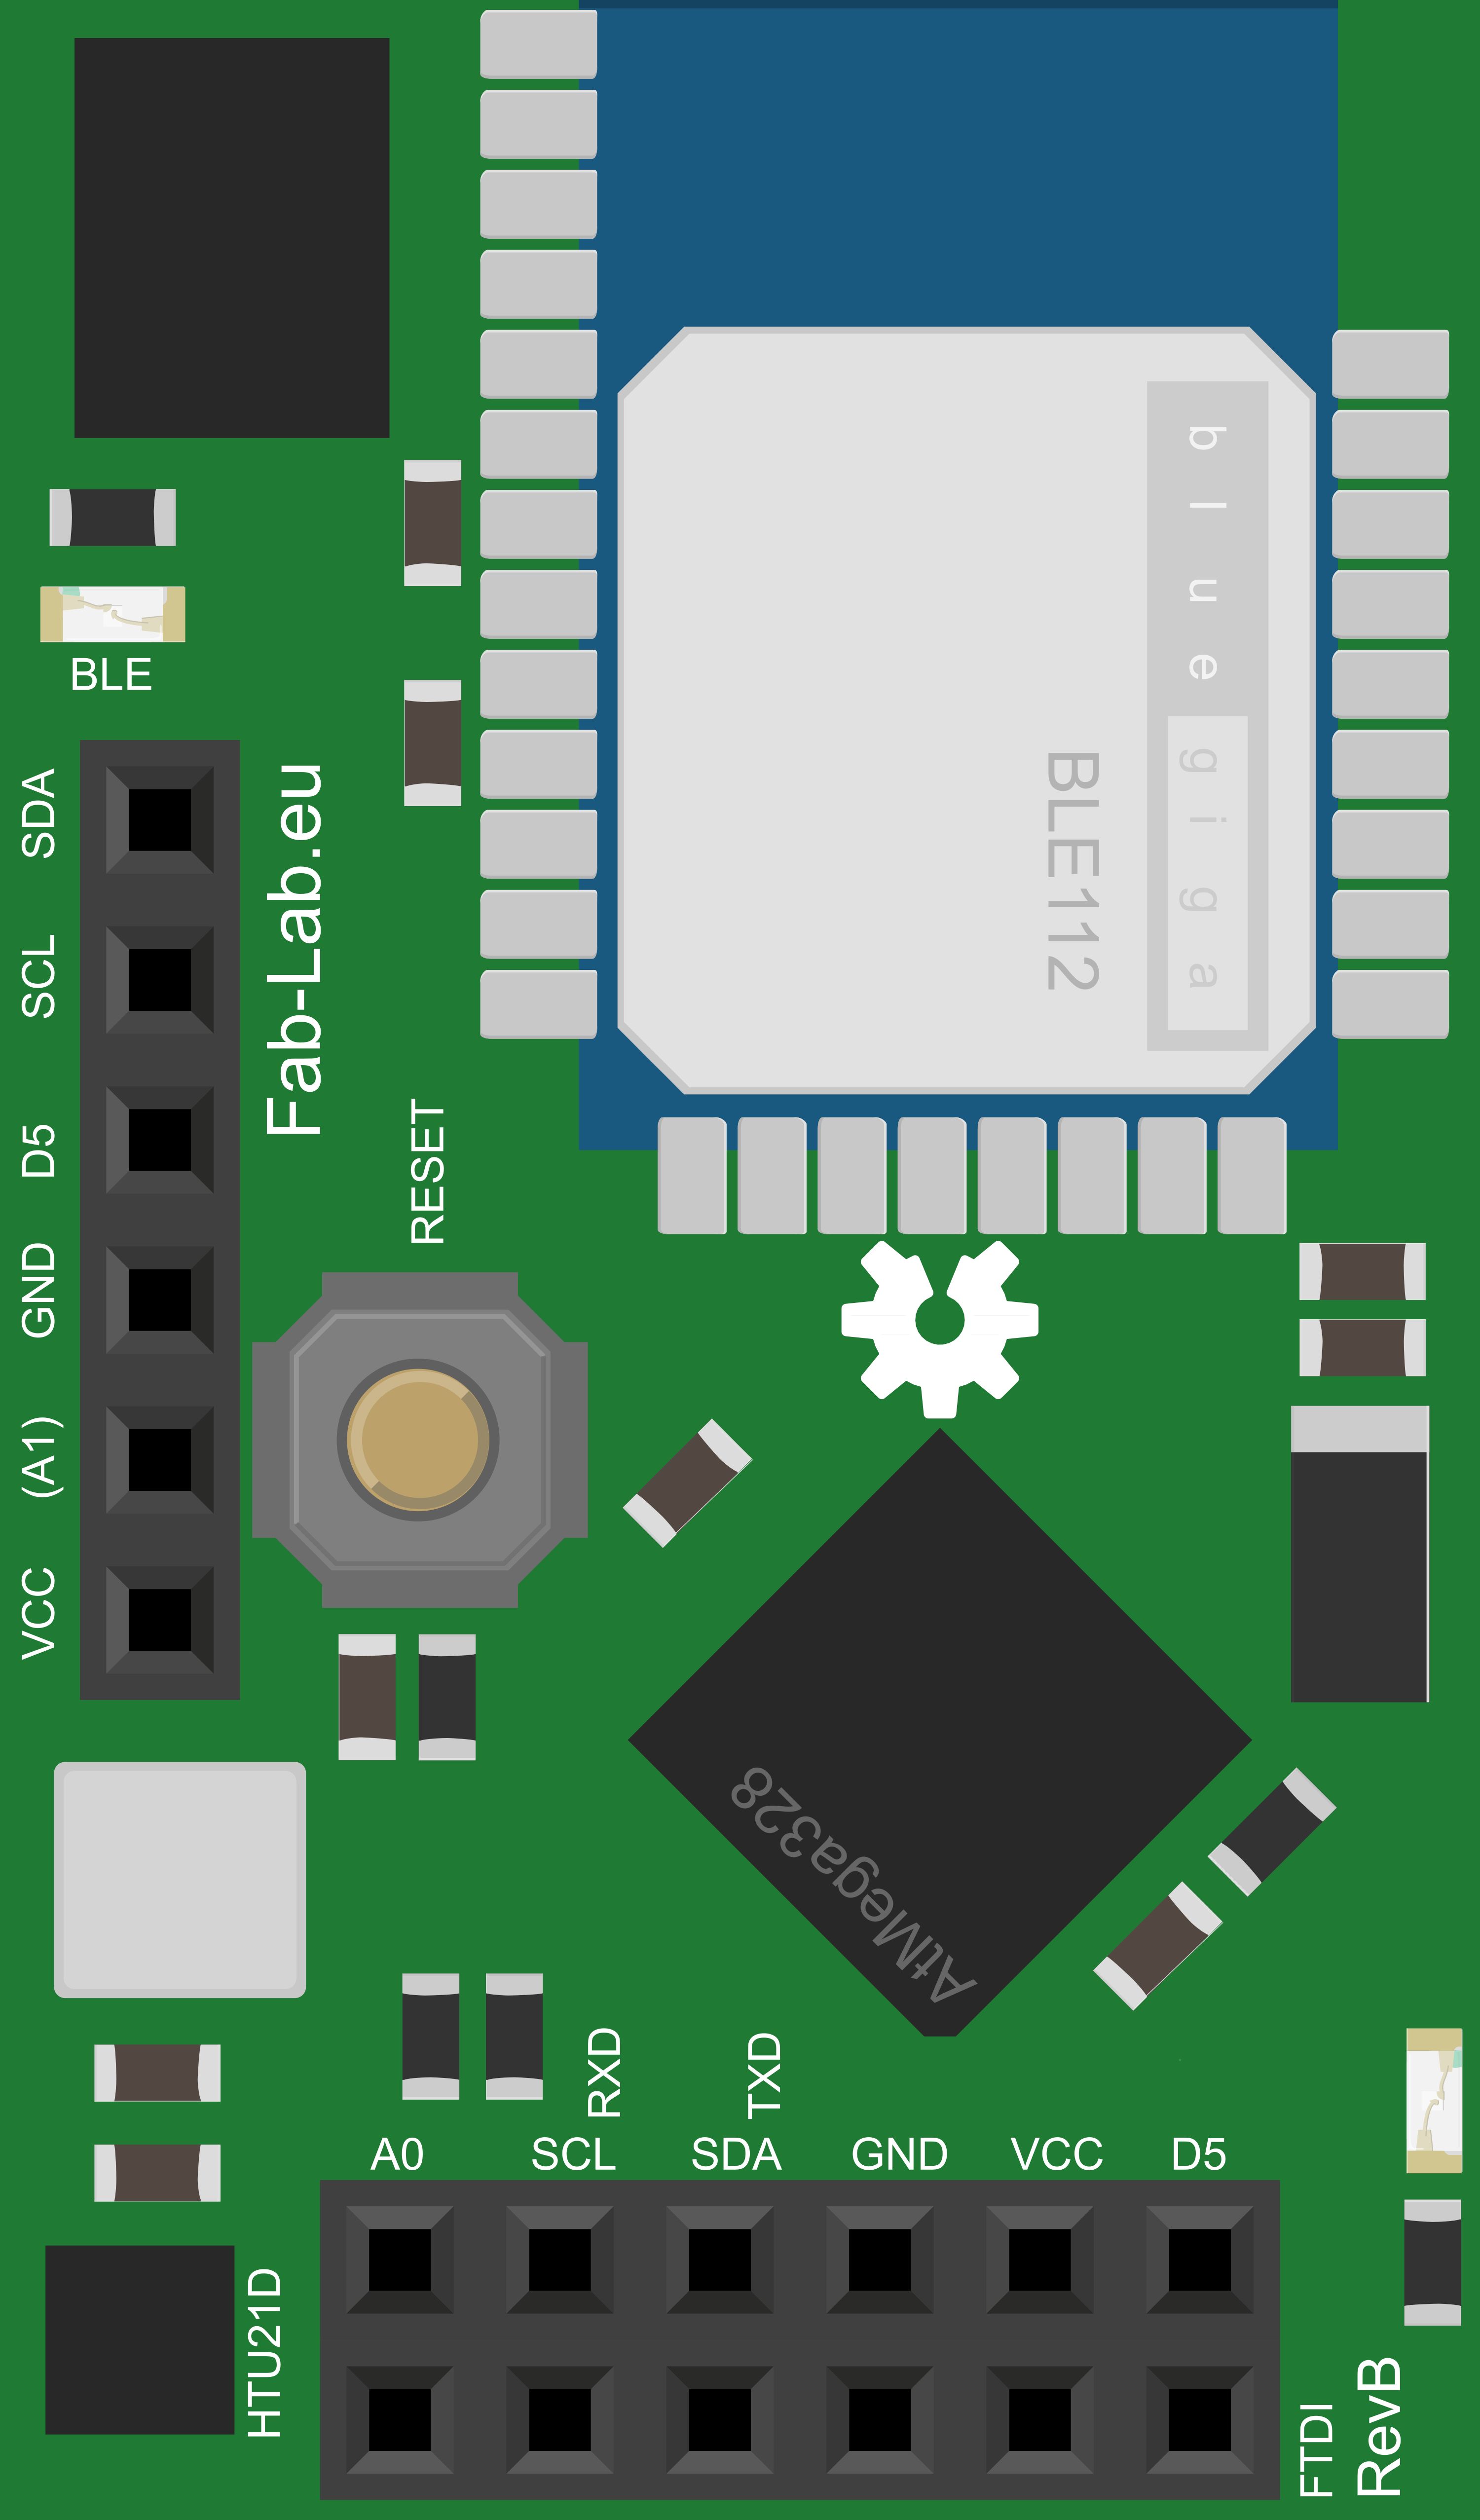
The blueIOT RevB is a versatile Internet of Things (IoT) development board that integrates the power of the ATmega32U4 microcontroller with Wi-Fi and Bluetooth connectivity. This board is designed for hobbyists, educators, and professionals who are looking to develop IoT applications with ease. The blueIOT RevB is suitable for a wide range of applications, including home automation, sensor networks, and wireless control systems.
Explore Projects Built with blueIOT RevB
Explore Projects Built with blueIOT RevB
Technical Specifications
Key Technical Details
- Microcontroller: ATmega32U4
- Operating Voltage: 5V
- Input Voltage (recommended): 7-12V
- Input Voltage (limits): 6-20V
- Digital I/O Pins: 20
- PWM Channels: 7
- Analog Input Channels: 12
- DC Current per I/O Pin: 40 mA
- DC Current for 3.3V Pin: 50 mA
- Flash Memory: 32 KB (ATmega32U4) of which 4 KB used by bootloader
- SRAM: 2.5 KB (ATmega32U4)
- EEPROM: 1 KB (ATmega32U4)
- Clock Speed: 16 MHz
- Wi-Fi: Built-in
- Bluetooth: Built-in
Pin Configuration and Descriptions
| Pin Number | Function | Description |
|---|---|---|
| 1 | TXD | Digital pin for UART transmission |
| 2 | RXD | Digital pin for UART reception |
| 3-7 | D2-D6 | General purpose digital I/O pins |
| 8 | D7 (PWM) | PWM output / digital I/O pin |
| 9-10 | D8-D9 (PWM) | PWM outputs / digital I/O pins |
| 11-16 | D10-D15 (PWM) | PWM outputs / digital I/O pins |
| 17-18 | SDA/SCL | I2C data & clock lines |
| 19-20 | A0-A1 | Analog input or digital I/O pins |
| 21-26 | A2-A7 | Analog inputs |
| 27 | AREF | Analog reference voltage |
| 28 | GND | Ground |
| 29 | RESET | Reset pin |
| 30 | 3V3 | 3.3V output (regulated) |
| 31 | 5V | 5V output (input voltage or USB connection) |
| 32 | VIN | Input voltage to the board |
Usage Instructions
Integrating blueIOT RevB into a Circuit
- Powering the Board: Connect a power supply to the VIN pin (6-20V) or plug the board into a USB port for power.
- Programming: Use the micro USB port to connect the board to a computer for programming.
- Digital I/O: Utilize the digital pins (D2-D15) for input or output functions. Remember to set the pin mode in your code.
- Analog Input: Connect sensors to the analog pins (A0-A7) to read varying voltages.
- PWM Output: Use PWM capable pins (D3, D5, D6, D9, D10, D11, D13) to control devices like LED brightness or motor speed.
- Serial Communication: Employ TXD and RXD for UART communication.
- I2C Communication: Connect I2C devices to SDA and SCL pins.
Best Practices
- Always disconnect the board from power sources before making or altering connections.
- Use a current limiting resistor with LEDs to prevent damage.
- Avoid supplying voltage higher than the pin's limit to prevent damage to the board.
- Ensure that the board's ground is connected to the ground of other components in the circuit.
Example Code for Arduino UNO
// This example code is designed to quickly deploy a Wi-Fi connection.
#include <SPI.h>
#include <WiFiNINA.h>

char ssid[] = "yourNetwork"; // your network SSID (name)
char pass[] = "secretPassword"; // your network password
int status = WL_IDLE_STATUS; // the Wi-Fi radio's status

void setup() {
  // Initialize serial and wait for the port to open:
  Serial.begin(9600);
  while (!Serial) {
    ; // wait for serial port to connect. Needed for native USB
  }

  // Check for the presence of the shield:
  if (WiFi.status() == WL_NO_SHIELD) {
    Serial.println("WiFi shield not present");
    // Don't continue if the shield is not present
    while (true);
  }

  // Attempt to connect to Wi-Fi network:
  while (status != WL_CONNECTED) {
    Serial.print("Attempting to connect to SSID: ");
    Serial.println(ssid);
    // Connect to WPA/WPA2 network:
    status = WiFi.begin(ssid, pass);
  }

  // You're connected now, so print out the status:
  printWifiStatus();
}

void loop() {
  // Do nothing here; we only want to connect to Wi-Fi in this example
}

void printWifiStatus() {
  // Print the SSID of the network you're attached to:
  Serial.print("SSID: ");
  Serial.println(WiFi.SSID());

  // Print your board's IP address:
  Serial.print("IP Address: ");
  Serial.println(WiFi.localIP());

  // Print the received signal strength:
  long rssi = WiFi.RSSI();
  Serial.print("Signal strength (RSSI):");
  Serial.print(rssi);
  Serial.println(" dBm");
}
Troubleshooting and FAQs
Common Issues
- Wi-Fi or Bluetooth not connecting: Ensure that the correct credentials and settings are used for the Wi-Fi network or Bluetooth device.
- Board not recognized by computer: Check the USB cable and drivers. Try a different USB port or cable.
- Unexpected behavior in circuits: Verify that all connections are correct and secure. Check for shorts or incorrect wiring.
Solutions and Tips
- Reset the board: If the board is not behaving as expected, press the reset button to restart the board.
- Update firmware: Ensure that the board's firmware is up to date for optimal performance.
- Serial Monitor: Use the Serial Monitor to debug and monitor the output from the board.
FAQs
Q: Can the blueIOT RevB be powered by a battery? A: Yes, it can be powered by a battery connected to the VIN pin, as long as the voltage is within the specified limits (6-20V).
Q: How do I update the Wi-Fi or Bluetooth firmware? A: Firmware updates can be done through the Arduino IDE, using specific update sketches provided by the manufacturer.
Q: What is the maximum range of the Bluetooth connection? A: The range of Bluetooth can vary depending on the environment, but typically it is around 10 meters (33 feet) without obstructions.
Q: Can I use the blueIOT RevB with the Arduino IDE? A: Yes, the blueIOT RevB is compatible with the Arduino IDE, and you can program it using the same methods as other Arduino boards.