How to Use TEA5767 module: Examples, Pinouts, and Specs
Introduction
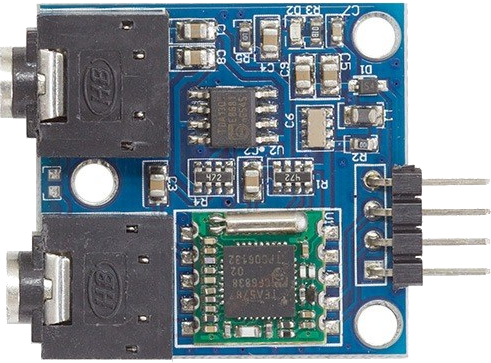
The TEA5767 module is a digital FM radio receiver designed for the reception of FM radio signals. It operates via an I2C interface, enabling seamless communication with microcontrollers such as Arduino, Raspberry Pi, and other embedded systems. The module supports a wide range of FM frequencies, making it suitable for various audio and radio-based projects.
Explore Projects Built with TEA5767 module
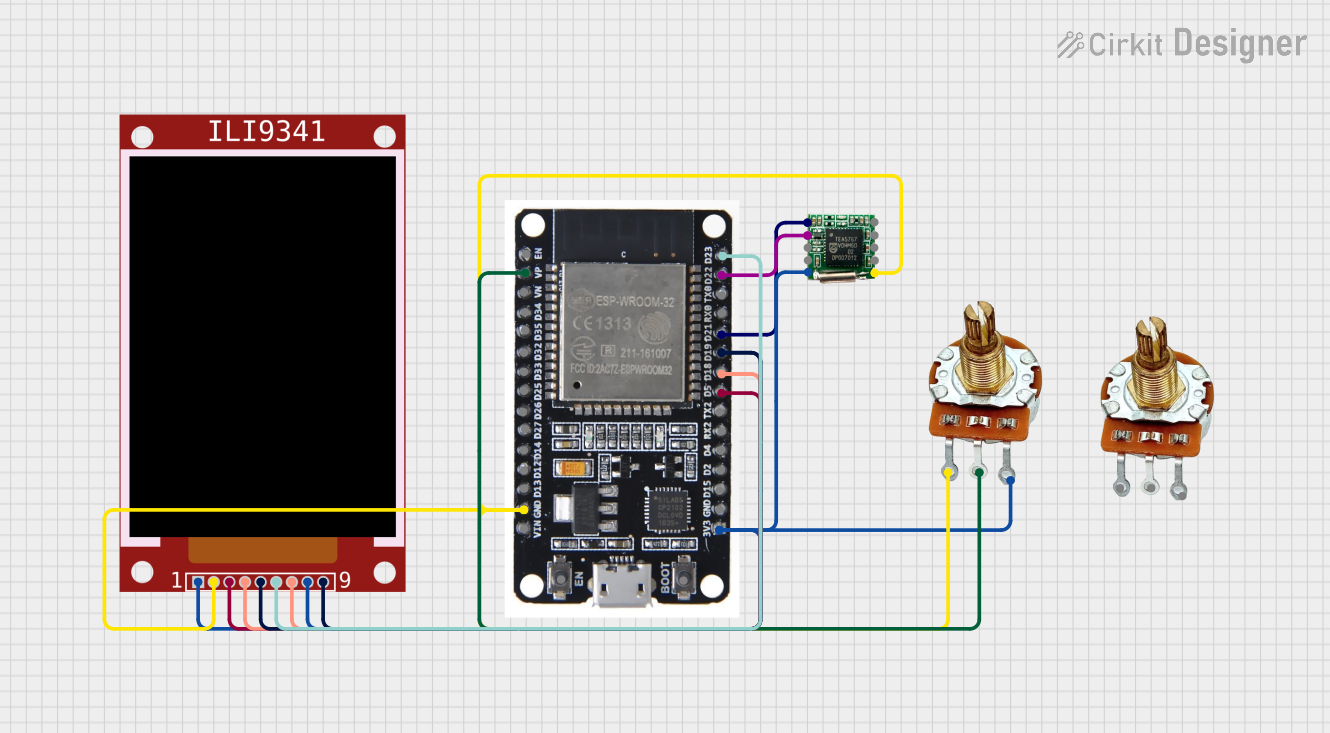


Explore Projects Built with TEA5767 module
Common Applications and Use Cases
- DIY FM radio receivers
- Audio systems with FM functionality
- Embedded systems requiring radio signal reception
- Educational projects for learning about radio communication
- Internet of Things (IoT) devices with FM radio features
Technical Specifications
The TEA5767 module is compact and efficient, with the following key specifications:
| Parameter | Value |
|---|---|
| Operating Voltage | 2.5V to 5V |
| Operating Current | ~10mA |
| Frequency Range | 76 MHz to 108 MHz |
| Interface | I2C (Inter-Integrated Circuit) |
| Audio Output | Stereo (Left and Right channels) |
| Sensitivity | ~2 µV for strong signal reception |
| Tuning Step | 50 kHz |
| Dimensions | ~20mm x 15mm |
Pin Configuration and Descriptions
The TEA5767 module typically has 8 pins. Below is the pinout and description:
| Pin | Name | Description |
|---|---|---|
| 1 | SDA | I2C Data Line: Used for communication with the microcontroller |
| 2 | SCL | I2C Clock Line: Synchronizes data transfer with the microcontroller |
| 3 | GND | Ground: Connect to the ground of the power supply |
| 4 | VCC | Power Supply: Connect to a 3.3V or 5V power source |
| 5 | LOUT | Left Audio Output: Connect to the left channel of an audio amplifier or speaker |
| 6 | ROUT | Right Audio Output: Connect to the right channel of an audio amplifier or speaker |
| 7 | ANT | Antenna Input: Connect an external antenna for better signal reception |
| 8 | NC | Not Connected: Leave this pin unconnected |
Usage Instructions
How to Use the TEA5767 Module in a Circuit
- Power the Module: Connect the
VCCpin to a 3.3V or 5V power source and theGNDpin to ground. - Connect the I2C Interface:
- Connect the
SDApin to the I2C data line of your microcontroller. - Connect the
SCLpin to the I2C clock line of your microcontroller.
- Connect the
- Attach an Antenna: For optimal signal reception, connect an external antenna to the
ANTpin. - Audio Output: Connect the
LOUTandROUTpins to an audio amplifier or directly to speakers. - Programming: Use an I2C library to communicate with the module and tune to desired FM frequencies.
Important Considerations and Best Practices
- Power Supply: Ensure the module is powered within its operating voltage range (2.5V to 5V). Exceeding this range may damage the module.
- Antenna: Use a proper antenna to improve signal reception, especially in areas with weak FM signals.
- I2C Pull-Up Resistors: If your microcontroller does not have built-in pull-up resistors on the I2C lines, add external resistors (4.7kΩ to 10kΩ) between
SDA/SCLandVCC. - Audio Amplification: The audio output from the module is low-power and may require an amplifier for driving speakers.
Example Code for Arduino UNO
Below is an example Arduino sketch to interface with the TEA5767 module and tune to a specific FM frequency:
#include <Wire.h> // Include the Wire library for I2C communication

#define TEA5767_ADDRESS 0x60 // I2C address of the TEA5767 module

void setup() {
  Wire.begin(); // Initialize I2C communication
  Serial.begin(9600); // Initialize serial communication for debugging
  tuneToFrequency(101.1); // Tune to 101.1 MHz
}

void loop() {
  // The module will continue to play the tuned frequency
  // Add additional functionality here if needed
}

void tuneToFrequency(float frequency) {
  uint8_t buffer[5];
  uint16_t frequencyB = (frequency * 1000000 + 225000) / 32768;
  // Convert frequency to binary format

  buffer[0] = (frequencyB >> 8) & 0x3F; // High byte of frequency
  buffer[1] = frequencyB & 0xFF;        // Low byte of frequency
  buffer[2] = 0xB0;                     // Set high side injection
  buffer[3] = 0x10;                     // Enable stereo
  buffer[4] = 0x00;                     // Reserved byte

  Wire.beginTransmission(TEA5767_ADDRESS); // Start I2C communication
  Wire.write(buffer, 5);                   // Send frequency data
  Wire.endTransmission();                  // End I2C communication
}
Notes on the Code
- Replace
101.1in thetuneToFrequencyfunction with your desired FM frequency. - Ensure the I2C connections (
SDAandSCL) are properly wired to the Arduino UNO.
Troubleshooting and FAQs
Common Issues and Solutions
No Audio Output:
- Ensure the
LOUTandROUTpins are connected to an amplifier or speakers. - Verify that the module is tuned to a valid FM frequency with a strong signal.
- Ensure the
Poor Signal Reception:
- Check the antenna connection and use a longer or higher-quality antenna.
- Ensure there is no significant interference from nearby electronic devices.
I2C Communication Failure:
- Verify the
SDAandSCLconnections to the microcontroller. - Check if pull-up resistors are required on the I2C lines.
- Verify the
Module Not Powering On:
- Confirm that the
VCCandGNDpins are correctly connected. - Ensure the power supply voltage is within the specified range (2.5V to 5V).
- Confirm that the
FAQs
Q: Can the TEA5767 module be used with a 3.3V microcontroller?
A: Yes, the module supports a wide operating voltage range (2.5V to 5V) and can work with both 3.3V and 5V systems.
Q: How do I improve audio quality?
A: Use a high-quality antenna and ensure the module is tuned to a strong FM signal. Additionally, use an audio amplifier for better sound output.
Q: Can I use the TEA5767 module without an external antenna?
A: While it is possible, the signal reception may be weak. An external antenna is recommended for optimal performance.
Q: What is the maximum distance for I2C communication?
A: The I2C bus is typically reliable for short distances (up to 1 meter). For longer distances, consider using I2C extenders or repeaters.