How to Use Soil Moisture Sensor: Examples, Pinouts, and Specs
Introduction
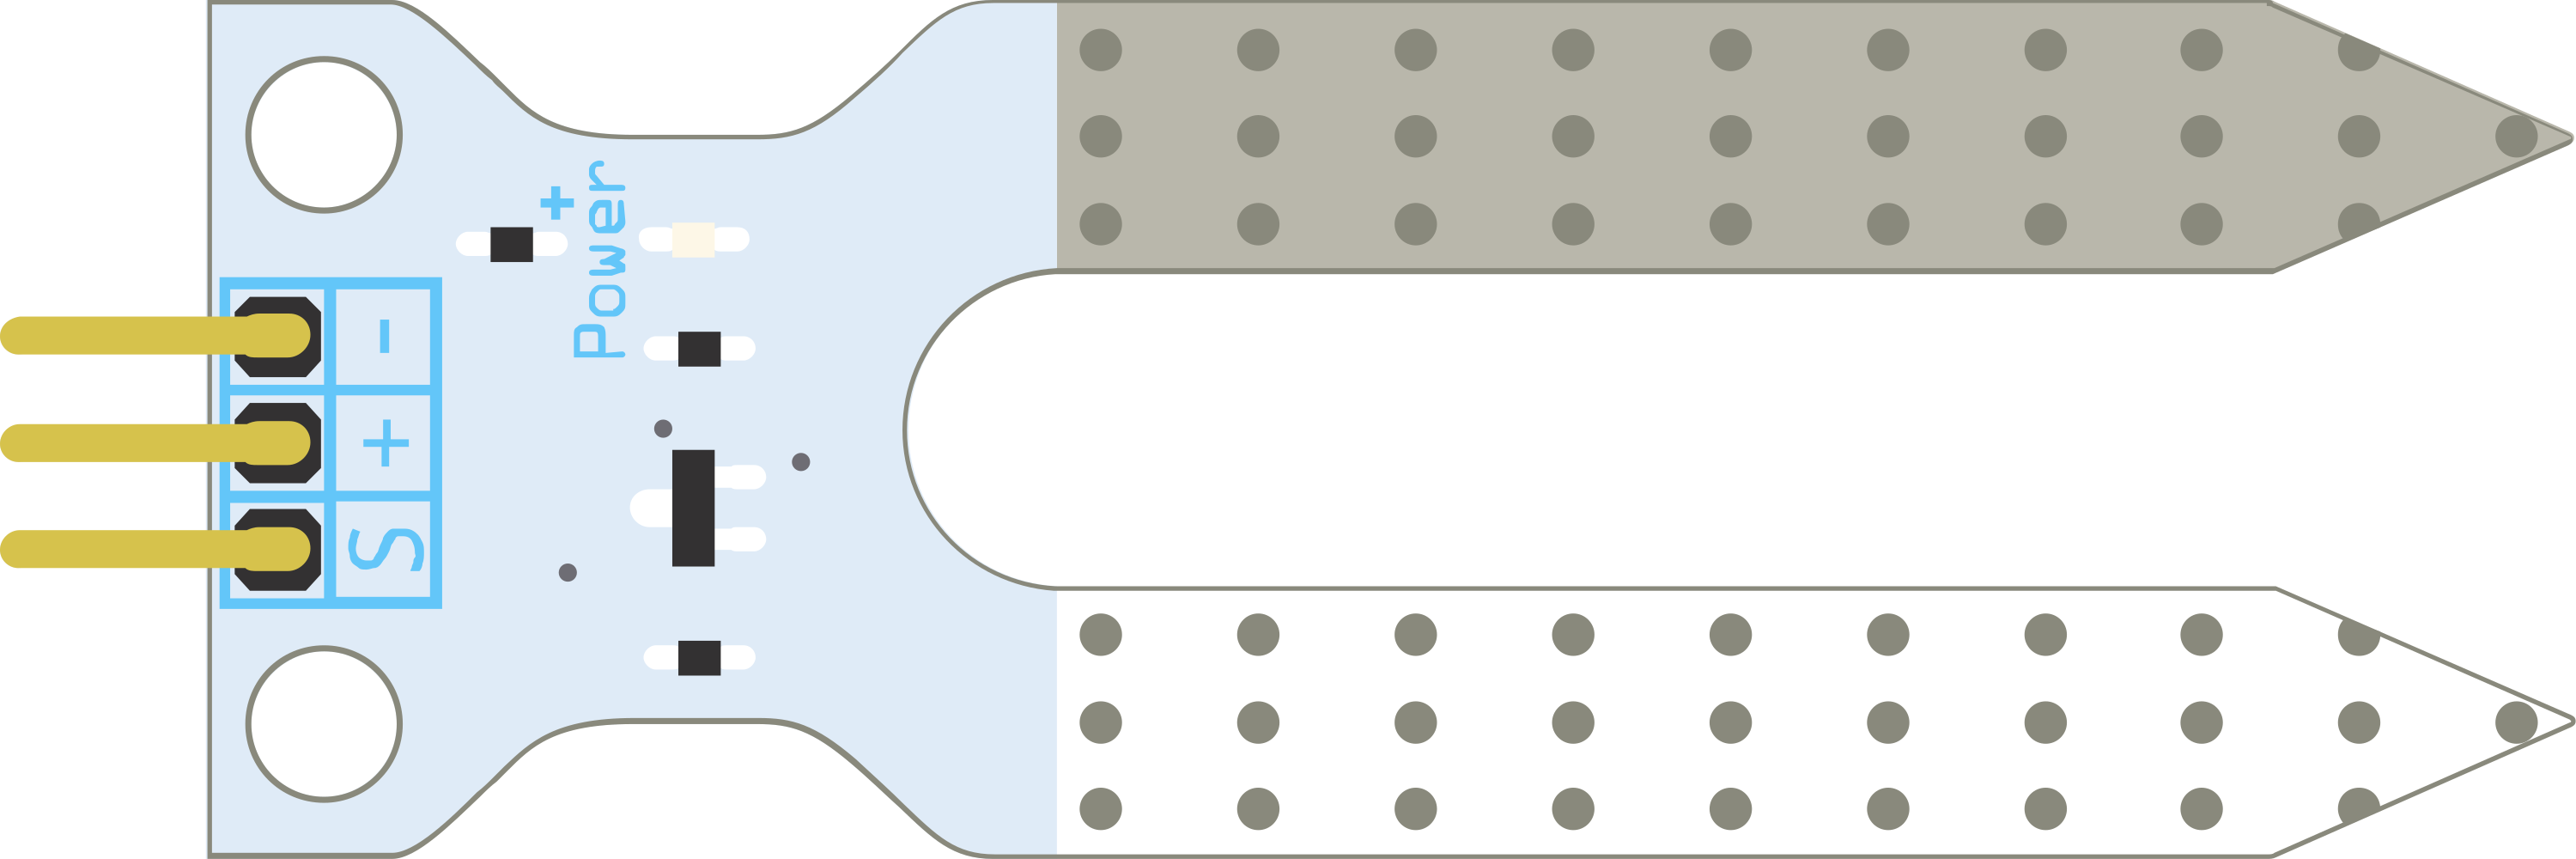
The Soil Moisture Sensor is an electronic device designed to measure the moisture content in soil, providing valuable data for agricultural applications, gardening, and environmental monitoring. By detecting the conductivity between two probes, the sensor can infer the level of moisture present, as water conducts electricity more effectively than dry soil.
Explore Projects Built with Soil Moisture Sensor
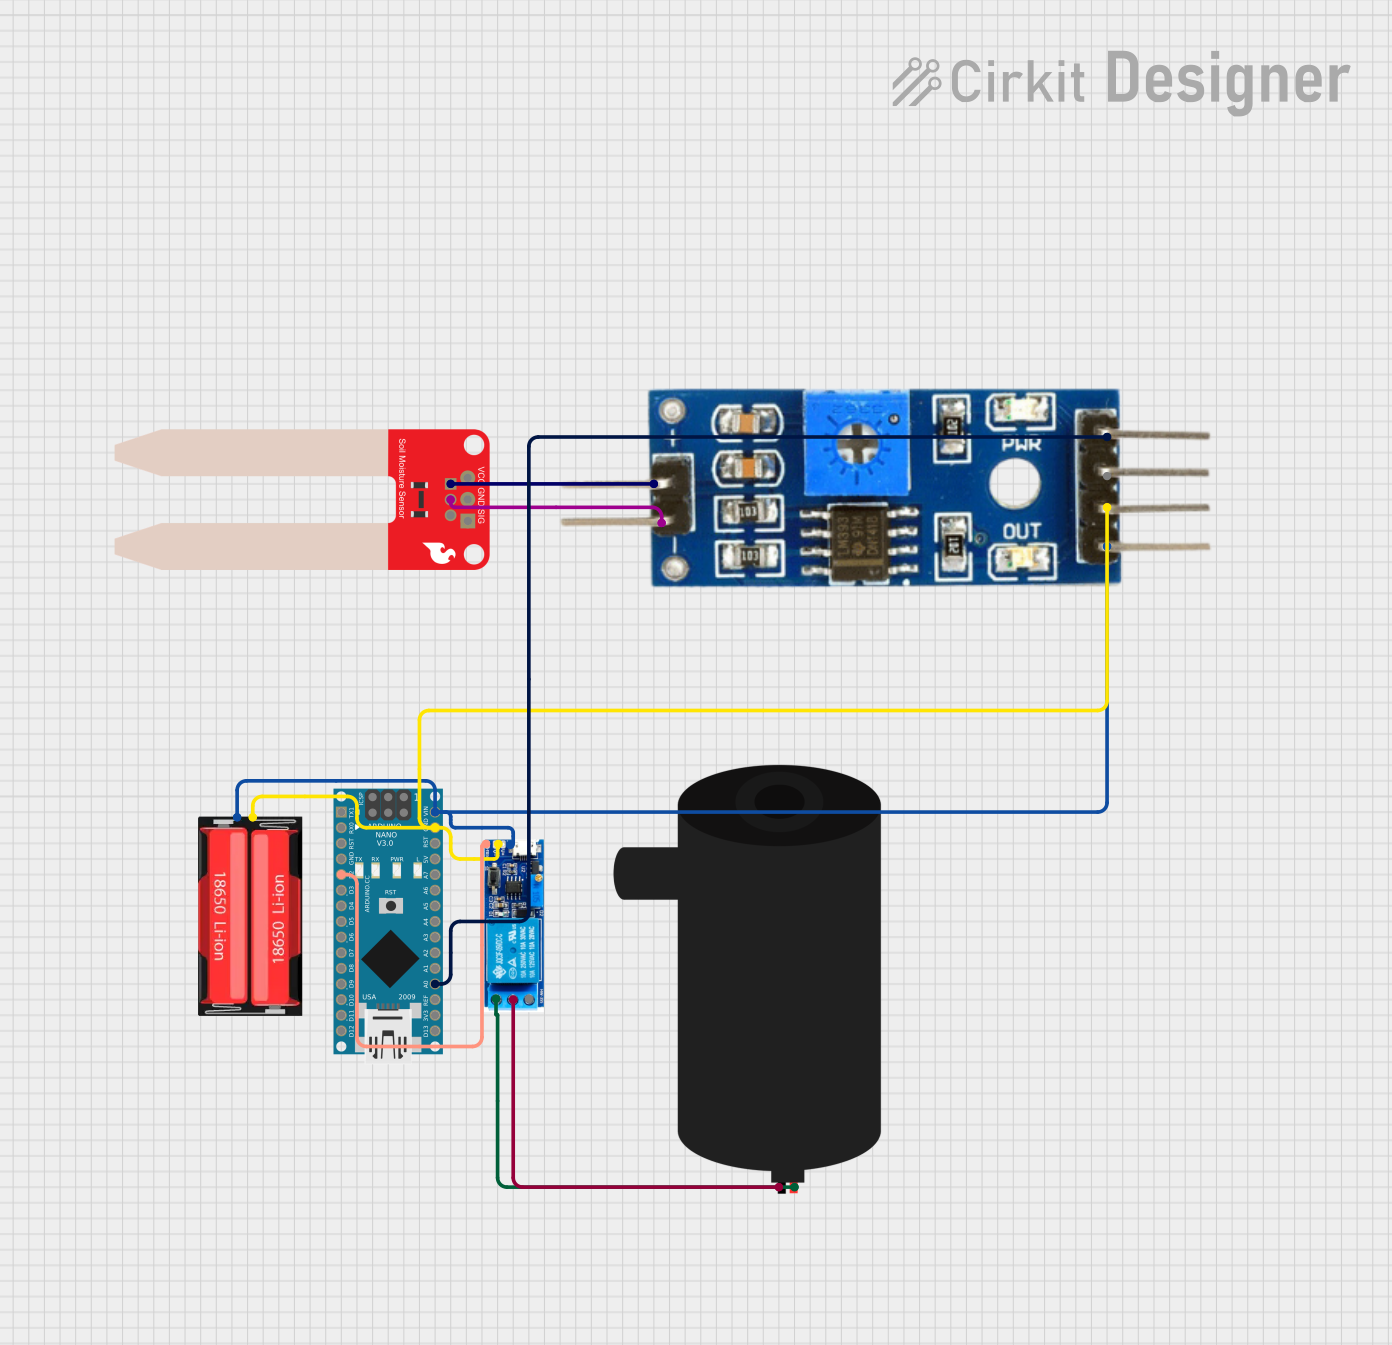
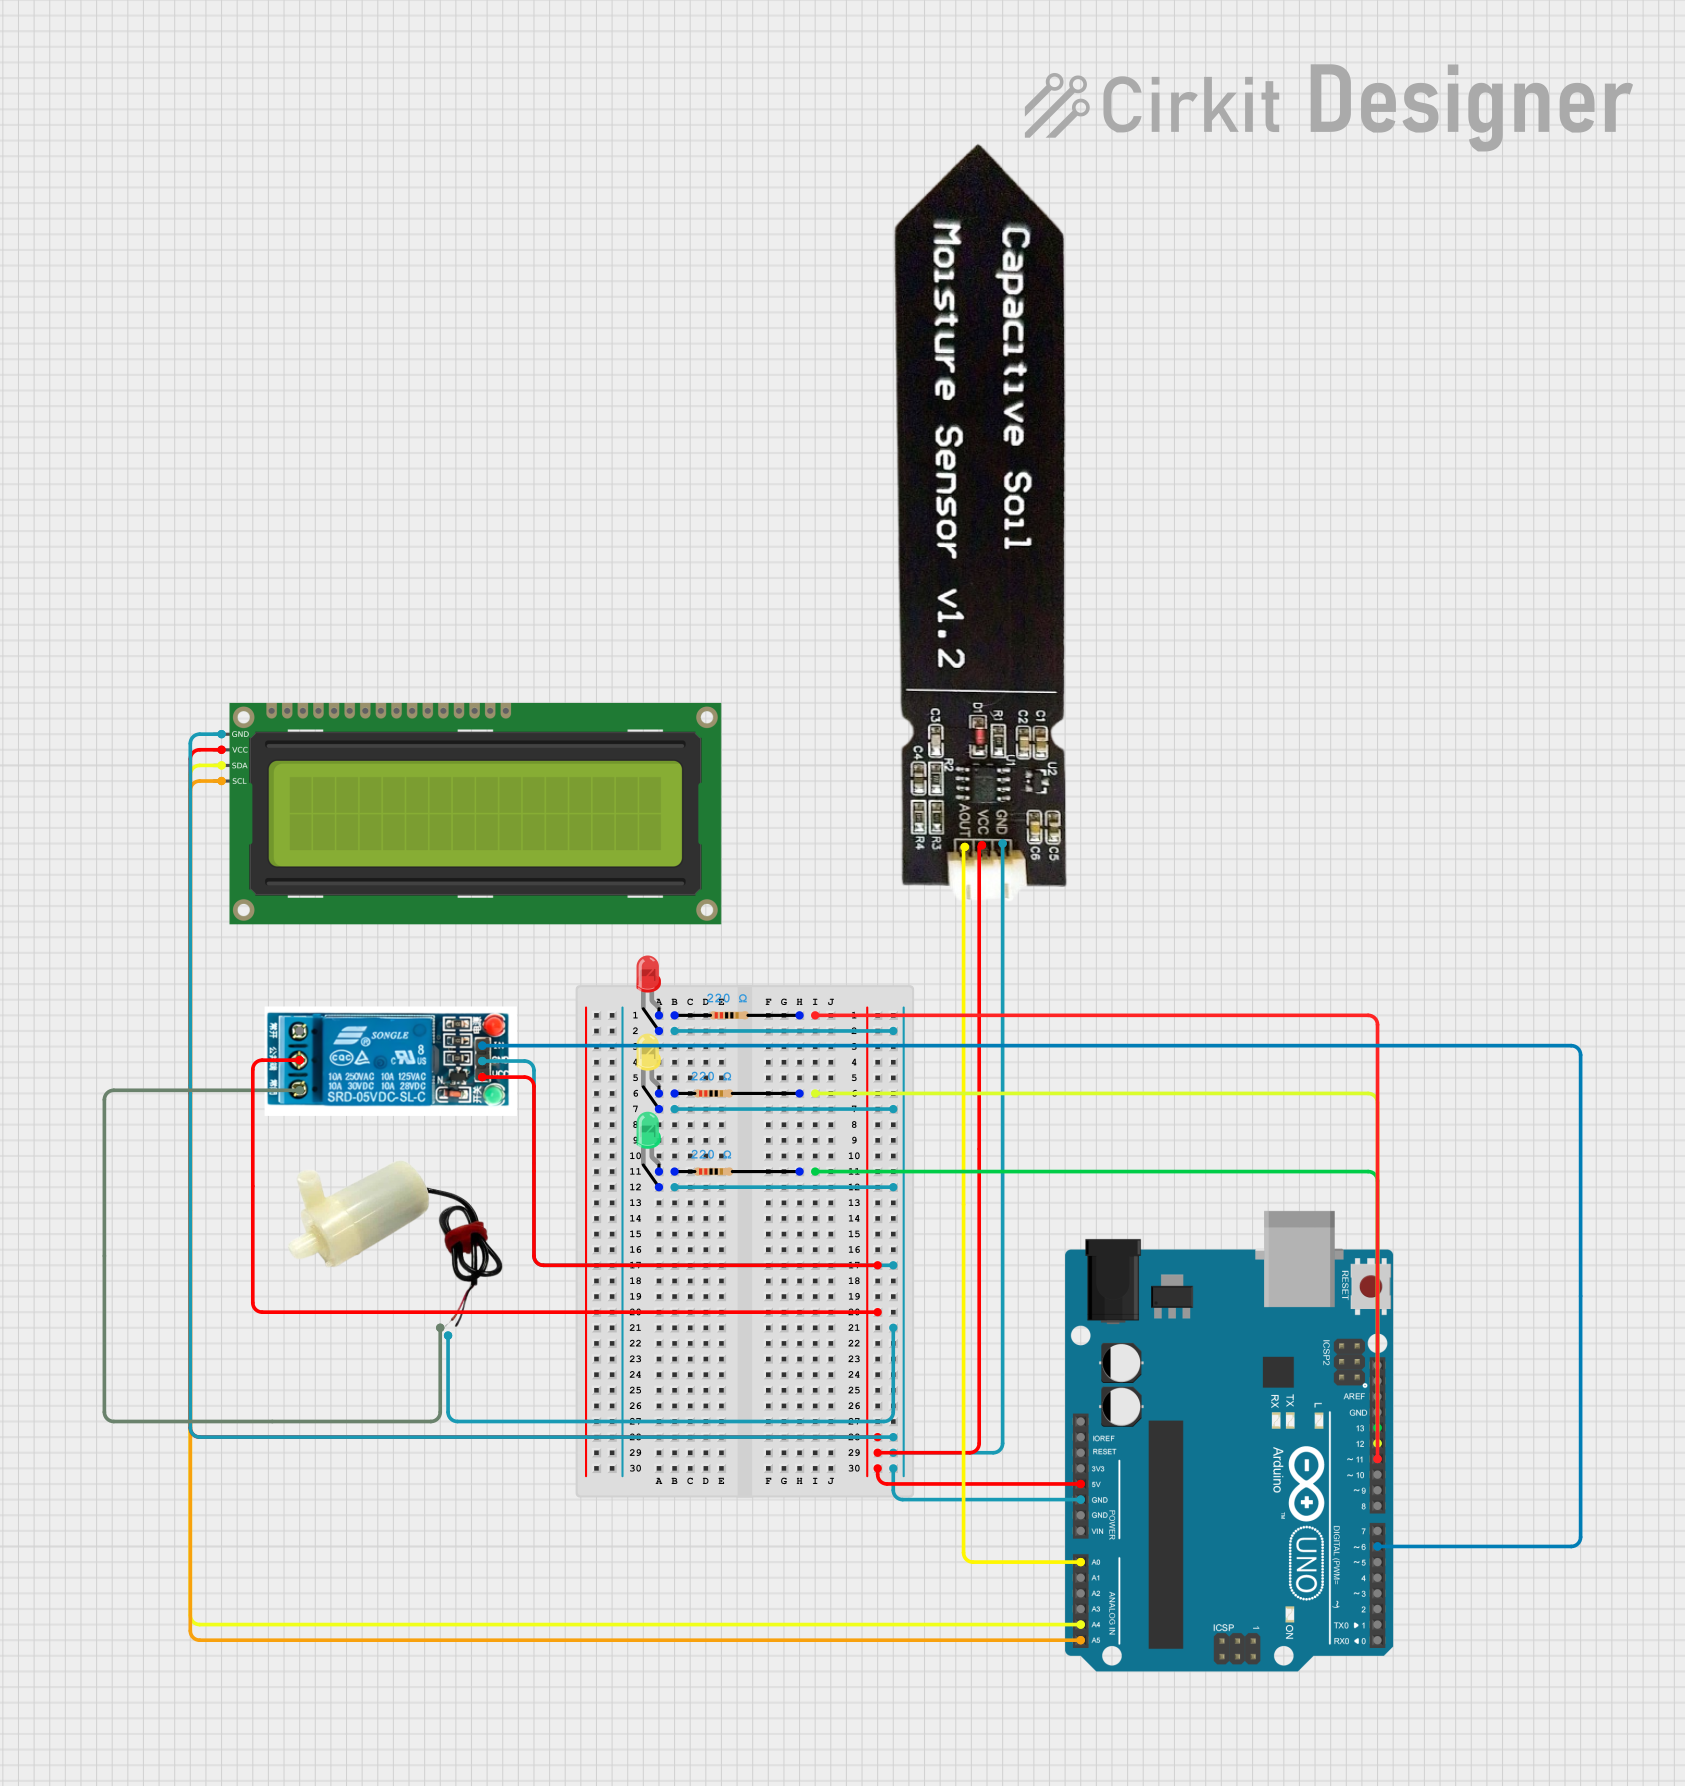
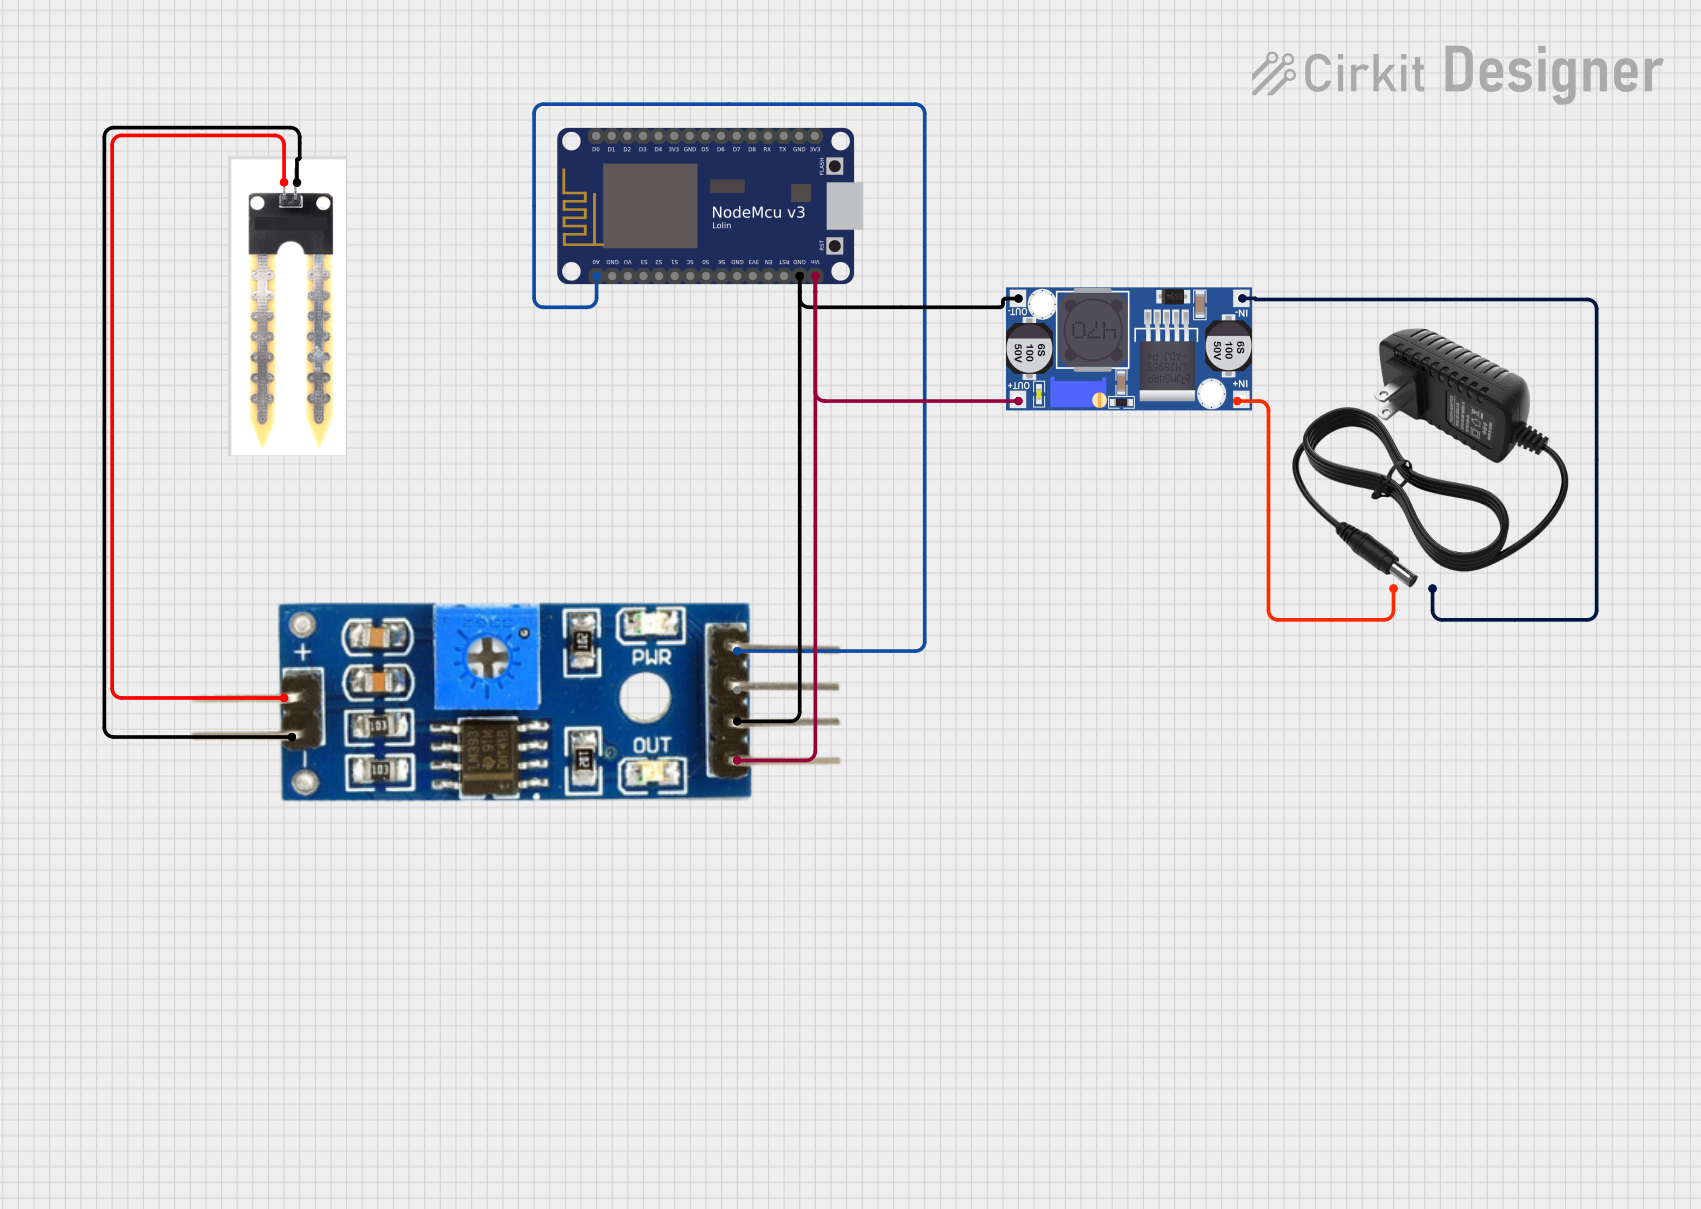
Explore Projects Built with Soil Moisture Sensor
Common Applications and Use Cases
- Agriculture: Monitoring soil moisture to optimize irrigation and improve crop yield.
- Home Gardening: Ensuring plants receive the correct amount of water.
- Landscaping: Managing water usage for lawns and gardens.
- Environmental Science: Studying soil conditions in different ecosystems.
Technical Specifications
Key Technical Details
- Operating Voltage: 3.3V to 5V
- Output Voltage: 0V to 3.0V (analog), Digital output available
- Current Consumption: 5mA to 20mA
- Sensing Area: Typically 1cm x 5cm
- Operating Temperature: -10°C to +70°C
Pin Configuration and Descriptions
| Pin Name | Description |
|---|---|
| VCC | Power supply (3.3V to 5V) |
| GND | Ground |
| AOUT | Analog output (moisture level voltage) |
| DOUT | Digital output (threshold-based moisture) |
Usage Instructions
How to Use the Component in a Circuit
- Power Connection: Connect the VCC pin to the 5V or 3.3V output on your microcontroller and the GND pin to a ground pin.
- Output Connection: Connect the AOUT pin to an analog input on your microcontroller to read the moisture level as an analog value. Optionally, connect the DOUT pin to a digital input if you wish to use a threshold-based digital signal.
- Sensor Placement: Insert the probes into the soil, ensuring they are not touching each other.
Important Considerations and Best Practices
- Avoid submerging the sensor's electronic components in water.
- Clean the probes after use to prevent corrosion and maintain accuracy.
- Calibrate the sensor for the specific soil type and conditions for best results.
- Use a pull-up or pull-down resistor if using the digital output to ensure a stable signal.
Example Code for Arduino UNO
// Define the sensor pin
const int moistureSensorPin = A0; // Analog input pin that the sensor is attached to
const int sensorPowerPin = 7;     // Digital pin used to power the sensor

void setup() {
  Serial.begin(9600);   // open serial port, set the baud rate to 9600 bps
  pinMode(sensorPowerPin, OUTPUT); // Set the sensor power pin as an output
}

void loop() {
  digitalWrite(sensorPowerPin, HIGH); // Turn the sensor on
  delay(10); // Wait 10 milliseconds for stabilization

  // Read the value from the sensor
  int sensorValue = analogRead(moistureSensorPin);
  digitalWrite(sensorPowerPin, LOW); // Turn the sensor off

  // Print the moisture level to the serial monitor
  Serial.print("Moisture level: ");
  Serial.println(sensorValue);

  delay(1000); // Wait for a second before reading again
}
Troubleshooting and FAQs
Common Issues
- Inconsistent Readings: Ensure the sensor is properly calibrated and the probes are fully inserted into the soil.
- Corrosion of Probes: Clean the probes regularly and avoid leaving the sensor in the soil for extended periods.
- No Readings: Check the power supply and connections to the sensor.
Solutions and Tips for Troubleshooting
- Calibration: Test the sensor in soil with known moisture levels to create a reference point.
- Connection Issues: Verify all connections are secure and the correct pins are used.
- Power Supply: Ensure the sensor is receiving the correct voltage as per the technical specifications.
FAQs
Q: Can the sensor be left in the soil permanently? A: It is not recommended to leave the sensor in the soil permanently as it can lead to corrosion of the probes.
Q: Is the sensor waterproof? A: The probes are water-resistant but the electronic components are not. Avoid exposing them to water.
Q: How do I set the threshold for the digital output? A: The threshold can be set through a potentiometer on the sensor module or via software in the microcontroller.
Remember to keep the documentation updated with any changes to the component or its usage, and always provide clear and accurate information to ensure the best user experience.