How to Use Adruino Mega Sensor Shield: Examples, Pinouts, and Specs
Introduction
The Arduino Mega Sensor Shield is an expansion board designed to fit on top of an Arduino Mega microcontroller board. It simplifies the process of connecting various sensors and devices to the Arduino Mega by providing a convenient way to access its numerous pins. The shield is particularly useful for projects that require multiple sensor connections, making it ideal for robotics, environmental monitoring, interactive installations, and prototyping.
Explore Projects Built with Adruino Mega Sensor Shield

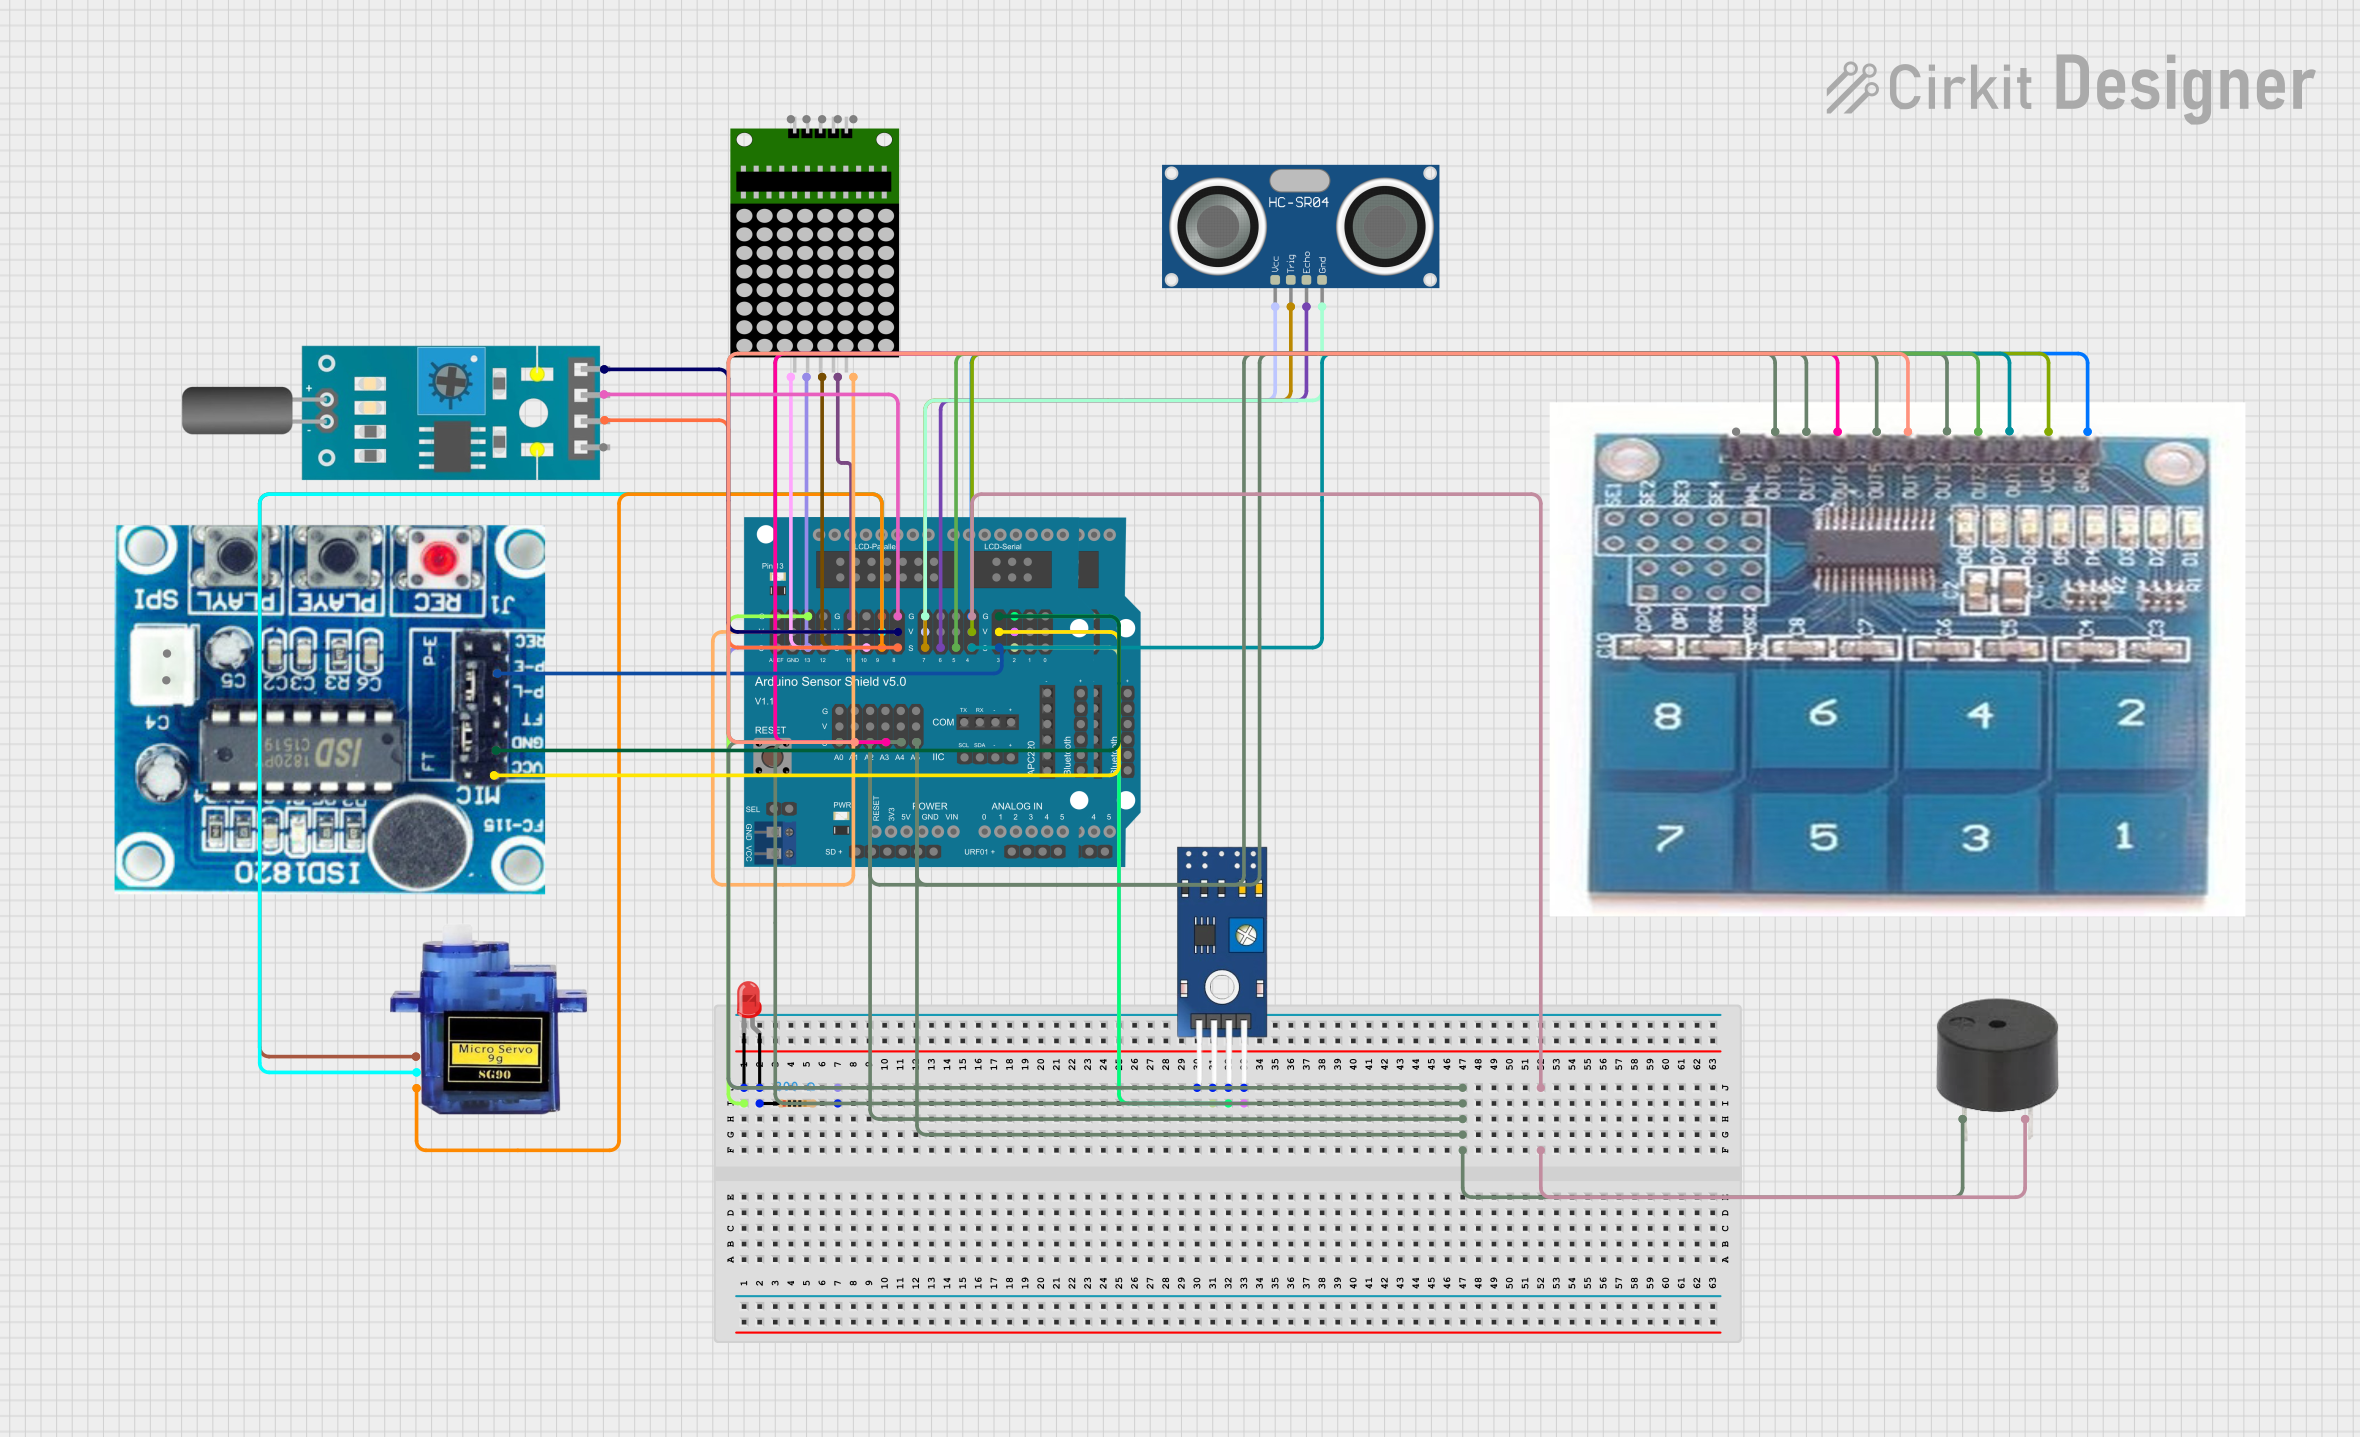

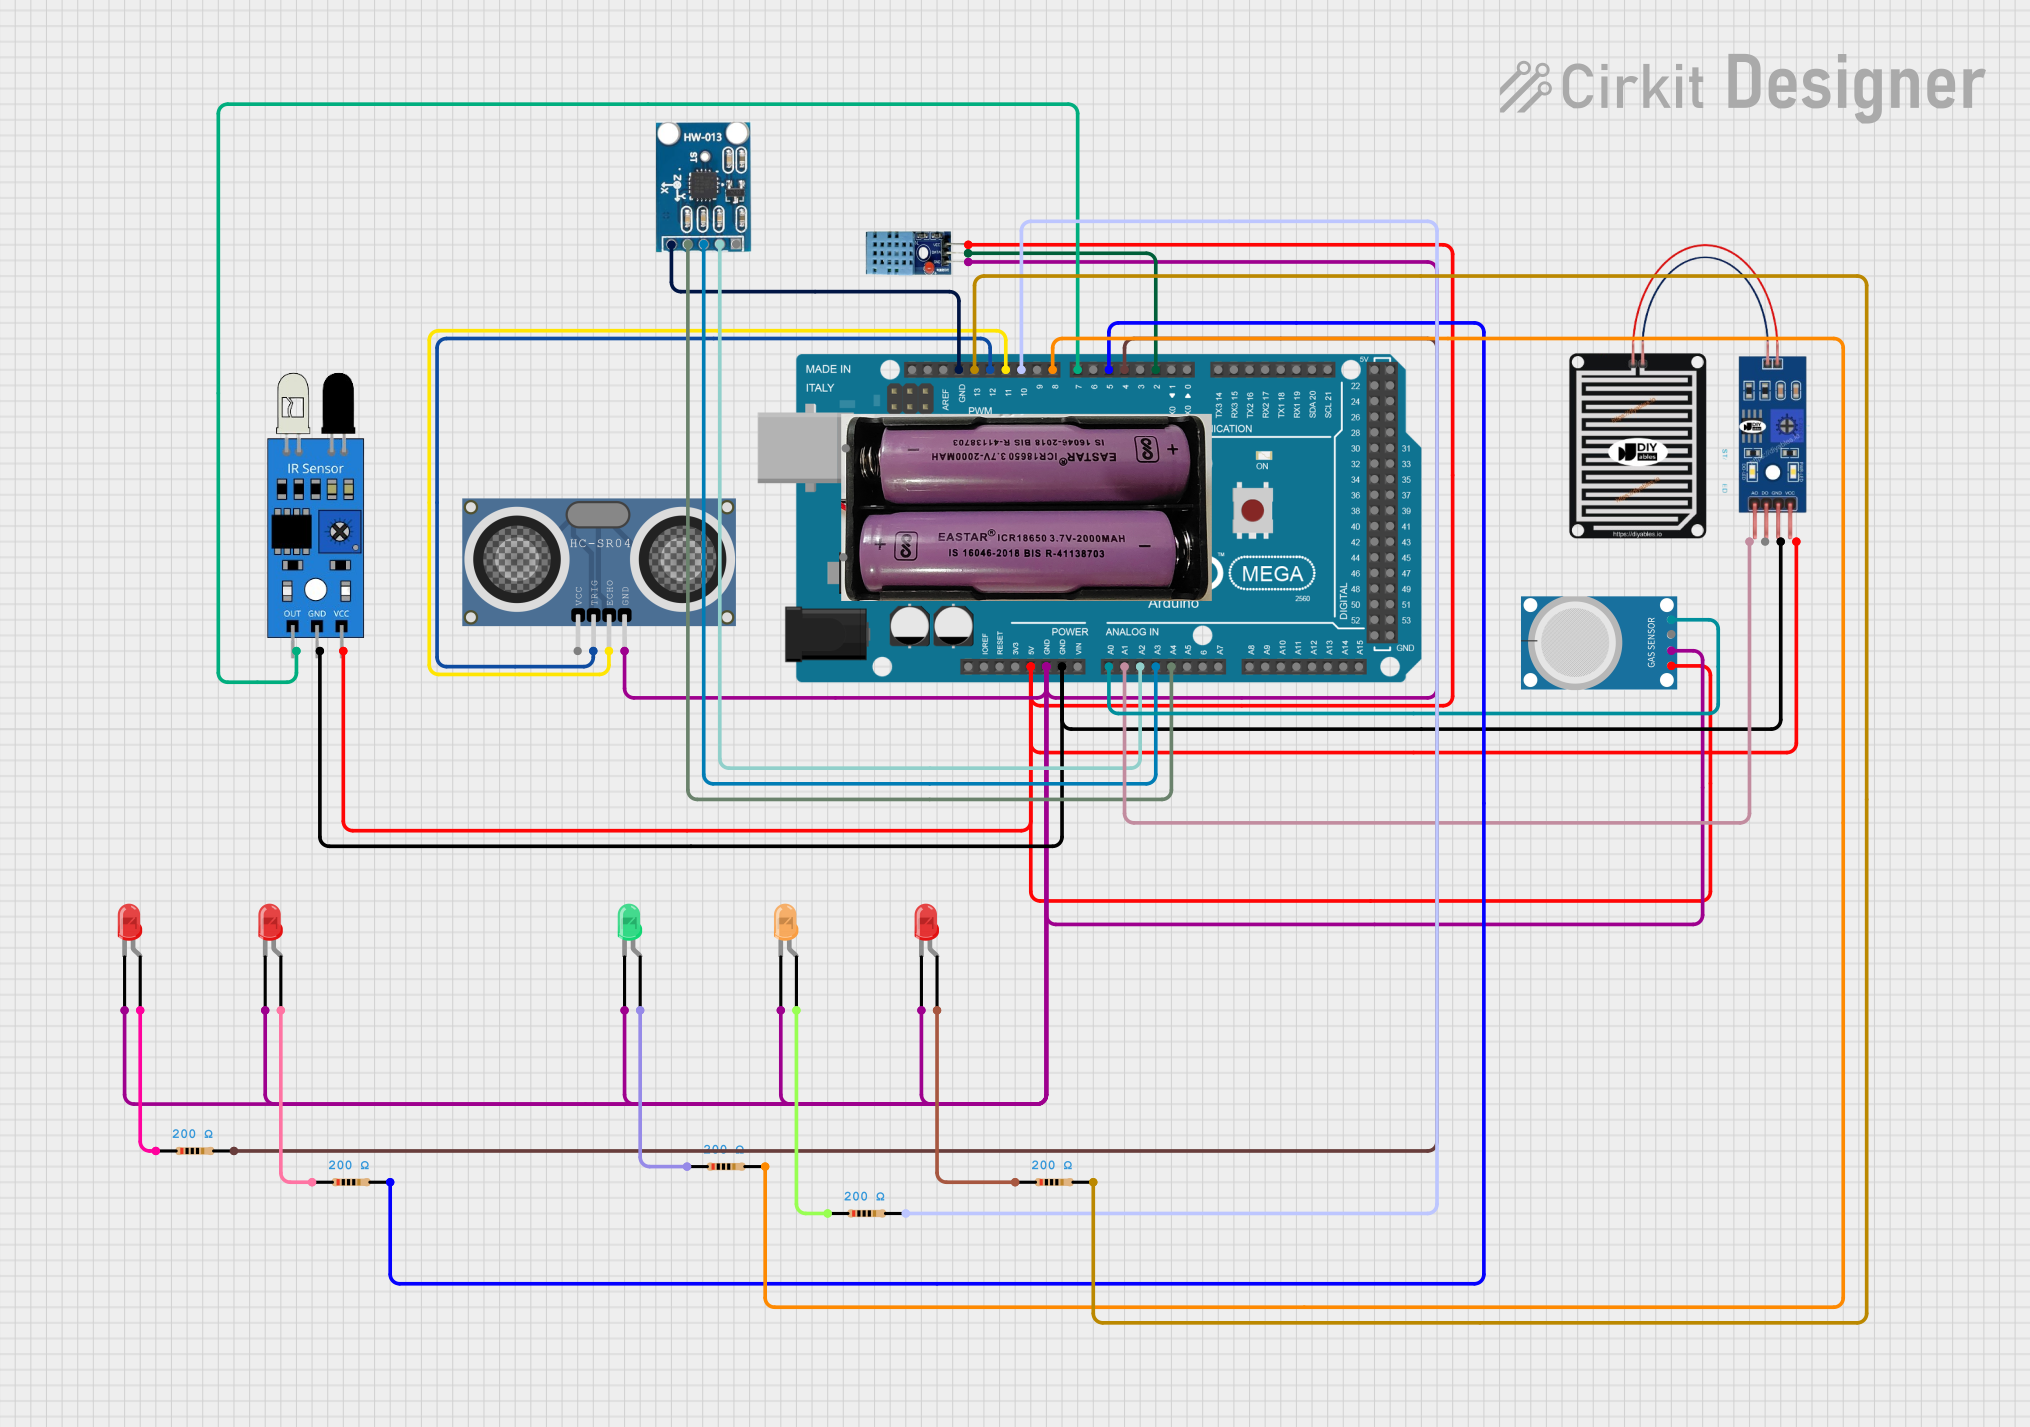
Explore Projects Built with Adruino Mega Sensor Shield
Common Applications and Use Cases
- Robotics control systems
- Home automation
- Data logging
- Environmental monitoring (temperature, humidity, air quality)
- Educational projects and learning platforms
- Interactive art installations
Technical Specifications
Key Technical Details
- Operating Voltage: 5V (supplied from the Arduino Mega)
- I/O Pins: Utilizes the Arduino Mega's 54 digital I/O pins and 16 analog inputs
- Communication: Supports I2C, SPI, and UART protocols
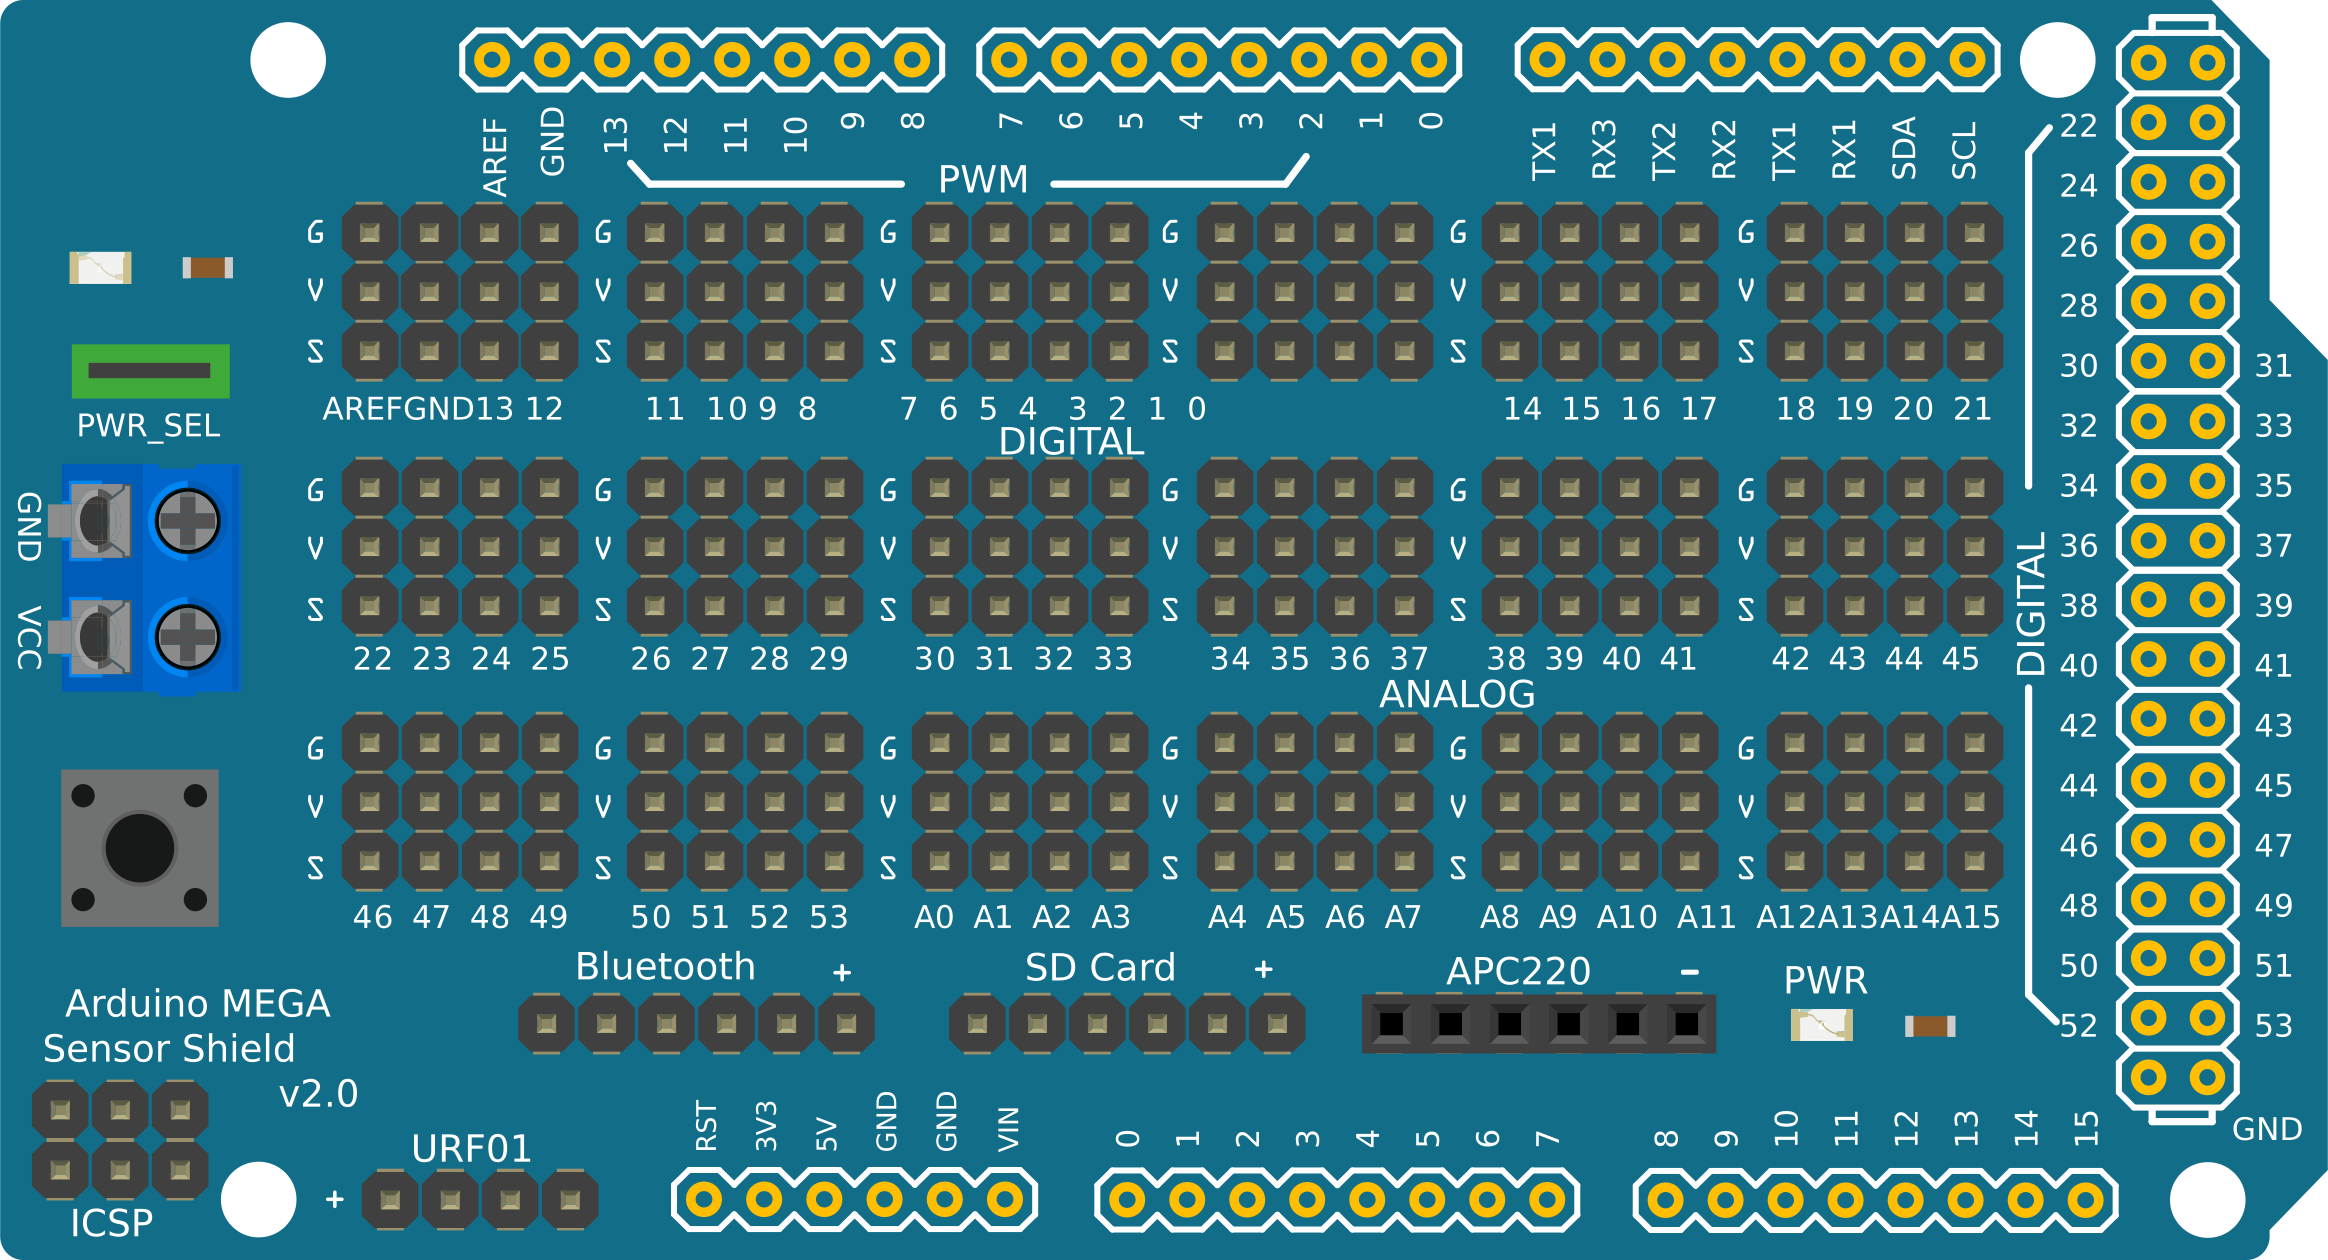
Pin Configuration and Descriptions
| Pin Label | Description |
|---|---|
| GND | Ground connection points |
| 5V | 5V power supply from the Arduino Mega |
| 3.3V | 3.3V power supply (if available on the shield) |
| A0-A15 | Analog input pins connected to the Arduino Mega's analog pins |
| D0-D53 | Digital pins connected to the Arduino Mega's digital pins |
| SDA | I2C data line |
| SCL | I2C clock line |
| MISO | SPI Master In Slave Out |
| MOSI | SPI Master Out Slave In |
| SCK | SPI Serial Clock |
| RX0-RX3 | UART Receive pins |
| TX0-TX3 | UART Transmit pins |
Usage Instructions
How to Use the Component in a Circuit
- Mounting the Shield: Carefully align the pins of the Arduino Mega Sensor Shield with the headers on the Arduino Mega board and press down gently to connect them.
- Connecting Sensors: Plug your sensors into the appropriate pins on the shield. Ensure that the power ratings and signal levels of the sensors are compatible with the Arduino Mega.
- Powering the System: Connect the Arduino Mega to a power source. The Sensor Shield will draw power directly from the Arduino board.
Important Considerations and Best Practices
- Pin Usage: Be aware of the pin mapping between the Arduino Mega and the Sensor Shield to avoid conflicts.
- Power Requirements: Ensure that the total power consumption of all connected sensors does not exceed the power capabilities of the Arduino Mega.
- Signal Integrity: Keep wiring as short as possible to minimize interference and signal degradation.
- Firmware Updates: Always check for the latest firmware for your Arduino Mega to ensure compatibility with the Sensor Shield.
Troubleshooting and FAQs
Common Issues Users Might Face
- Sensors Not Responding: Check connections and ensure that the correct pins are being used. Verify that the sensor is powered and configured correctly.
- Intermittent Connections: Inspect the headers and pins for any signs of damage or poor contact. Re-seat the shield if necessary.
- Inaccurate Sensor Readings: Ensure that there is no electrical noise affecting the sensor signals. Use shielded cables if necessary.
Solutions and Tips for Troubleshooting
- Check Power Supply: Verify that the Arduino Mega and the Sensor Shield are receiving the correct voltage.
- Inspect Connections: Double-check all connections, including those on the Sensor Shield and the sensors themselves.
- Review Code: Ensure that the code uploaded to the Arduino Mega is correct and that it is properly addressing the pins on the Sensor Shield.
FAQs
Q: Can I use the Arduino Mega Sensor Shield with other Arduino boards?
A: The shield is specifically designed for the Arduino Mega due to its pin layout and may not be compatible with other Arduino models.
Q: How many sensors can I connect to the Sensor Shield?
A: It depends on the number of available pins and the power requirements of the sensors. The Arduino Mega can support multiple sensors as long as you do not exceed its power and pin limitations.
Q: Do I need to install any drivers or libraries to use the Sensor Shield?
A: No additional drivers are required, but you may need specific libraries for the sensors you are using.
Example Code for Arduino UNO
// Example code for initializing a sensor connected to the Arduino Mega Sensor Shield
#include <SensorLibrary.h> // Replace with the actual library for your sensor

Sensor mySensor; // Create a sensor instance

void setup() {
  // Initialize the sensor
  mySensor.begin();
}

void loop() {
  // Read data from the sensor
  int sensorValue = mySensor.read();
  // Process the sensor data
  // ...
}
Note: Replace SensorLibrary.h and Sensor with the actual library and class name for the sensor you are using. The example code provided is a generic template and will need to be modified to fit your specific sensor and application.