How to Use LCD 16x2 attached i2c: Examples, Pinouts, and Specs
Introduction
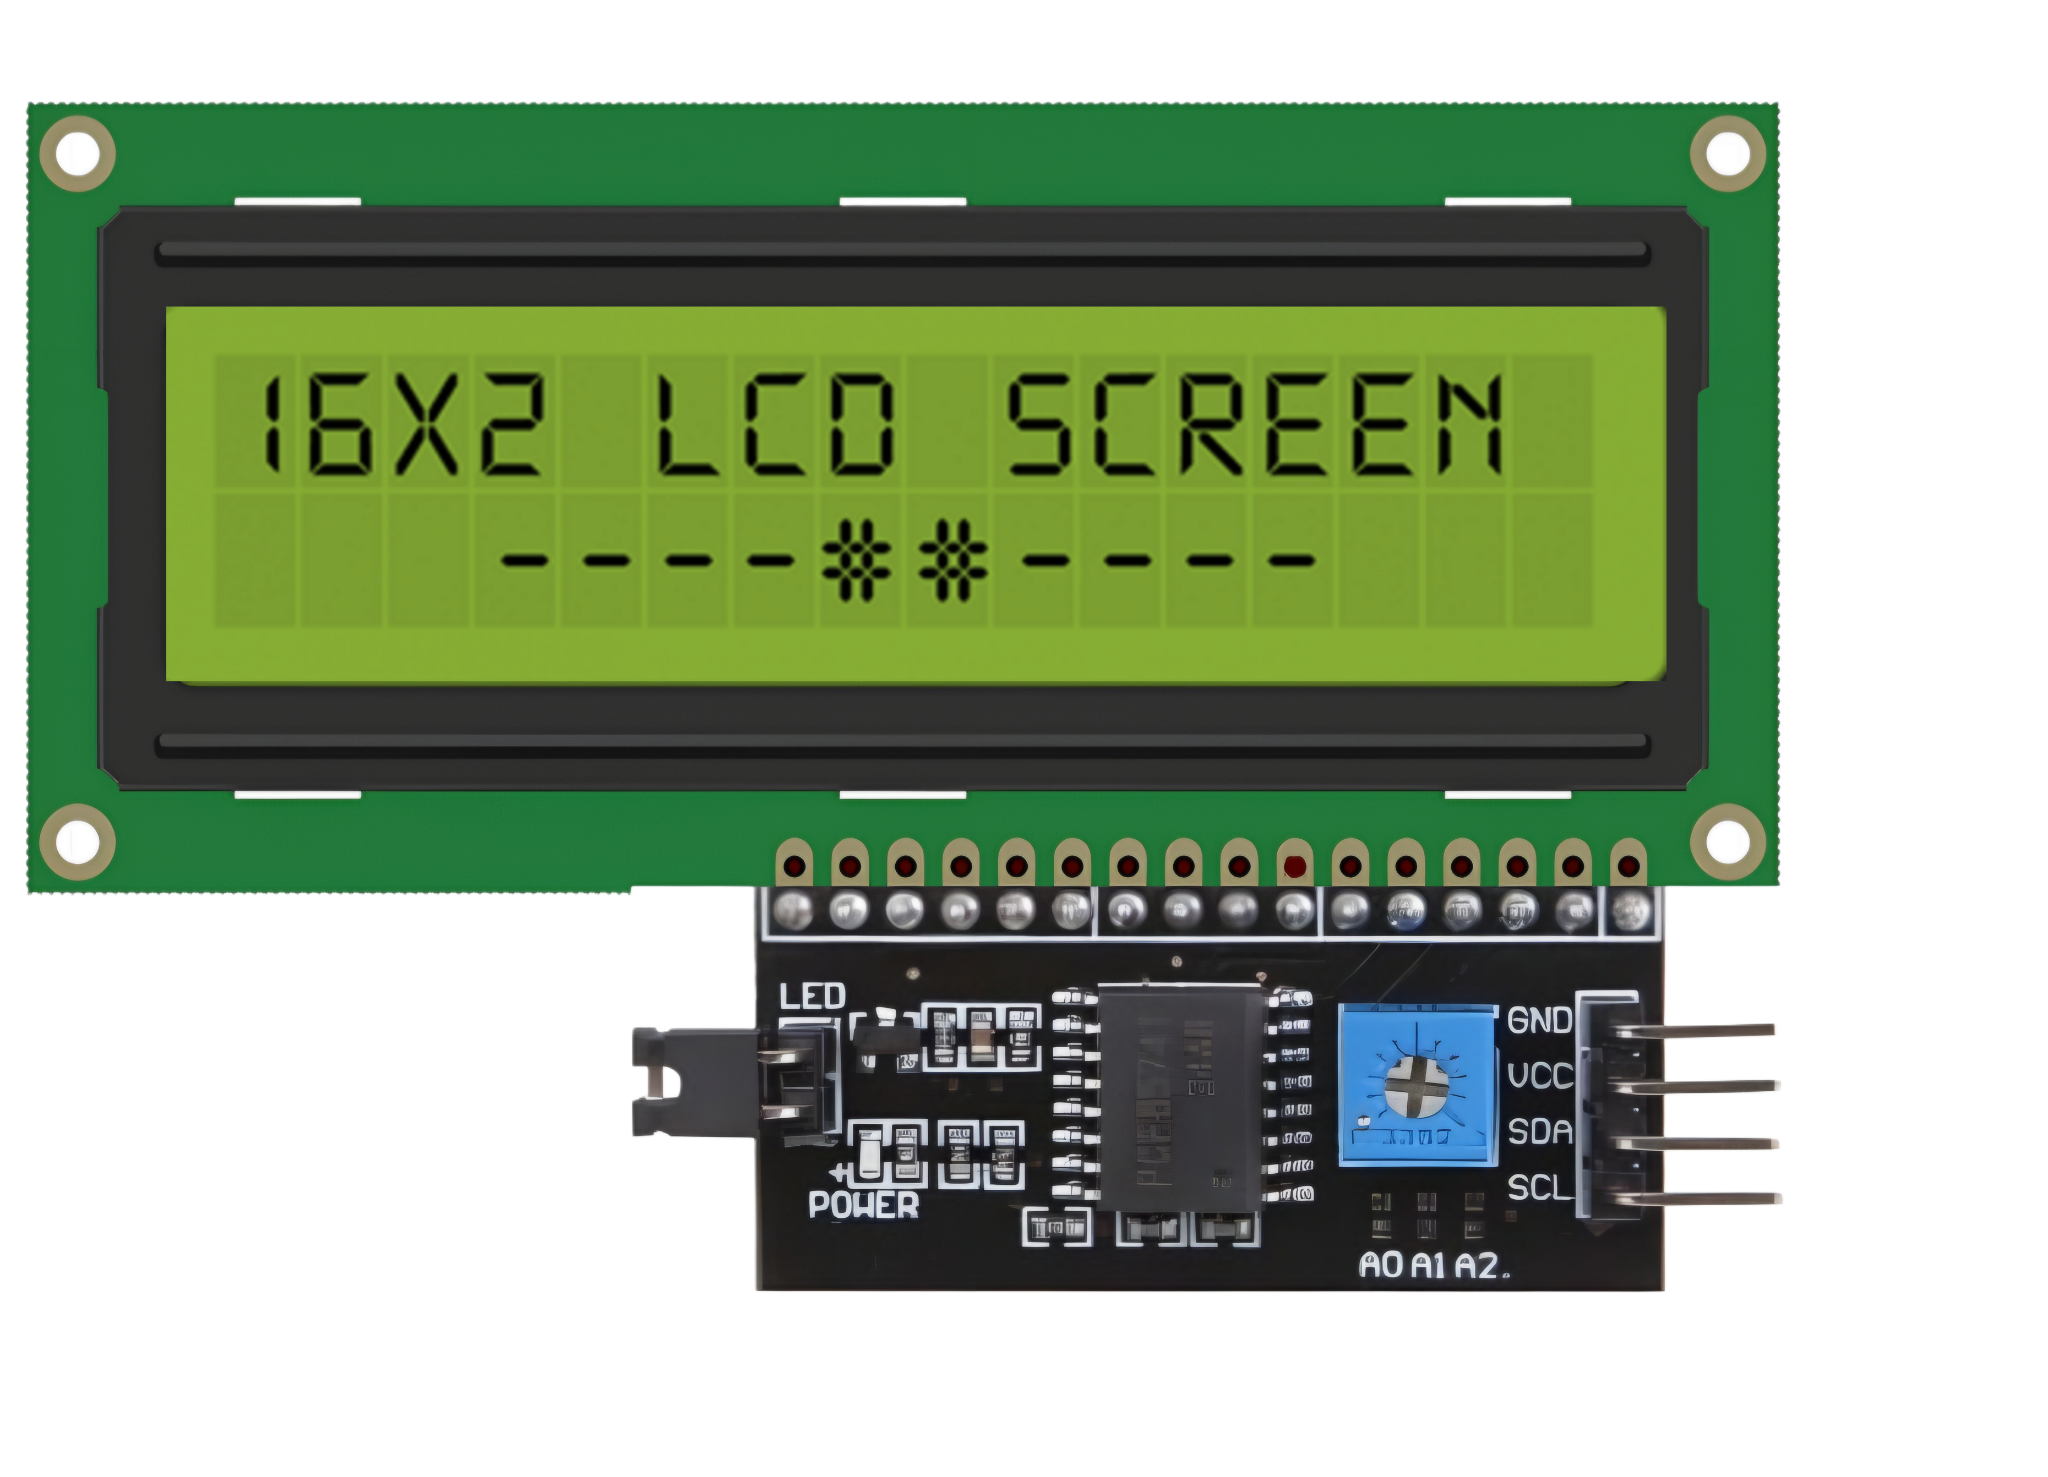
The LCD 16x2 Attached I2C (Manufacturer Part ID: 1602A-I2C) is a 16-character by 2-line Liquid Crystal Display (LCD) module designed for efficient and user-friendly integration into electronic projects. This module uses the I2C (Inter-Integrated Circuit) interface, which significantly reduces the number of pins required for communication, making it ideal for microcontroller-based applications.
Explore Projects Built with LCD 16x2 attached i2c


Explore Projects Built with LCD 16x2 attached i2c
Common Applications and Use Cases
- Microcontroller-based projects (e.g., Arduino, Raspberry Pi)
- Displaying sensor data, system status, or user interfaces
- Home automation systems
- Educational and prototyping purposes
- Industrial control panels
Technical Specifications
The following table outlines the key technical details of the LCD 16x2 Attached I2C module:
| Parameter | Value |
|---|---|
| Manufacturer | Generic |
| Part ID | 1602A-I2C |
| Display Type | 16x2 Character LCD |
| Interface | I2C (Inter-Integrated Circuit) |
| Operating Voltage | 5V DC |
| Backlight | LED (with adjustable brightness) |
| Character Size | 5x8 dot matrix |
| I2C Address (Default) | 0x27 (can vary, check datasheet) |
| Operating Temperature | -20°C to +70°C |
| Dimensions | 80mm x 36mm x 12mm |
Pin Configuration and Descriptions
The LCD 16x2 module with I2C interface has a 4-pin header for connection. The pinout is as follows:
| Pin | Name | Description |
|---|---|---|
| 1 | GND | Ground connection |
| 2 | VCC | Power supply (5V DC) |
| 3 | SDA | Serial Data Line for I2C communication |
| 4 | SCL | Serial Clock Line for I2C communication |
Usage Instructions
How to Use the Component in a Circuit
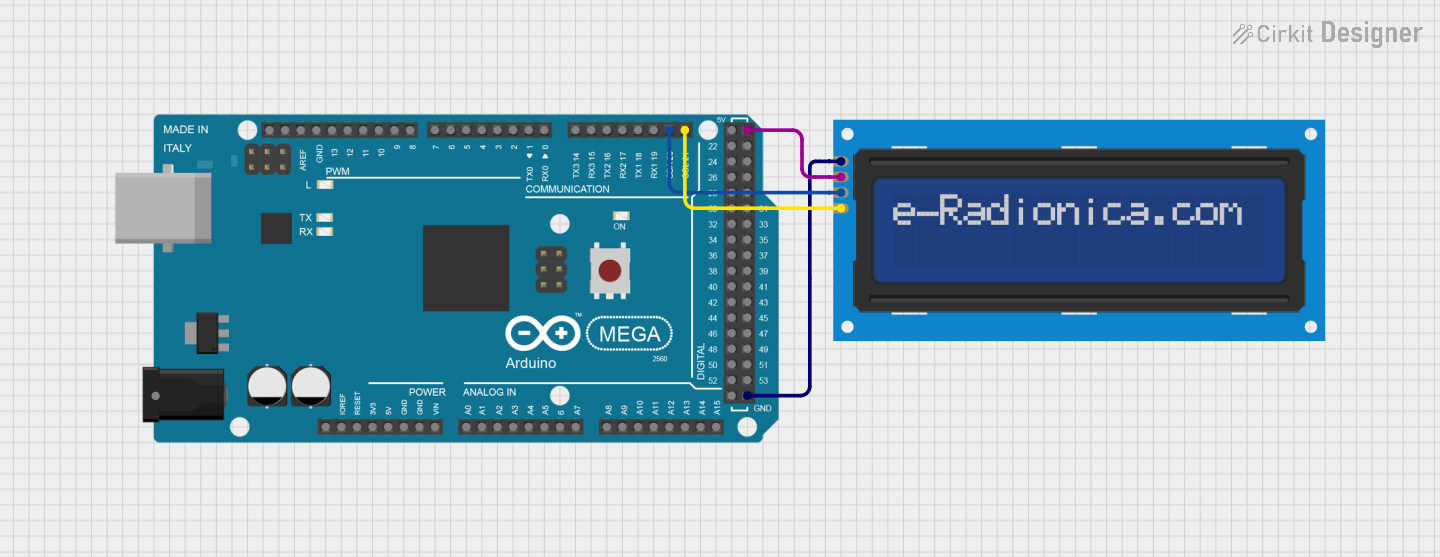
Connect the Module:
- Connect the
GNDpin to the ground of your microcontroller. - Connect the
VCCpin to the 5V power supply of your microcontroller. - Connect the
SDApin to the I2C data line (e.g., A4 on Arduino UNO). - Connect the
SCLpin to the I2C clock line (e.g., A5 on Arduino UNO).
- Connect the
Install Required Libraries:
- For Arduino, install the
LiquidCrystal_I2Clibrary from the Arduino Library Manager. - Go to Sketch > Include Library > Manage Libraries, search for
LiquidCrystal_I2C, and install it.
- For Arduino, install the
Write and Upload Code:
- Use the following example code to display text on the LCD:
#include <Wire.h>
#include <LiquidCrystal_I2C.h>

// Initialize the LCD with I2C address 0x27 and 16x2 dimensions
LiquidCrystal_I2C lcd(0x27, 16, 2);

void setup() {
  lcd.begin(); // Initialize the LCD
  lcd.backlight(); // Turn on the backlight

  // Display a message on the LCD
  lcd.setCursor(0, 0); // Set cursor to column 0, row 0
  lcd.print("Hello, World!"); // Print text on the first line
  lcd.setCursor(0, 1); // Set cursor to column 0, row 1
  lcd.print("I2C LCD Test"); // Print text on the second line
}

void loop() {
  // No actions in the loop for this example
}
Important Considerations and Best Practices
- I2C Address: The default I2C address is typically
0x27, but it may vary depending on the module. Use an I2C scanner sketch to detect the correct address if needed. - Power Supply: Ensure a stable 5V power supply to avoid flickering or malfunctioning of the display.
- Contrast Adjustment: Use the potentiometer on the I2C backpack to adjust the contrast of the display.
- Backlight Control: The backlight can be turned on or off programmatically using the
lcd.backlight()andlcd.noBacklight()functions.
Troubleshooting and FAQs
Common Issues and Solutions
No Display or Blank Screen:
- Verify the wiring connections, especially
GNDandVCC. - Check the contrast adjustment potentiometer on the I2C backpack.
- Ensure the correct I2C address is used in the code.
- Verify the wiring connections, especially
Flickering or Unstable Display:
- Ensure a stable 5V power supply.
- Avoid long or poor-quality wires for I2C connections.
Incorrect or Garbled Characters:
- Double-check the I2C address and ensure it matches the module.
- Verify that the
LiquidCrystal_I2Clibrary is correctly installed and up to date.
I2C Address Not Detected:
- Use an I2C scanner sketch to detect the module's address.
- Ensure the
SDAandSCLlines are properly connected.
FAQs
Q: Can I use this module with a 3.3V microcontroller?
A: The module is designed for 5V operation. If using a 3.3V microcontroller, a logic level shifter is recommended for the SDA and SCL lines.
Q: How do I change the I2C address?
A: The I2C address can be changed by modifying the solder jumpers on the I2C backpack. Refer to the module's datasheet for details.
Q: Can I control the backlight brightness programmatically?
A: The backlight can only be turned on or off programmatically. For brightness control, a hardware modification (e.g., adding a PWM circuit) is required.
Q: What is the maximum cable length for I2C communication?
A: The maximum length depends on the pull-up resistors and communication speed, but it is generally recommended to keep the length under 1 meter for reliable operation.
This documentation provides a comprehensive guide to using the LCD 16x2 Attached I2C module effectively in your projects.