How to Use Arduino Sensor Shield: Examples, Pinouts, and Specs
Introduction
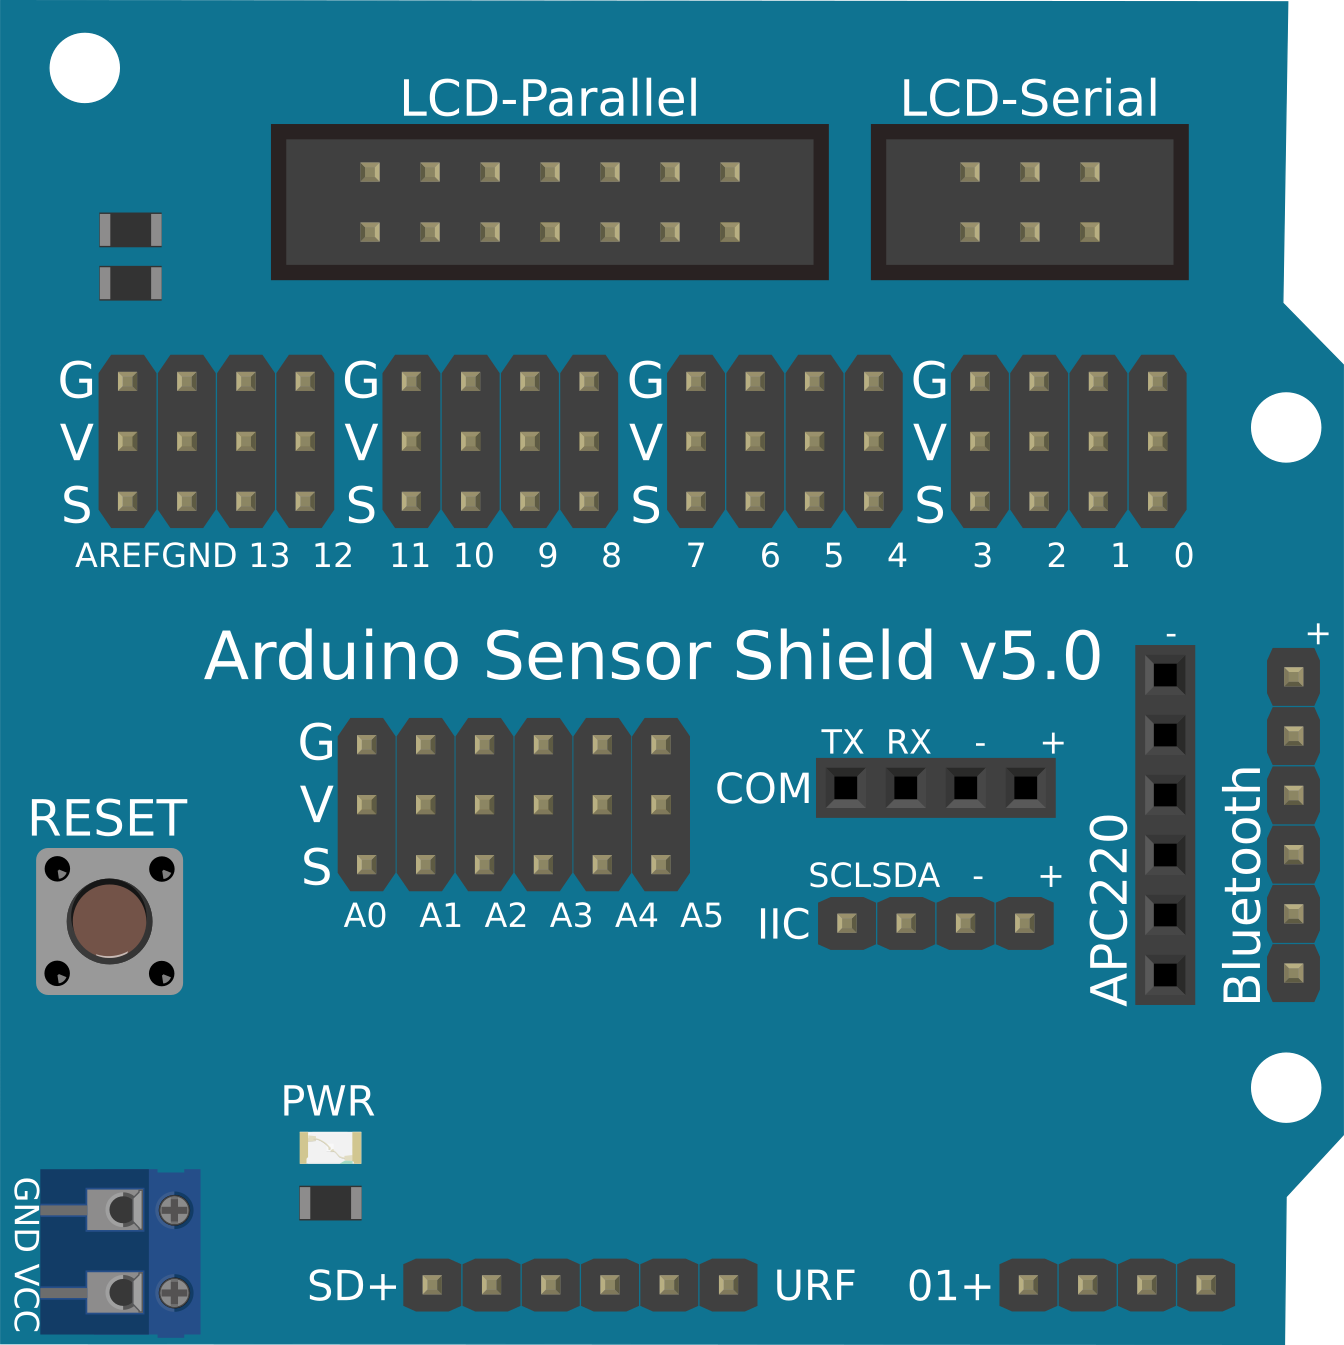
The Arduino Sensor Shield is a versatile expansion board designed to simplify the process of connecting sensors, modules, and other peripherals to an Arduino board. It provides a convenient interface with clearly labeled pins, making it easier to build interactive projects without the need for complex wiring. This shield is compatible with most Arduino boards, such as the Arduino UNO, Mega, and Leonardo.
Explore Projects Built with Arduino Sensor Shield
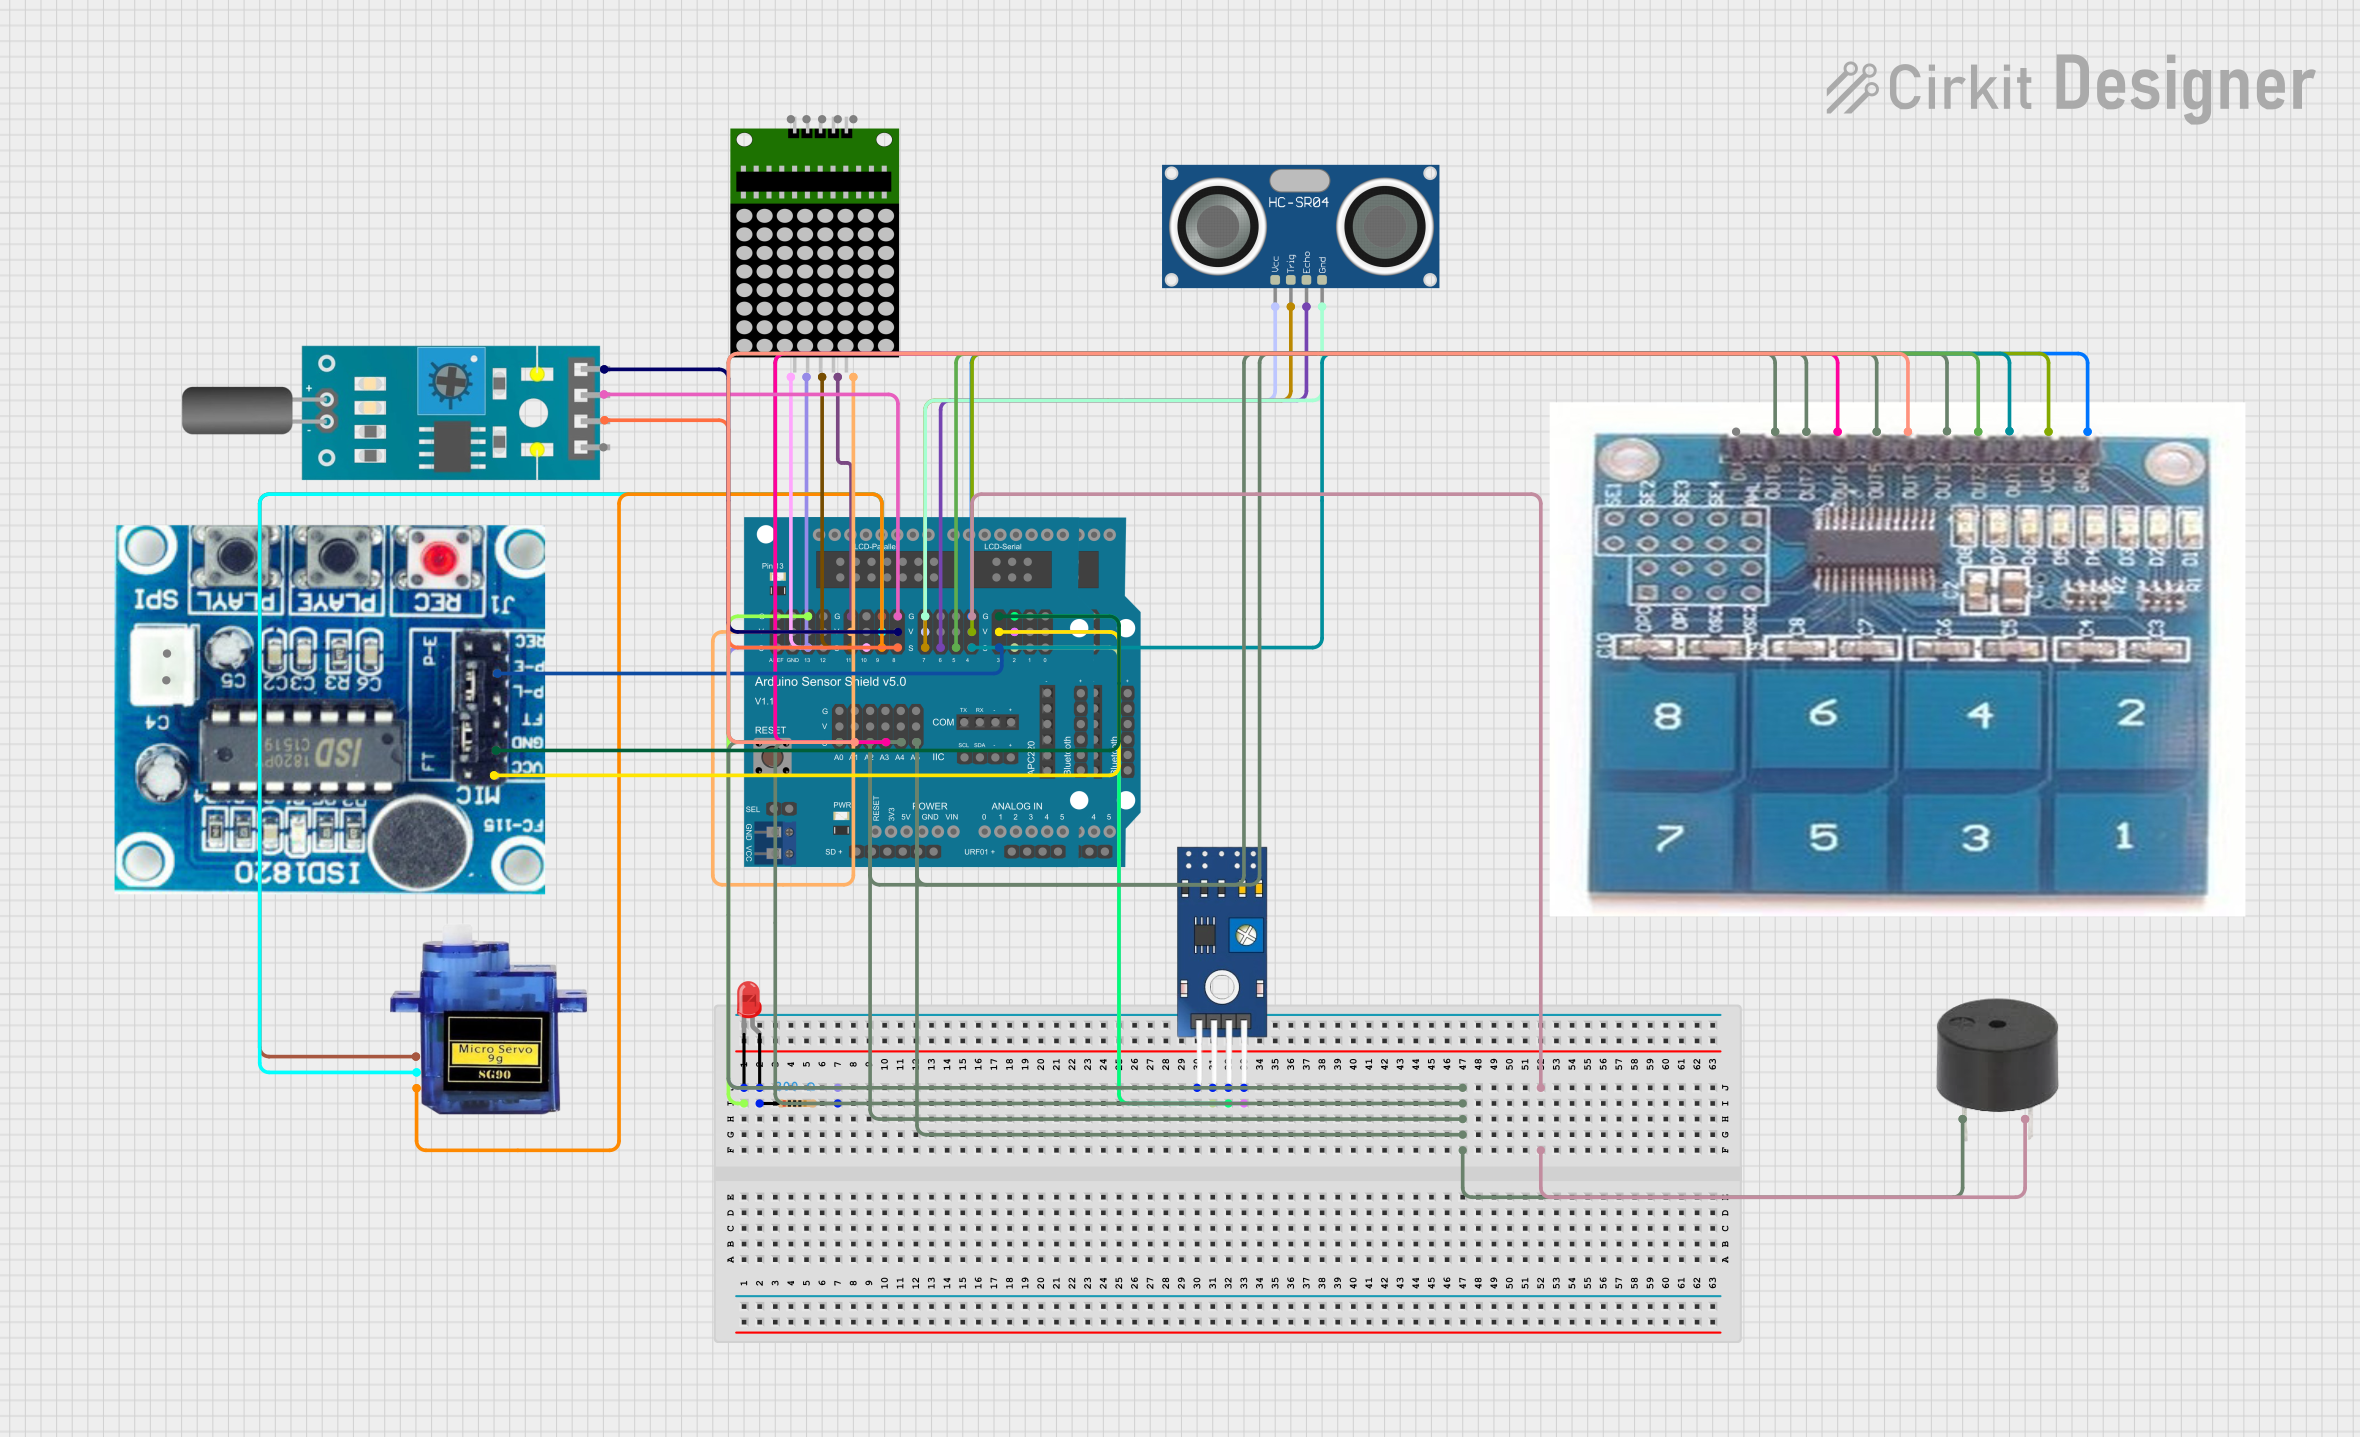
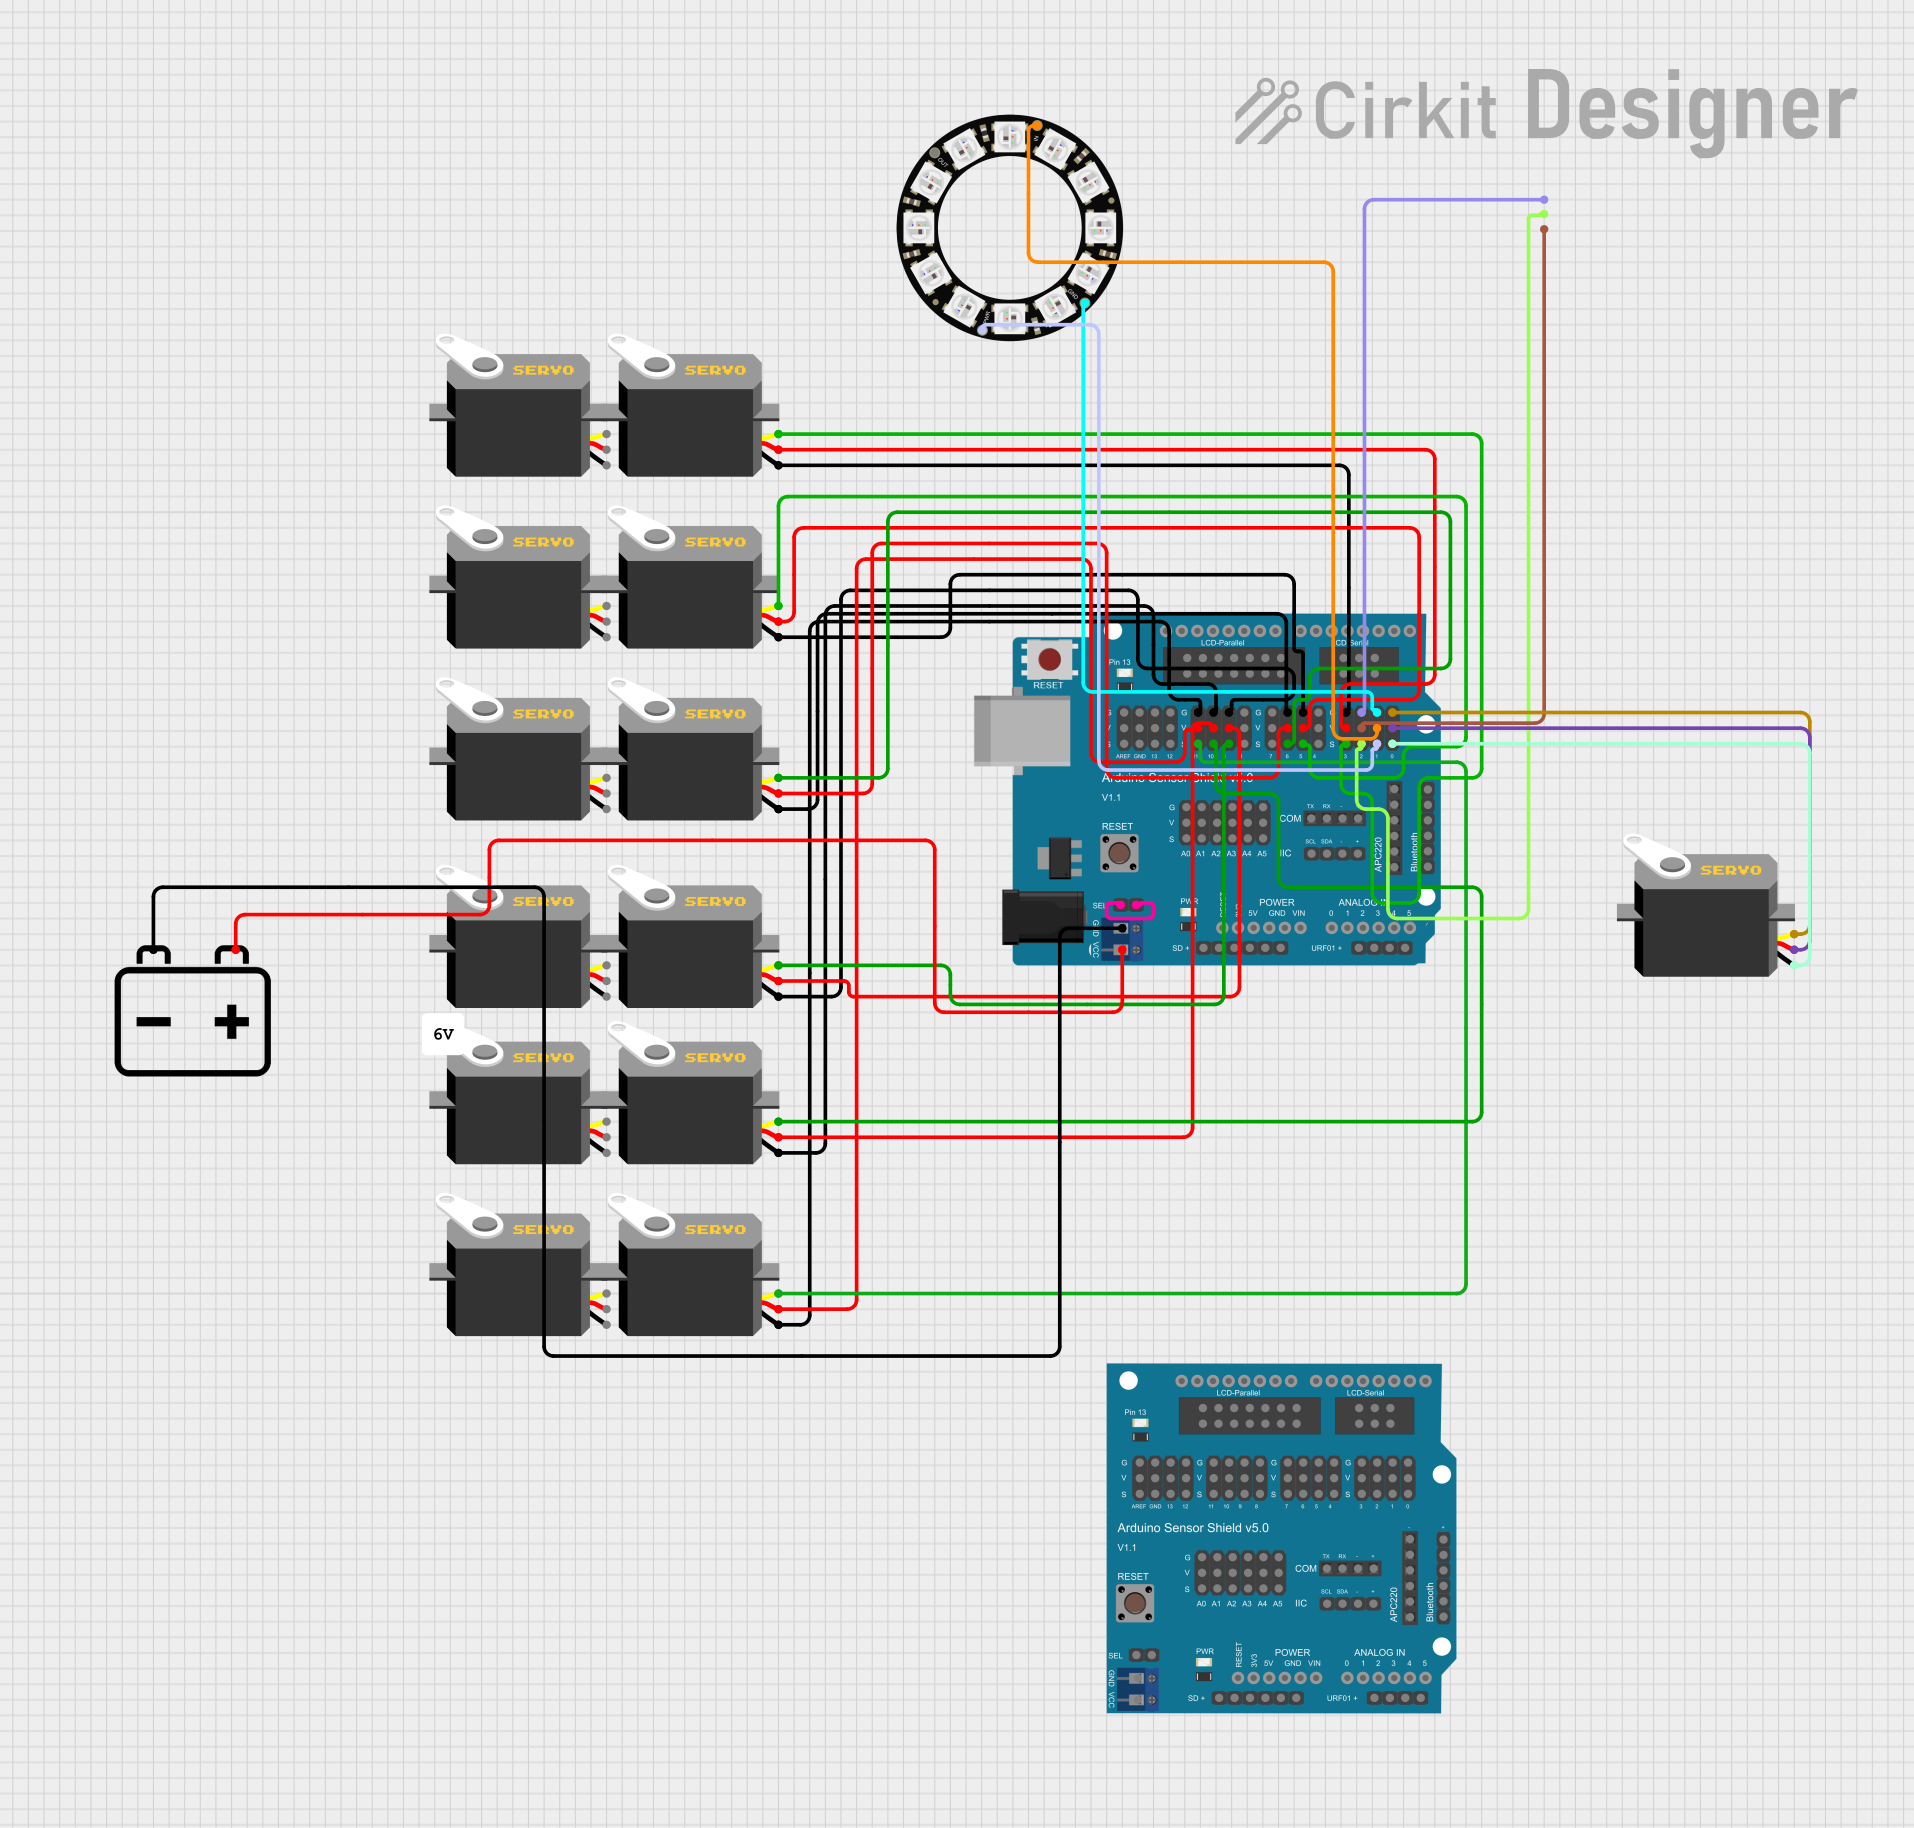


Explore Projects Built with Arduino Sensor Shield
Common Applications and Use Cases
- Prototyping sensor-based projects (e.g., temperature, humidity, motion detection)
- Robotics and automation systems
- IoT (Internet of Things) applications
- Educational projects for learning electronics and programming
- Rapid development of interactive systems
Technical Specifications
- Compatibility: Arduino UNO, Mega, Leonardo, and other standard Arduino boards
- Operating Voltage: 5V (supplied by the Arduino board)
- Pinout: Breakout for all Arduino pins, including digital, analog, and power
- Connectors:
- 3-pin headers for sensors/modules (Signal, VCC, GND)
- I2C interface (SDA, SCL)
- UART interface (TX, RX)
- Servo motor headers
- Dimensions: Matches the standard Arduino form factor
- Additional Features:
- Reset button
- Power indicator LED
- External power input (optional, for high-power peripherals)
Pin Configuration and Descriptions
The Arduino Sensor Shield provides easy access to all Arduino pins. Below is a detailed description of the pin layout:
| Pin Type | Description |
|---|---|
| Digital Pins | D0-D13: Standard digital I/O pins for connecting sensors, modules, or actuators. |
| Analog Pins | A0-A5: Analog input pins for reading sensor data (e.g., temperature, light). |
| Power Pins | 5V, 3.3V, GND: Power supply for sensors and modules. |
| I2C Interface | SDA, SCL: Dedicated pins for I2C communication. |
| UART Interface | TX, RX: Serial communication pins for modules like Bluetooth or GSM. |
| Servo Headers | 3-pin headers for directly connecting servo motors (Signal, VCC, GND). |
Usage Instructions
How to Use the Arduino Sensor Shield in a Circuit
- Attach the Shield: Place the Arduino Sensor Shield on top of your Arduino board, ensuring the pins align correctly.
- Connect Sensors/Modules:
- Use the 3-pin headers (Signal, VCC, GND) to connect sensors or modules.
- For I2C devices, connect them to the SDA and SCL pins.
- For UART-based modules, use the TX and RX pins.
- Power the System:
- If your sensors/modules require additional power, connect an external power source to the shield.
- Otherwise, the shield will draw power from the Arduino board.
- Upload Code:
- Write and upload your Arduino sketch using the Arduino IDE.
- Ensure the correct pins are defined in your code for each connected sensor/module.
Important Considerations and Best Practices
- Power Management: Avoid overloading the Arduino's onboard power supply. Use an external power source for high-power peripherals like servo motors.
- Pin Conflicts: Check for pin conflicts when using multiple modules. Some modules may share the same pins (e.g., I2C devices).
- Secure Connections: Ensure all connections are secure to prevent intermittent issues.
- Code Compatibility: Use libraries specific to the sensors/modules you are connecting for easier integration.
Example Code for Arduino UNO
Below is an example of using the Arduino Sensor Shield to read data from a DHT11 temperature and humidity sensor connected to pin D2:
#include <DHT.h>

// Define the pin where the DHT11 sensor is connected
#define DHTPIN 2  // Pin D2 on the Arduino Sensor Shield

// Define the type of DHT sensor
#define DHTTYPE DHT11

// Initialize the DHT sensor
DHT dht(DHTPIN, DHTTYPE);

void setup() {
  Serial.begin(9600);  // Start serial communication
  dht.begin();         // Initialize the DHT sensor
  Serial.println("DHT11 Sensor Test");
}

void loop() {
  delay(2000);  // Wait 2 seconds between readings

  // Read temperature and humidity from the DHT11 sensor
  float humidity = dht.readHumidity();
  float temperature = dht.readTemperature();

  // Check if the readings are valid
  if (isnan(humidity) || isnan(temperature)) {
    Serial.println("Failed to read from DHT sensor!");
    return;
  }

  // Print the readings to the Serial Monitor
  Serial.print("Humidity: ");
  Serial.print(humidity);
  Serial.print("%  Temperature: ");
  Serial.print(temperature);
  Serial.println("°C");
}
Troubleshooting and FAQs
Common Issues and Solutions
No Power to Sensors/Modules:
- Cause: Loose connections or insufficient power supply.
- Solution: Check all connections and ensure the shield is properly seated on the Arduino board. Use an external power source if needed.
Incorrect Sensor Readings:
- Cause: Wrong pin configuration or faulty sensor.
- Solution: Verify the pin assignments in your code and ensure the sensor is functioning correctly.
Communication Errors (I2C or UART):
- Cause: Pin conflicts or incorrect wiring.
- Solution: Ensure no other devices are using the same pins. Double-check the wiring and connections.
Servo Motors Not Working:
- Cause: Insufficient power supply.
- Solution: Use an external power source to drive the servo motors.
FAQs
Q: Can I use the Arduino Sensor Shield with an Arduino Mega?
A: Yes, the shield is compatible with the Arduino Mega. However, ensure that the pin mappings in your code match the Mega's pin layout.
Q: How many sensors can I connect to the shield?
A: The number of sensors depends on the available digital and analog pins. For example, the Arduino UNO provides 14 digital pins and 6 analog pins.
Q: Do I need additional libraries for my sensors?
A: Yes, most sensors require specific libraries for proper functionality. Check the documentation for your sensor/module and install the necessary libraries in the Arduino IDE.
Q: Can I stack other shields on top of the Sensor Shield?
A: Yes, as long as the additional shield does not block access to the pins or cause pin conflicts.