How to Use LED Dimmer Controller 12V-24V: Examples, Pinouts, and Specs
Introduction
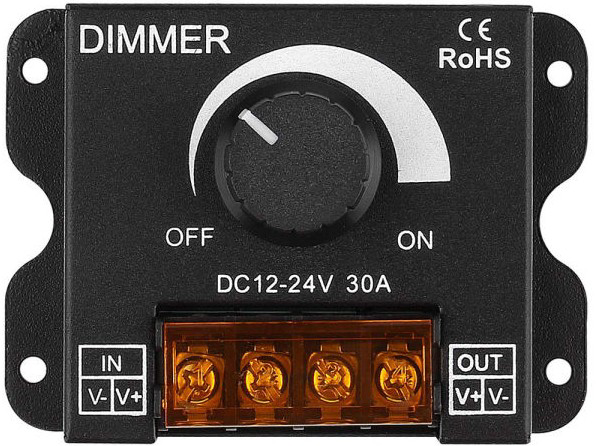
The LED Dimmer Controller 12V-24V (Manufacturer Part ID: 30A-DIMMER-cap) by Edlang Lighting CO is a versatile device designed to adjust the brightness of LED lights. It achieves this by varying the voltage or current supplied to the LEDs, making it ideal for applications requiring precise lighting control. This dimmer is compatible with 12V to 24V DC systems and supports a maximum current of 30A, making it suitable for both residential and commercial lighting setups.
Explore Projects Built with LED Dimmer Controller 12V-24V

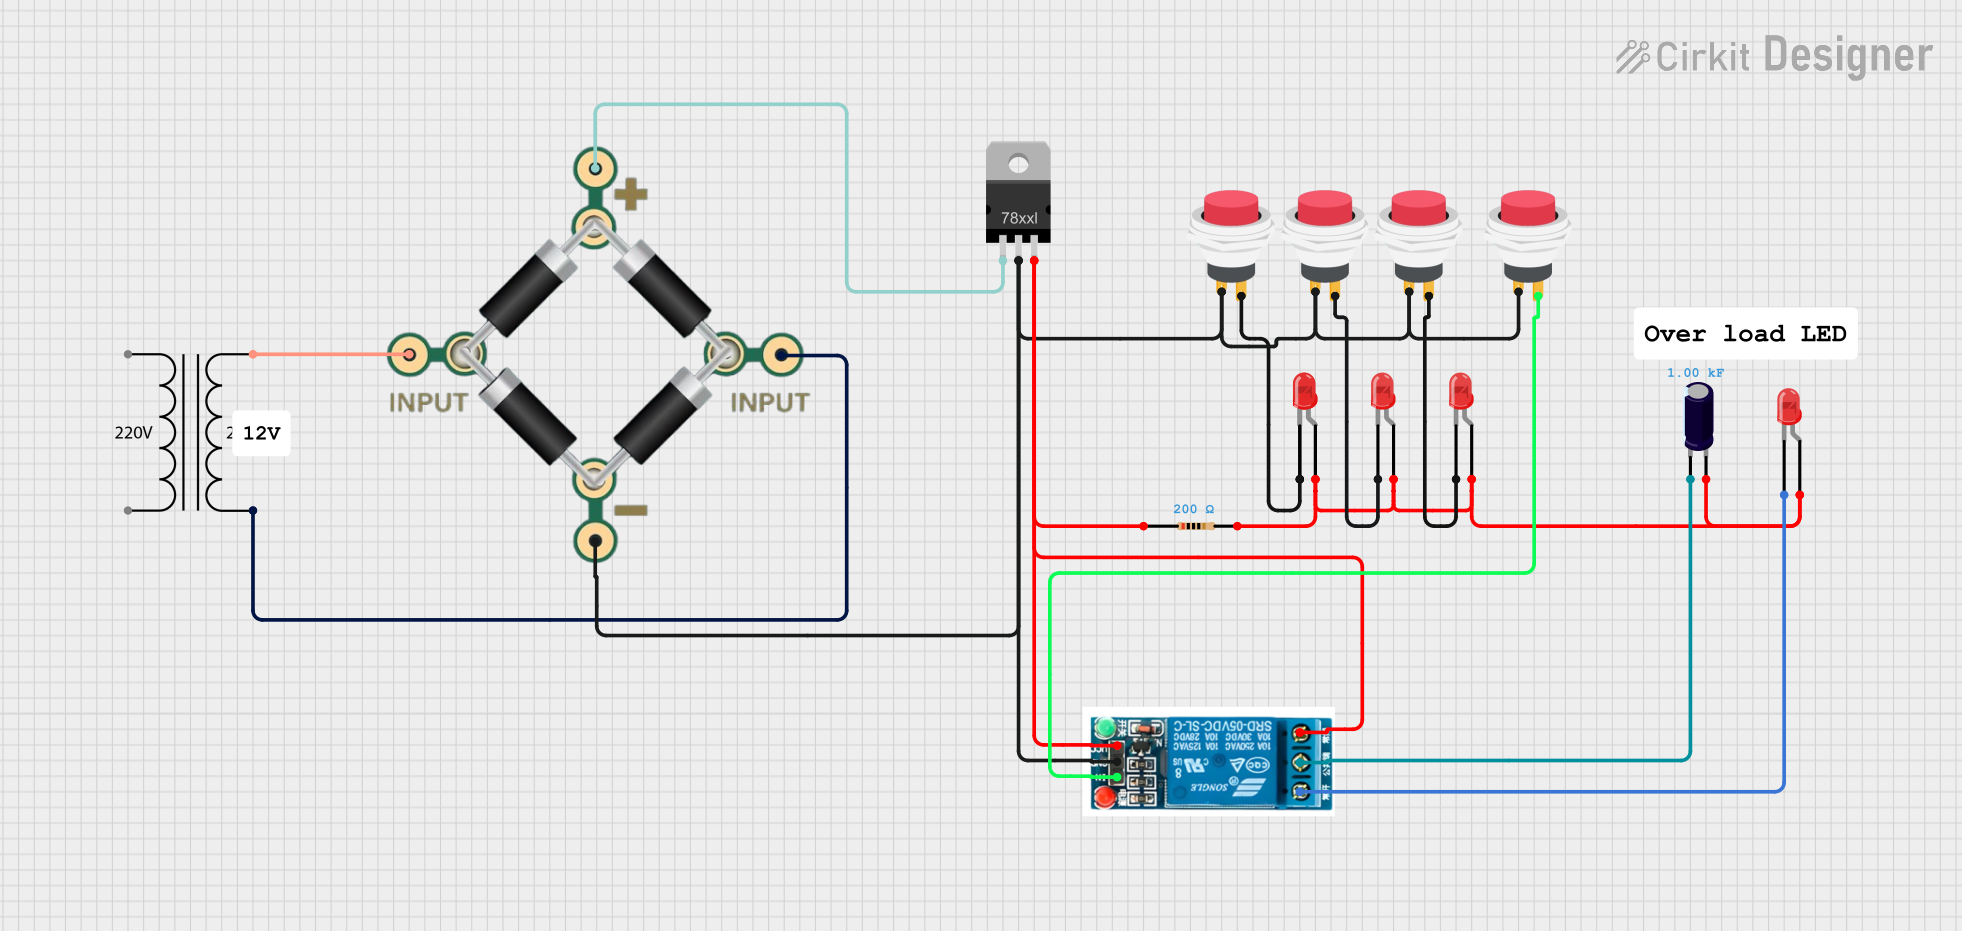

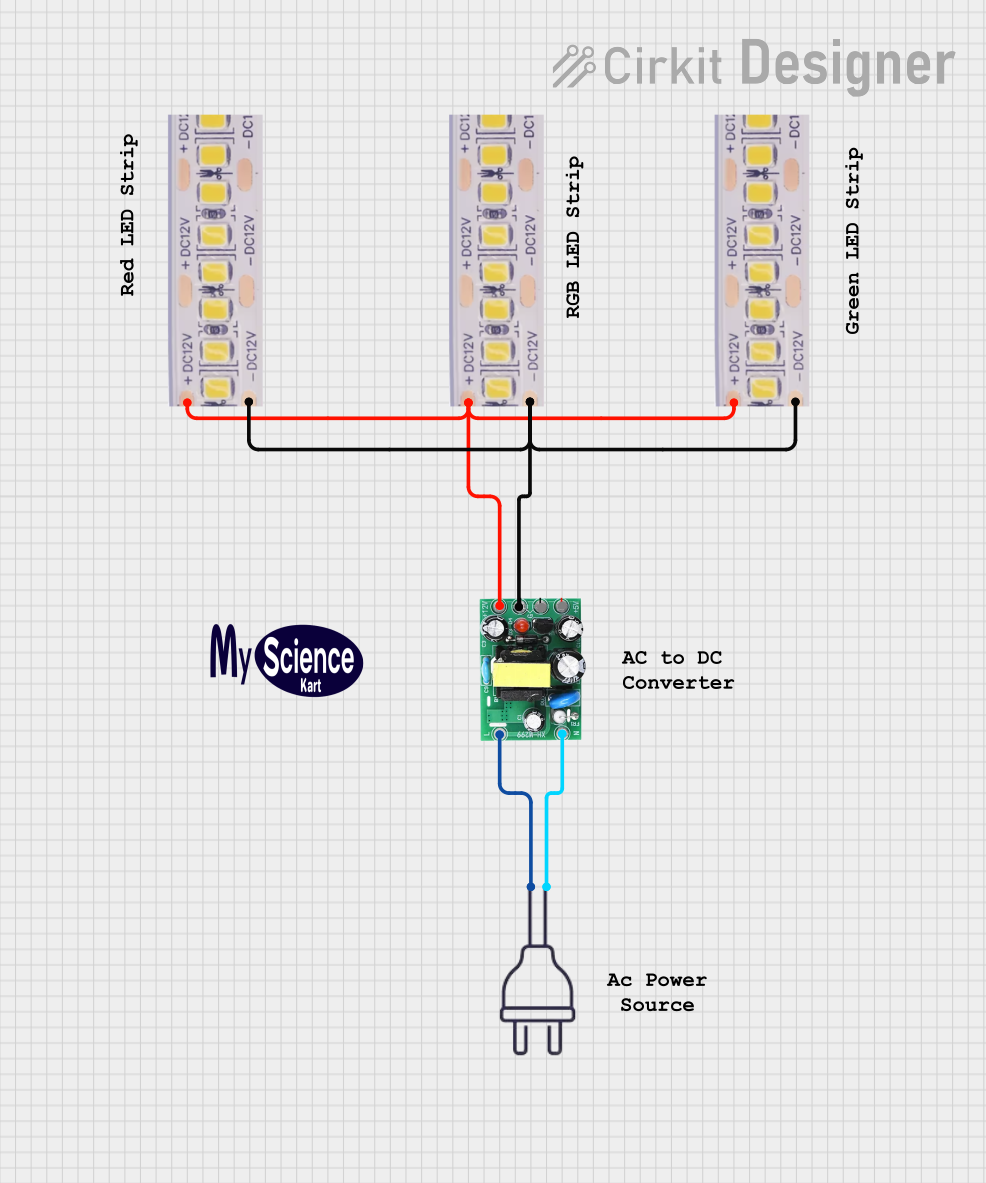
Explore Projects Built with LED Dimmer Controller 12V-24V
Common Applications and Use Cases
- Home lighting systems for adjustable ambiance
- Commercial lighting in restaurants, retail stores, and offices
- Automotive LED lighting systems
- Stage and event lighting
- Energy-saving applications by reducing LED brightness when full intensity is not required
Technical Specifications
Below are the key technical details for the 30A-DIMMER-cap:
| Parameter | Specification |
|---|---|
| Input Voltage | 12V to 24V DC |
| Maximum Current | 30A |
| Output Power | Up to 360W (12V) / 720W (24V) |
| Control Type | Rotary knob (manual adjustment) |
| Dimming Range | 0% to 100% |
| Operating Temperature | -20°C to 60°C |
| Dimensions | 85mm x 65mm x 40mm |
| Weight | 120g |
Pin Configuration and Descriptions
The LED Dimmer Controller has a simple terminal block for input and output connections. Below is the pin configuration:
| Pin Name | Description |
|---|---|
| V+ (Input) | Positive DC input voltage (12V or 24V) |
| V- (Input) | Negative DC input voltage (ground) |
| V+ (Output) | Positive DC output voltage to the LED load |
| V- (Output) | Negative DC output voltage (ground) to the LED load |
Usage Instructions
How to Use the Component in a Circuit
Power Supply Connection:
- Connect a 12V or 24V DC power supply to the input terminals (
V+andV-). - Ensure the power supply voltage matches the voltage rating of your LED lights.
- Connect a 12V or 24V DC power supply to the input terminals (
LED Load Connection:
- Connect the LED light's positive terminal to the output
V+terminal. - Connect the LED light's negative terminal to the output
V-terminal.
- Connect the LED light's positive terminal to the output
Adjusting Brightness:
- Use the rotary knob on the dimmer to adjust the brightness of the connected LEDs.
- Turning the knob clockwise increases brightness, while turning it counterclockwise decreases brightness.
Testing:
- Power on the system and test the dimmer functionality by rotating the knob to ensure smooth brightness adjustment.
Important Considerations and Best Practices
- Current Rating: Ensure the total current drawn by the connected LEDs does not exceed 30A.
- Heat Dissipation: For high-power applications, ensure proper ventilation or heat dissipation to prevent overheating.
- Polarity: Double-check the polarity of the connections to avoid damage to the dimmer or LEDs.
- Compatibility: Use only with dimmable LED lights rated for 12V or 24V DC systems.
- Fuse Protection: Consider adding a fuse between the power supply and the dimmer for added safety.
Arduino UNO Integration Example
While the 30A-DIMMER-cap is a standalone manual dimmer, it can be integrated with an Arduino UNO for automated control. Below is an example of how to control the brightness of an LED strip using PWM (Pulse Width Modulation) via the Arduino:
Circuit Setup
- Connect the Arduino's PWM pin (e.g., Pin 9) to the dimmer's input control terminal (if available).
- Connect the dimmer's output terminals to the LED strip as described above.
Arduino Code
// Example code to control LED brightness using PWM on Arduino UNO
// Connect the dimmer's control input to Arduino Pin 9

const int pwmPin = 9; // PWM pin connected to the dimmer's control input

void setup() {
  pinMode(pwmPin, OUTPUT); // Set the PWM pin as an output
}

void loop() {
  // Gradually increase brightness
  for (int brightness = 0; brightness <= 255; brightness++) {
    analogWrite(pwmPin, brightness); // Write PWM signal to dimmer
    delay(10); // Small delay for smooth transition
  }

  // Gradually decrease brightness
  for (int brightness = 255; brightness >= 0; brightness--) {
    analogWrite(pwmPin, brightness); // Write PWM signal to dimmer
    delay(10); // Small delay for smooth transition
  }
}
Troubleshooting and FAQs
Common Issues and Solutions
| Issue | Possible Cause | Solution |
|---|---|---|
| LEDs do not light up | Incorrect wiring or loose connections | Double-check all connections and ensure proper polarity. |
| LEDs flicker during dimming | Incompatible LED driver or power supply issues | Use a compatible dimmable LED driver and ensure a stable power supply. |
| Dimmer overheats | Exceeding the maximum current rating | Reduce the load or use a dimmer with a higher current rating. |
| Brightness adjustment is not smooth | Faulty rotary knob or poor-quality LEDs | Replace the rotary knob or use high-quality dimmable LEDs. |
FAQs
Can this dimmer be used with non-dimmable LEDs?
No, this dimmer is designed for use with dimmable LED lights only.What happens if I connect a 36V power supply?
The dimmer is rated for 12V to 24V DC only. Connecting a higher voltage may damage the device.Can I use this dimmer outdoors?
The dimmer is not waterproof. If outdoor use is required, ensure it is housed in a weatherproof enclosure.Is it possible to control multiple LED strips with one dimmer?
Yes, as long as the total current does not exceed 30A and the strips are connected in parallel.
By following this documentation, users can effectively integrate and operate the LED Dimmer Controller 12V-24V in their lighting systems.