The Lipo Rider Plus (Manufacturer Part ID: 106990290) by Seeed is a versatile battery management system designed specifically for lithium polymer (LiPo) batteries. It integrates essential features such as voltage regulation, battery protection, and charging capabilities, making it an ideal solution for powering portable and embedded electronic projects. The Lipo Rider Plus ensures safe and efficient operation of LiPo batteries, extending their lifespan and providing stable power output.
Explore Projects Built with Lipo Rider Plus
Use Cirkit Designer to design, explore, and prototype these projects online. Some projects support real-time simulation. Click "Open Project" to start designing instantly!
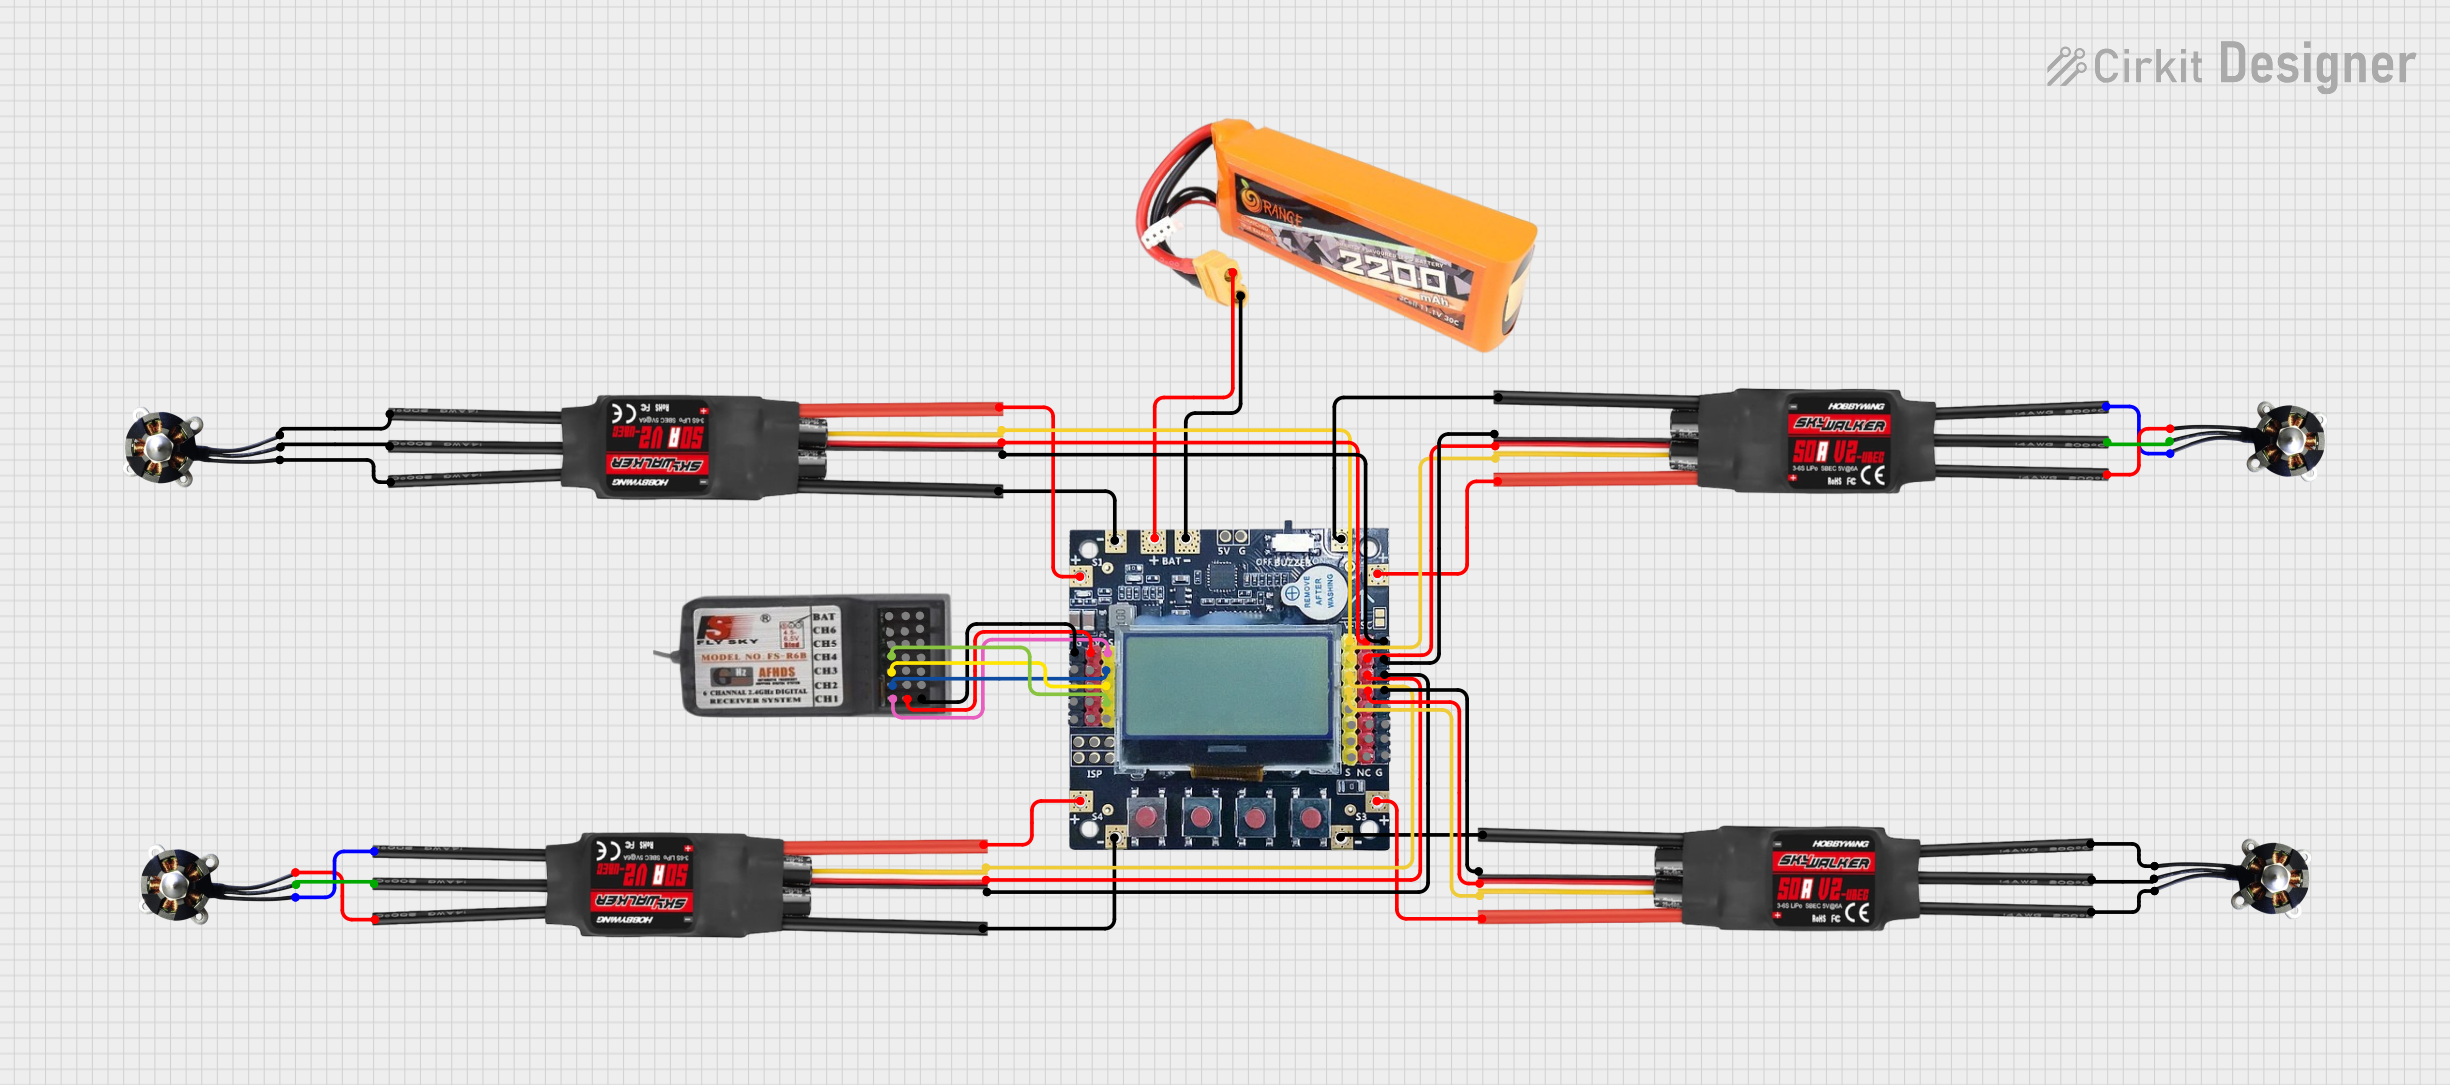
This circuit is a quadcopter control system that includes a LiPo battery, four BLDC motors, four ESCs, a KK2.1.5 flight controller, and an FS-R6B receiver. The KK2.1.5 flight controller manages the ESCs and motors based on input signals from the receiver, which is powered by the LiPo battery.
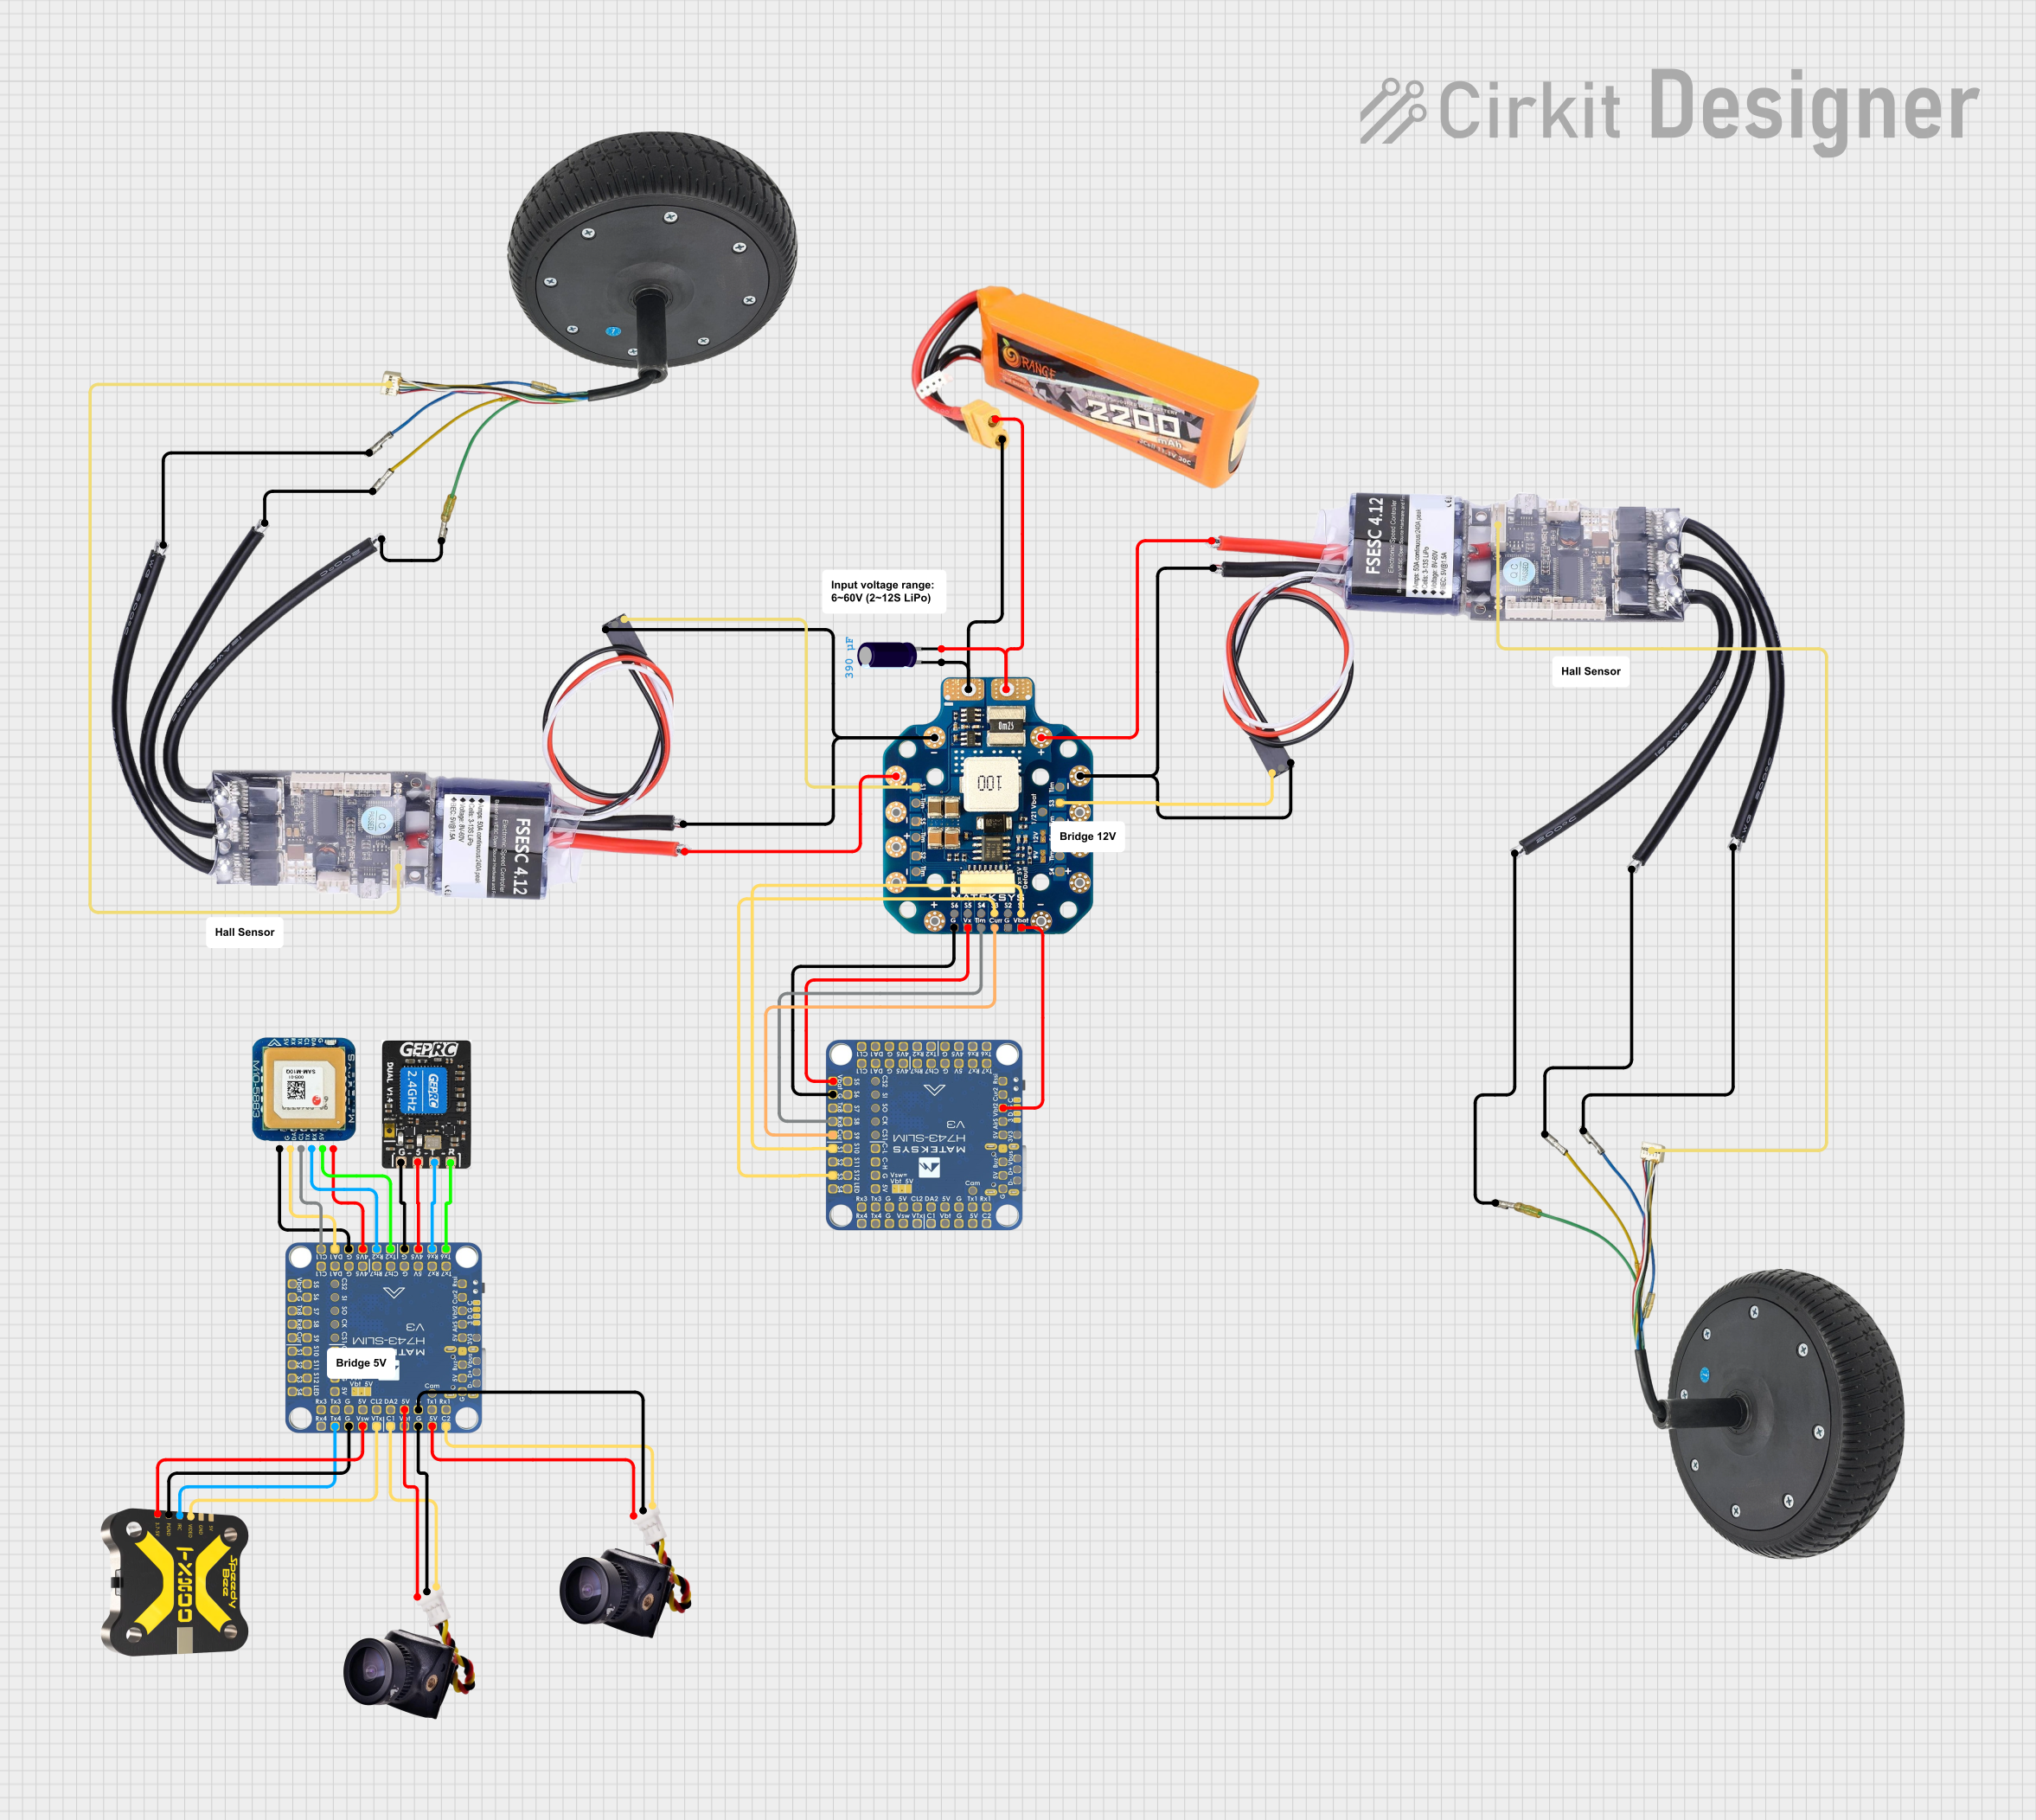
This circuit appears to be a power distribution and control system for a vehicle with two motorized wheels, possibly a drone or a robot. It includes a lipo battery connected to a Power Distribution Board (PDB) that distributes power to two Electronic Speed Controllers (ESCs) which in turn control the speed and direction of the motors. The system also integrates a flight controller (H743-SLIM V3) for managing various peripherals including GPS, FPV camera system, and a telemetry link (ExpressLRS).
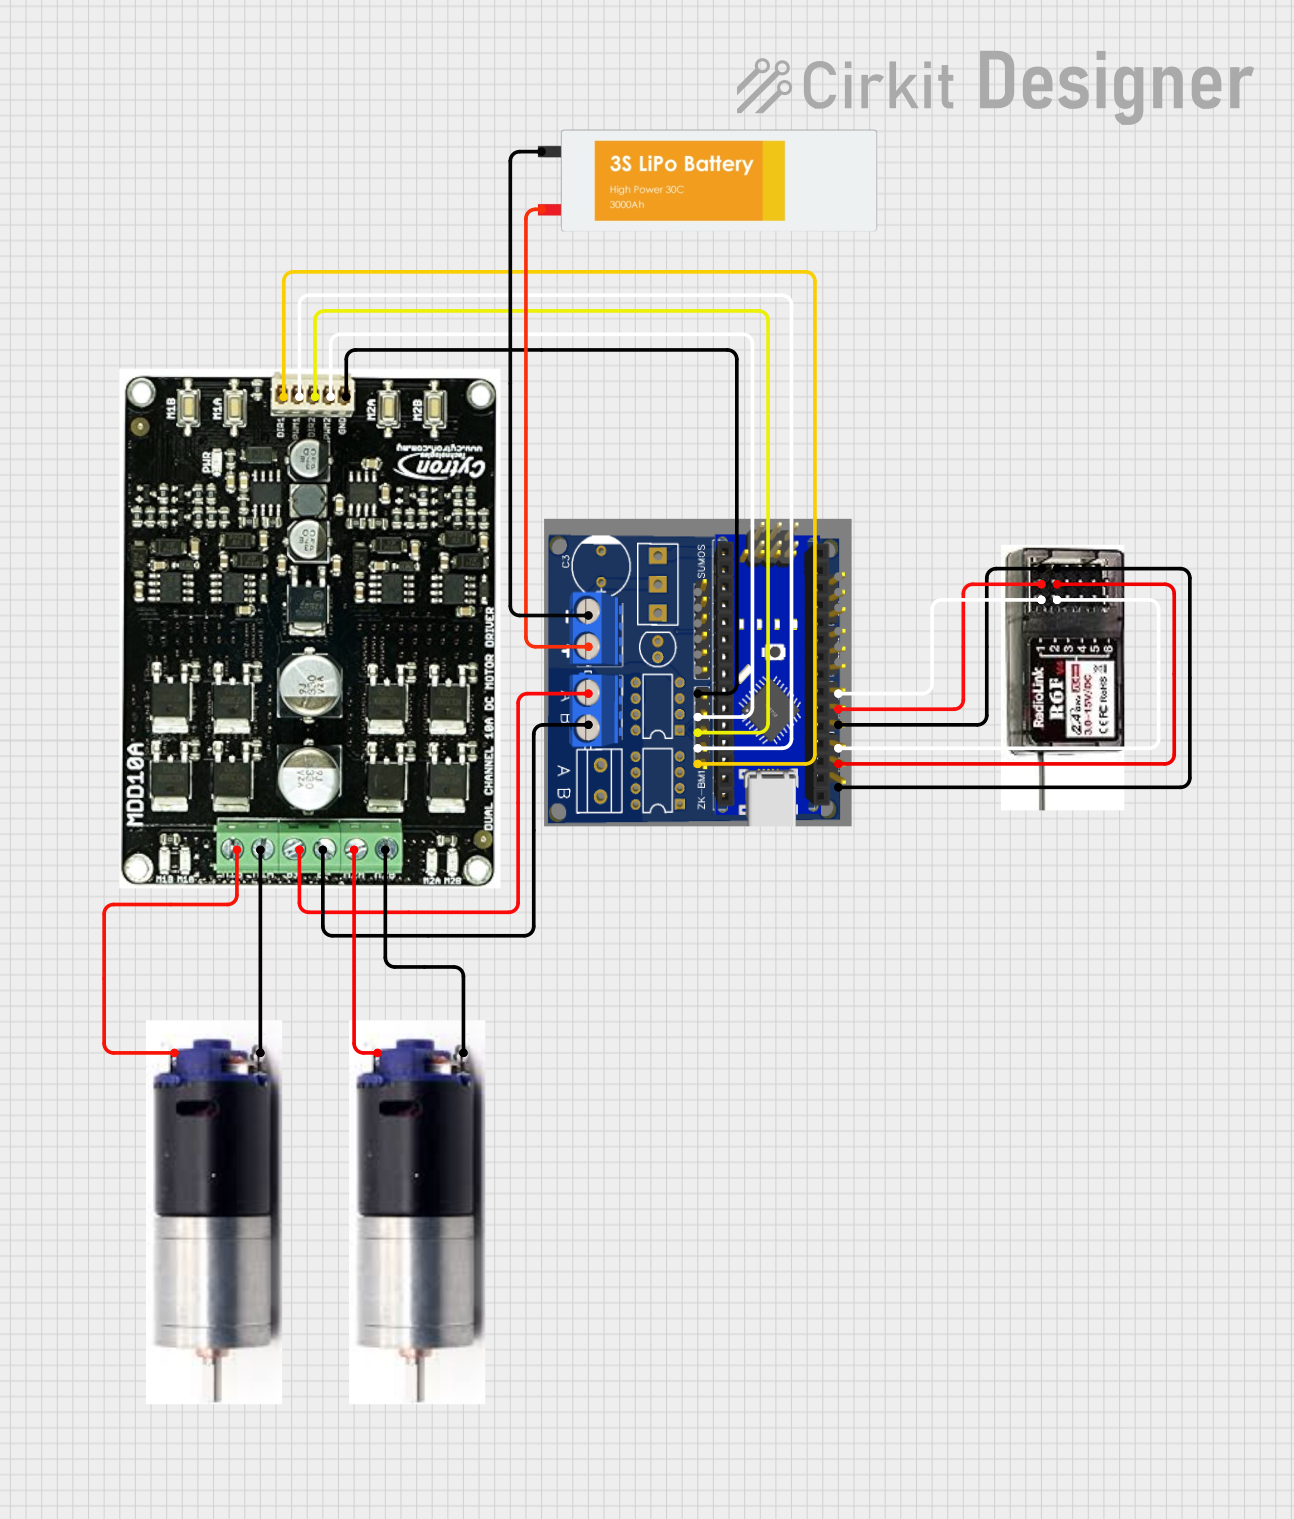
This circuit is a remote-controlled motor driver system powered by a LiPo battery. It uses a Massive RC MDEx microcontroller to control an MDD10A dual motor driver, which in turn drives two GM25 DC motors. The R6FG receiver receives remote control signals to manage the motor directions and speeds.
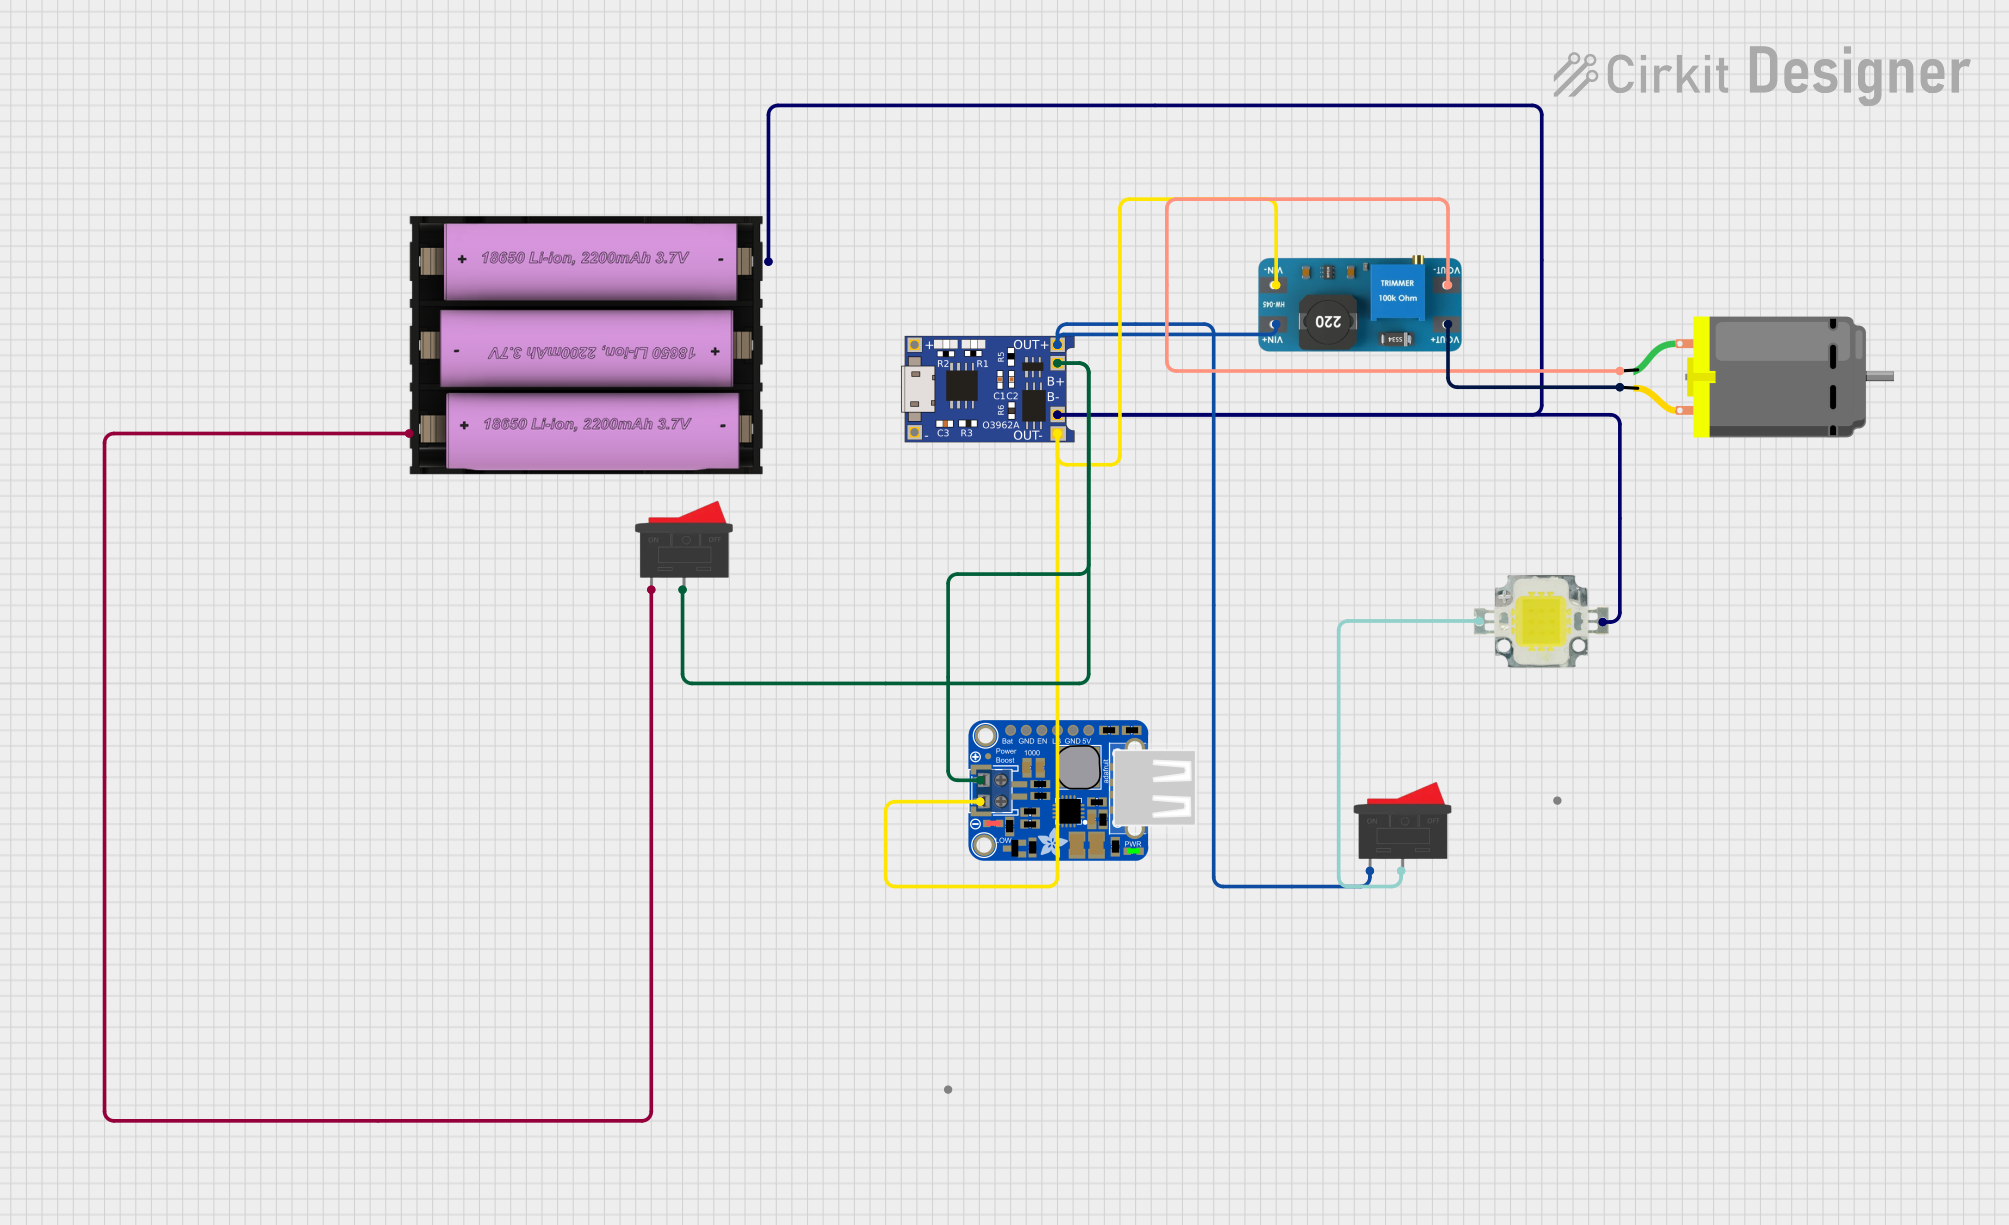
This circuit is designed to charge a Li-ion battery and power a DC motor and a 12V LED. The TP4056 module manages the battery charging process, while the PowerBoost 1000 and MT3608 boost converters step up the voltage to drive the motor and LED, respectively. Two rocker switches control the power flow to the LED and the charging circuit.
The Lipo Rider Plus is designed to provide reliable power management for LiPo batteries. Below are its key technical specifications:
Parameter
Value
Input Voltage Range
5V (via USB Type-C)
Output Voltage
5V (regulated)
Output Current (Max)
2.4A
Battery Input Voltage
3.7V (nominal)
Charging Current
1A (default, adjustable via resistor)
USB Port
USB Type-C (for charging and power input)
Protection Features
Overcharge, over-discharge, short circuit
Dimensions
50mm x 25mm
Pin Configuration and Descriptions
The Lipo Rider Plus has several key connectors and pins for interfacing with batteries and external devices. Below is a description of its pin configuration:
Pin/Connector
Description
USB Type-C
Input for charging the LiPo battery and powering the system.
BAT+ / BAT-
Terminals for connecting a 3.7V LiPo battery.
5V Output
Provides a regulated 5V output for powering external devices.
EN (Enable)
Enable pin to turn the output on or off.
LED Indicators
Status LEDs for charging, power output, and fault conditions.
Usage Instructions
The Lipo Rider Plus is straightforward to use and can be integrated into a variety of projects. Follow the steps below to use the component effectively:
Step 1: Connecting the Battery
Connect a 3.7V LiPo battery to the BAT+ and BAT- terminals. Ensure correct polarity to avoid damage.
Verify that the battery is securely connected and that the voltage is within the supported range.
Step 2: Power Input and Charging
Use a USB Type-C cable to connect the Lipo Rider Plus to a 5V power source (e.g., a USB wall adapter or computer).
The charging LED will light up to indicate that the battery is charging. Once fully charged, the LED will turn off.
Step 3: Powering External Devices
Connect your external device to the 5V Output terminal.
Ensure that the total current draw of the connected devices does not exceed 2.4A.
Step 4: Using the Enable Pin
The EN (Enable) pin can be used to control the output. Pull the pin high to enable the output or low to disable it.
Important Considerations and Best Practices
Always use a compatible 3.7V LiPo battery to avoid damage to the component.
Do not exceed the maximum output current of 2.4A to prevent overheating or failure.
Ensure proper ventilation when using the Lipo Rider Plus in high-power applications.
If adjusting the charging current, refer to the datasheet for resistor selection guidelines.
Example: Using Lipo Rider Plus with Arduino UNO
The Lipo Rider Plus can be used to power an Arduino UNO. Below is an example setup and code:
Hardware Setup
Connect a 3.7V LiPo battery to the BAT+ and BAT- terminals.
Use the 5V Output terminal to power the Arduino UNO by connecting it to the Arduino's 5V and GND pins.
Example Code
// Example code to blink an LED using Arduino UNO powered by Lipo Rider Plus

const int ledPin = 13; // Pin connected to the onboard LED

void setup() {
  pinMode(ledPin, OUTPUT); // Set the LED pin as an output
}

void loop() {
  digitalWrite(ledPin, HIGH); // Turn the LED on
  delay(1000);                // Wait for 1 second
  digitalWrite(ledPin, LOW);  // Turn the LED off
  delay(1000);                // Wait for 1 second
}
Troubleshooting and FAQs
Common Issues and Solutions
Battery Not Charging
Ensure the USB Type-C cable and power source are functioning properly.
Verify that the battery is securely connected to the BAT+ and BAT- terminals.
Check for any visible damage to the battery or the Lipo Rider Plus.
No Output Voltage
Confirm that the battery is charged and connected correctly.
Check the EN (Enable) pin to ensure the output is enabled.
Verify that the connected load does not exceed the maximum current rating.
Overheating
Ensure proper ventilation and avoid exceeding the maximum output current of 2.4A.
Check for any short circuits in the connected load.
FAQs
Q: Can I use the Lipo Rider Plus with other types of batteries?
A: No, the Lipo Rider Plus is specifically designed for 3.7V LiPo batteries. Using other types of batteries may result in damage or unsafe operation.
Q: How do I adjust the charging current?
A: The charging current can be adjusted by replacing the onboard resistor. Refer to the datasheet for the appropriate resistor value.
Q: Can I use the Lipo Rider Plus to power multiple devices simultaneously?
A: Yes, as long as the total current draw does not exceed 2.4A.
Q: What happens if the battery is over-discharged?
A: The Lipo Rider Plus includes over-discharge protection to prevent damage to the battery. The output will be disabled until the battery is recharged.


 Open Project in Cirkit Designer