
How to Use ESP32 Terminal adapter 38 pin: Examples, Pinouts, and Specs
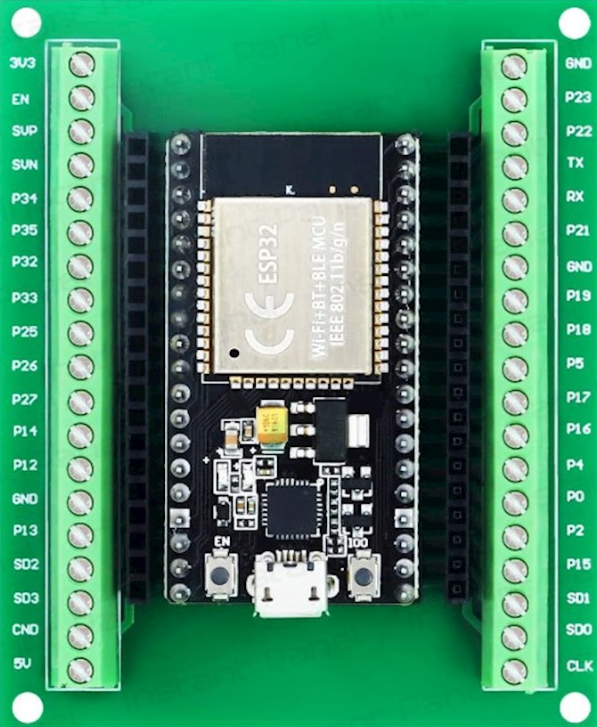
 Design with ESP32 Terminal adapter 38 pin in Cirkit Designer
Introduction
The ESP32 Terminal Adapter 38 Pin is a versatile development board accessory designed to simplify prototyping and development with the ESP32 microcontroller. Manufactured by ESP (Part ID: 32), this adapter provides a convenient way to connect peripherals and components to the ESP32 via its 38-pin layout. It is particularly useful for developers working on IoT, robotics, and embedded systems projects.
Explore Projects Built with ESP32 Terminal adapter 38 pin
 Open Project in Cirkit Designer
 Open Project in Cirkit Designer
 Open Project in Cirkit Designer
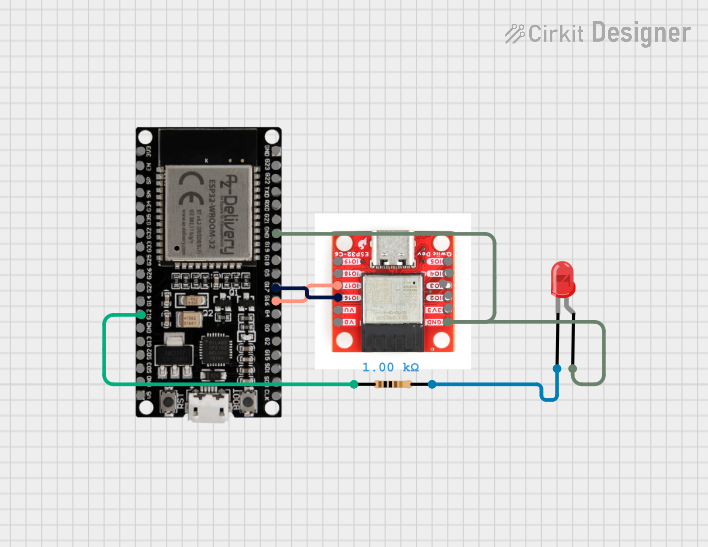 Open Project in Cirkit Designer
Explore Projects Built with ESP32 Terminal adapter 38 pin
Open Project in Cirkit DesignerOpen Project in Cirkit DesignerOpen Project in Cirkit DesignerOpen Project in Cirkit DesignerCommon Applications and Use Cases
- Rapid prototyping of IoT devices
- Development of smart home automation systems
- Robotics and sensor integration
- Educational projects and learning platforms
- Debugging and testing ESP32-based circuits
Technical Specifications
The ESP32 Terminal Adapter 38 Pin is designed to provide easy access to the ESP32's GPIO pins and other interfaces. Below are the key technical details:
Key Specifications
| Parameter | Value |
|---|---|
| Manufacturer | ESP |
| Part ID | 32 |
| Pin Count | 38 |
| Voltage Input Range | 3.3V to 5V |
| Compatible Microcontroller | ESP32 |
| Dimensions | 60mm x 40mm x 15mm |
| Operating Temperature | -40°C to 85°C |
Pin Configuration and Descriptions
The terminal adapter provides access to all 38 pins of the ESP32 microcontroller. Below is the pinout description:
| Pin Number | Pin Name | Description |
|---|---|---|
| 1 | GND | Ground |
| 2 | 3V3 | 3.3V Power Supply |
| 3 | EN | Enable Pin (Active High) |
| 4 | IO0 | GPIO0 (Boot Mode Selection) |
| 5 | IO1 | GPIO1 (UART TX) |
| 6 | IO2 | GPIO2 (General Purpose I/O) |
| 7 | IO3 | GPIO3 (UART RX) |
| 8 | IO4 | GPIO4 (PWM, ADC, or General Purpose I/O) |
| 9 | IO5 | GPIO5 (PWM, ADC, or General Purpose I/O) |
| ... | ... | ... (Refer to the ESP32 datasheet for full) |
| 38 | VIN | Voltage Input (5V) |
Note: For a complete pinout and detailed functionality, refer to the ESP32 datasheet.
Usage Instructions
How to Use the ESP32 Terminal Adapter
Connect the ESP32 Microcontroller:
- Insert the ESP32 module into the terminal adapter, ensuring proper alignment of the pins.
- Secure the module to avoid loose connections.
Power the Adapter:
- Provide a 3.3V or 5V power supply to the terminal adapter via the VIN or 3V3 pin.
- Ensure the power source is stable and within the specified voltage range.
Connect Peripherals:
- Use jumper wires or connectors to attach sensors, actuators, or other peripherals to the GPIO pins.
- Refer to the pin configuration table to identify the appropriate pins for your application.
Program the ESP32:
- Connect the ESP32 to your computer using a USB cable.
- Use the Arduino IDE or ESP-IDF to upload your code to the ESP32.
Important Considerations and Best Practices
- Voltage Levels: Ensure that all connected peripherals operate within the ESP32's voltage range (3.3V logic).
- Pin Usage: Avoid using reserved pins (e.g., IO0 for boot mode) for general-purpose I/O unless necessary.
- Power Supply: Use a regulated power supply to prevent damage to the ESP32 or connected components.
- Static Protection: Handle the terminal adapter and ESP32 module with care to avoid electrostatic discharge (ESD) damage.
Example Code for Arduino UNO Integration
Below is an example of how to use the ESP32 Terminal Adapter with an Arduino UNO to read data from a DHT11 temperature and humidity sensor:
#include <DHT.h>

// Define the DHT sensor type and pin
#define DHTPIN 4       // GPIO4 on the ESP32 Terminal Adapter
#define DHTTYPE DHT11  // DHT11 sensor

DHT dht(DHTPIN, DHTTYPE);

void setup() {
  Serial.begin(115200);  // Initialize serial communication
  dht.begin();           // Initialize the DHT sensor
  Serial.println("DHT11 Sensor Test");
}

void loop() {
  delay(2000);  // Wait 2 seconds between readings

  // Read temperature and humidity
  float humidity = dht.readHumidity();
  float temperature = dht.readTemperature();

  // Check if readings are valid
  if (isnan(humidity) || isnan(temperature)) {
    Serial.println("Failed to read from DHT sensor!");
    return;
  }

  // Print the results to the Serial Monitor
  Serial.print("Humidity: ");
  Serial.print(humidity);
  Serial.print("%  Temperature: ");
  Serial.print(temperature);
  Serial.println("°C");
}
Note: Ensure the DHT11 sensor is connected to GPIO4 on the terminal adapter.
Troubleshooting and FAQs
Common Issues and Solutions
ESP32 Not Powering On:
- Cause: Insufficient or unstable power supply.
- Solution: Verify the power source and ensure it provides 3.3V or 5V as required.
Peripheral Not Responding:
- Cause: Incorrect pin connections or mismatched voltage levels.
- Solution: Double-check the pin configuration and ensure peripherals are compatible with 3.3V logic.
Code Upload Fails:
- Cause: Incorrect boot mode or USB connection issue.
- Solution: Ensure GPIO0 is set to boot mode if required and check the USB cable/port.
Overheating:
- Cause: Excessive current draw or short circuit.
- Solution: Inspect the circuit for shorts and ensure peripherals do not exceed the ESP32's current limits.
FAQs
Q: Can I use 5V peripherals with the ESP32 Terminal Adapter?
A: The ESP32 operates at 3.3V logic. Use a level shifter to interface with 5V peripherals.
Q: Is the terminal adapter compatible with all ESP32 modules?
A: The adapter is designed for 38-pin ESP32 modules. Ensure your module matches this pin configuration.
Q: How do I reset the ESP32 using the terminal adapter?
A: Use the EN (Enable) pin to reset the ESP32. Pull it low momentarily to trigger a reset.
Q: Can I use the terminal adapter for battery-powered projects?
A: Yes, you can connect a battery to the VIN pin, provided it supplies a stable voltage within the specified range.
This concludes the documentation for the ESP32 Terminal Adapter 38 Pin. For further assistance, refer to the ESP32 datasheet or contact the manufacturer.