How to Use 18650 V8 Battery Shield: Examples, Pinouts, and Specs
Introduction
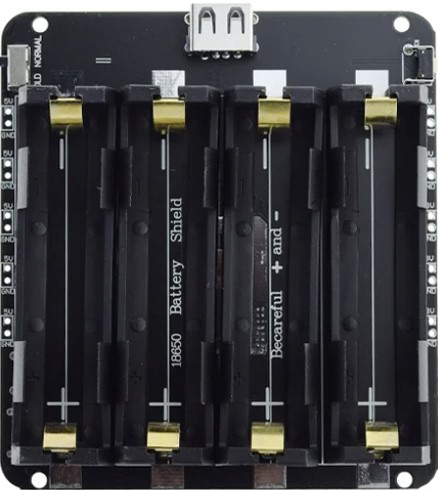
The 18650 V8 Battery Shield is a versatile battery management board designed to hold and protect 18650 lithium-ion batteries. It provides essential safety features such as overcharge protection, over-discharge protection, and short-circuit protection, ensuring the safe and efficient operation of your batteries. This shield is widely used in DIY electronics projects, portable power supplies, and IoT applications. Its compact design and built-in USB output make it an excellent choice for powering microcontrollers, sensors, and other low-power devices.
Explore Projects Built with 18650 V8 Battery Shield


Explore Projects Built with 18650 V8 Battery Shield
Common Applications and Use Cases
- DIY power banks
- Portable electronics projects
- IoT devices and sensors
- Arduino and Raspberry Pi projects
- Emergency backup power supplies
Technical Specifications
The 18650 V8 Battery Shield is designed to provide reliable power management for 18650 lithium-ion batteries. Below are its key technical details:
Key Technical Details
- Input Voltage (Charging): 5V (via micro-USB or Type-C port)
- Output Voltage: 5V (USB output), 3.7V (direct battery output)
- Output Current: Up to 2A (USB output)
- Battery Type Supported: 18650 lithium-ion battery
- Protection Features:
- Overcharge protection
- Over-discharge protection
- Short-circuit protection
- Charging Indicator LEDs:
- Red: Charging
- Blue: Fully charged
- Dimensions: Approximately 60mm x 25mm x 15mm
Pin Configuration and Descriptions
The 18650 V8 Battery Shield includes several pins and connectors for input and output. Below is a detailed description:
| Pin/Connector | Description |
|---|---|
| Micro-USB Port | Used for charging the 18650 battery with a 5V power source. |
| Type-C Port | Alternative charging port for the 18650 battery. |
| USB-A Output Port | Provides 5V regulated output for powering external devices. |
| Battery Terminals | Slots for inserting one or two 18650 lithium-ion batteries. |
| 3.7V Output Pin | Direct output from the battery (unregulated, 3.7V nominal). |
| 5V Output Pin | Regulated 5V output for powering external circuits. |
| ON/OFF Switch | Controls the power output from the shield. |
| LED Indicators | Red and blue LEDs to indicate charging status and battery level. |
Usage Instructions
How to Use the 18650 V8 Battery Shield in a Circuit
Insert the Battery:
- Place one or two 18650 lithium-ion batteries into the battery slots, ensuring correct polarity.
- The positive terminal of the battery should align with the "+" marking on the shield.
Charge the Battery:
- Connect a 5V power source to the micro-USB or Type-C port to charge the battery.
- The red LED will light up during charging, and the blue LED will light up when fully charged.
Power External Devices:
- Use the USB-A port to power devices requiring 5V, such as Arduino boards or sensors.
- Alternatively, use the 5V or 3.7V output pins to connect directly to your circuit.
Turn On/Off:
- Use the ON/OFF switch to control the power output from the shield.
Important Considerations and Best Practices
- Battery Selection: Use only high-quality 18650 lithium-ion batteries with built-in protection circuits for added safety.
- Avoid Overloading: Do not connect devices that draw more than 2A from the USB output.
- Heat Management: Ensure proper ventilation to prevent overheating during charging or discharging.
- Polarity Check: Always check the battery polarity before inserting it into the shield to avoid damage.
- Unregulated Output: Be cautious when using the 3.7V output pin, as it is directly connected to the battery and is not regulated.
Example: Powering an Arduino UNO
The 18650 V8 Battery Shield can be used to power an Arduino UNO via its USB port. Below is an example of how to connect and use it:
- Insert a fully charged 18650 battery into the shield.
- Connect the USB-A output port of the shield to the Arduino UNO's USB input using a USB cable.
- Turn on the shield using the ON/OFF switch.
- The Arduino UNO will now be powered by the shield.
Optional: Arduino Code Example
If you are using the shield to power sensors or other peripherals connected to the Arduino, here is a simple code example to read data from a sensor:
// Example: Reading data from a sensor powered by the 18650 V8 Battery Shield
// Ensure the sensor is connected to the Arduino and powered by the shield.

const int sensorPin = A0; // Analog pin connected to the sensor
int sensorValue = 0;      // Variable to store the sensor reading

void setup() {
  Serial.begin(9600); // Initialize serial communication
  pinMode(sensorPin, INPUT); // Set the sensor pin as input
}

void loop() {
  sensorValue = analogRead(sensorPin); // Read the sensor value
  Serial.print("Sensor Value: ");
  Serial.println(sensorValue); // Print the sensor value to the Serial Monitor
  delay(1000); // Wait for 1 second before reading again
}
Troubleshooting and FAQs
Common Issues and Solutions
Battery Not Charging:
- Cause: Incorrect battery polarity or damaged battery.
- Solution: Check the battery polarity and ensure it is inserted correctly. Replace the battery if necessary.
No Output Power:
- Cause: The ON/OFF switch is in the OFF position or the battery is depleted.
- Solution: Turn on the switch and ensure the battery is charged.
Overheating During Charging:
- Cause: Poor ventilation or faulty battery.
- Solution: Ensure proper ventilation and replace the battery if it continues to overheat.
LED Indicators Not Working:
- Cause: Faulty LEDs or damaged circuit.
- Solution: Inspect the shield for physical damage. Replace the shield if necessary.
FAQs
Q: Can I use the shield with other battery types?
A: No, the shield is specifically designed for 18650 lithium-ion batteries.Q: Can I charge the battery while powering a device?
A: Yes, the shield supports simultaneous charging and discharging, but ensure the total current draw does not exceed 2A.Q: Is the 3.7V output safe for all devices?
A: No, the 3.7V output is unregulated and should only be used with devices that can handle this voltage range.Q: How many batteries can the shield hold?
A: The shield can hold one or two 18650 batteries, depending on your power requirements.