How to Use 12v COB LED Strip: Examples, Pinouts, and Specs

Introduction
The 12V COB LED Strip by Xunata (Manufacturer Part ID: 12V COB LED Light) is a flexible lighting solution that utilizes Chip-on-Board (COB) technology. This advanced design ensures a seamless, uniform light output without visible LED dots, making it ideal for applications requiring smooth and consistent illumination. Operating at 12 volts, this LED strip is energy-efficient and versatile, suitable for a wide range of lighting projects.
Explore Projects Built with 12v COB LED Strip
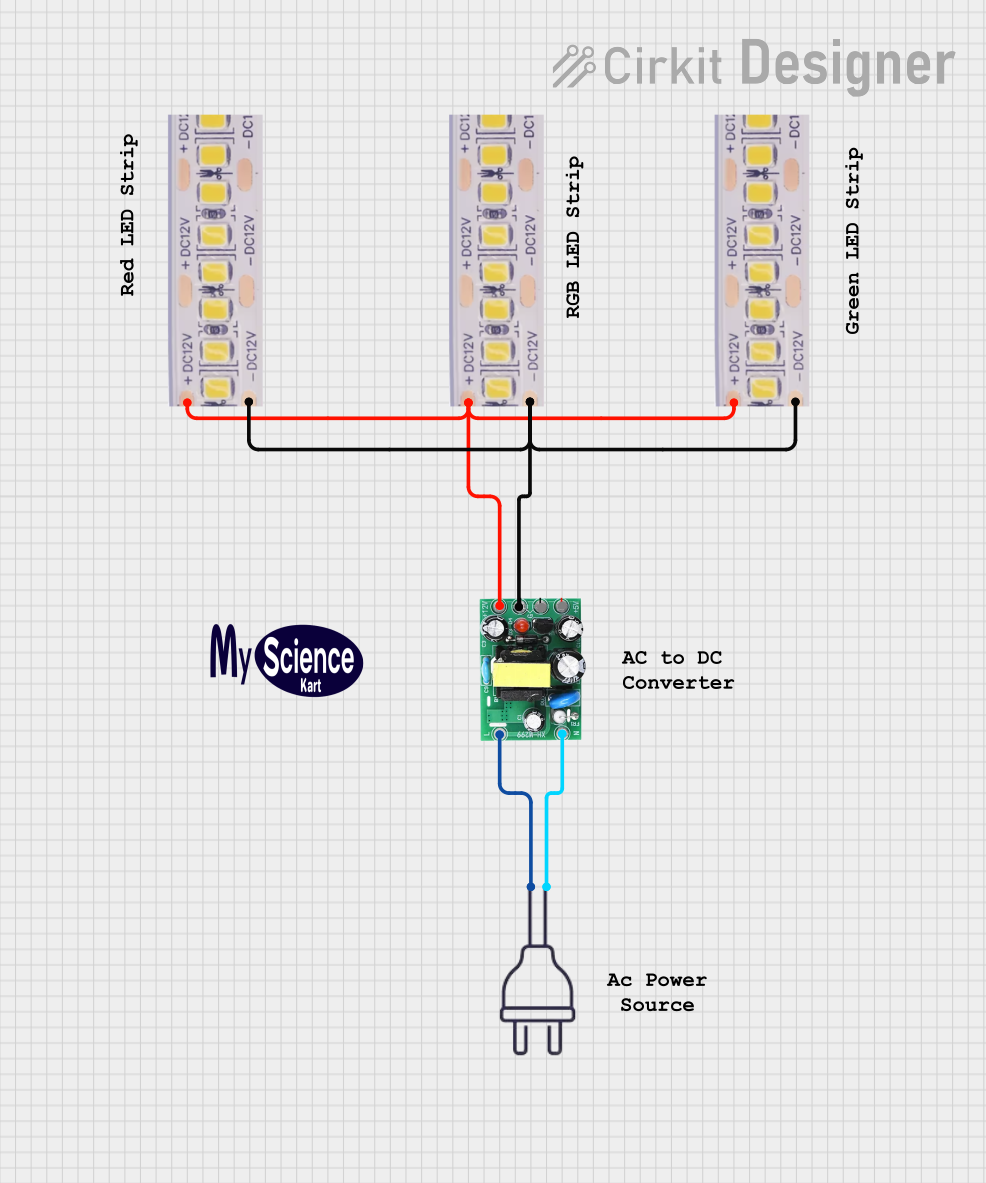
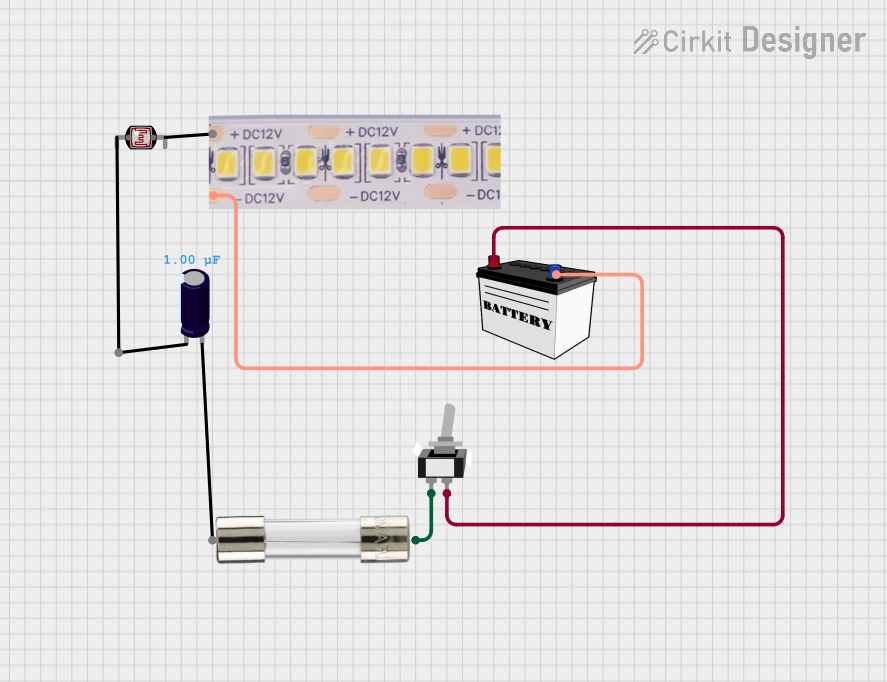
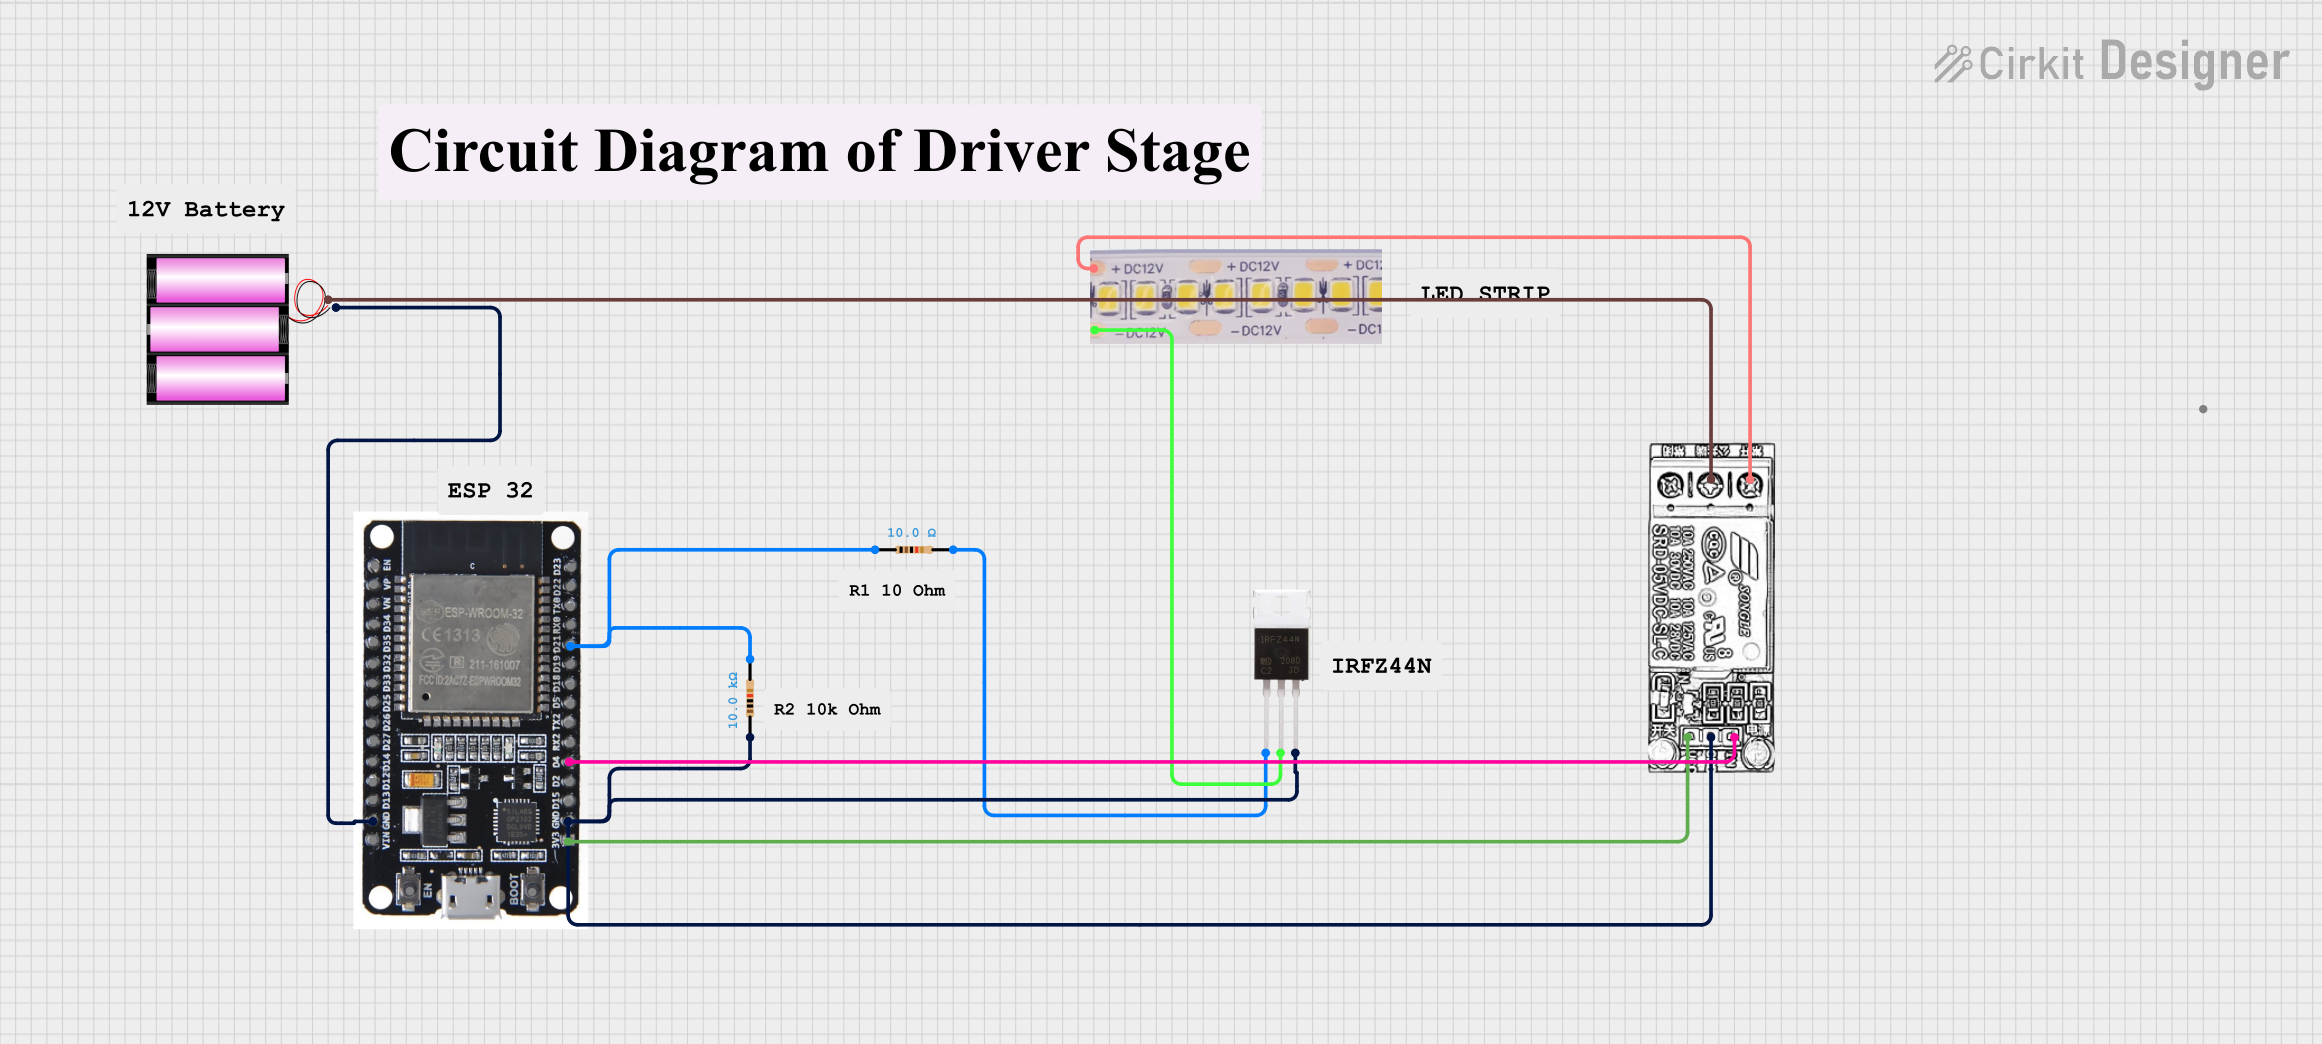
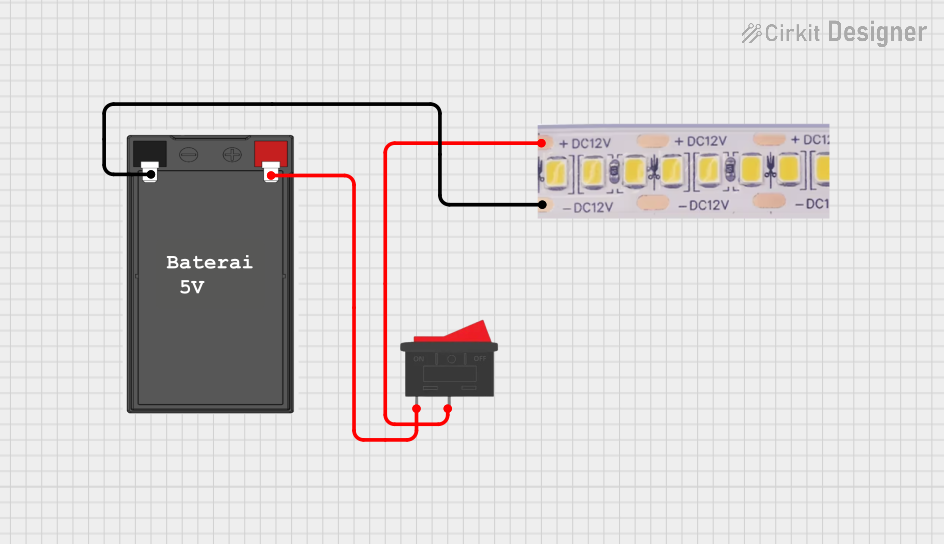
Explore Projects Built with 12v COB LED Strip
Common Applications and Use Cases
- Accent Lighting: Highlight architectural features, furniture, or artwork.
- Ambient Lighting: Create a warm and inviting atmosphere in living spaces.
- Task Lighting: Illuminate workspaces, such as desks or kitchen counters.
- Automotive Lighting: Enhance vehicle interiors or exteriors.
- DIY Projects: Perfect for custom lighting designs in hobbyist projects.
Technical Specifications
Key Technical Details
| Parameter | Value |
|---|---|
| Operating Voltage | 12V DC |
| Power Consumption | ~10W per meter |
| LED Type | Chip-on-Board (COB) |
| Luminous Flux | ~1000-1200 lumens per meter |
| Color Temperature | 2700K (Warm White) to 6500K (Cool White) |
| Beam Angle | 180° |
| Strip Width | ~8mm |
| Cutting Interval | ~50mm (varies by model) |
| Lifespan | ~50,000 hours |
| Waterproof Rating | IP20 (non-waterproof) or IP65 (waterproof) |
Pin Configuration and Descriptions
The 12V COB LED Strip typically has two connection points: Positive (+) and Negative (-). These are located at both ends of the strip for easy wiring.
| Pin Name | Description |
|---|---|
| + (VCC) | Positive terminal for 12V DC input. |
| - (GND) | Negative terminal for ground. |
Usage Instructions
How to Use the Component in a Circuit
- Power Supply: Use a regulated 12V DC power supply with sufficient current capacity. For example, if using 5 meters of the strip (10W/m), ensure the power supply can provide at least 50W (4.2A at 12V).
- Connecting the Strip:
- Identify the + (VCC) and - (GND) terminals on the strip.
- Connect the + (VCC) terminal to the positive output of the power supply.
- Connect the - (GND) terminal to the negative output of the power supply.
- Cutting the Strip: The strip can be cut at marked intervals (usually every 50mm). Ensure cuts are made cleanly at the designated points to avoid damaging the circuit.
- Mounting: Use the adhesive backing (if available) to attach the strip to a clean, dry surface. For waterproof models, additional mounting clips may be required.
Important Considerations and Best Practices
- Voltage Matching: Ensure the power supply voltage matches the strip's 12V requirement. Overvoltage can damage the LEDs.
- Heat Management: For long strips or high-power applications, consider using an aluminum channel or heatsink to dissipate heat.
- Polarity: Double-check the polarity of connections. Reversing the polarity may damage the strip.
- Dimming: Use a compatible PWM dimmer for brightness control. Avoid using resistive dimmers, as they may not work correctly with LED strips.
- Waterproofing: For outdoor or wet environments, use the IP65-rated version and seal all connections with waterproof connectors or silicone.
Example: Connecting to an Arduino UNO
The 12V COB LED Strip can be controlled using an Arduino UNO and a MOSFET for PWM dimming. Below is an example circuit and code:
Circuit Diagram
- Connect the + (VCC) terminal of the LED strip to the 12V power supply.
- Connect the - (GND) terminal of the LED strip to the Drain pin of an N-channel MOSFET (e.g., IRF540N).
- Connect the Source pin of the MOSFET to the GND of the power supply.
- Connect the Gate pin of the MOSFET to a PWM-capable pin on the Arduino (e.g., Pin 9).
- Connect the Arduino's GND to the power supply's GND.
Arduino Code
// Example code to control the brightness of a 12V COB LED Strip
// using PWM on an Arduino UNO.

const int ledPin = 9; // PWM pin connected to the MOSFET Gate
int brightness = 0;   // Initial brightness level (0-255)
int fadeAmount = 5;   // Amount to change brightness by

void setup() {
  pinMode(ledPin, OUTPUT); // Set the LED pin as an output
}

void loop() {
  analogWrite(ledPin, brightness); // Set the brightness using PWM

  // Change the brightness for the next loop iteration
  brightness += fadeAmount;

  // Reverse the direction of fading at the ends of the range
  if (brightness <= 0 || brightness >= 255) {
    fadeAmount = -fadeAmount;
  }

  delay(30); // Wait for 30ms to create a smooth fade effect
}
Troubleshooting and FAQs
Common Issues and Solutions
LED Strip Does Not Light Up:
- Cause: Incorrect wiring or insufficient power supply.
- Solution: Verify the polarity of connections and ensure the power supply provides adequate voltage and current.
Uneven Brightness Along the Strip:
- Cause: Voltage drop over long strips.
- Solution: Use power injection at multiple points along the strip to maintain consistent voltage.
Overheating:
- Cause: Insufficient heat dissipation.
- Solution: Mount the strip on an aluminum channel or heatsink to improve heat dissipation.
Flickering:
- Cause: Incompatible dimmer or unstable power supply.
- Solution: Use a compatible PWM dimmer and a regulated power supply.
Adhesive Backing Fails:
- Cause: Dusty or uneven mounting surface.
- Solution: Clean the surface thoroughly before mounting or use additional mounting clips.
FAQs
Can I cut the strip to a custom length? Yes, the strip can be cut at marked intervals (usually every 50mm). Ensure cuts are made at the designated points.
Is the strip waterproof? The strip is available in both IP20 (non-waterproof) and IP65 (waterproof) versions. Choose the appropriate version for your application.
Can I connect multiple strips together? Yes, but ensure the power supply can handle the total current draw. For long runs, use power injection to prevent voltage drop.
What is the lifespan of the strip? The strip has an estimated lifespan of ~50,000 hours under normal operating conditions.
Can I dim the strip? Yes, the strip can be dimmed using a compatible PWM dimmer or an Arduino with a MOSFET.
This documentation provides a comprehensive guide to using the 12V COB LED Strip by Xunata. Follow the instructions and best practices to ensure optimal performance and longevity of your lighting project.