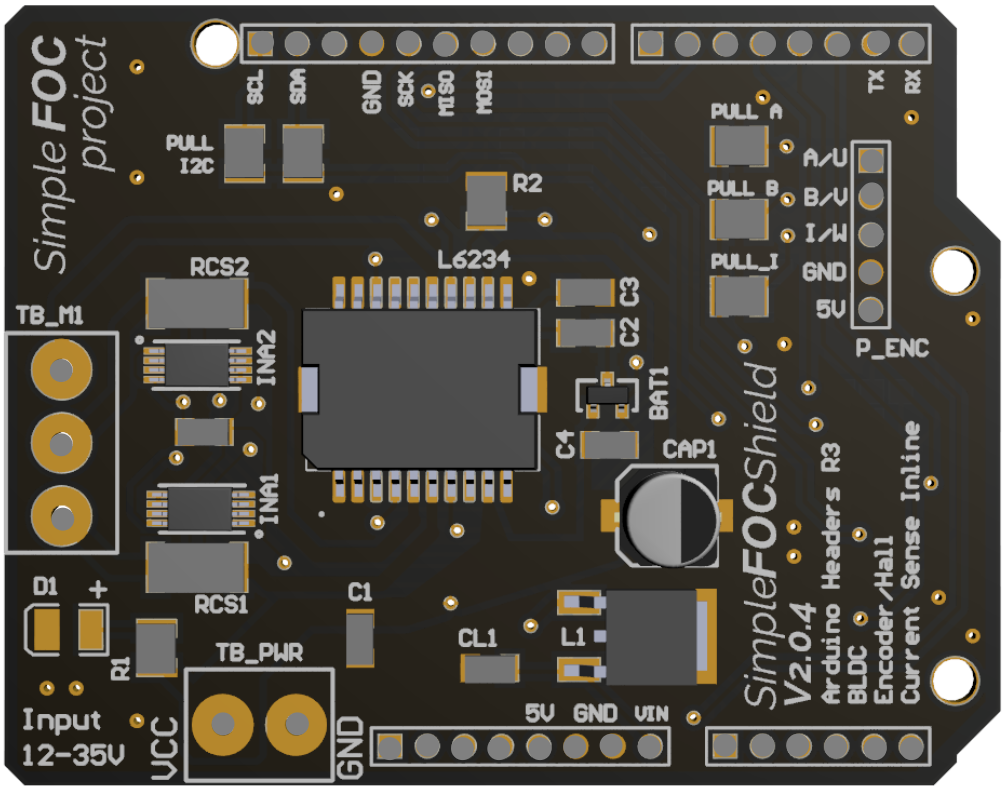
The Simple Field Oriented Control (FOC) Shield is a versatile circuit board designed to drive brushless DC (BLDC) motors with high efficiency and precision. It leverages Field Oriented Control (FOC) algorithms to achieve smooth and accurate motor control, making it ideal for applications requiring precise motion, such as robotics, drones, and industrial automation.
This shield is compatible with popular microcontrollers, such as the Arduino UNO, and provides features like current sensing, PWM control, and communication interfaces for seamless integration. Its compact design and ease of use make it a popular choice for both hobbyists and professionals.
Explore Projects Built with Simple FOC Shield
Use Cirkit Designer to design, explore, and prototype these projects online. Some projects support real-time simulation. Click "Open Project" to start designing instantly!
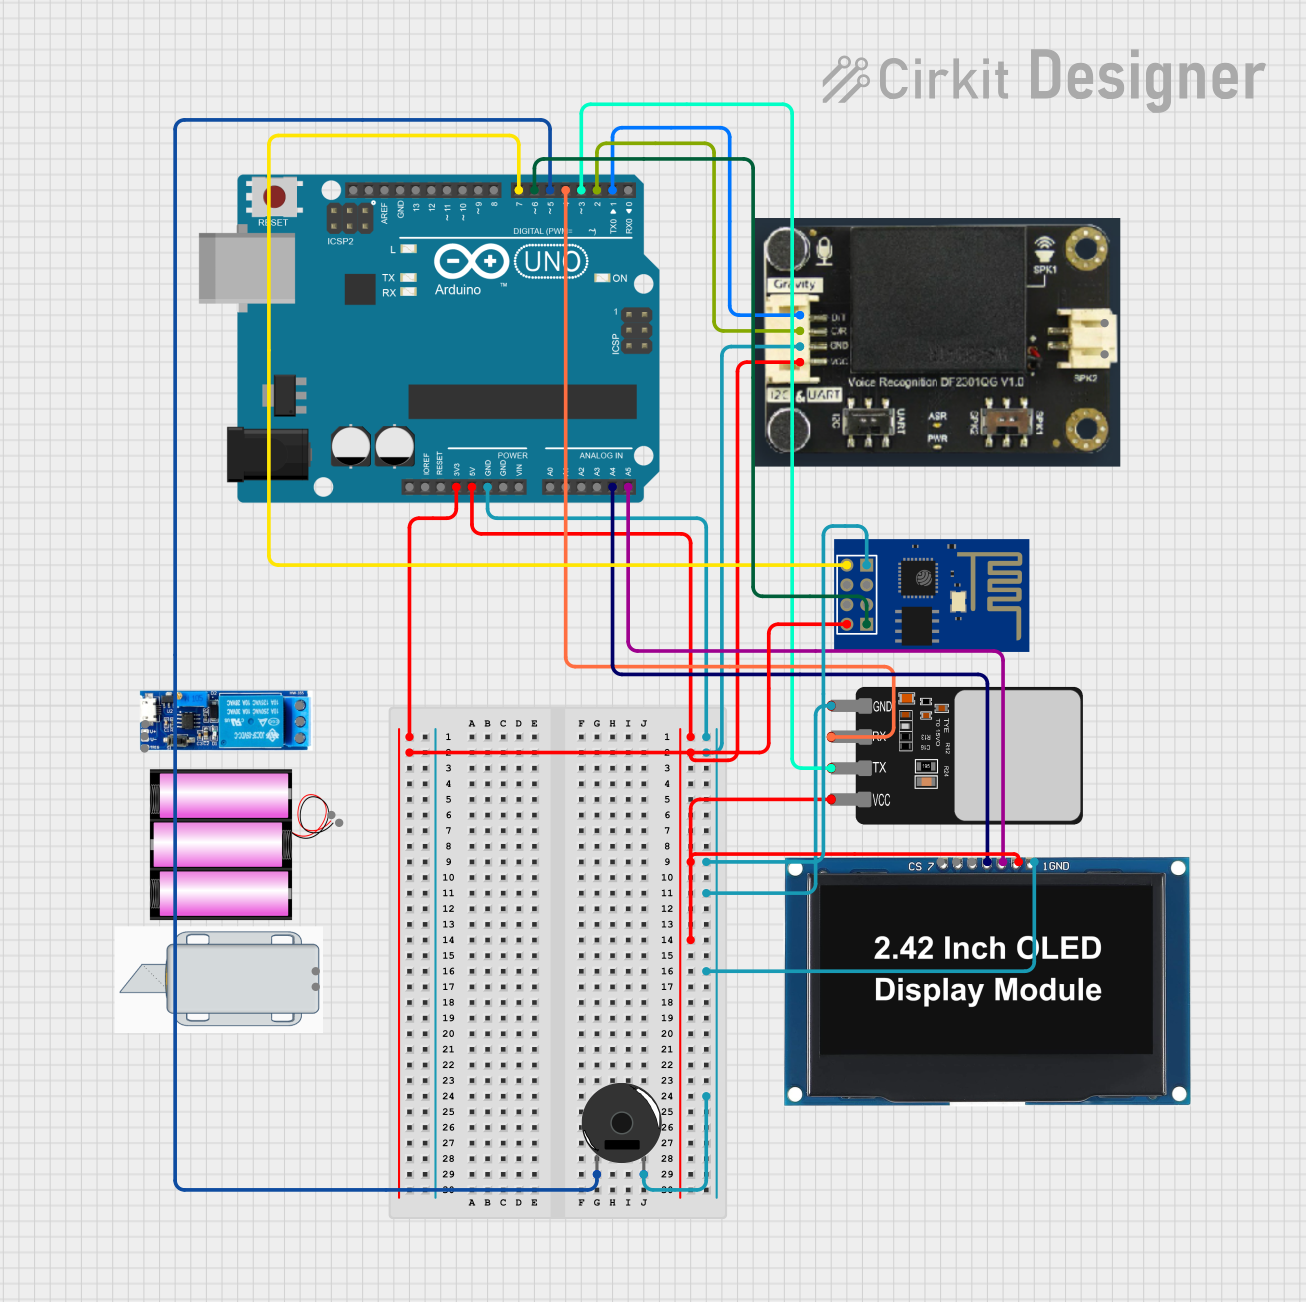
This circuit is designed to serve as a multifunctional security and interaction system, featuring biometric authentication through a fingerprint scanner, voice command recognition, visual feedback via an OLED display, and wireless communication capabilities with the ESP8266 WiFi module. The piezo buzzer provides audio feedback, and the Arduino UNO serves as the central controller for the system.
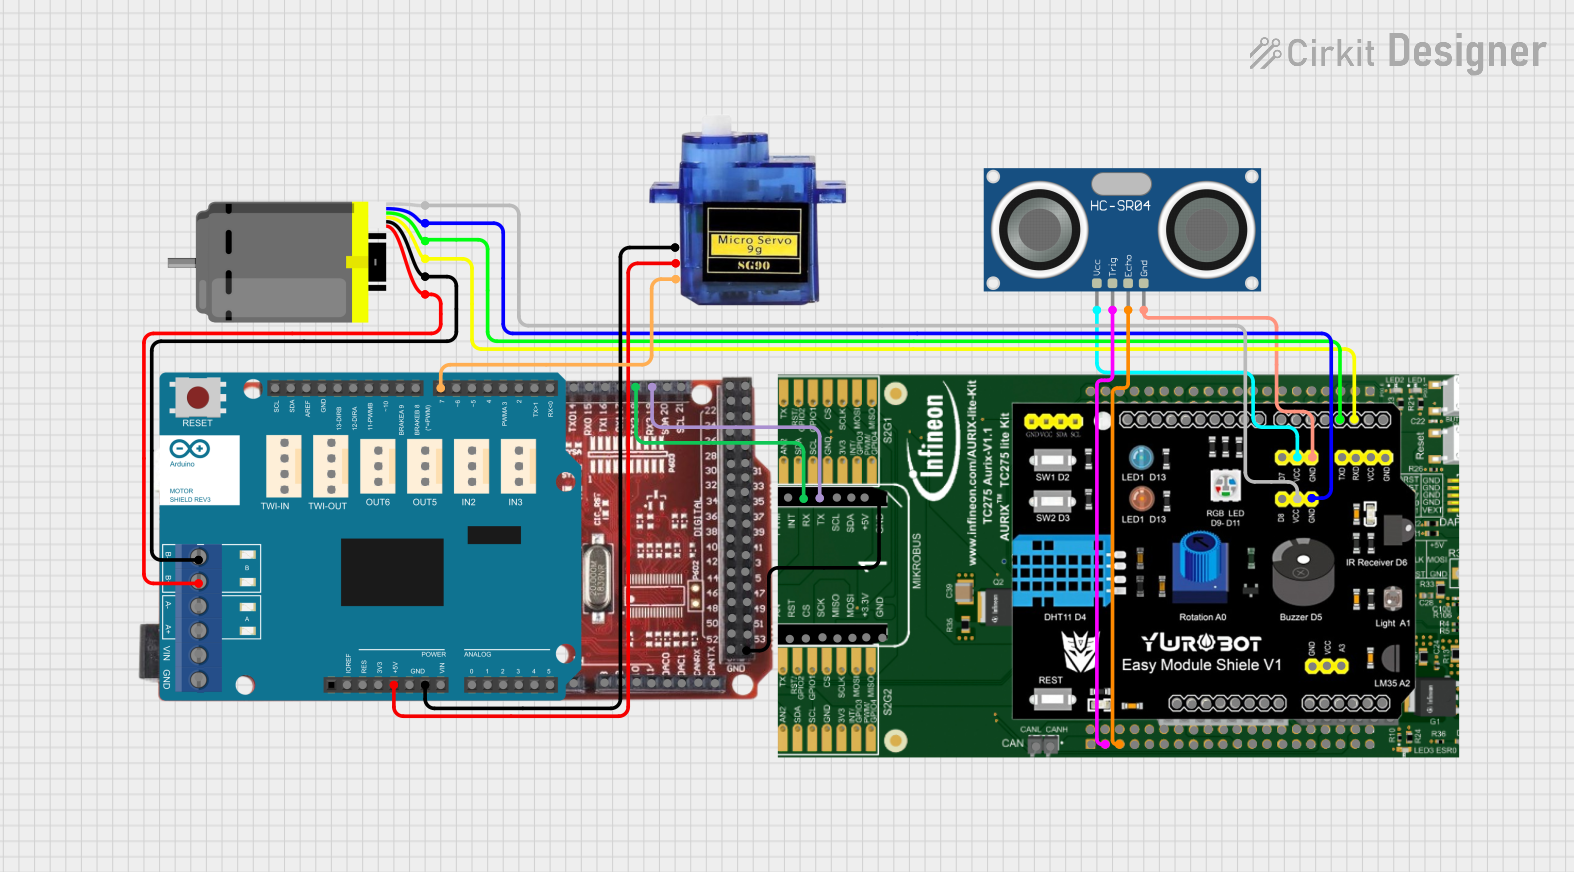
This circuit is designed for robotic control, featuring a TC275 microcontroller setup for processing inputs and outputs, an Arduino Motor Shield to drive a DC motor with encoder feedback and a micro servo, and an HC-SR04 Ultrasonic Sensor for distance sensing. The system is likely used for tasks such as navigation, object avoidance, or precise movement control in a robotic application.
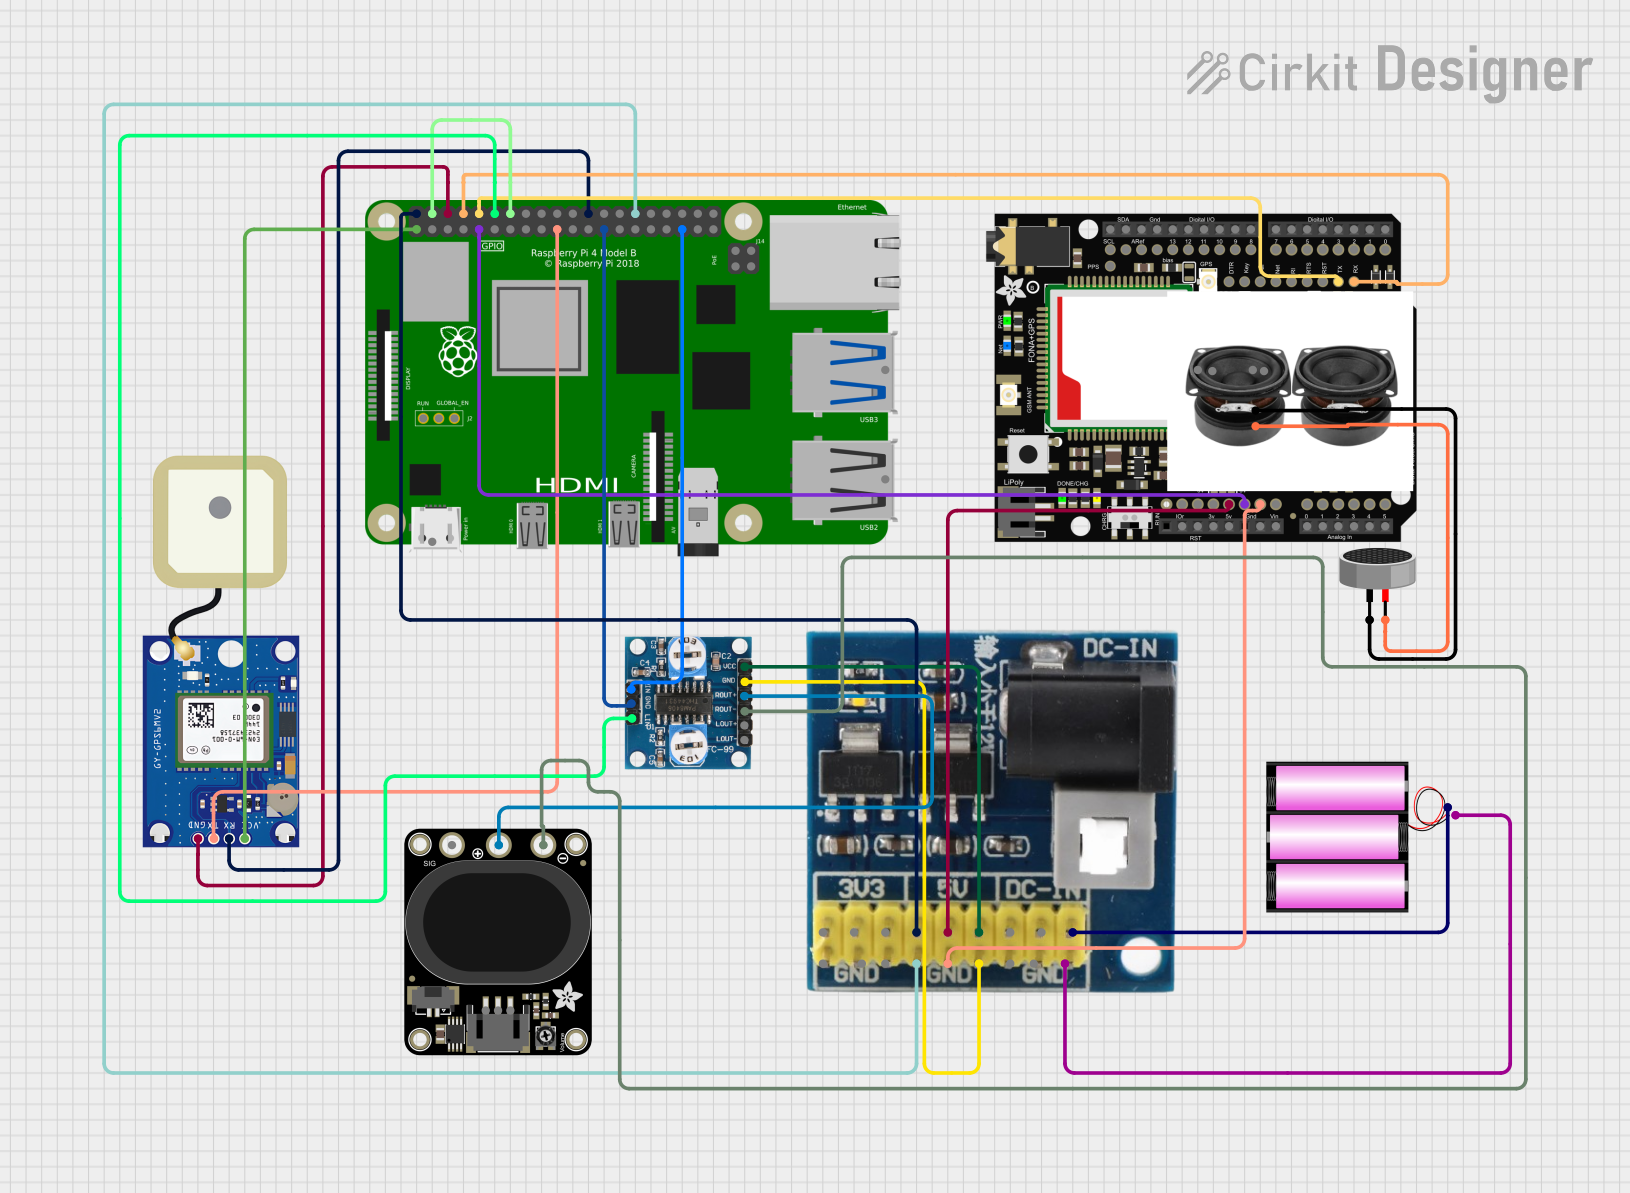
This circuit features a Raspberry Pi 4B as the central processing unit, interfaced with a GPS NEO-6M V2 module for location tracking and an Adafruit FONA 808 Shield for cellular communication. It includes a PAM8406 5V Digital Audio Amplifier connected to an Adafruit STEMMA Speaker for audio output, and a Condenser Microphone connected to the FONA 808 for audio input. Power management is handled by a 12V battery connected to a voltage regulator that steps down the voltage to 5V and 3V required by the various components.
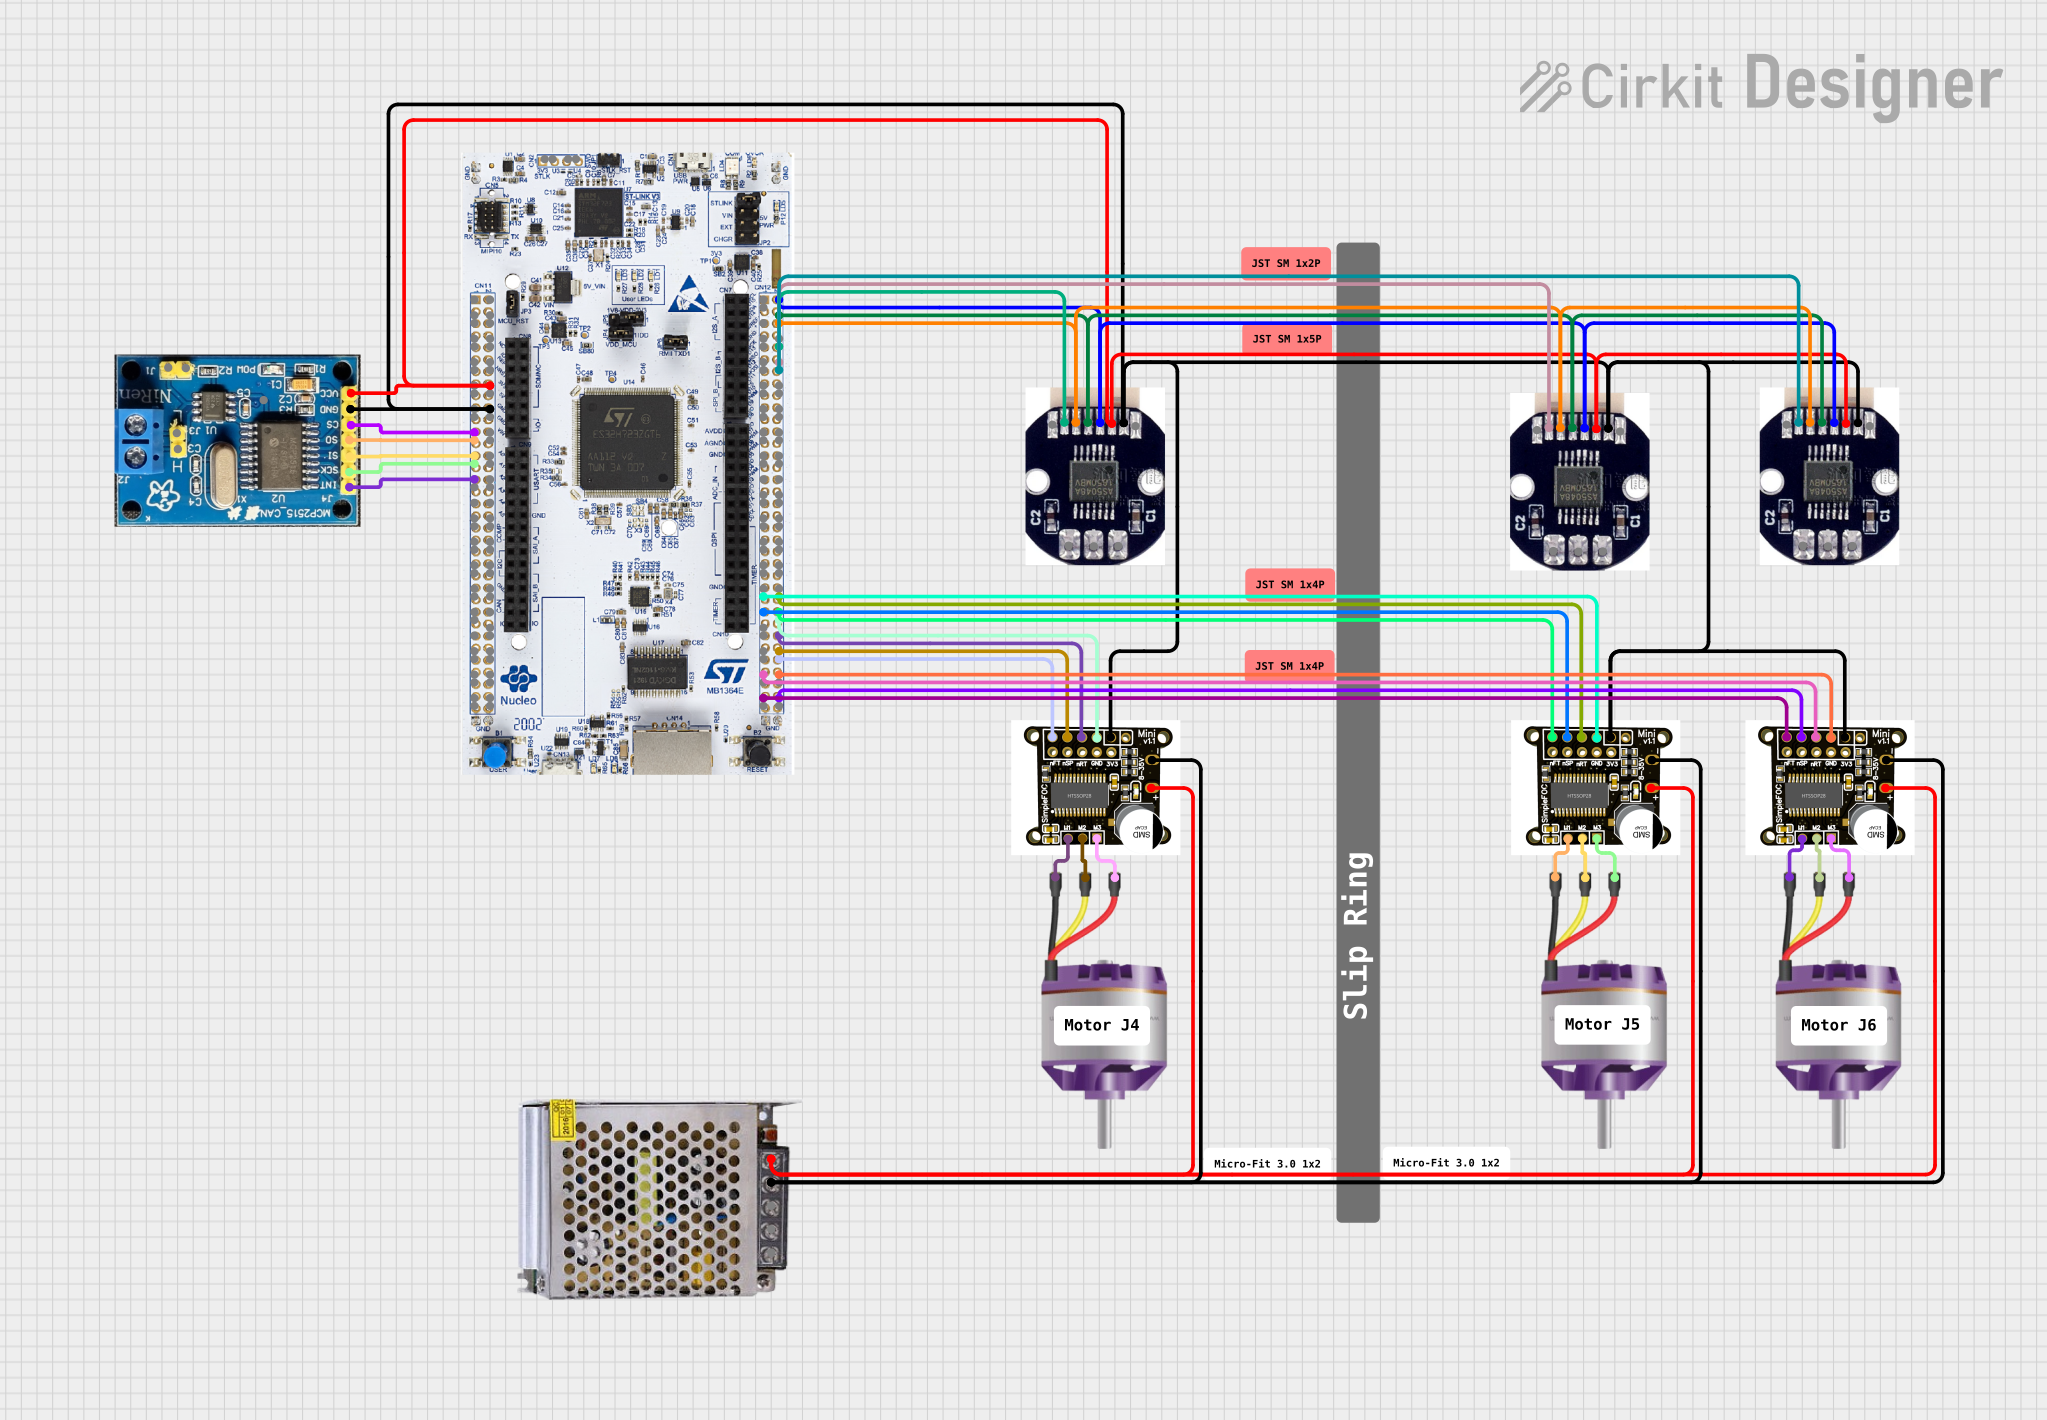
This is a motor control system designed to operate and manage multiple brushless motors with feedback from magnetic encoders. It uses a STM32H7 microcontroller for control logic, SimpleFOCMini drivers for motor control, and a CAN BUS for communication, all powered by a 12V DC supply.
Precision motor control in research and development
Technical Specifications
The Simple FOC Shield is designed to work with a wide range of BLDC motors and microcontrollers. Below are its key technical details:
General Specifications
Parameter
Value
Input Voltage Range
6V to 24V
Maximum Current
10A per motor phase
Supported Motors
3-phase BLDC motors
Communication Interfaces
I2C, UART, SPI
PWM Frequency
Up to 20 kHz
Current Sensing
2-phase inline sensing
Microcontroller Support
Arduino UNO, STM32, ESP32
Pin Configuration
The Simple FOC Shield features a standard pinout for easy connection to microcontrollers. Below is the pin configuration:
Pin Name
Description
VIN
Input voltage (6V to 24V)
GND
Ground
PWM1
PWM signal for motor phase 1
PWM2
PWM signal for motor phase 2
PWM3
PWM signal for motor phase 3
CS1
Current sense for motor phase 1
CS2
Current sense for motor phase 2
EN
Enable pin to activate the motor driver
SDA
I2C data line
SCL
I2C clock line
TX
UART transmit
RX
UART receive
Usage Instructions
How to Use the Simple FOC Shield
Connect the Shield to a Microcontroller:
Mount the Simple FOC Shield onto an Arduino UNO or connect it to another compatible microcontroller using jumper wires.
Ensure proper alignment of the pins to avoid damage.
Connect the BLDC Motor:
Attach the three motor wires to the PWM1, PWM2, and PWM3 terminals on the shield.
Secure the connections to prevent loose wiring during operation.
Power the Shield:
Provide a DC power supply (6V to 24V) to the VIN and GND pins.
Ensure the power supply can handle the current requirements of the motor.
Program the Microcontroller:
Use a compatible library, such as the Arduino SimpleFOC library, to control the motor.
Upload the code to the microcontroller to initialize and control the motor.
Test the Setup:
Enable the motor driver by setting the EN pin high.
Run the motor control code and verify smooth operation.
Important Considerations
Current Sensing: Ensure the current sensing resistors are properly calibrated for accurate feedback.
Heat Dissipation: Use a heatsink or active cooling if the shield operates at high currents for extended periods.
Power Supply: Use a stable and adequately rated power supply to avoid voltage drops or overheating.
Motor Compatibility: Verify that the motor's voltage and current ratings are within the shield's specifications.
Example Code for Arduino UNO
Below is an example of how to use the Simple FOC Shield with an Arduino UNO to control a BLDC motor:
#include <SimpleFOC.h> // Include the SimpleFOC library

// Define motor and driver objects
BLDCMotor motor = BLDCMotor(7); // Motor with 7 pole pairs
BLDCDriver3PWM driver = BLDCDriver3PWM(9, 10, 11); // PWM pins for motor phases

void setup() {
  // Initialize the driver
  driver.voltage_power_supply = 12; // Set power supply voltage
  driver.init();

  // Link the driver to the motor
  motor.linkDriver(&driver);

  // Set motor parameters
  motor.voltage_limit = 6; // Limit motor voltage to 6V
  motor.controller = ControlType::velocity; // Velocity control mode

  // Initialize the motor
  motor.init();

  // Set initial target velocity
  motor.target = 2; // Target velocity in rad/s
}

void loop() {
  // Run the motor control loop
  motor.loopFOC(); // Field Oriented Control algorithm
  motor.move();    // Move the motor to the target velocity
}
Notes:
Ensure the SimpleFOC library is installed in your Arduino IDE.
Adjust the voltage_power_supply and target values based on your motor and application.
Troubleshooting and FAQs
Common Issues and Solutions
Motor Not Spinning:
Verify all connections, especially the motor wires and power supply.
Check if the EN pin is set high to enable the motor driver.
Ensure the motor parameters (e.g., pole pairs) are correctly configured in the code.
Overheating:
Use a heatsink or active cooling for the shield if it gets too hot.
Reduce the motor's voltage or current limit in the code.
Erratic Motor Behavior:
Check for loose connections or damaged wires.
Ensure the current sensing resistors are properly calibrated.
Verify the motor's specifications match the shield's capabilities.
Communication Issues:
Ensure the correct communication protocol (I2C, UART, or SPI) is selected in the code.
Check the wiring of the communication lines (SDA, SCL, TX, RX).
FAQs
Q: Can I use the Simple FOC Shield with a stepper motor?
A: No, the Simple FOC Shield is designed specifically for 3-phase BLDC motors. For stepper motors, use a dedicated stepper motor driver.
Q: What is the maximum motor speed supported?
A: The maximum speed depends on the motor's specifications and the PWM frequency. Ensure the motor's voltage and current ratings are not exceeded.
Q: Can I use a 5V power supply with the shield?
A: No, the minimum input voltage for the shield is 6V. Using a lower voltage may result in unstable operation or damage.
Q: Is the shield compatible with Raspberry Pi?
A: Yes, the shield can be used with Raspberry Pi, but additional wiring and configuration may be required to interface the GPIO pins.
By following this documentation, you can effectively use the Simple FOC Shield to control BLDC motors with precision and efficiency.

 Open Project in Cirkit Designer