
How to Use GP1A57HR: Examples, Pinouts, and Specs
 Design with GP1A57HR in Cirkit Designer
Introduction
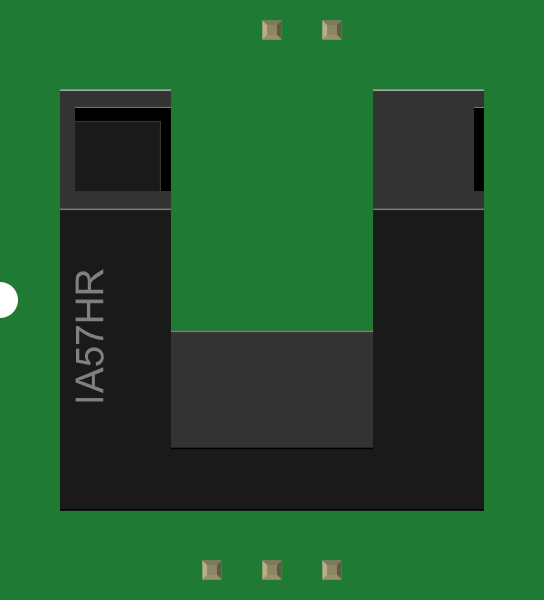
The GP1A57HR is an infrared (IR) emitter and phototransistor pair designed for object detection and proximity sensing applications. This component integrates an IR LED and a phototransistor in a compact housing, enabling reliable detection of objects or changes in light intensity. Its high sensitivity and wide operating voltage range make it a versatile choice for a variety of electronic projects, including robotics, automation systems, and consumer electronics.
Explore Projects Built with GP1A57HR
 Open Project in Cirkit Designer
 Open Project in Cirkit Designer
 Open Project in Cirkit Designer
 Open Project in Cirkit Designer
Explore Projects Built with GP1A57HR
Open Project in Cirkit DesignerOpen Project in Cirkit DesignerOpen Project in Cirkit DesignerOpen Project in Cirkit DesignerCommon Applications
- Object detection in robotics
- Proximity sensing in automation systems
- Optical encoders for motor control
- Line-following robots
- Non-contact switches
Technical Specifications
Key Specifications
| Parameter | Value |
|---|---|
| Operating Voltage | 4.5V to 16V |
| Output Current | 20mA (maximum) |
| Detection Distance | 0.5mm to 5mm (typical) |
| Response Time | 20µs (typical) |
| Operating Temperature | -25°C to +85°C |
| Storage Temperature | -40°C to +85°C |
| Package Type | Compact plastic housing |
Pin Configuration and Descriptions
The GP1A57HR has a 4-pin configuration. The table below describes each pin:
| Pin Number | Name | Description |
|---|---|---|
| 1 | VCC | Power supply input (4.5V to 16V) |
| 2 | GND | Ground connection |
| 3 | Output | Phototransistor output signal |
| 4 | LED Anode | Positive terminal of the IR LED (connect to VCC) |
| (Body) | LED Cathode | Negative terminal of the IR LED (internally connected to GND) |
Usage Instructions
How to Use the GP1A57HR in a Circuit
- Power Supply: Connect the VCC pin to a power source within the operating voltage range (4.5V to 16V). Connect the GND pin to the ground of the circuit.
- IR LED Connection: The LED anode (Pin 4) should be connected to VCC through a current-limiting resistor. The cathode is internally connected to GND.
- Output Signal: The output pin (Pin 3) provides a signal based on the amount of IR light received by the phototransistor. This signal can be connected to a microcontroller or other processing circuitry.
- Resistor Selection: Use a resistor in series with the IR LED to limit the current. For example, with a 5V supply and a forward voltage of 1.2V for the IR LED, a 220Ω resistor is recommended.
Important Considerations
- Detection Distance: Ensure the object to be detected is within the specified range (0.5mm to 5mm) for optimal performance.
- Ambient Light: Minimize interference from ambient light sources by shielding the component or using modulation techniques.
- Current Limiting: Always use a current-limiting resistor for the IR LED to prevent damage.
- Orientation: Align the emitter and phototransistor properly for accurate detection.
Example: Connecting to an Arduino UNO
Below is an example of how to connect the GP1A57HR to an Arduino UNO for object detection:
Circuit Connections
- Connect Pin 1 (VCC) to the 5V pin on the Arduino.
- Connect Pin 2 (GND) to the GND pin on the Arduino.
- Connect Pin 3 (Output) to a digital input pin on the Arduino (e.g., D2).
- Connect Pin 4 (LED Anode) to the 5V pin on the Arduino through a 220Ω resistor.
Arduino Code
// GP1A57HR Object Detection Example
// Connect the output pin of the GP1A57HR to Arduino digital pin 2.

const int sensorPin = 2; // GP1A57HR output connected to digital pin 2
const int ledPin = 13;   // Onboard LED for visual feedback

void setup() {
  pinMode(sensorPin, INPUT); // Set sensor pin as input
  pinMode(ledPin, OUTPUT);   // Set LED pin as output
  Serial.begin(9600);        // Initialize serial communication
}

void loop() {
  int sensorValue = digitalRead(sensorPin); // Read the sensor output

  if (sensorValue == LOW) {
    // Object detected (output is active low)
    digitalWrite(ledPin, HIGH); // Turn on LED
    Serial.println("Object detected!");
  } else {
    // No object detected
    digitalWrite(ledPin, LOW); // Turn off LED
    Serial.println("No object detected.");
  }

  delay(100); // Small delay for stability
}
Troubleshooting and FAQs
Common Issues and Solutions
No Output Signal:
- Ensure the power supply voltage is within the specified range (4.5V to 16V).
- Verify that the IR LED is properly connected with a current-limiting resistor.
- Check the alignment of the emitter and phototransistor.
False Detections:
- Reduce ambient light interference by shielding the component.
- Use a pull-up resistor on the output pin if the signal is unstable.
Component Overheating:
- Verify that the current-limiting resistor for the IR LED is correctly calculated.
- Ensure the component is not exposed to excessive ambient temperatures.
FAQs
Q: Can the GP1A57HR detect transparent objects?
A: The GP1A57HR may have difficulty detecting transparent objects due to low IR reflectivity. Use reflective tape or adjust the detection setup for better results.
Q: What is the maximum detection range?
A: The typical detection range is 0.5mm to 5mm. Performance may vary depending on the object's reflectivity and size.
Q: Can I use the GP1A57HR with a 3.3V microcontroller?
A: Yes, but ensure the power supply voltage is at least 4.5V for proper operation. Use a level shifter if necessary for the output signal.
Q: How do I protect the component from ambient light interference?
A: Use a physical shield or modulation techniques to minimize interference from ambient light sources.
This concludes the documentation for the GP1A57HR.