How to Use Adafruit Trinket 5V: Examples, Pinouts, and Specs
Introduction
The Adafruit Trinket 5V is a versatile and compact microcontroller board that serves as a perfect solution for small projects where space is at a premium. Based on the ATtiny85 microcontroller, the Trinket offers a robust platform for hobbyists and professionals alike to create wearable electronics, tiny robots, or even to add intelligence to everyday objects. Its compatibility with the Arduino IDE allows for a familiar programming environment, making it accessible to a wide range of users.
Explore Projects Built with Adafruit Trinket 5V
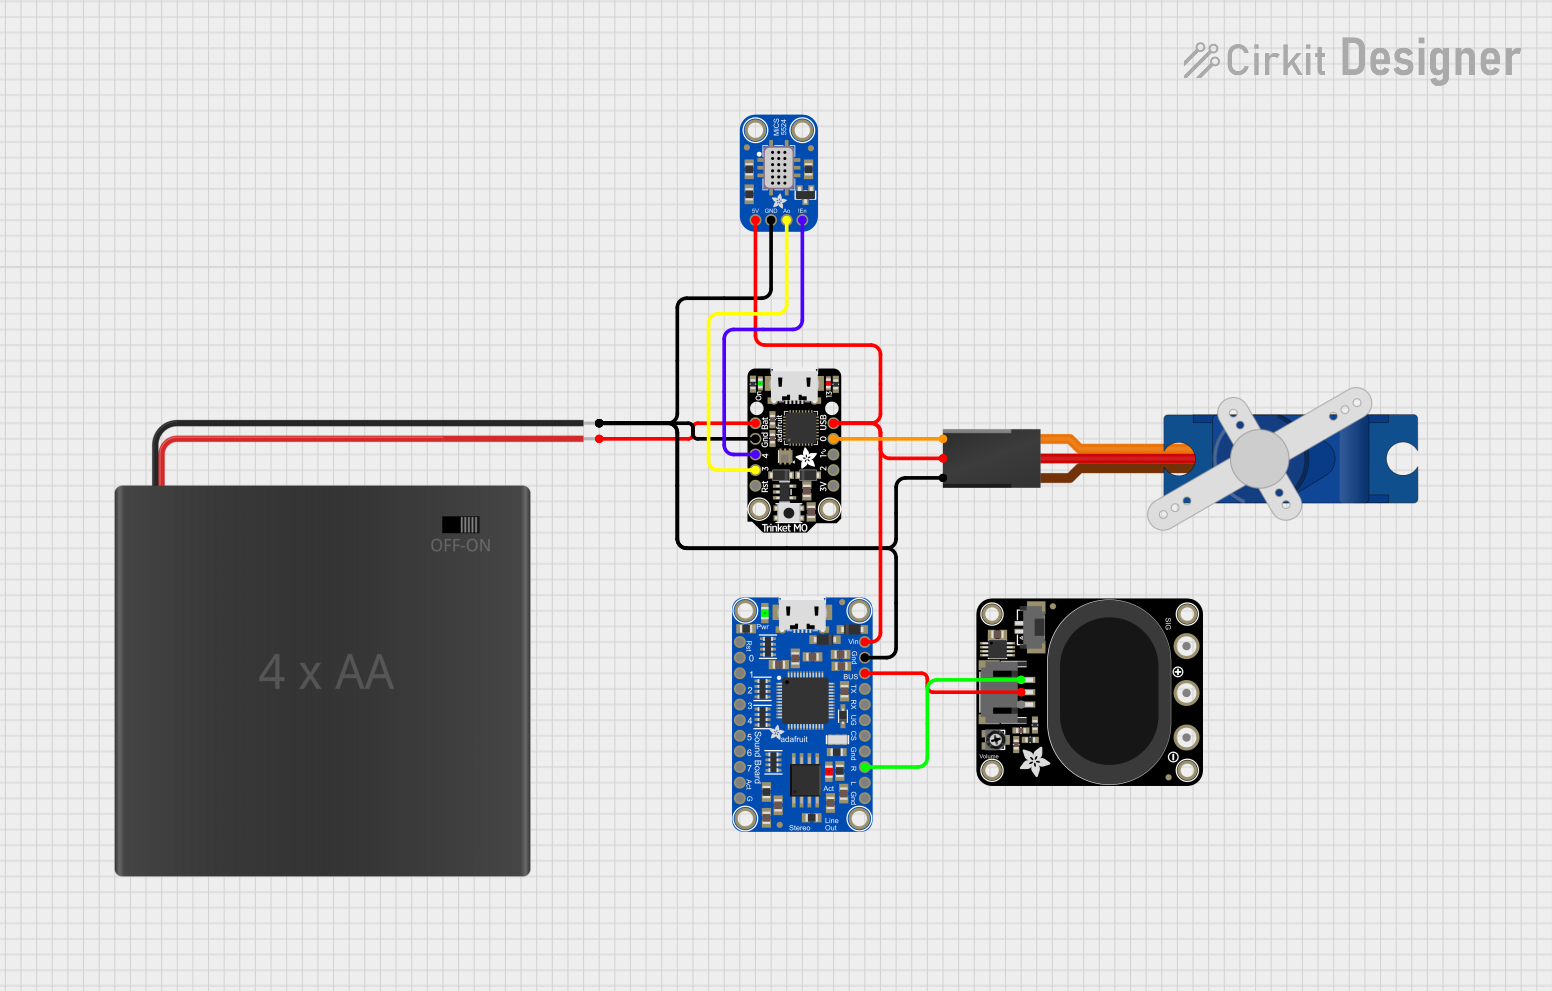


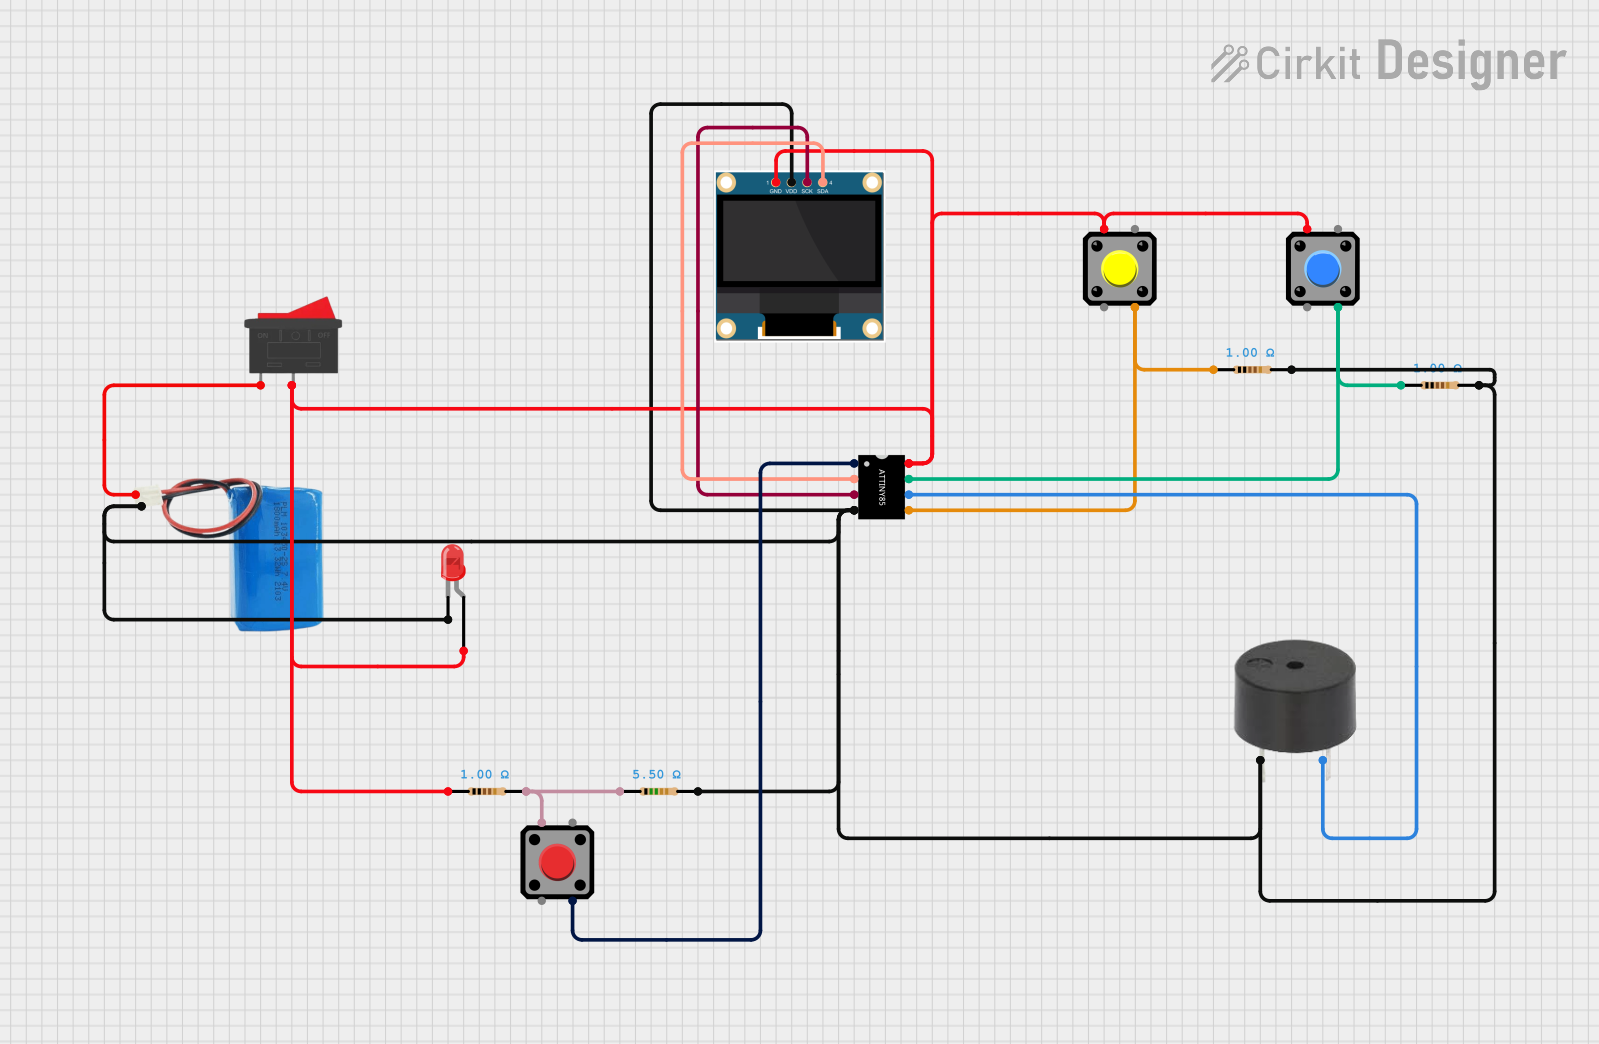
Explore Projects Built with Adafruit Trinket 5V
Common Applications and Use Cases
- Wearable electronics
- Small robotics projects
- USB peripheral development
- Prototyping IoT devices
- Educational purposes for learning electronics and programming
Technical Specifications
Key Technical Details
- Microcontroller: ATtiny85
- Operating Voltage: 5V
- Input Voltage: 7-16V (via battery port)
- Digital I/O Pins: 5 (of which 2 are used for USB if the Trinket is programming)
- PWM Channels: 3
- Analog Input Channels: 3 (multiplexed with digital I/O pins)
- Flash Memory: 8 KB (ATtiny85) with 2.75 KB used by bootloader
- SRAM: 512 bytes
- EEPROM: 512 bytes
- Clock Speed: 8 MHz
- Dimensions: 15.5mm x 31mm x 5mm
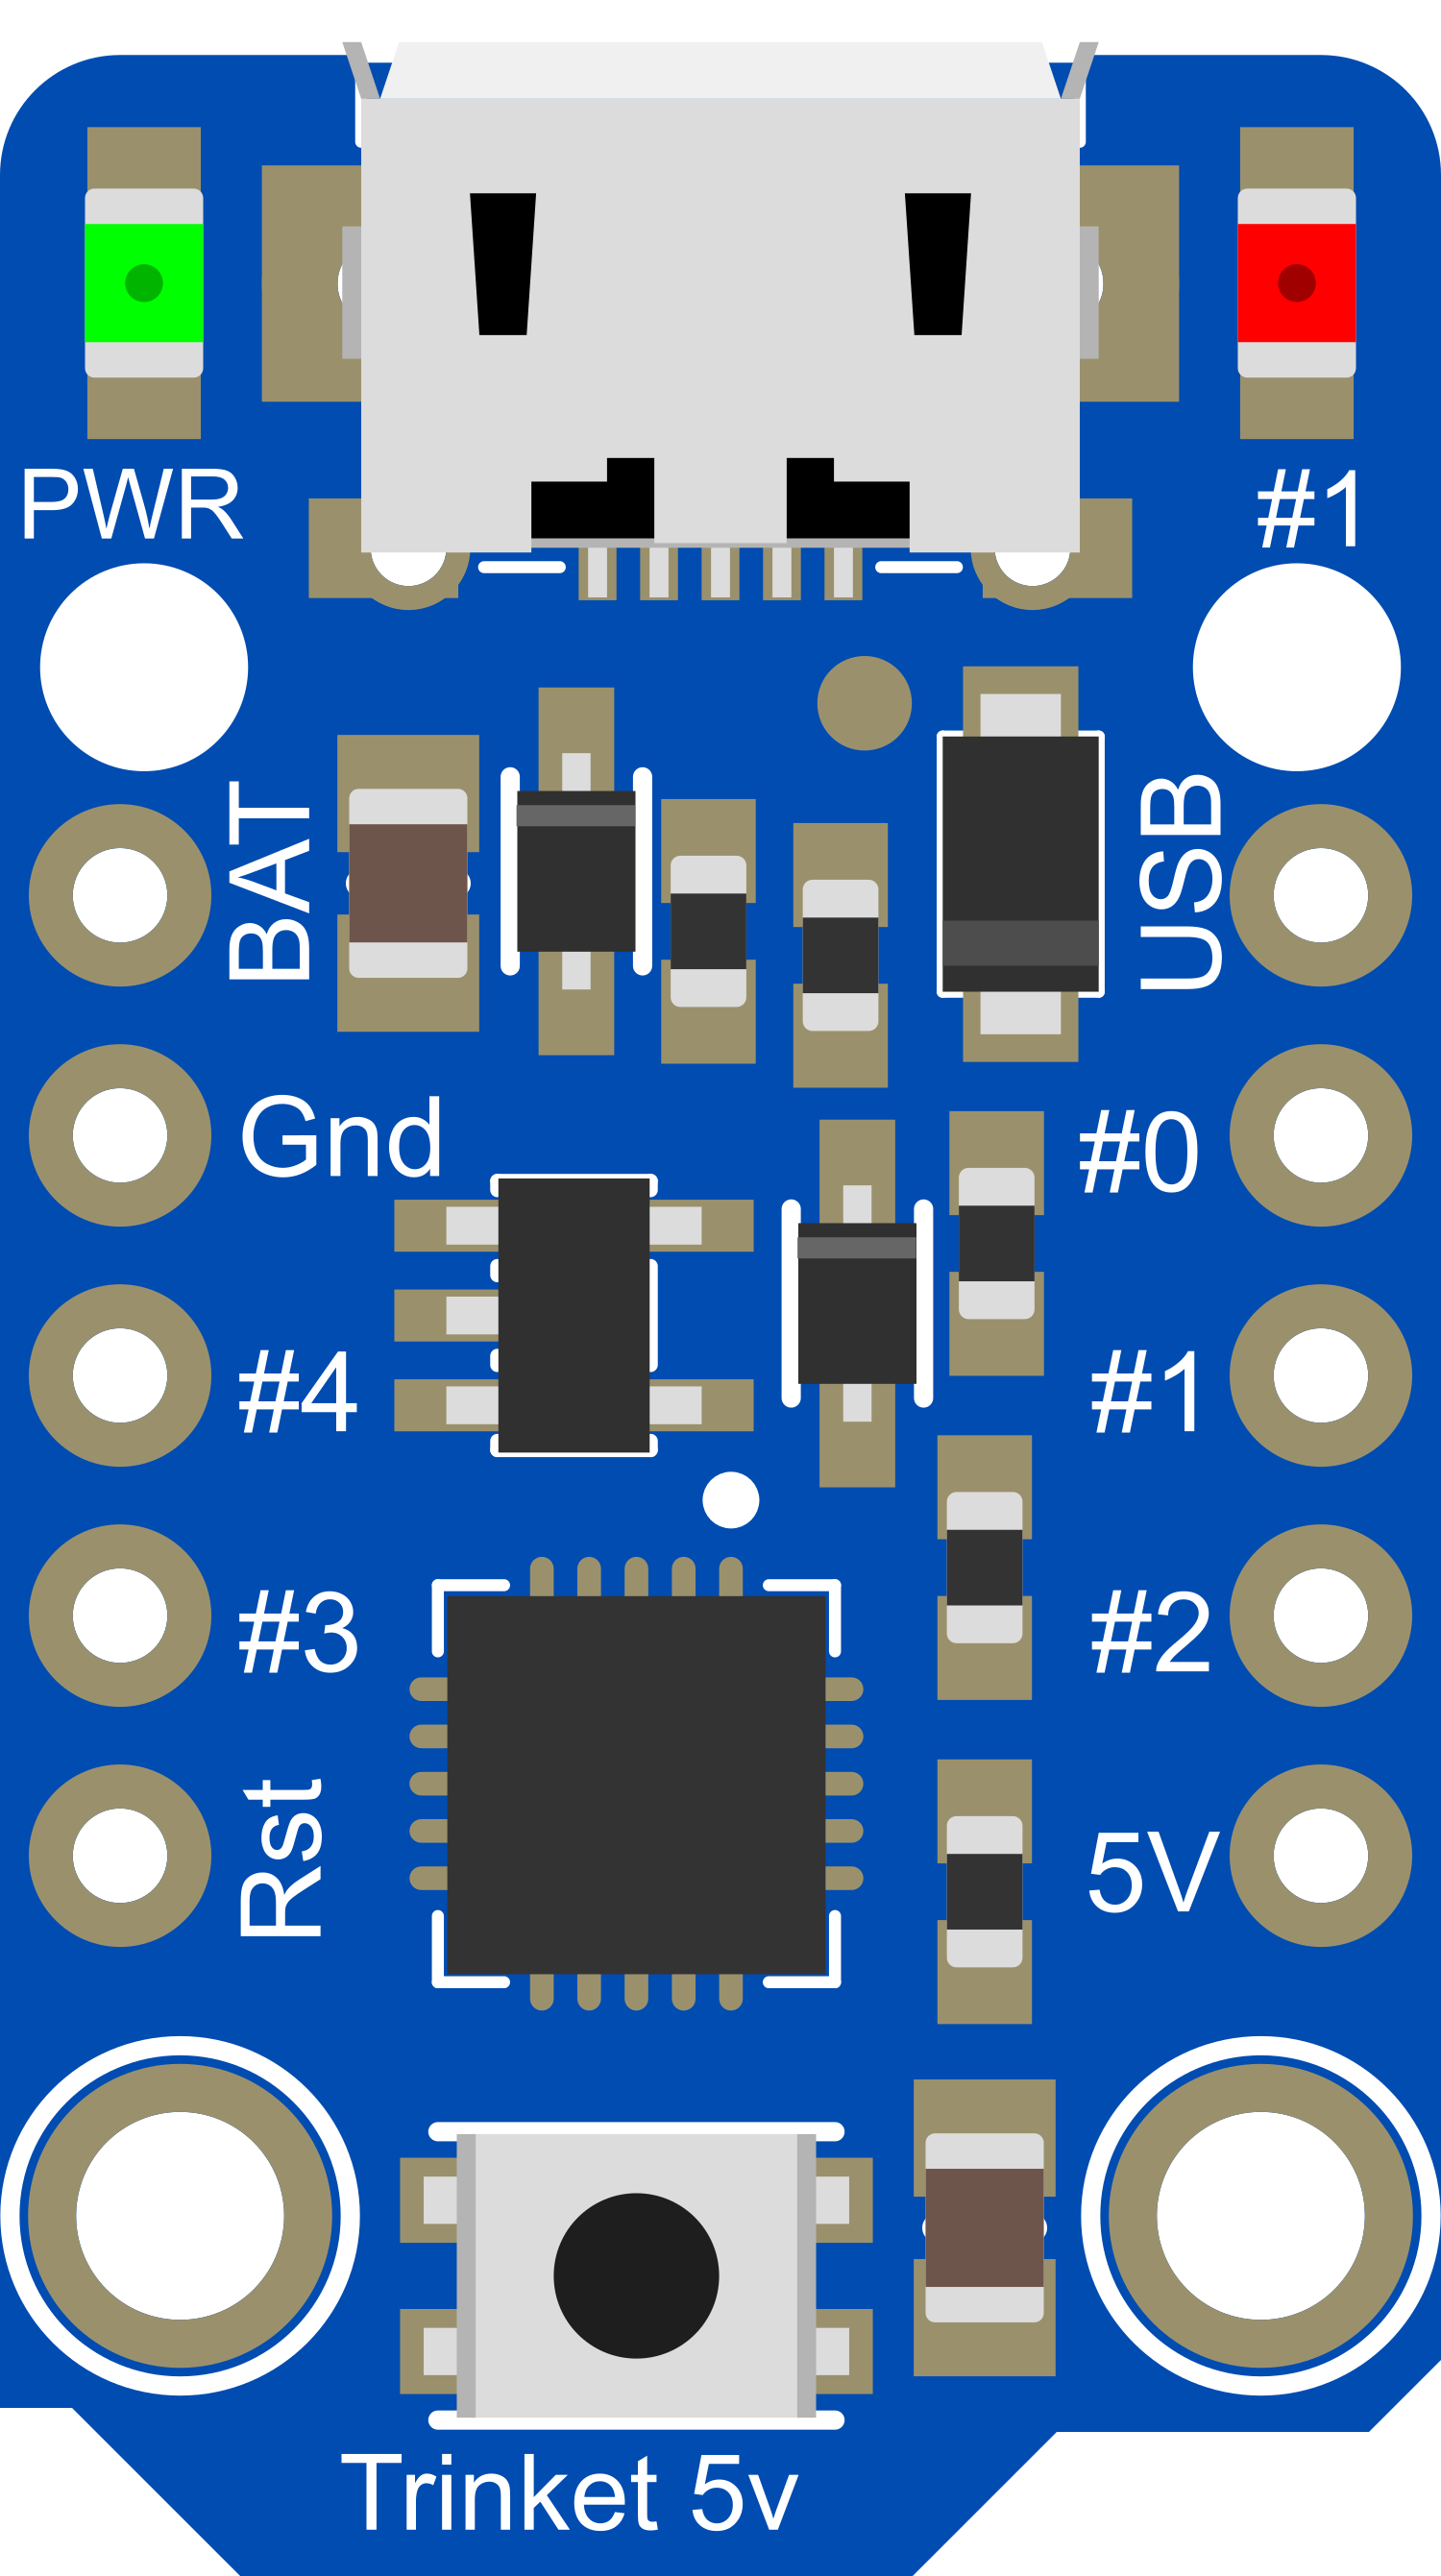
Pin Configuration and Descriptions
| Pin Number | Name | Description |
|---|---|---|
| 1 | BAT+ | Battery input for an external power source (7-16V DC) |
| 2 | GND | Ground pin |
| 3 | 5V | Regulated 5V output from the onboard regulator |
| 4 | #0 | GPIO pin, also used for USB data- if the Trinket is programming |
| 5 | #1 | GPIO pin, can be used for PWM output |
| 6 | #2 | GPIO pin, can be used for analog input |
| 7 | #3 | GPIO pin, also used for USB data+ if the Trinket is programming |
| 8 | #4 | GPIO pin, can be used for PWM output or analog input |
| 9 | RST | Reset pin, can be used to restart the microcontroller |
Usage Instructions
How to Use the Component in a Circuit
- Powering the Trinket: Connect a 7-16V DC power source to the BAT+ and GND pins, or use the USB port for power and programming.
- Connecting I/O Pins: Use the GPIO pins (#0-#4) to connect sensors, actuators, or other components. Remember that pins #0 and #3 are used for USB communication during programming.
- Programming the Trinket: Connect the Trinket to a computer using a USB cable and select the appropriate board and port in the Arduino IDE.
Important Considerations and Best Practices
- Ensure that the input voltage does not exceed 16V to prevent damage to the board.
- When using PWM or analog features, consult the ATtiny85 datasheet for detailed information on pin capabilities.
- The Trinket does not have a serial port, so serial debugging is not possible in the traditional sense.
- To reduce power consumption, use the
LOWpower modes of the ATtiny85 when possible.
Troubleshooting and FAQs
Common Issues Users Might Face
- Trinket not recognized by the computer: Ensure that the USB cable is properly connected and that the Trinket is selected in the Arduino IDE.
- Incorrect behavior of I/O pins: Verify that the pin configurations in your code match the physical connections in your circuit.
- Power issues: If the Trinket is unresponsive, check the power supply for proper voltage and connections.
Solutions and Tips for Troubleshooting
- Use a different USB cable or port if the Trinket is not recognized.
- Double-check your code for any pin misconfigurations.
- If you encounter power issues, measure the voltage at the BAT+ and GND pins to ensure it falls within the specified range.
Example Code for Arduino UNO
// Blink an LED connected to pin #1 on the Adafruit Trinket 5V

void setup() {
  pinMode(1, OUTPUT); // Set pin #1 as an output
}

void loop() {
  digitalWrite(1, HIGH); // Turn the LED on
  delay(1000);           // Wait for a second
  digitalWrite(1, LOW);  // Turn the LED off
  delay(1000);           // Wait for a second
}
Note: The above code is a simple example to get you started with the Trinket. The actual implementation may vary based on the specific requirements of your project. Always refer to the official Adafruit documentation and the ATtiny85 datasheet for more detailed information.