Cirkit Designer Logo
Cirkit Designer
Your all-in-one circuit design IDE
Home / 
Component Documentation

How to Use 5V White LED Strip: Examples, Pinouts, and Specs

Image of 5V White LED Strip
Cirkit Designer LogoDesign with 5V White LED Strip in Cirkit Designer

Introduction

The 5V White LED Strip is a flexible strip of white LEDs designed to operate at a voltage of 5 volts. This component is widely used in decorative lighting, backlighting, and various other applications where a bright, consistent light source is required. Its flexibility allows it to be easily installed in a variety of settings, making it a versatile choice for both hobbyists and professionals.

Explore Projects Built with 5V White LED Strip

Use Cirkit Designer to design, explore, and prototype these projects online. Some projects support real-time simulation. Click "Open Project" to start designing instantly!
220V to 12V LED Strip Lighting System
Image of Effect of light on plant growth: A project utilizing 5V White LED Strip in a practical application
This circuit consists of a 220V AC power source connected to an AC-to-DC converter, which steps down the voltage to 12V DC to power a series of three 12V white LED strips. The LED strips are connected in parallel to the output of the converter, sharing a common ground. The circuit is designed to convert household AC voltage to a lower DC voltage suitable for powering LED lighting.
Cirkit Designer LogoOpen Project in Cirkit Designer
Arduino Mega 2560 and Raspberry Pi 4B Controlled WS2812 RGB LED Strip
Image of circuit_image: A project utilizing 5V White LED Strip in a practical application
This circuit features an Arduino Mega 2560 microcontroller programmed to control a WS2812 RGB LED strip and a white LED, indicating status or providing user feedback. The Arduino and the LED strip are powered by a common 5V supply, and the circuit includes interfacing with a Raspberry Pi 4B for potential communication or coordination between the two boards.
Cirkit Designer LogoOpen Project in Cirkit Designer
Arduino Nano IR-Controlled 12V LED Strip with Battery Power
Image of aaa: A project utilizing 5V White LED Strip in a practical application
This circuit uses an Arduino Nano to control a 12V white LED strip via a single-channel relay, with power supplied by a 18650 Li-ion battery boosted by an MT3608 module. An IR receiver allows remote control of the LED strip, and the Arduino Nano is powered by a 5V battery connected through USB power.
Cirkit Designer LogoOpen Project in Cirkit Designer
Battery-Powered LED Strip with Toggle Switch and Fuse Protection
Image of wern: A project utilizing 5V White LED Strip in a practical application
This circuit is a simple 12V lighting system that uses a toggle switch to control a 12V white LED strip. The circuit includes a fuse for overcurrent protection and is powered by a 12V battery.
Cirkit Designer LogoOpen Project in Cirkit Designer

Explore Projects Built with 5V White LED Strip

Use Cirkit Designer to design, explore, and prototype these projects online. Some projects support real-time simulation. Click "Open Project" to start designing instantly!
Image of Effect of light on plant growth: A project utilizing 5V White LED Strip in a practical application
220V to 12V LED Strip Lighting System
This circuit consists of a 220V AC power source connected to an AC-to-DC converter, which steps down the voltage to 12V DC to power a series of three 12V white LED strips. The LED strips are connected in parallel to the output of the converter, sharing a common ground. The circuit is designed to convert household AC voltage to a lower DC voltage suitable for powering LED lighting.
Cirkit Designer LogoOpen Project in Cirkit Designer
Image of circuit_image: A project utilizing 5V White LED Strip in a practical application
Arduino Mega 2560 and Raspberry Pi 4B Controlled WS2812 RGB LED Strip
This circuit features an Arduino Mega 2560 microcontroller programmed to control a WS2812 RGB LED strip and a white LED, indicating status or providing user feedback. The Arduino and the LED strip are powered by a common 5V supply, and the circuit includes interfacing with a Raspberry Pi 4B for potential communication or coordination between the two boards.
Cirkit Designer LogoOpen Project in Cirkit Designer
Image of aaa: A project utilizing 5V White LED Strip in a practical application
Arduino Nano IR-Controlled 12V LED Strip with Battery Power
This circuit uses an Arduino Nano to control a 12V white LED strip via a single-channel relay, with power supplied by a 18650 Li-ion battery boosted by an MT3608 module. An IR receiver allows remote control of the LED strip, and the Arduino Nano is powered by a 5V battery connected through USB power.
Cirkit Designer LogoOpen Project in Cirkit Designer
Image of wern: A project utilizing 5V White LED Strip in a practical application
Battery-Powered LED Strip with Toggle Switch and Fuse Protection
This circuit is a simple 12V lighting system that uses a toggle switch to control a 12V white LED strip. The circuit includes a fuse for overcurrent protection and is powered by a 12V battery.
Cirkit Designer LogoOpen Project in Cirkit Designer

Technical Specifications

Key Technical Details

Parameter Value
Operating Voltage 5V DC
Current Rating 1A per meter (typical)
Power Rating 5W per meter (typical)
LED Type SMD 5050
LED Density 60 LEDs per meter
Color Temperature 6000K (Cool White)
Strip Length Customizable (1m, 2m, etc.)
Waterproof Rating IP20 (non-waterproof) or IP65 (waterproof)

Pin Configuration and Descriptions

Pin Name Description
+5V Positive power supply (5V DC)
GND Ground

Usage Instructions

How to Use the Component in a Circuit

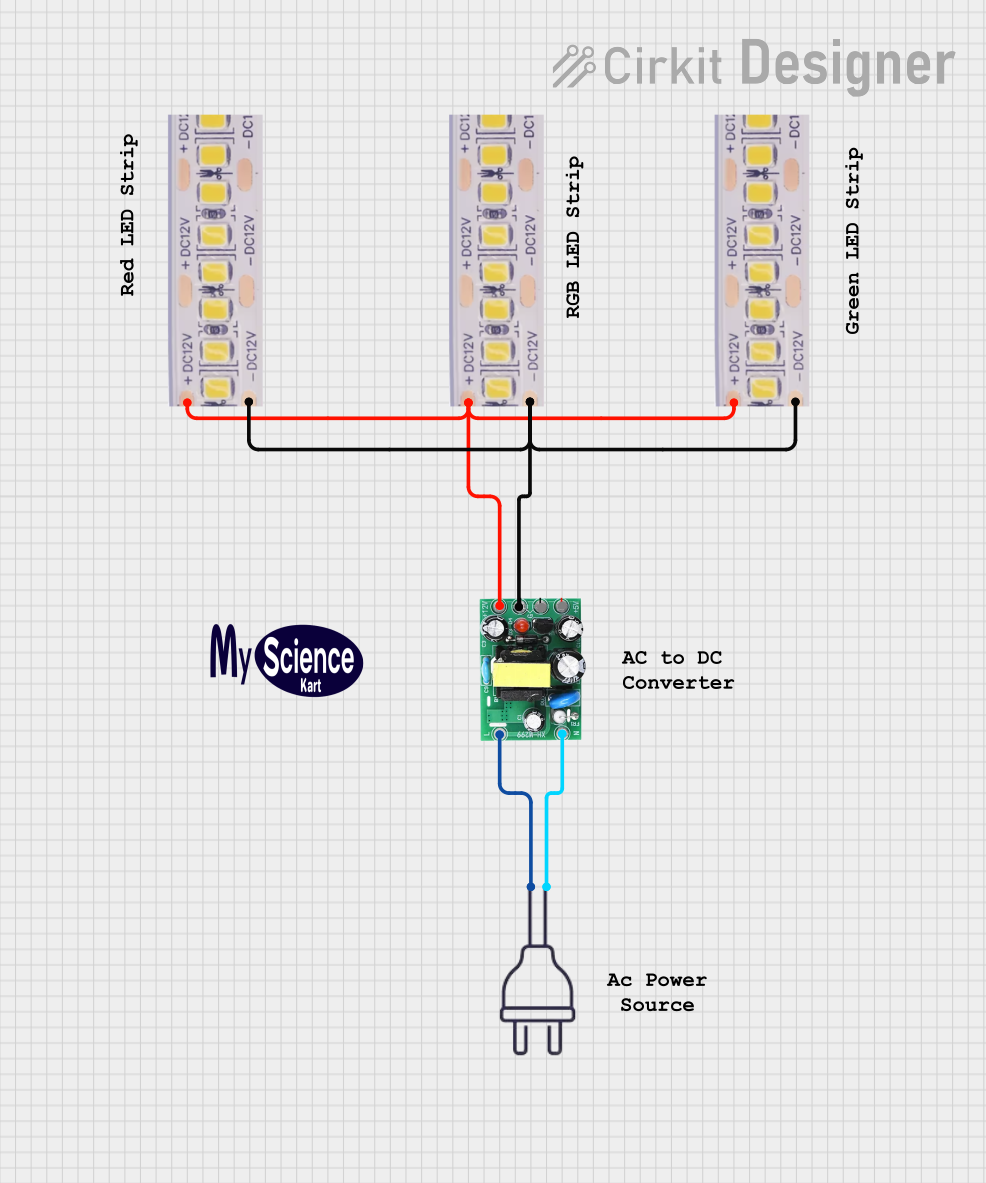
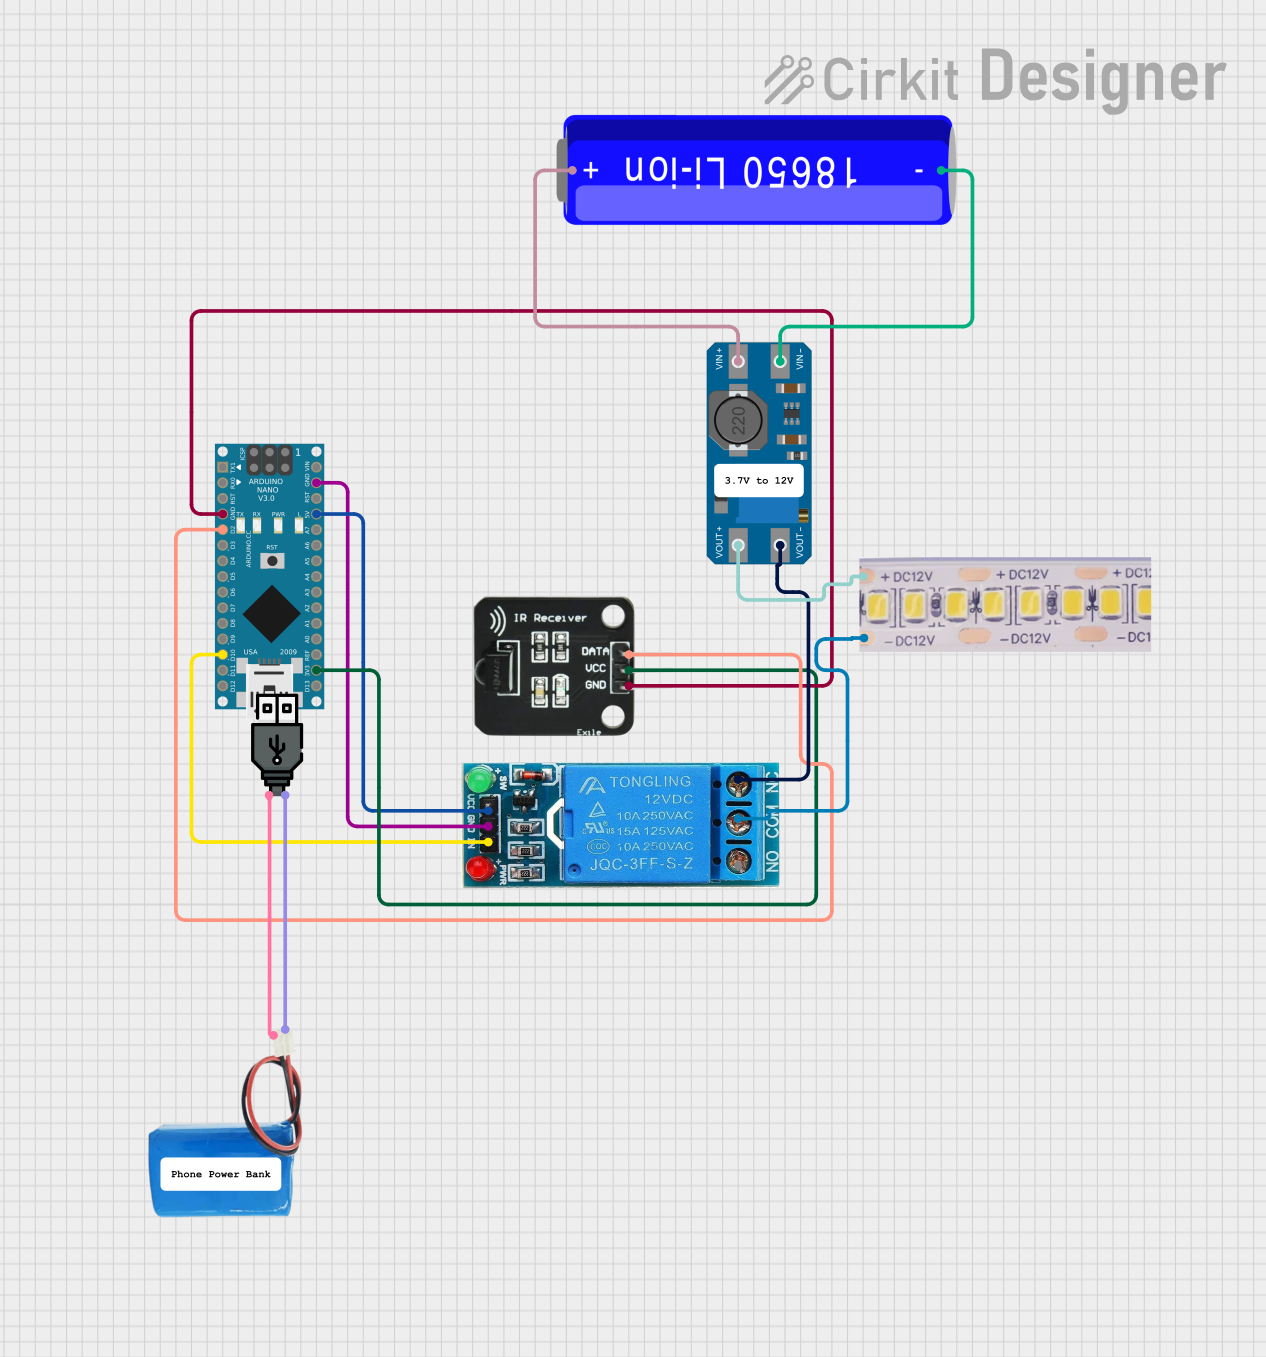
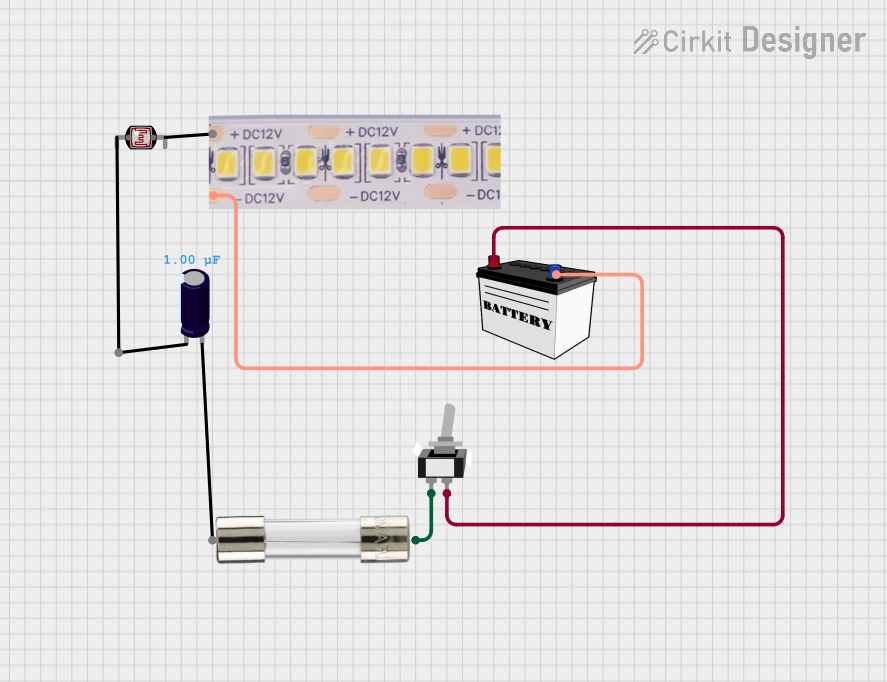
  1. Power Supply: Ensure you have a stable 5V DC power supply. The current rating of the power supply should match the total current consumption of the LED strip. For example, a 2-meter strip would typically require a 5V, 2A power supply.

  2. Connecting the LED Strip:

    • Connect the +5V pin of the LED strip to the positive terminal of the power supply.
    • Connect the GND pin of the LED strip to the ground terminal of the power supply.
  3. Controlling with Arduino UNO:

    • You can control the brightness of the LED strip using PWM (Pulse Width Modulation) from an Arduino UNO. Connect a suitable N-channel MOSFET between the LED strip and the Arduino to handle the current.

Important Considerations and Best Practices

  • Heat Dissipation: Ensure proper ventilation or heat sinking to prevent overheating, especially for longer strips.
  • Voltage Drop: For longer strips, consider injecting power at multiple points to avoid voltage drop and ensure uniform brightness.
  • Polarity: Always check the polarity before connecting the power supply to avoid damaging the LEDs.
  • Waterproofing: If using the IP65 version, ensure the ends are properly sealed to maintain the waterproof rating.

Example Code for Arduino UNO

Below is an example code to control the brightness of the 5V White LED Strip using an Arduino UNO and a MOSFET.

// Define the pin connected to the MOSFET gate
const int ledPin = 9;

void setup() {
  // Set the LED pin as an output
  pinMode(ledPin, OUTPUT);
}

void loop() {
  // Increase brightness
  for (int brightness = 0; brightness <= 255; brightness++) {
    analogWrite(ledPin, brightness);
    delay(10); // Delay to see the change in brightness
  }
  
  // Decrease brightness
  for (int brightness = 255; brightness >= 0; brightness--) {
    analogWrite(ledPin, brightness);
    delay(10); // Delay to see the change in brightness
  }
}

Troubleshooting and FAQs

Common Issues Users Might Face

  1. LED Strip Not Lighting Up:

    • Solution: Check the power supply connections and ensure the correct voltage and polarity. Verify that the power supply is functioning correctly.
  2. Uneven Brightness:

    • Solution: This could be due to voltage drop along the strip. Inject power at multiple points along the strip to maintain uniform brightness.
  3. Overheating:

    • Solution: Ensure proper ventilation and consider using a heat sink. Check if the current rating of the power supply matches the requirements of the LED strip.
  4. Flickering:

    • Solution: This could be due to an unstable power supply. Ensure the power supply is capable of providing a stable 5V output with sufficient current.

FAQs

  • Can I cut the LED strip to a custom length?

    • Yes, the LED strip can be cut at designated points, usually marked by a line or scissor icon.
  • Can I extend the LED strip?

    • Yes, you can extend the LED strip by soldering additional strips together, but ensure the power supply can handle the increased current.
  • Is the LED strip dimmable?

    • Yes, the LED strip can be dimmed using PWM control from a microcontroller like the Arduino UNO.
  • Can I use the LED strip outdoors?

    • Only the IP65 waterproof version is suitable for outdoor use. Ensure all connections are properly sealed to maintain the waterproof rating.

This documentation provides a comprehensive guide to using the 5V White LED Strip, ensuring both beginners and experienced users can effectively utilize this versatile component.