How to Use Heatbed: Examples, Pinouts, and Specs
Introduction
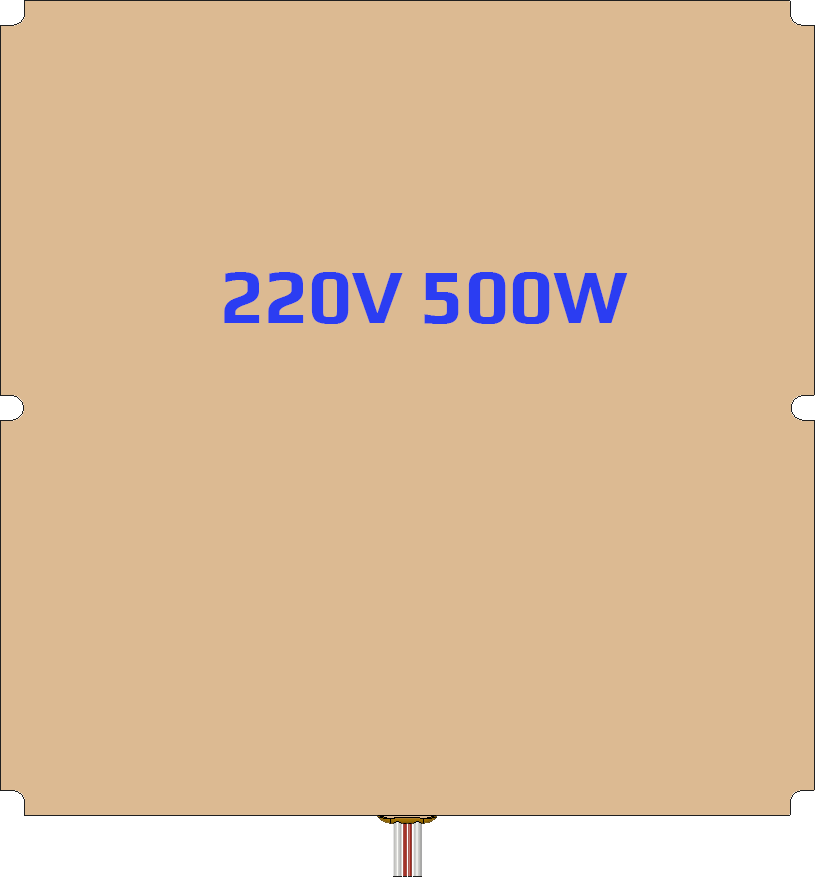
A heatbed is a critical component in the realm of 3D printing, providing a heated print surface that significantly improves the adhesion of the first layer of extruded filament. By maintaining a consistent temperature across the print surface, a heatbed helps to prevent warping and other issues associated with the cooling of thermoplastic materials. This ensures higher quality prints with better dimensional accuracy. Heatbeds are commonly used in Fused Deposition Modeling (FDM) 3D printers with materials such as PLA, ABS, and PETG.
Explore Projects Built with Heatbed

Explore Projects Built with Heatbed
Technical Specifications
Key Technical Details
- Operating Voltage: Typically 12V or 24V
- Power Rating: Varies depending on size (e.g., 120W, 220W)
- Maximum Temperature: Usually around 110°C (230°F)
- Heating Time to 60°C: Approximately 5-10 minutes, depending on power
- Surface Material: Often aluminum, with a coating or build surface applied
- Thermal Safety Features: May include a thermistor for temperature feedback and a thermal fuse for overheat protection
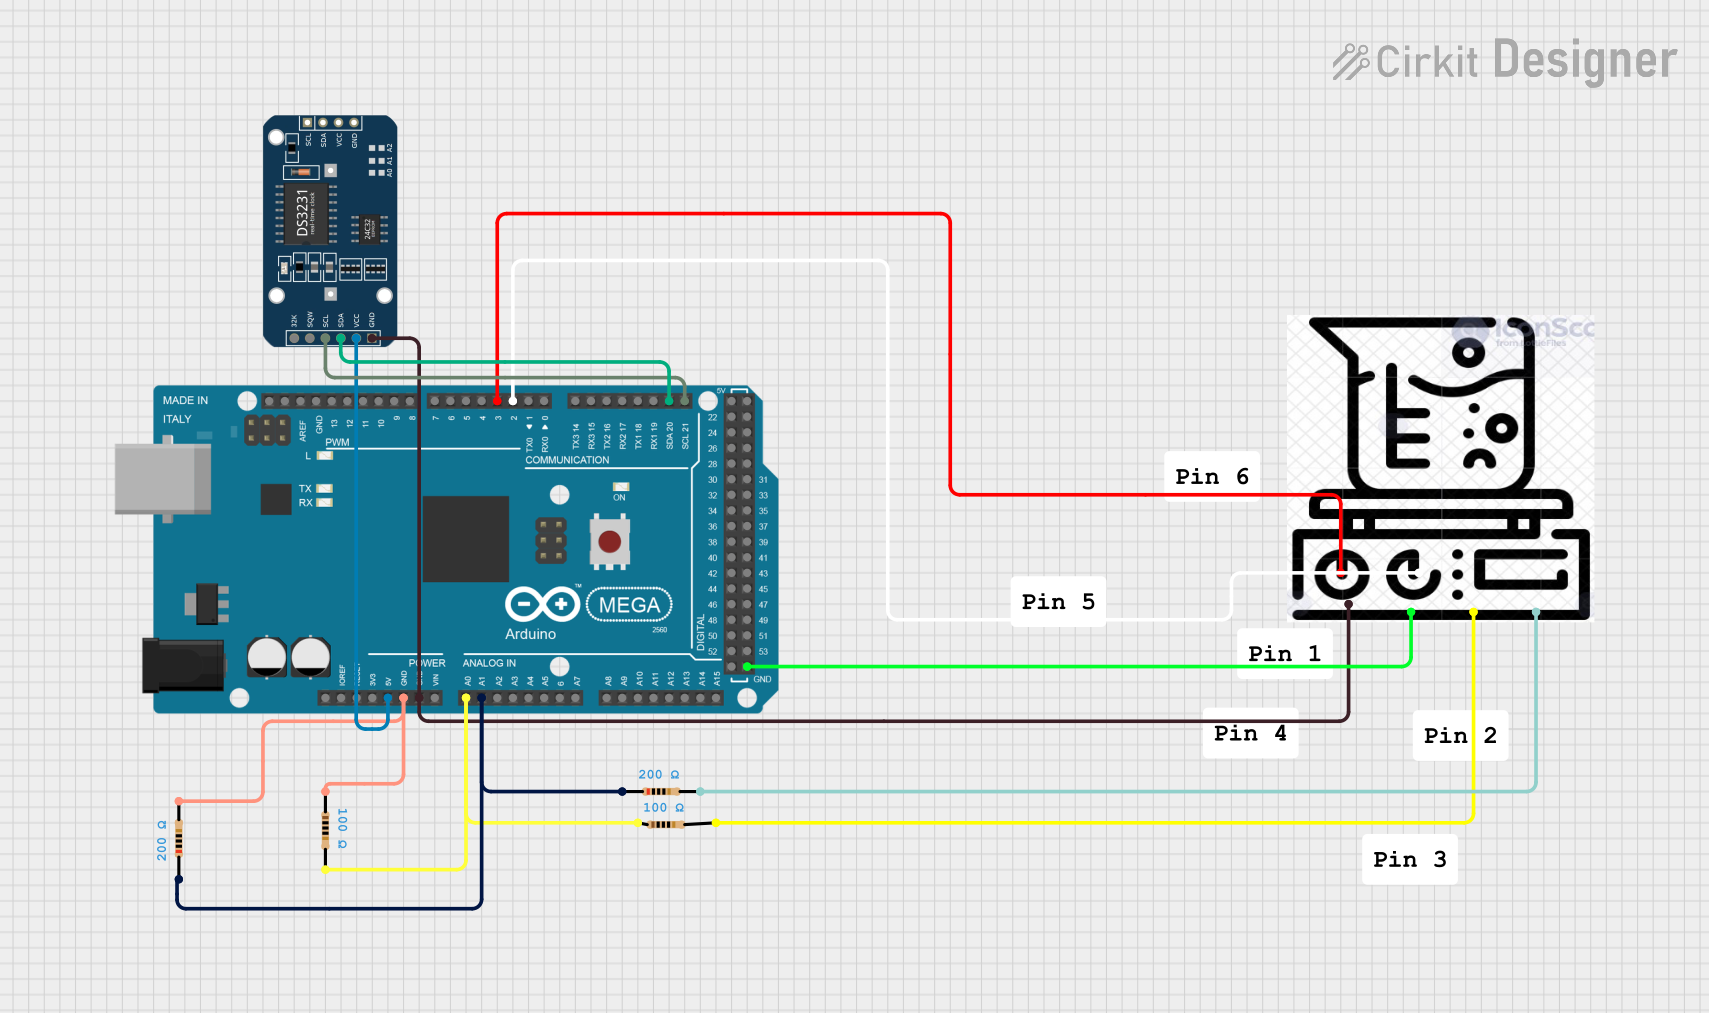
Pin Configuration and Descriptions
| Pin Number | Description | Notes |
|---|---|---|
| 1 | Power (+) | Connect to the positive power supply |
| 2 | Power (-) | Connect to the negative power supply |
| 3 | Thermistor (+) | Connect to the temperature control circuit |
| 4 | Thermistor (-) | Connect to the temperature control circuit |
Usage Instructions
Integration into a 3D Printer Circuit
Power Connection: Connect the power pins of the heatbed to a suitable power supply, ensuring that the voltage matches the heatbed's requirements. Use a MOSFET or a solid-state relay to control the power to the heatbed, as it draws significant current.
Temperature Monitoring: Connect the thermistor pins to the 3D printer's mainboard, allowing the firmware to monitor and control the heatbed temperature.
Firmware Configuration: Update the 3D printer's firmware settings to match the heatbed's specifications, including the thermistor type and the maximum temperature limit.
Best Practices
- Insulation: Consider adding insulation beneath the heatbed to reduce heat loss and improve heating efficiency.
- Surface Calibration: Ensure the heatbed is level and properly calibrated for even heat distribution.
- Safety Precautions: Always monitor the heatbed during operation to prevent overheating and potential fire hazards.
Troubleshooting and FAQs
Common Issues and Solutions
- Heatbed Not Heating: Check the wiring connections and the power supply. Ensure the controlling MOSFET or relay is functioning correctly.
- Uneven Heating: Verify that the heatbed is level and that there are no obstructions or damage to the surface.
- Overheating: Confirm that the thermistor is properly seated and that the firmware is correctly configured to prevent overheating.
FAQs
Q: Can I use a heatbed with a higher voltage rating on my printer? A: It is not recommended to use a heatbed with a voltage rating higher than what your printer's power supply and electronics are rated for.
Q: How do I know if my heatbed is working correctly? A: Use an infrared thermometer to check the surface temperature and ensure it matches the temperature reported by the printer's firmware.
Q: What should I do if the heatbed temperature fluctuates? A: Check the thermistor connections and consider PID tuning the heatbed temperature control in the firmware.
Example Arduino Code for Heatbed Control
// Define the heatbed control pin and thermistor pin
#define HEATBED_PIN 10
#define THERMISTOR_PIN A0

// Define the target temperature in Celsius
#define TARGET_TEMP 60

void setup() {
  pinMode(HEATBED_PIN, OUTPUT);
  analogWrite(HEATBED_PIN, 0); // Start with the heatbed off
}

void loop() {
  int tempReading = analogRead(THERMISTOR_PIN);
  float temperature = convertToTemperature(tempReading);

  // Turn on the heatbed if the temperature is below the target
  if (temperature < TARGET_TEMP) {
    analogWrite(HEATBED_PIN, 255); // Full power to heatbed
  } else {
    analogWrite(HEATBED_PIN, 0); // Turn off heatbed
  }

  // Wait for a short period before checking again
  delay(2000);
}

// Function to convert the thermistor reading to a temperature value
float convertToTemperature(int reading) {
  // This is a placeholder function. The actual conversion will depend on
  // the specific thermistor used and will require a proper conversion formula.
  return reading * 0.48828125; // Example conversion for illustration
}
Note: The example code provided is a simple illustration of how to control a heatbed using an Arduino. In practice, more sophisticated control algorithms, such as PID control, are used to maintain a stable temperature. Additionally, the conversion from thermistor reading to temperature requires a specific formula based on the thermistor's characteristics and the circuit design.