How to Use Gravity pH Meter V2.0: Examples, Pinouts, and Specs
Introduction
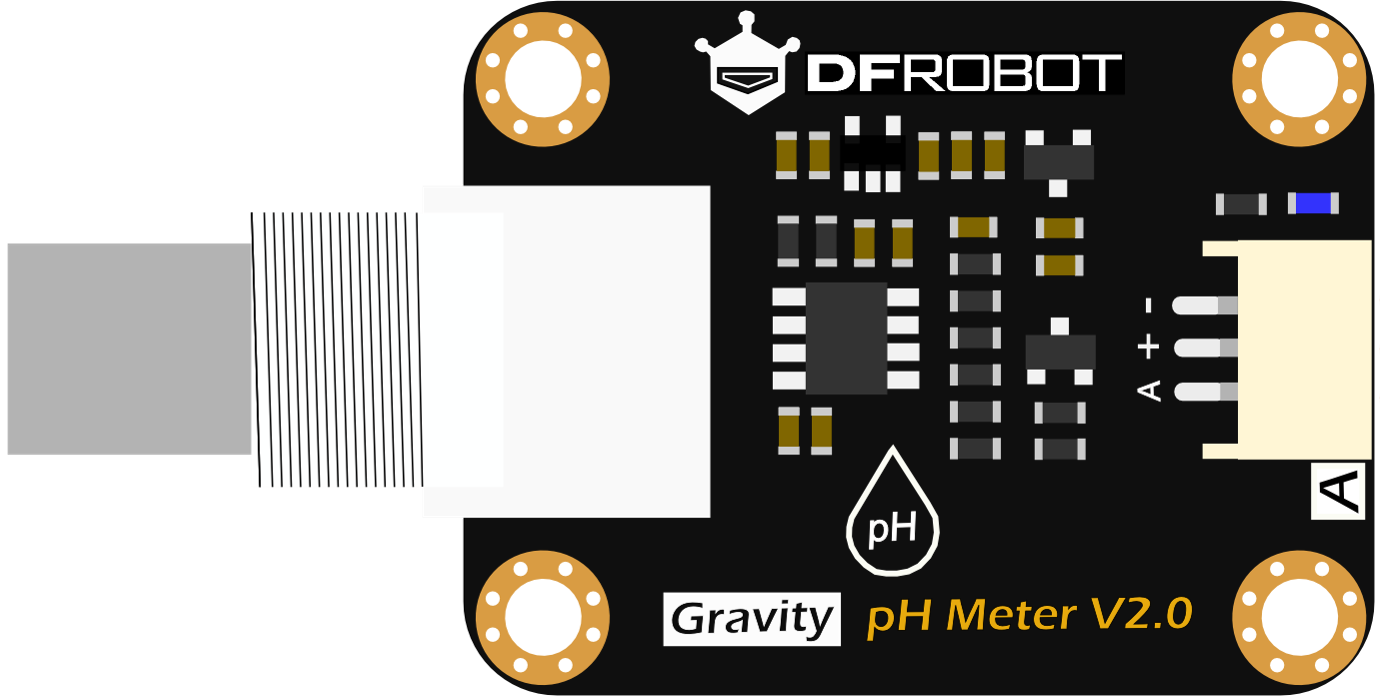
The Gravity pH Meter V2.0 (Manufacturer Part ID: SEN161-V2) by DFROBOT is a precision instrument designed to measure the acidity or alkalinity of a solution. It provides accurate pH readings, making it an essential tool for applications in laboratories, aquariums, hydroponics, environmental monitoring, and more. This module is easy to use, compatible with Arduino and other microcontrollers, and features enhanced stability and reliability compared to its predecessor.
Explore Projects Built with Gravity pH Meter V2.0
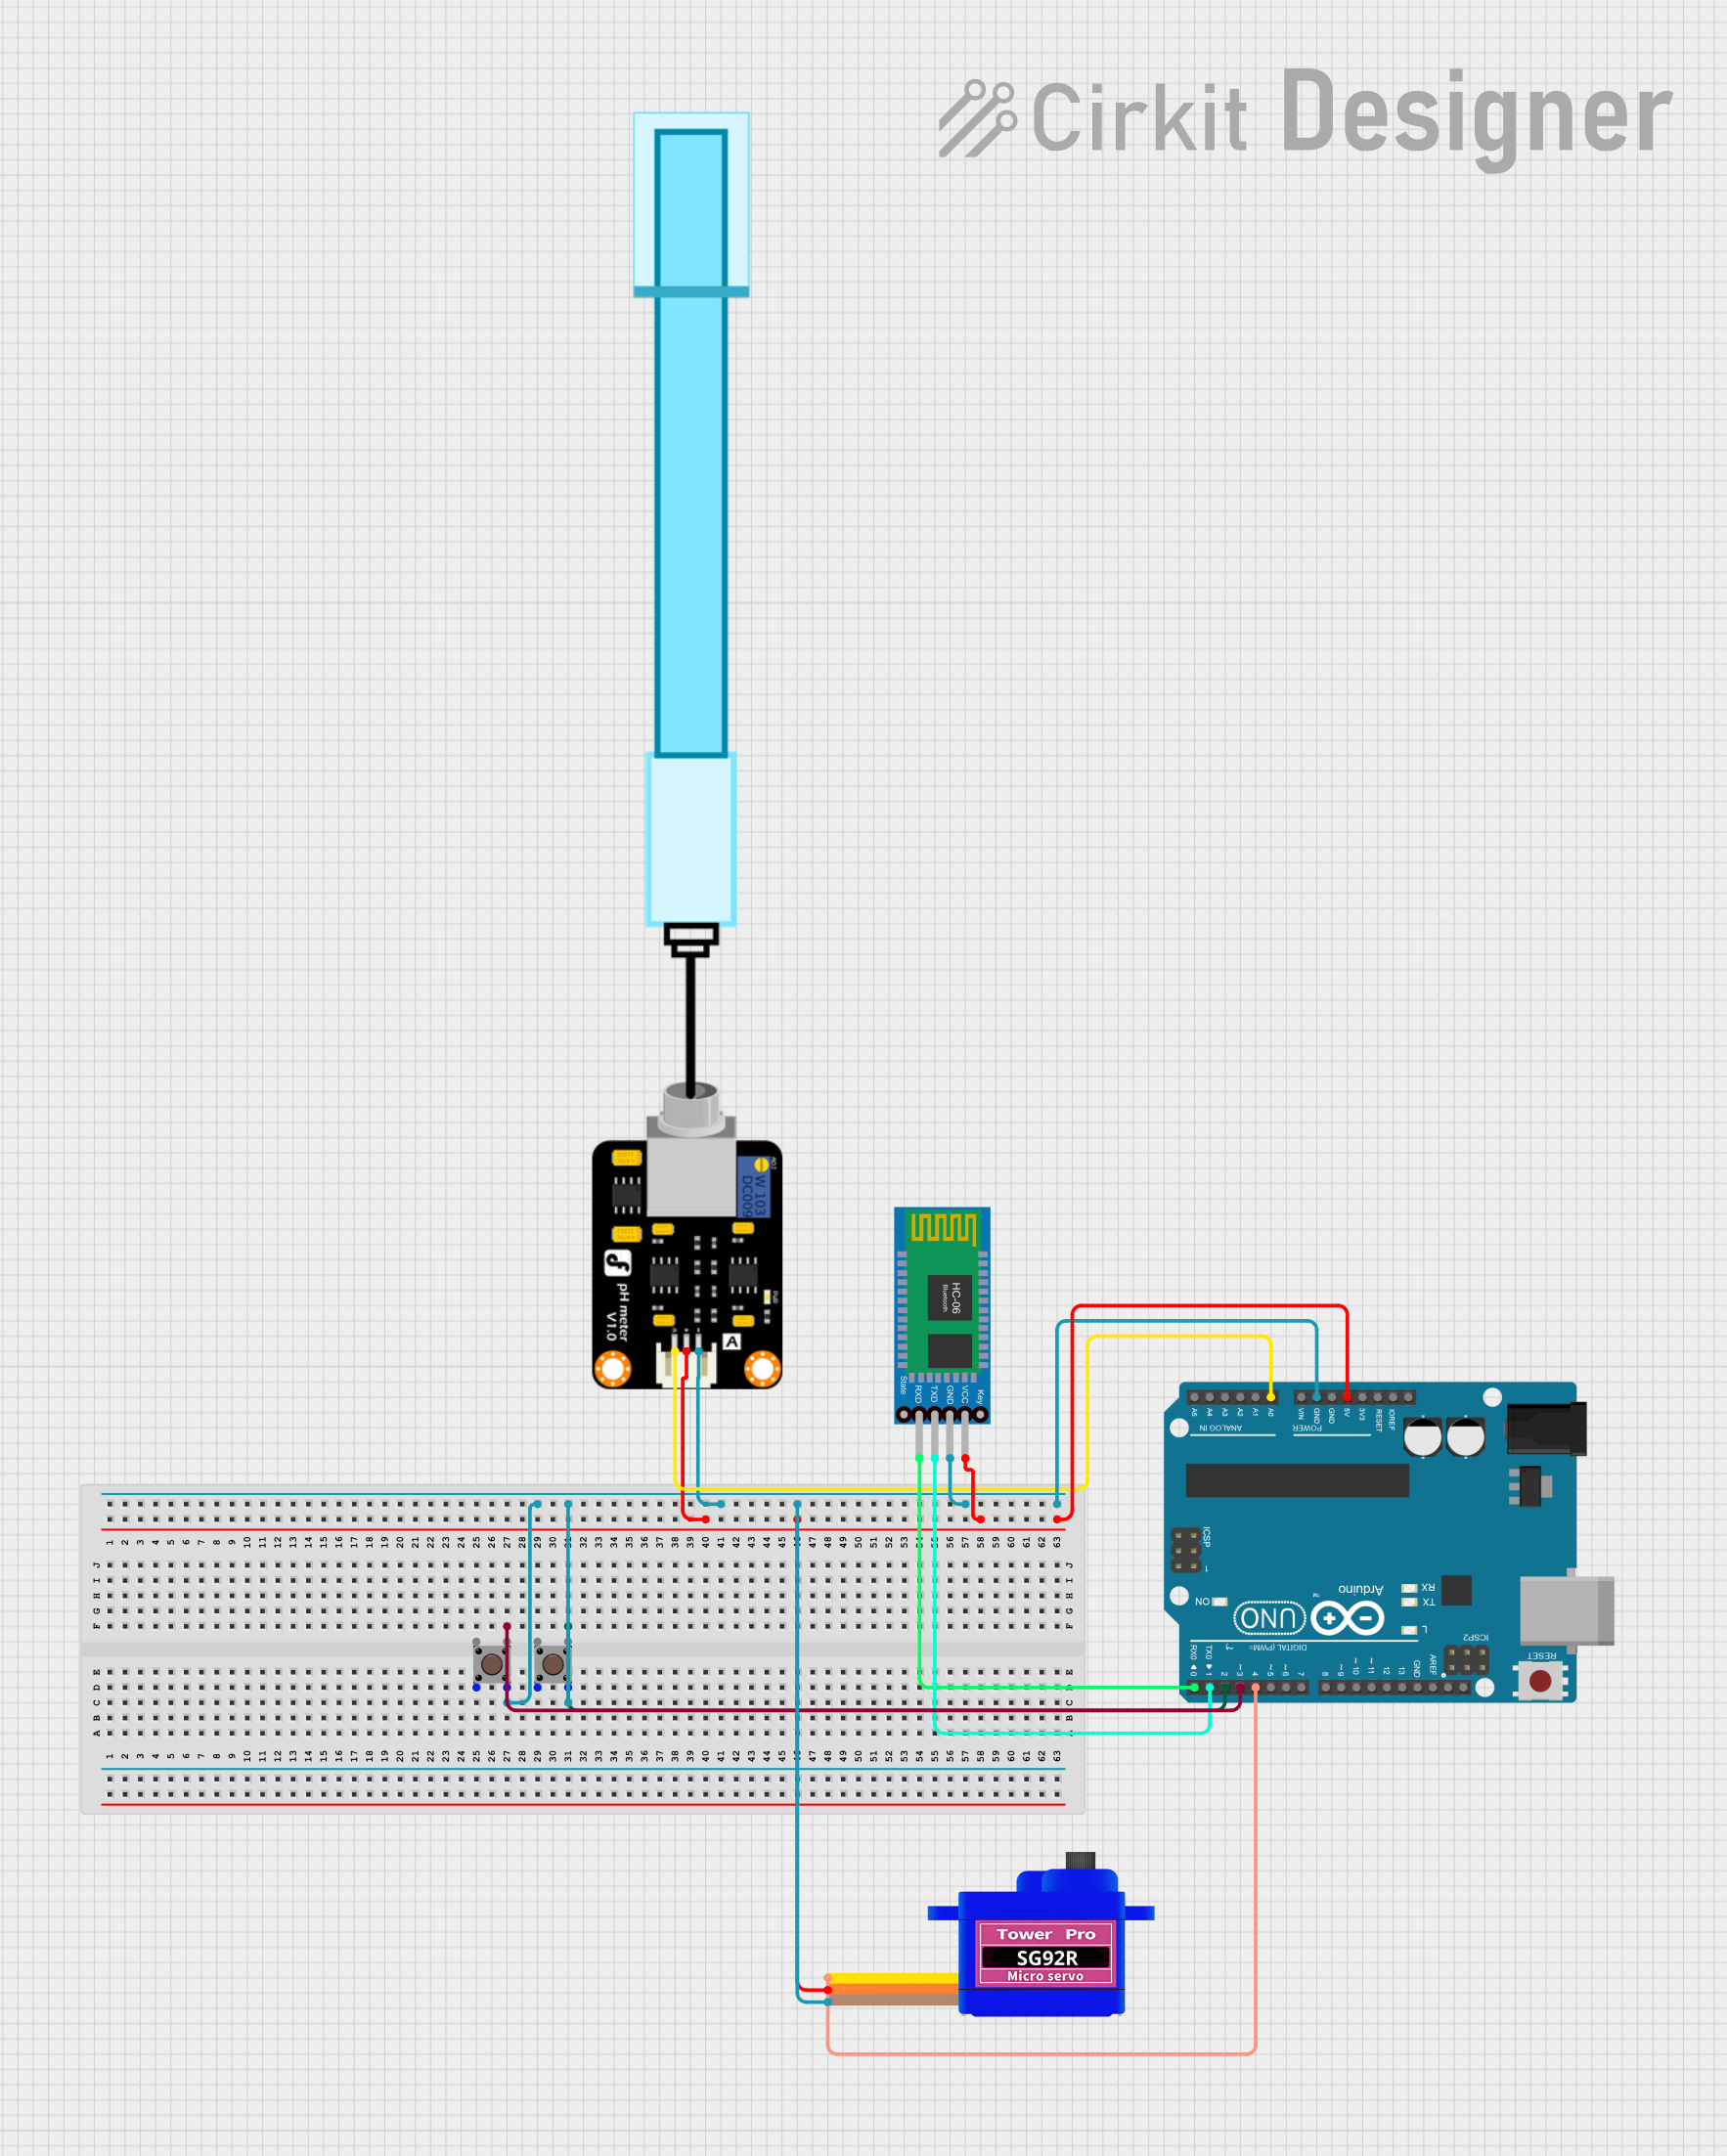
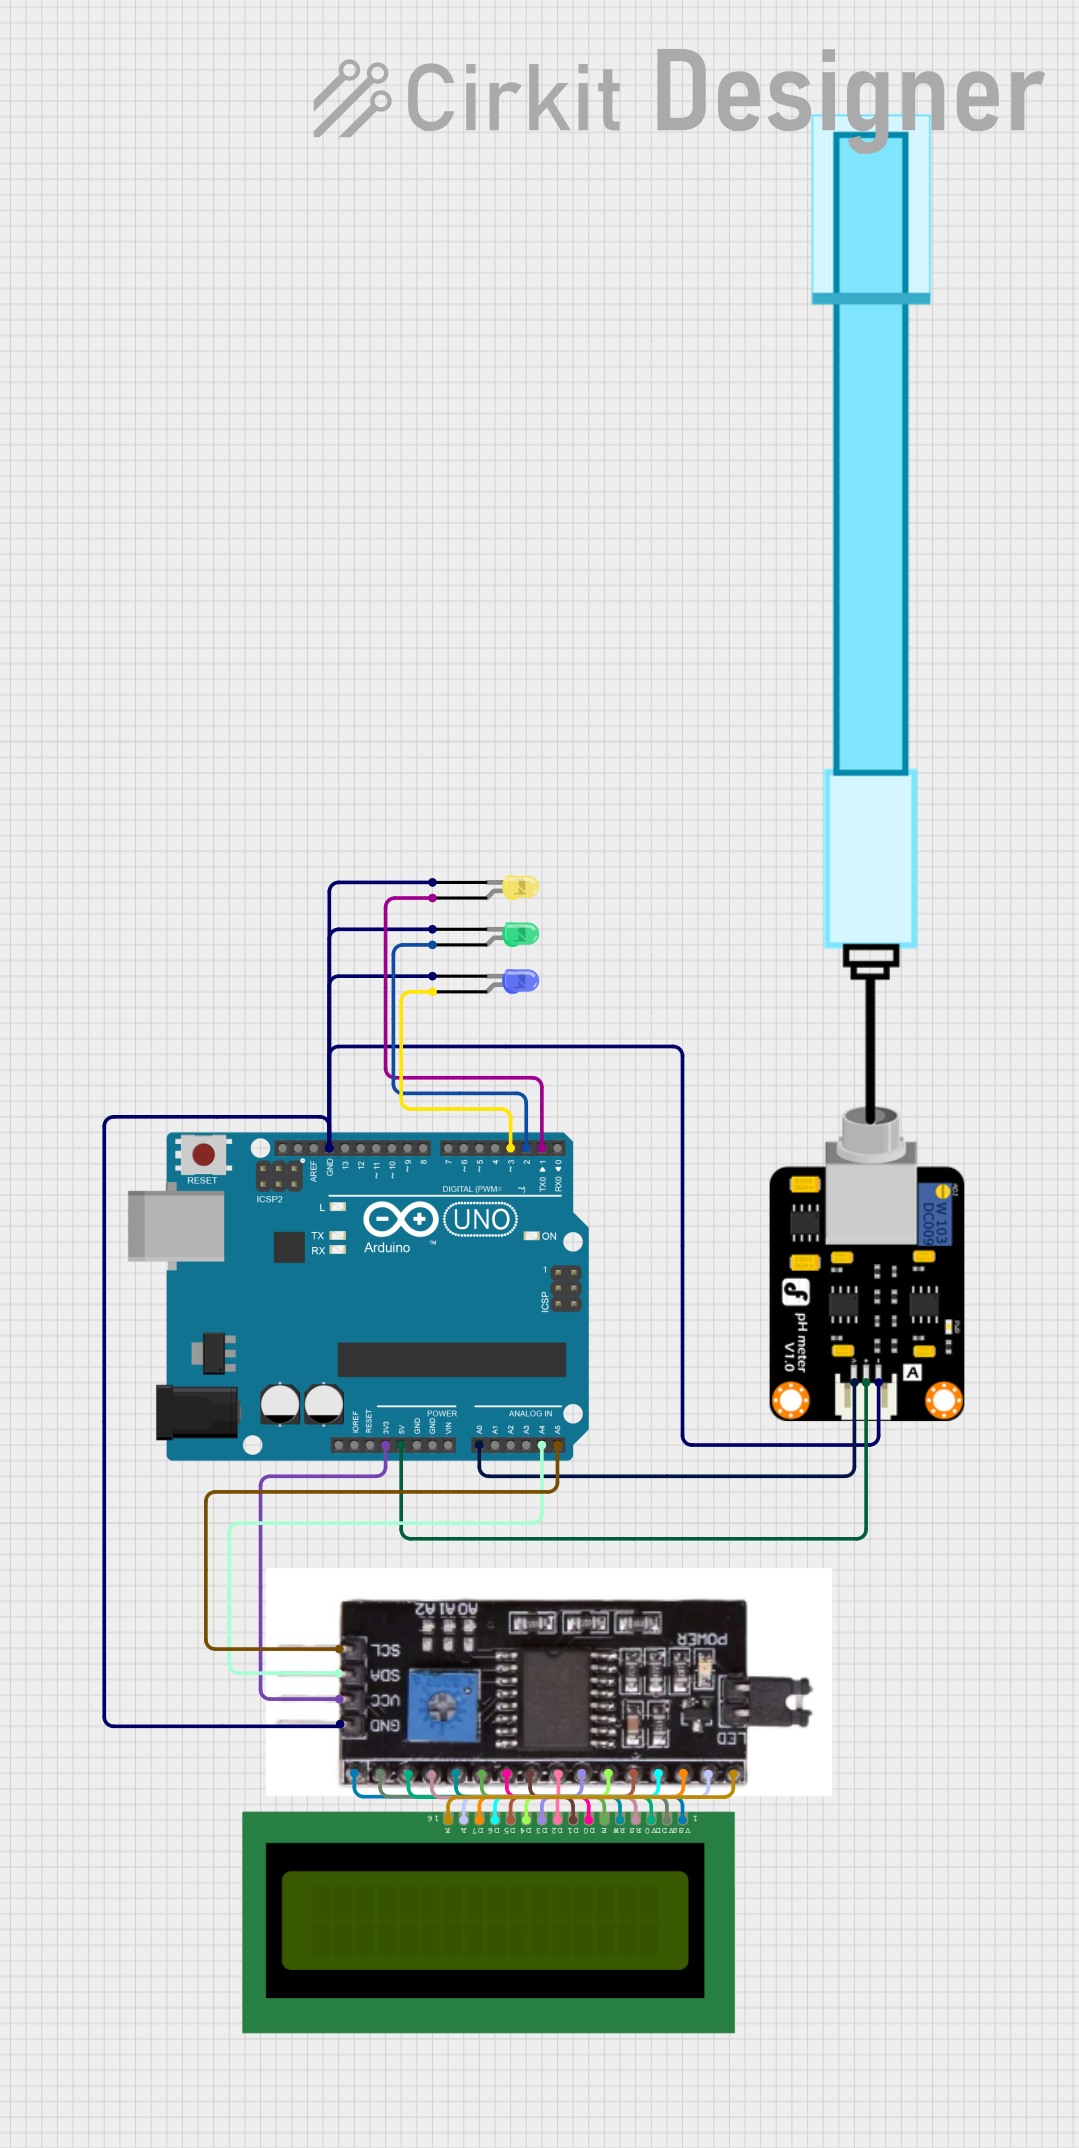
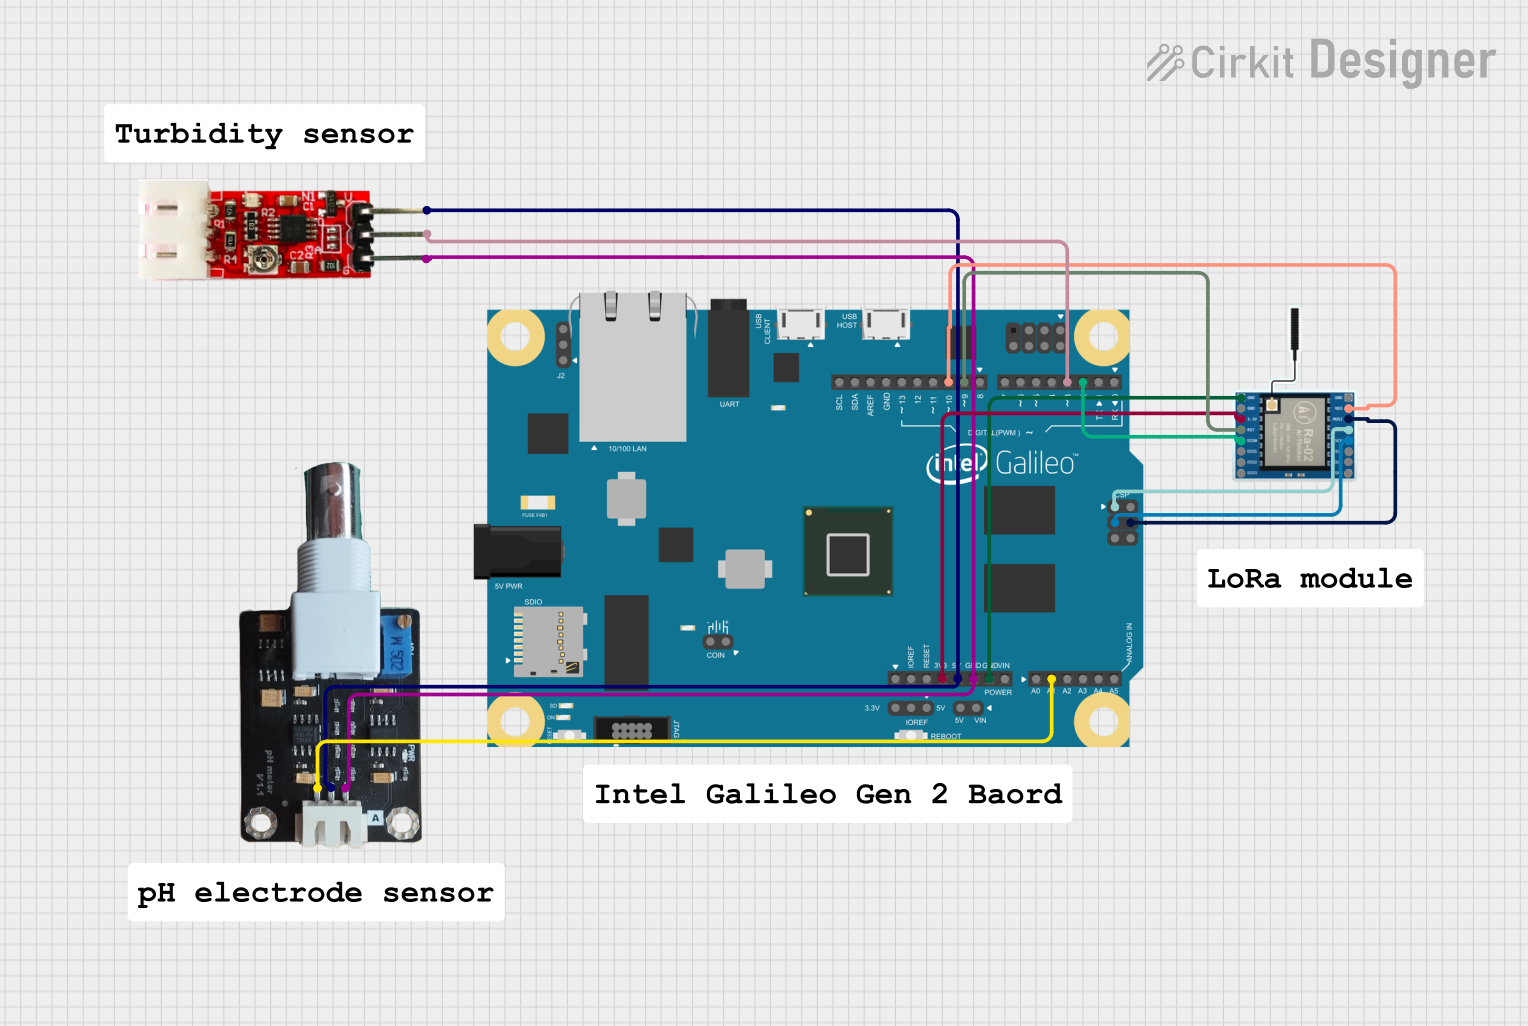
Explore Projects Built with Gravity pH Meter V2.0
Common Applications
- Laboratories: For chemical analysis and research.
- Aquariums: To monitor water quality and maintain a healthy environment for aquatic life.
- Hydroponics: To ensure optimal pH levels for plant growth.
- Environmental Monitoring: For testing water quality in natural bodies of water.
- Education: As a teaching tool for chemistry and environmental science.
Technical Specifications
The following table outlines the key technical details of the Gravity pH Meter V2.0:
| Parameter | Specification |
|---|---|
| Supply Voltage | 3.3V - 5.5V |
| Output Signal | 0 - 3.0V |
| Measurement Range | 0 - 14 pH |
| Accuracy | ±0.1 pH (at 25°C) |
| Response Time | ≤1 minute |
| Operating Temperature | 0°C - 60°C |
| Probe Connector | BNC |
| Module Dimensions | 42mm x 32mm |
Pin Configuration
The Gravity pH Meter V2.0 features a 3-pin interface for easy connection to microcontrollers. The pin configuration is as follows:
| Pin | Label | Description |
|---|---|---|
| 1 | VCC |
Power supply input (3.3V - 5.5V) |
| 2 | GND |
Ground connection |
| 3 | AOUT |
Analog output signal (0 - 3.0V) |
Usage Instructions
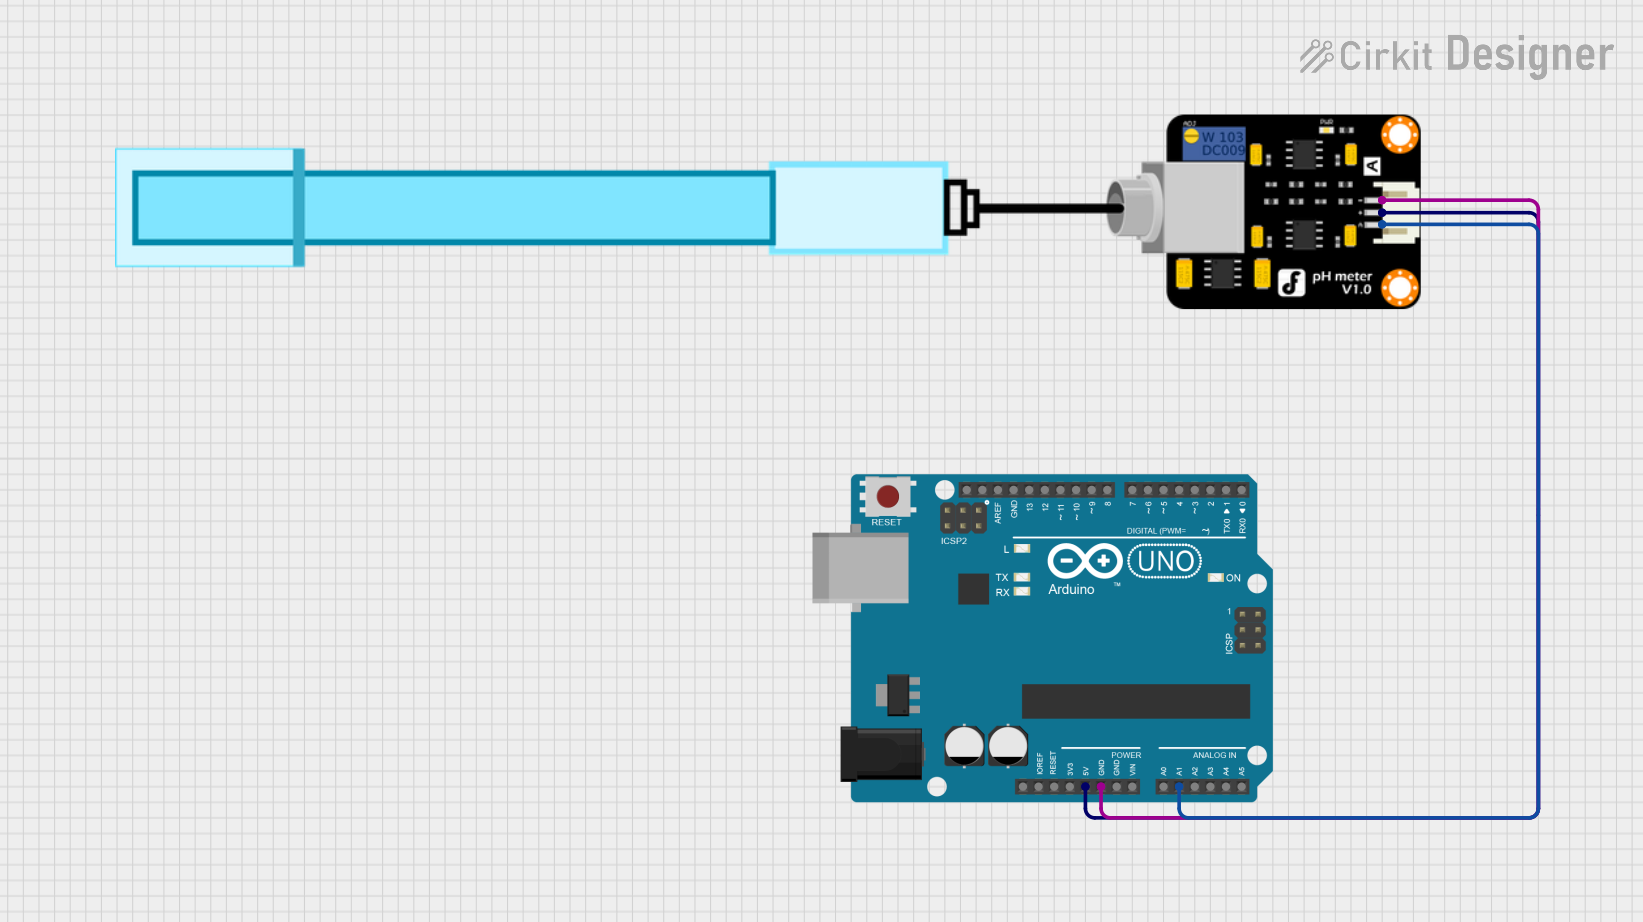
Connecting the pH Meter to an Arduino UNO
Hardware Setup:
- Connect the
VCCpin of the pH meter to the5Vpin on the Arduino UNO. - Connect the
GNDpin of the pH meter to theGNDpin on the Arduino UNO. - Connect the
AOUTpin of the pH meter to an analog input pin on the Arduino UNO (e.g.,A0). - Attach the BNC probe to the pH meter module.
- Connect the
Calibration:
- Use standard pH buffer solutions (e.g., pH 4.0, pH 7.0, and pH 10.0) to calibrate the sensor.
- Adjust the potentiometer on the module to fine-tune the output for accurate readings.
Arduino Code: Below is an example Arduino sketch to read and display pH values:
// Include necessary libraries (if any)
const int pH_pin = A0; // Analog pin connected to the pH meter's AOUT
float voltage, pH_value;

void setup() {
  Serial.begin(9600); // Initialize serial communication
}

void loop() {
  int sensorValue = analogRead(pH_pin); // Read analog value from pH meter
  voltage = sensorValue * (5.0 / 1023.0); // Convert to voltage (5V system)

  // Convert voltage to pH value using the sensor's characteristics
  pH_value = 3.5 * voltage; // Adjust the multiplier based on calibration

  // Print the pH value to the Serial Monitor
  Serial.print("pH Value: ");
  Serial.println(pH_value);

  delay(1000); // Wait 1 second before the next reading
}
Important Considerations
- Calibration: Regular calibration is essential for accurate readings. Use fresh buffer solutions for best results.
- Probe Maintenance: Keep the pH probe clean and store it in a pH probe storage solution when not in use.
- Temperature Compensation: The module does not include automatic temperature compensation. For precise measurements, consider manually compensating for temperature variations.
- Avoid Drying: Never let the pH probe dry out, as this can damage the sensor.
Troubleshooting and FAQs
Common Issues and Solutions
Inaccurate Readings:
- Cause: The sensor is not calibrated.
- Solution: Recalibrate the sensor using standard pH buffer solutions.
No Output Signal:
- Cause: Incorrect wiring or loose connections.
- Solution: Verify all connections and ensure the module is powered correctly.
Slow Response Time:
- Cause: The probe is dirty or damaged.
- Solution: Clean the probe with distilled water and check for physical damage.
pH Value Stuck at a Fixed Number:
- Cause: The probe is dry or improperly stored.
- Solution: Soak the probe in a pH probe storage solution for at least 30 minutes.
FAQs
Q1: Can I use the Gravity pH Meter V2.0 with a 3.3V microcontroller?
A1: Yes, the module supports a supply voltage range of 3.3V to 5.5V, making it compatible with 3.3V systems like ESP32 or Raspberry Pi Pico.
Q2: How often should I calibrate the pH meter?
A2: Calibration frequency depends on usage. For critical applications, calibrate before each use. For general use, calibrate weekly or monthly.
Q3: Can the pH meter be used for high-temperature solutions?
A3: No, the operating temperature range is 0°C to 60°C. Using it outside this range may damage the probe.
Q4: What is the lifespan of the pH probe?
A4: The probe typically lasts 1-2 years with proper care and maintenance. Replace it if readings become unreliable.
By following this documentation, users can effectively integrate and maintain the Gravity pH Meter V2.0 for accurate and reliable pH measurements.