How to Use Motor amarillo motorreductor hobby: Examples, Pinouts, and Specs
Introduction
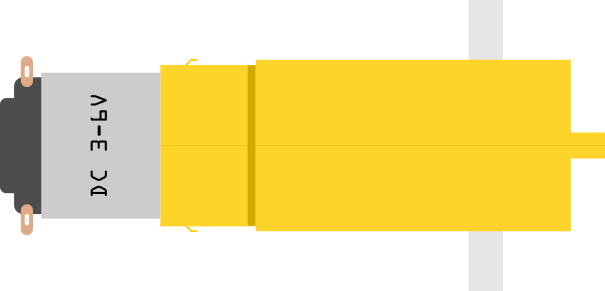
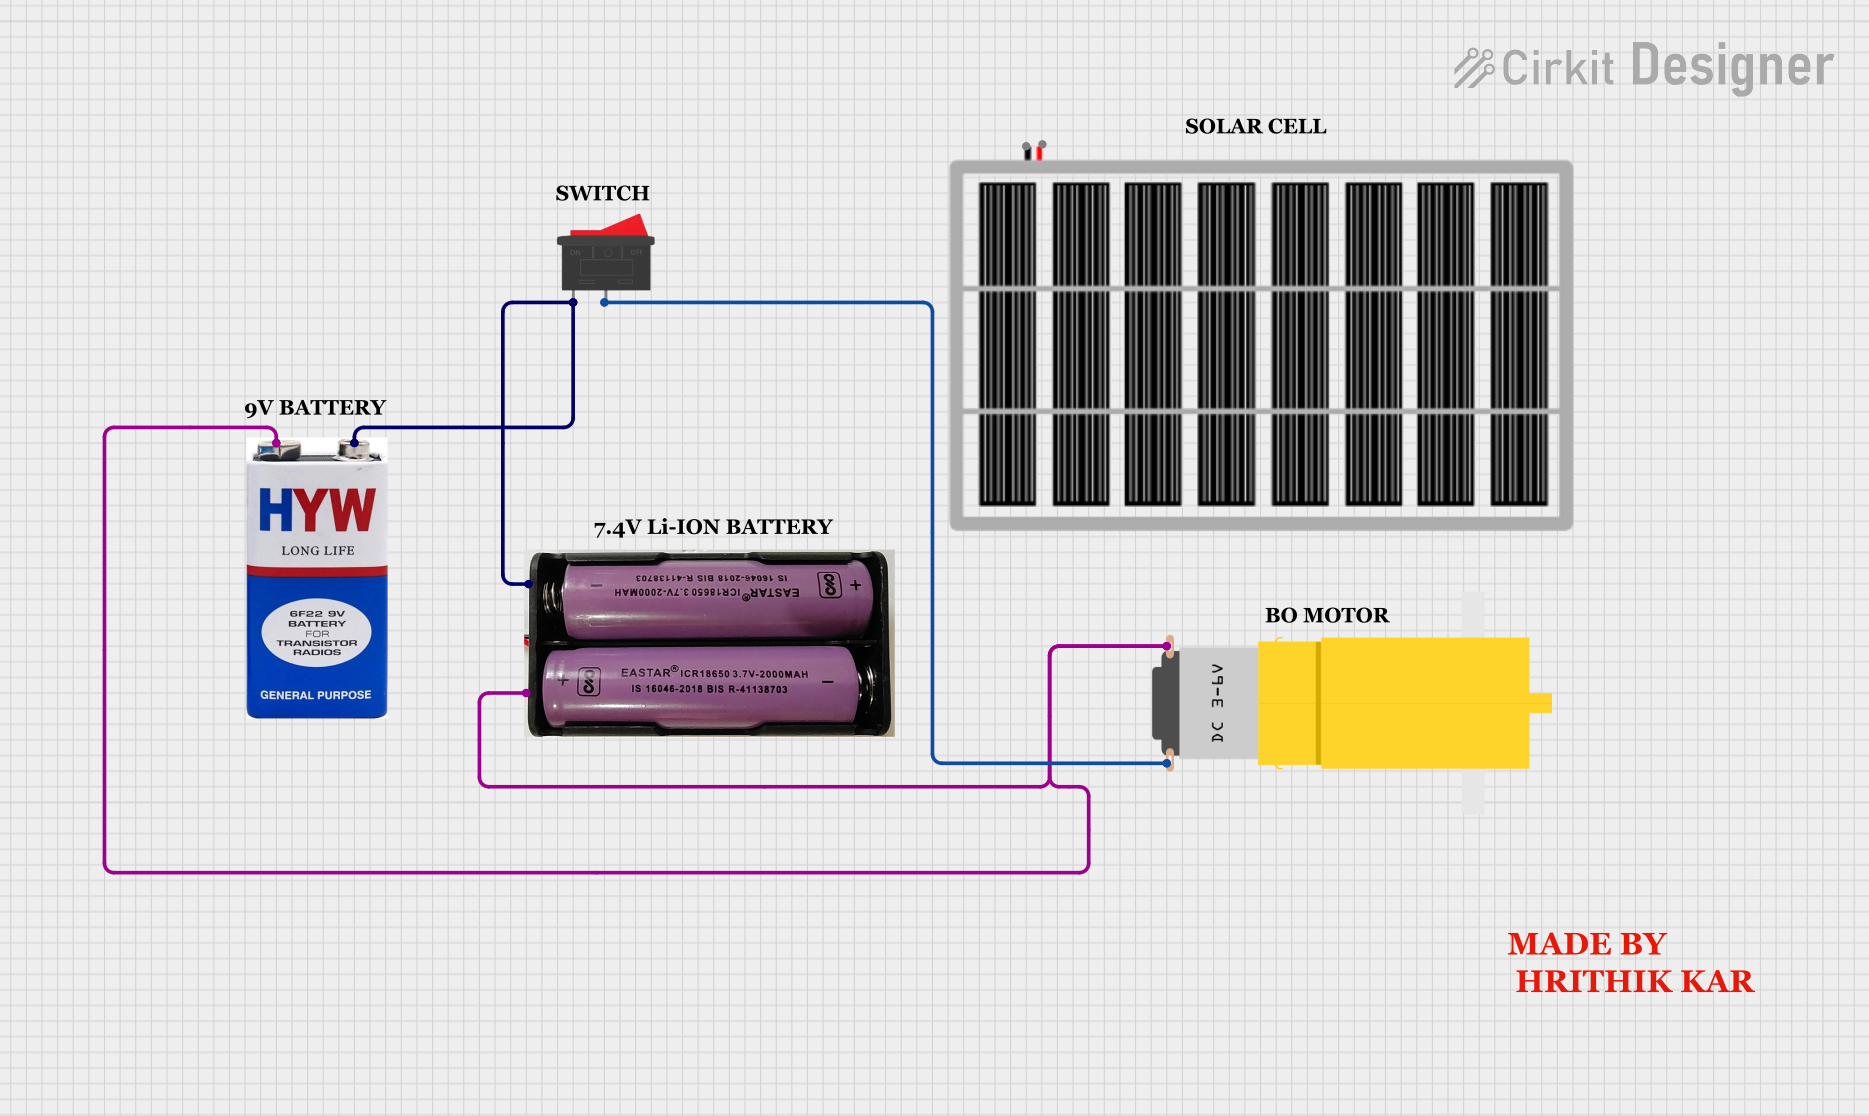
The Motor Amarillo Motorreductor Hobby is a compact DC (Direct Current) motor commonly used in hobby electronics and robotics projects. It features a built-in reduction gear system, which allows it to provide high torque at lower speeds, making it ideal for applications where controlled movement is essential. This motor is often used in small robots, educational kits, and DIY projects where space is limited and efficiency is desired.
Explore Projects Built with Motor amarillo motorreductor hobby
Explore Projects Built with Motor amarillo motorreductor hobby
Common Applications and Use Cases
- Small-scale robotics
- Educational projects and kits
- DIY electronic vehicles
- Prototyping mechanical systems
Technical Specifications
Key Technical Details
- Voltage: Typically 3V to 6V DC
- No-load Current: Approx. 70mA (at 3V)
- Stall Current: Approx. 250mA (at 3V)
- Speed: Around 90 RPM (at 3V, without load)
- Torque: Varies with voltage and load
- Gear Ratio: Typically around 48:1
Pin Configuration and Descriptions
The Motor Amarillo Motorreductor Hobby has two terminals for electrical connections. Below is the pin configuration:
| Pin Number | Description |
|---|---|
| 1 | Positive Voltage (V+) |
| 2 | Ground (GND) |
Usage Instructions
How to Use the Component in a Circuit
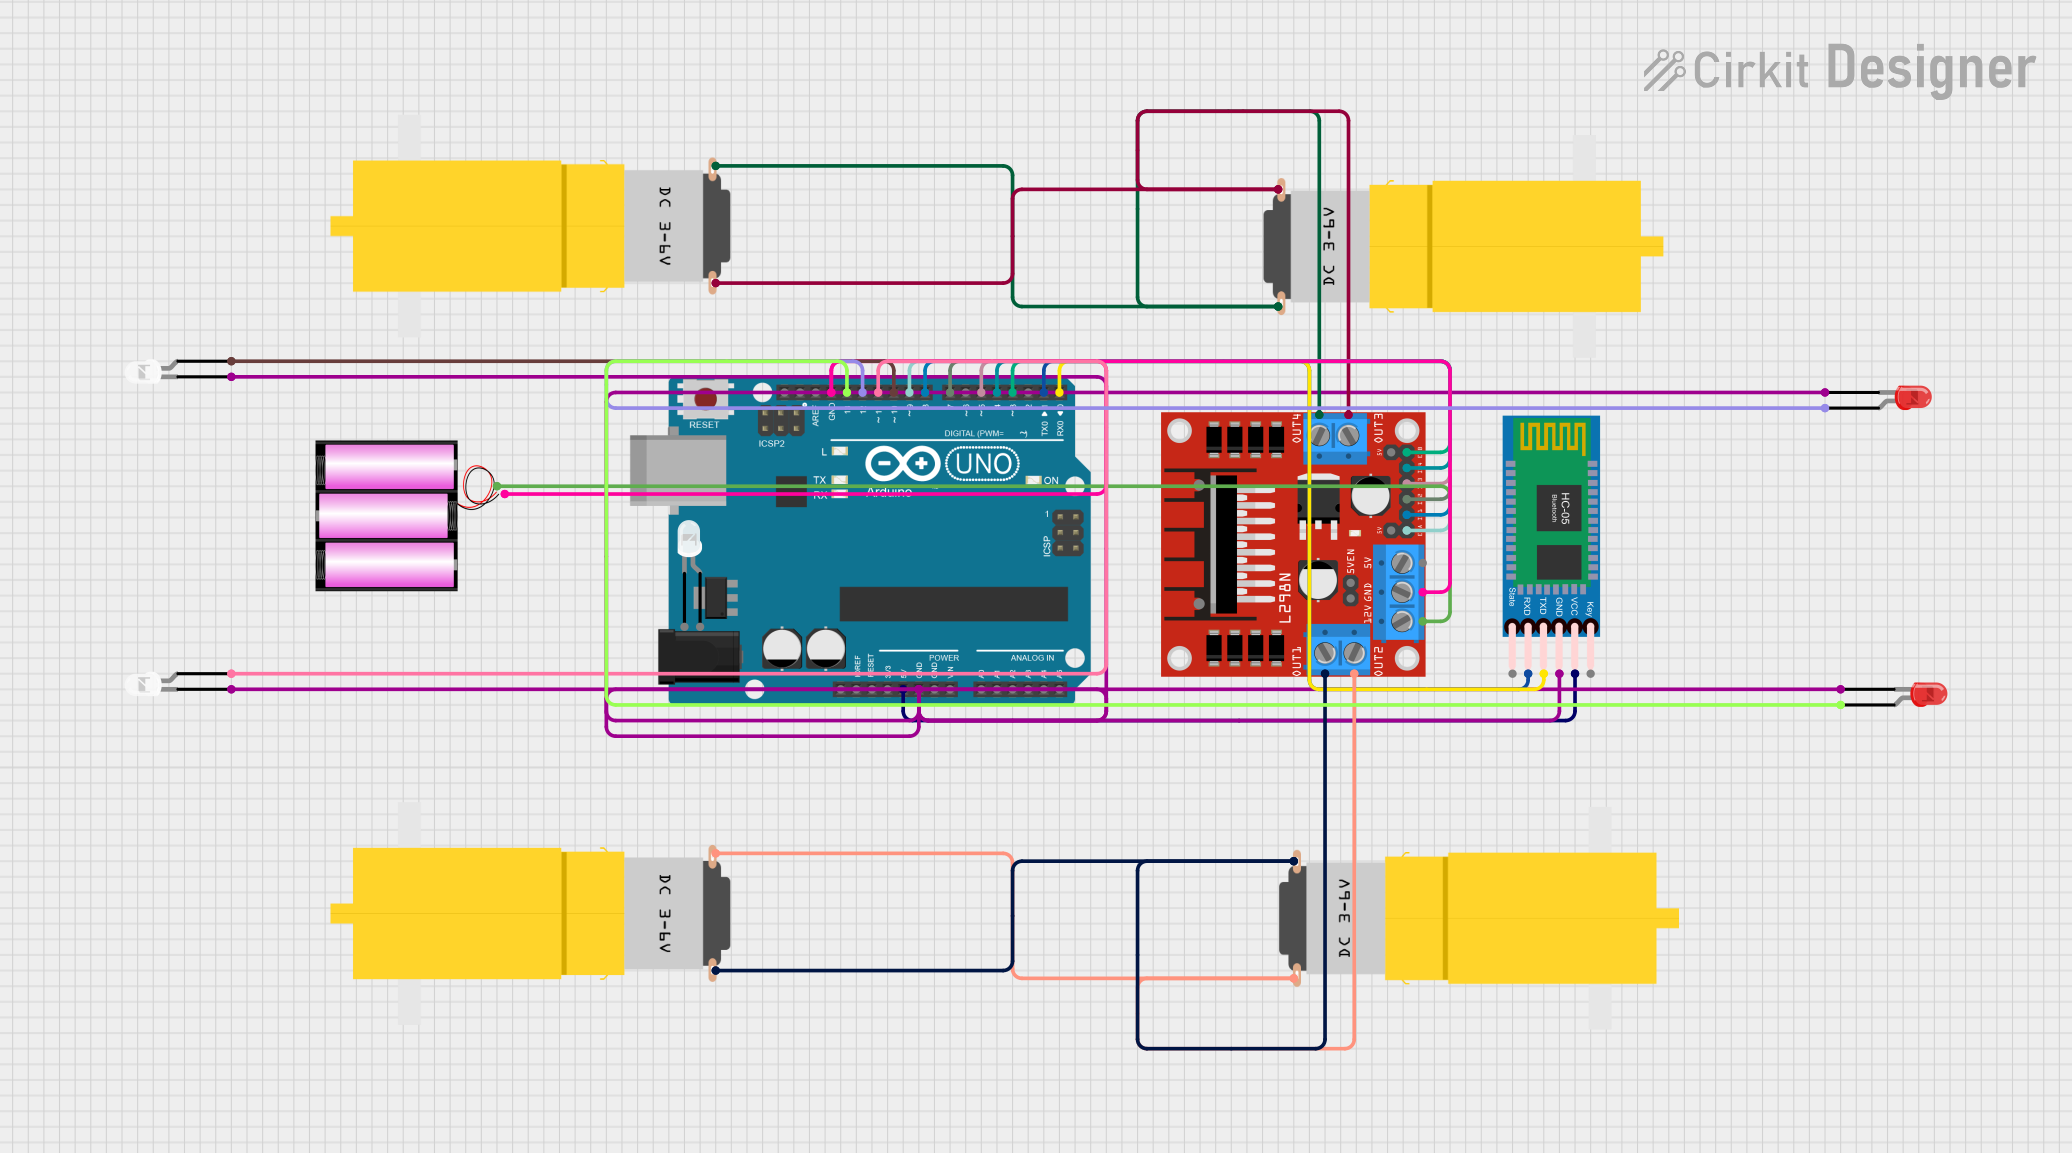
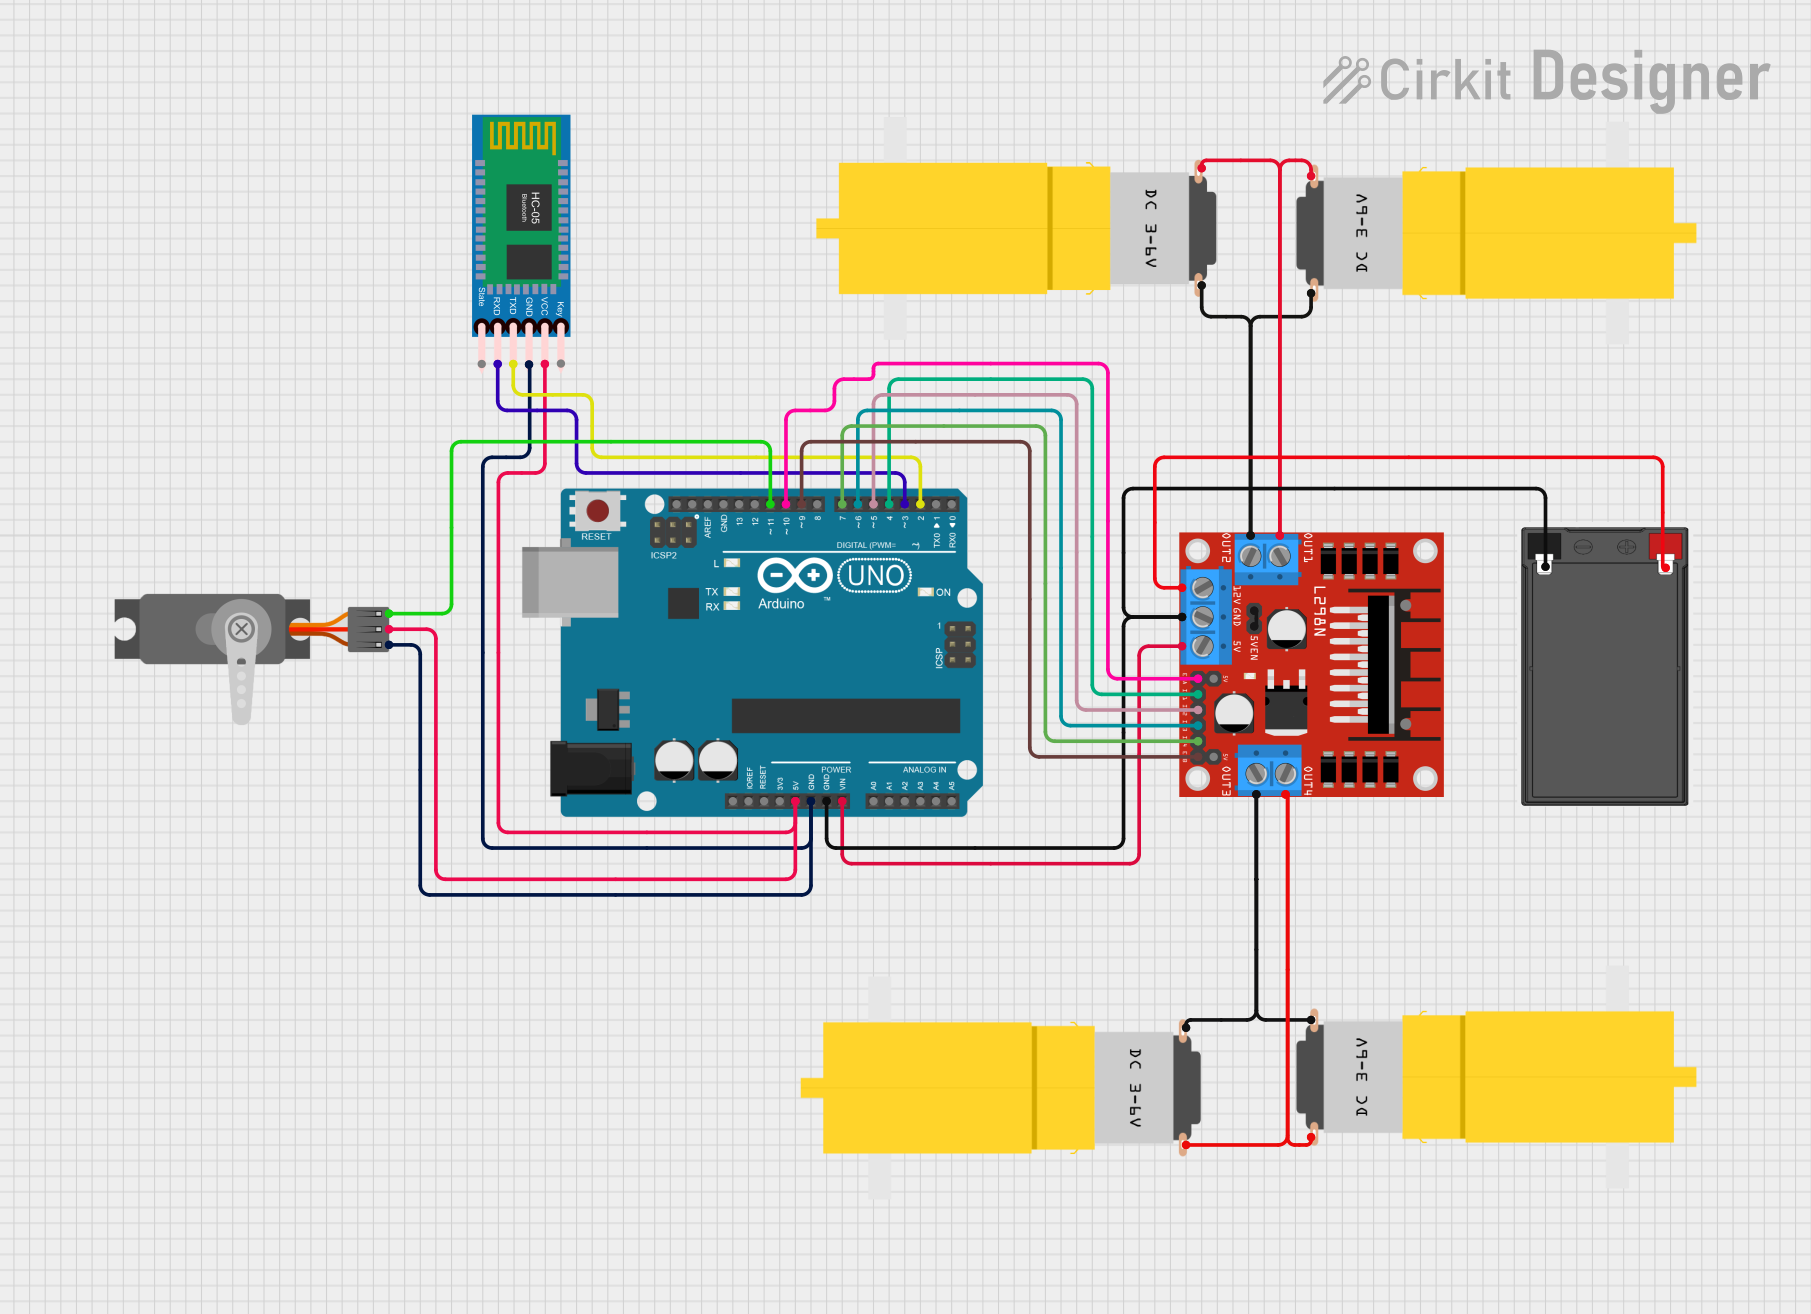
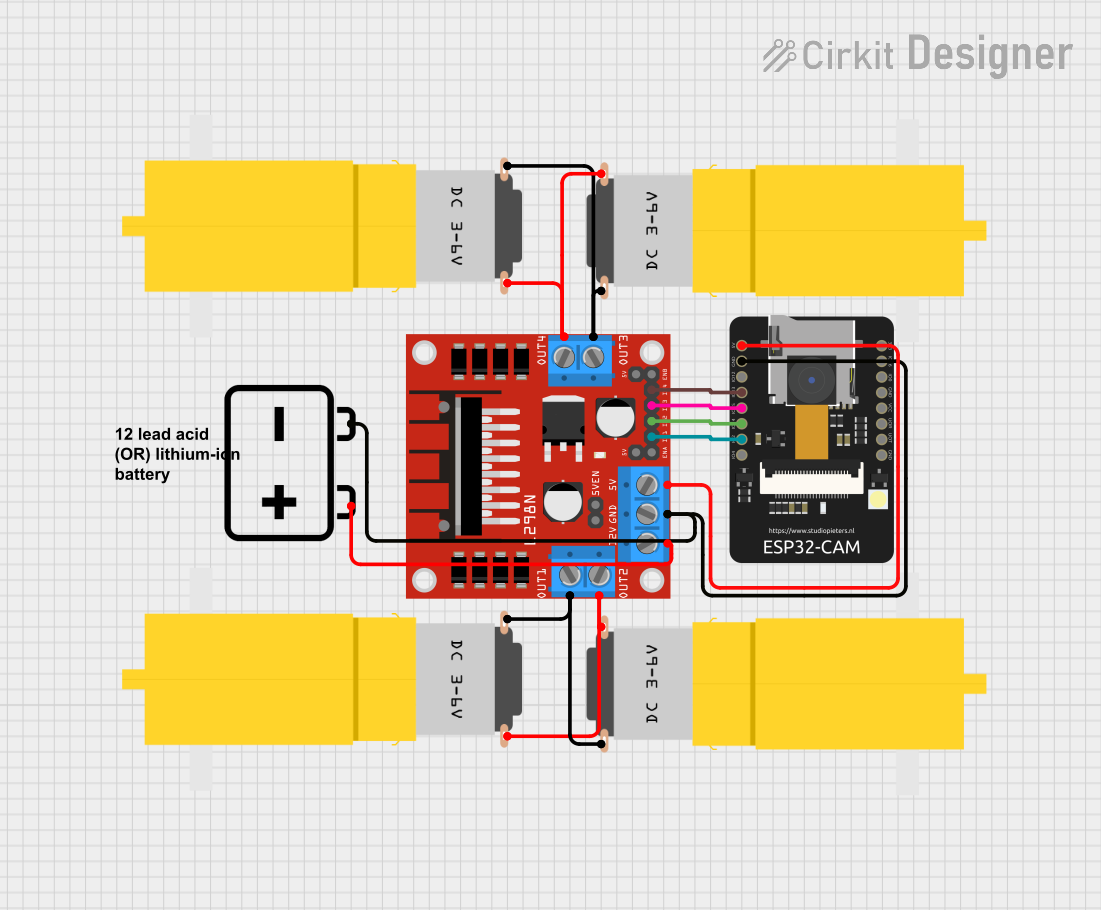
Power Supply: Connect the motor's positive terminal to the positive output of your power supply, and the negative terminal to the ground (GND). Ensure that the voltage is within the motor's specified range.
Control: To control the motor's direction and speed, you can use a motor driver or an H-bridge circuit. This allows you to reverse the polarity of the voltage applied to the motor and to use PWM (Pulse Width Modulation) for speed control.
Mounting: Secure the motor to your project using screws or a mounting bracket. Ensure that the motor shaft is aligned with the load to prevent undue stress on the motor bearings.
Important Considerations and Best Practices
- Voltage: Do not exceed the recommended voltage range as it may damage the motor.
- Current: Be aware of the stall current and ensure your power supply can handle the maximum current draw.
- Heat Dissipation: If running the motor for extended periods, ensure adequate ventilation to prevent overheating.
- Load: Avoid placing excessive loads on the motor shaft, which can lead to gear damage or motor burnout.
Troubleshooting and FAQs
Common Issues
- Motor not running: Check power supply connections and voltage levels. Ensure that the motor driver or control circuit is functioning correctly.
- Low torque or speed: Verify that the motor is not overloaded and that the voltage supply is within the specified range.
- Overheating: Reduce the load on the motor or improve cooling.
Solutions and Tips for Troubleshooting
- Check Connections: Loose or poor connections can cause intermittent or no operation. Ensure all connections are secure.
- Test Power Supply: Use a multimeter to verify that the power supply is delivering the correct voltage.
- Motor Driver: If using a motor driver, ensure it is properly configured and not damaged.
FAQs
Q: Can I run this motor at a higher voltage for more speed? A: Running the motor at a higher voltage than specified may increase speed temporarily but can lead to overheating and permanent damage.
Q: How can I reverse the direction of the motor? A: To reverse the direction, you can swap the polarity of the motor's connections, or use an H-bridge circuit to control the direction electronically.
Q: What is the best way to control the speed of the motor? A: The most efficient way to control the speed is by using PWM through a motor driver or an H-bridge.
Q: Can I connect this motor directly to an Arduino UNO? A: An Arduino UNO cannot supply enough current or voltage directly. Use a motor driver and connect the control signals from the Arduino to the driver.
Example Arduino UNO Code
Below is an example code snippet for controlling the Motor Amarillo Motorreductor Hobby using an Arduino UNO and a simple motor driver:
// Define motor control pins
const int motorPin1 = 3; // Motor driver input pin 1
const int motorPin2 = 4; // Motor driver input pin 2

void setup() {
  // Set motor control pins as outputs
  pinMode(motorPin1, OUTPUT);
  pinMode(motorPin2, OUTPUT);
}

void loop() {
  // Spin motor in one direction
  digitalWrite(motorPin1, HIGH);
  digitalWrite(motorPin2, LOW);
  delay(1000); // Run motor for 1 second

  // Stop motor
  digitalWrite(motorPin1, LOW);
  digitalWrite(motorPin2, LOW);
  delay(1000); // Stop motor for 1 second

  // Spin motor in the opposite direction
  digitalWrite(motorPin1, LOW);
  digitalWrite(motorPin2, HIGH);
  delay(1000); // Run motor for 1 second

  // Stop motor
  digitalWrite(motorPin1, LOW);
  digitalWrite(motorPin2, LOW);
  delay(1000); // Stop motor for 1 second
}
Note: This code assumes the use of a simple motor driver that can be controlled with two digital pins. Adjust the pin numbers and logic according to your specific motor driver's requirements. Always ensure that the motor driver can handle the motor's current requirements.