How to Use Adafruit USB Mini-B Breakout: Examples, Pinouts, and Specs
Introduction
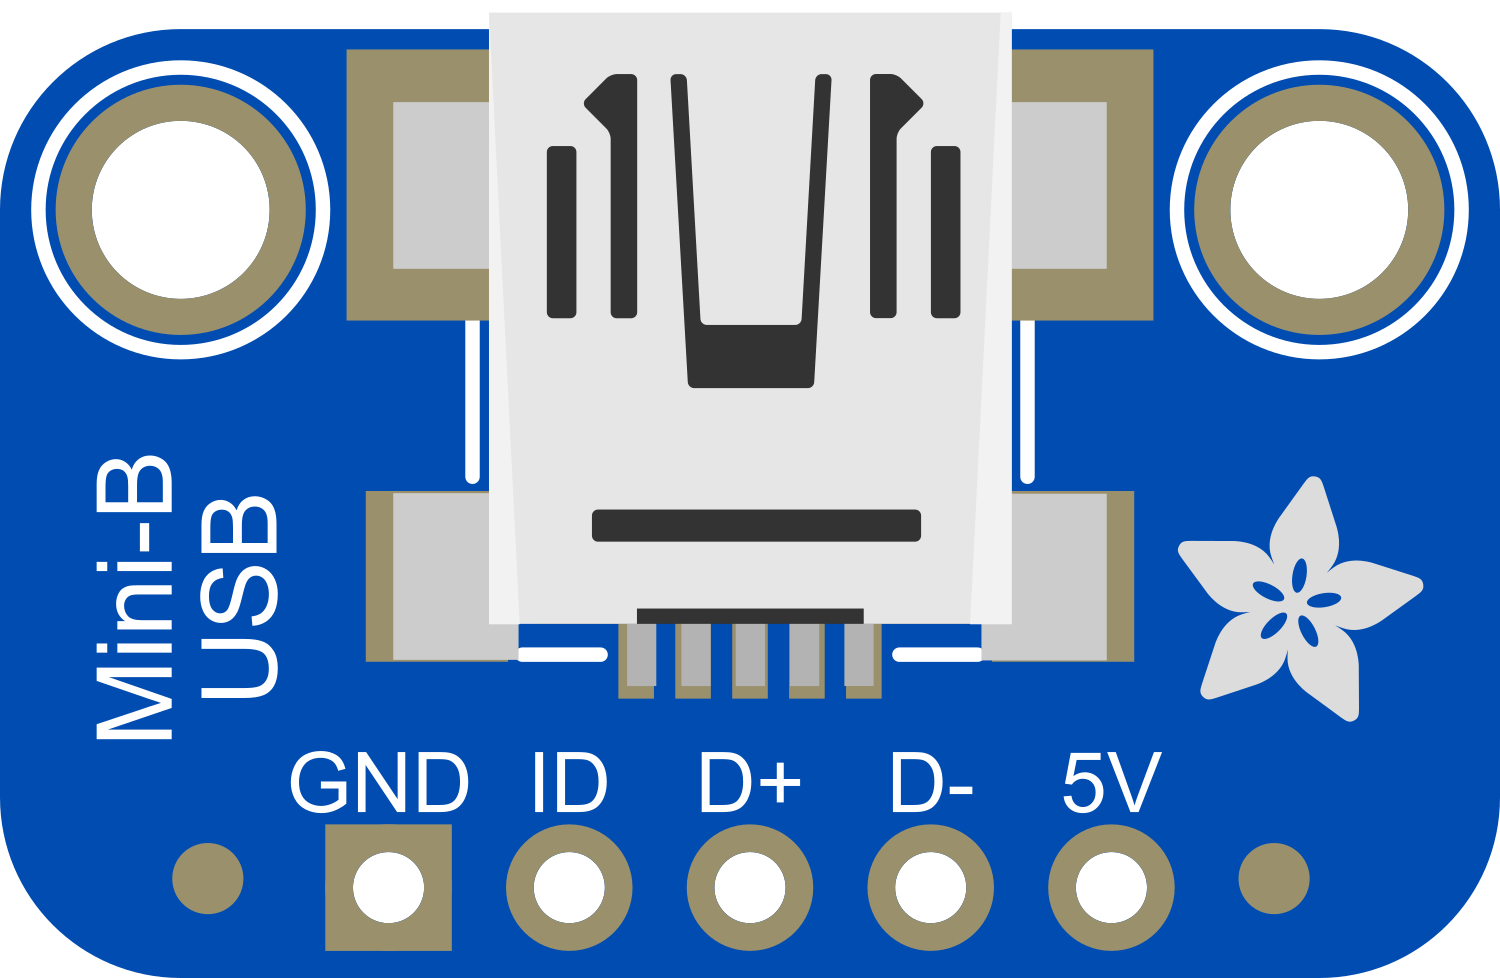
The Adafruit USB Mini-B Breakout board is a versatile and compact module designed to integrate USB connectivity into your electronics projects. With a standard Mini-B USB connector, this breakout board is commonly used to interface with computers, power supplies, and other USB host devices. It is ideal for DIY enthusiasts, hobbyists, and engineers who need to add USB communication or power to their designs.
Explore Projects Built with Adafruit USB Mini-B Breakout
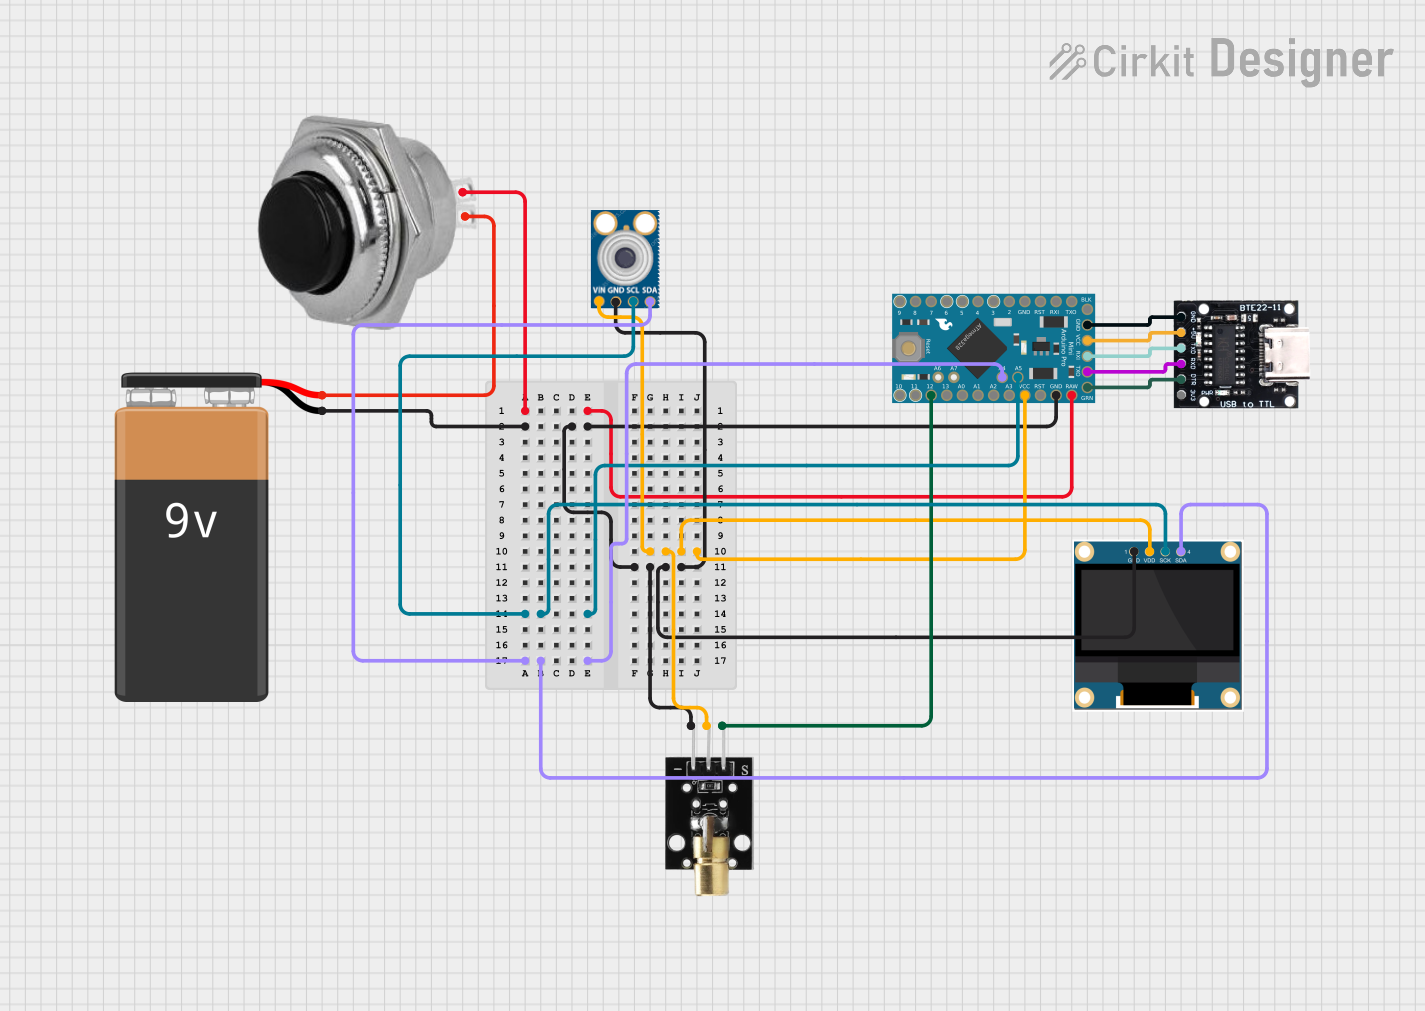

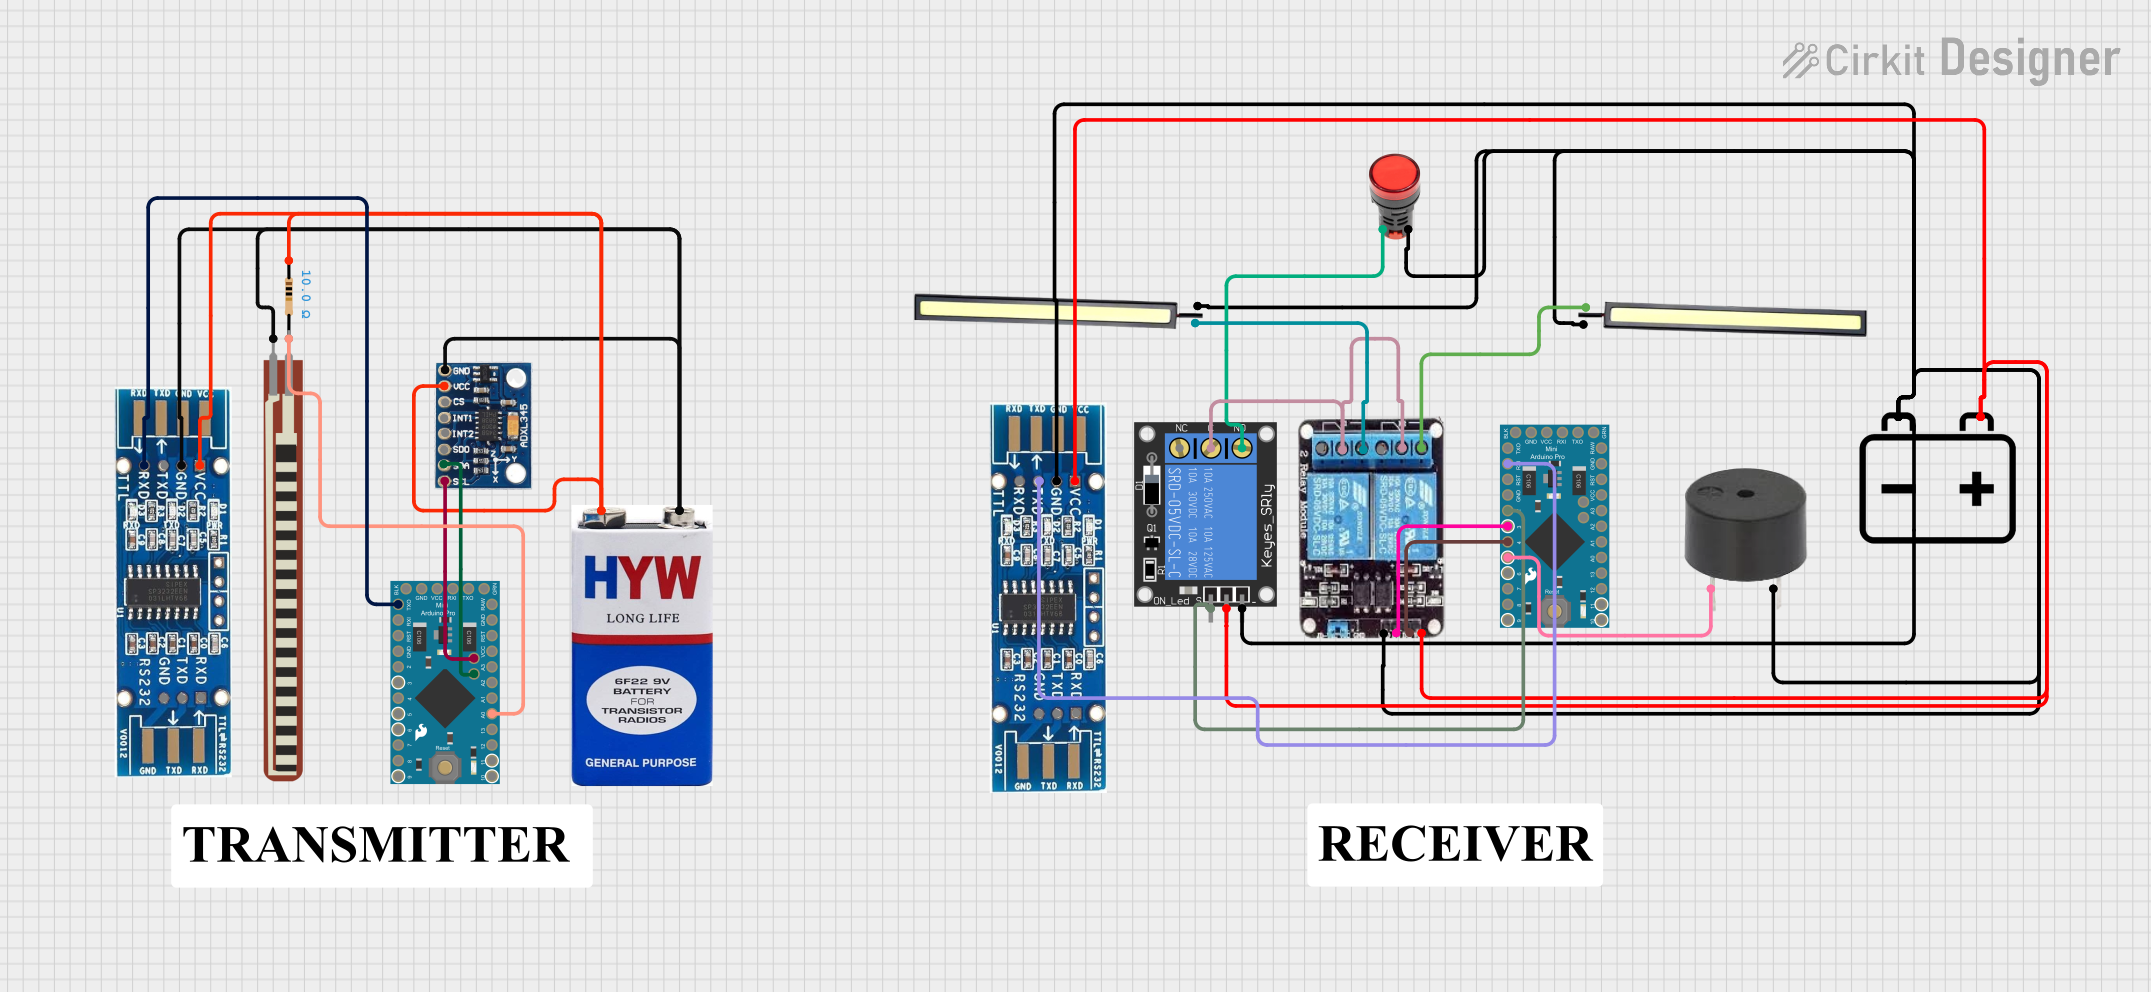

Explore Projects Built with Adafruit USB Mini-B Breakout
Common Applications and Use Cases
- USB-based power supply for small devices
- Data transfer interface for microcontroller projects
- Prototyping USB devices and host systems
- Adding USB connectivity to custom PCBs
Technical Specifications
Key Technical Details
- Voltage: 5V (typical USB power line)
- Current: Up to 500mA (as per USB 2.0 specification)
- Data Lines: D+ and D- for USB 2.0 communication
- Connector Type: USB Mini-B
Pin Configuration and Descriptions
| Pin Number | Name | Description |
|---|---|---|
| 1 | VBUS | Provides 5V from the USB connection |
| 2 | D- | USB Data minus |
| 3 | D+ | USB Data plus |
| 4 | ID | Not connected (typically used for OTG identification) |
| 5 | GND | Ground connection |
Usage Instructions
How to Use the Component in a Circuit
- Power Connection: Connect the VBUS pin to your project's power input and the GND pin to the common ground.
- Data Connection: Connect the D+ and D- pins to your microcontroller or other USB interface circuitry according to the USB standard.
- Mounting: Secure the breakout board onto your project's surface or breadboard using the mounting holes provided.
Important Considerations and Best Practices
- Voltage Regulation: Ensure that your project can handle the 5V supply from the USB without damage.
- Data Line Protection: Use appropriate resistors and capacitors to protect the data lines from voltage spikes.
- USB Compliance: Follow USB 2.0 specifications for impedance and trace routing if designing a custom PCB.
- Isolation: Consider using isolation techniques if your project interfaces with sensitive or high-power electronics.
Example Code for Arduino UNO
// Example code to communicate with a USB host using the Adafruit USB Mini-B Breakout
#include <SoftwareSerial.h>

SoftwareSerial usbSerial(10, 11); // RX, TX

void setup() {
  // Start the serial communication
  usbSerial.begin(9600);
  Serial.begin(9600);
  Serial.println("USB Mini-B Breakout Example");
}

void loop() {
  // Check if data is available from the USB
  if (usbSerial.available()) {
    char data = usbSerial.read();
    // Echo the data back to the USB host
    usbSerial.write(data);
  }

  // Check if data is available from the Serial Monitor
  if (Serial.available()) {
    char data = Serial.read();
    // Send the data to the USB host
    usbSerial.write(data);
  }
}
Troubleshooting and FAQs
Common Issues
- No Power: Ensure the VBUS and GND connections are secure and the USB cable is functional.
- No Data Transfer: Check that the D+ and D- lines are connected correctly and there are no shorts.
- Device Not Recognized: Verify that the device drivers are installed on the host computer and the USB cable is not damaged.
Solutions and Tips for Troubleshooting
- Cable Quality: Use a high-quality USB cable to ensure a stable connection.
- Connection Check: Use a multimeter to verify continuity for all connections.
- Signal Integrity: Keep the data lines as short as possible to maintain signal integrity.
FAQs
Q: Can I use this breakout board for USB 3.0 applications? A: No, this board is designed for USB 2.0 applications only.
Q: Is it possible to power a device through the USB Mini-B Breakout without data transfer? A: Yes, you can use the VBUS and GND pins to supply power without using the data lines.
Q: How can I mount the breakout board to my project? A: The board has mounting holes that can be used with standard screws or standoffs to secure it to your project.
Q: What should I do if my computer does not recognize the device connected through the breakout board? A: Check the USB cable, ensure proper drivers are installed, and verify that the data lines are correctly connected and functioning.