How to Use PMS5003 Board: Examples, Pinouts, and Specs
Introduction
The PMS5003 is a digital universal particle concentration sensor based on the laser scattering method that can continuously collect and calculate the number of suspended particles in different sizes in the air per unit volume, which is the particle concentration distribution, and then convert it into mass concentration and output it in the form of a digital interface. This sensor can be embedded in various instruments or environmental improvement equipment to provide timely and accurate concentration data.
Explore Projects Built with PMS5003 Board

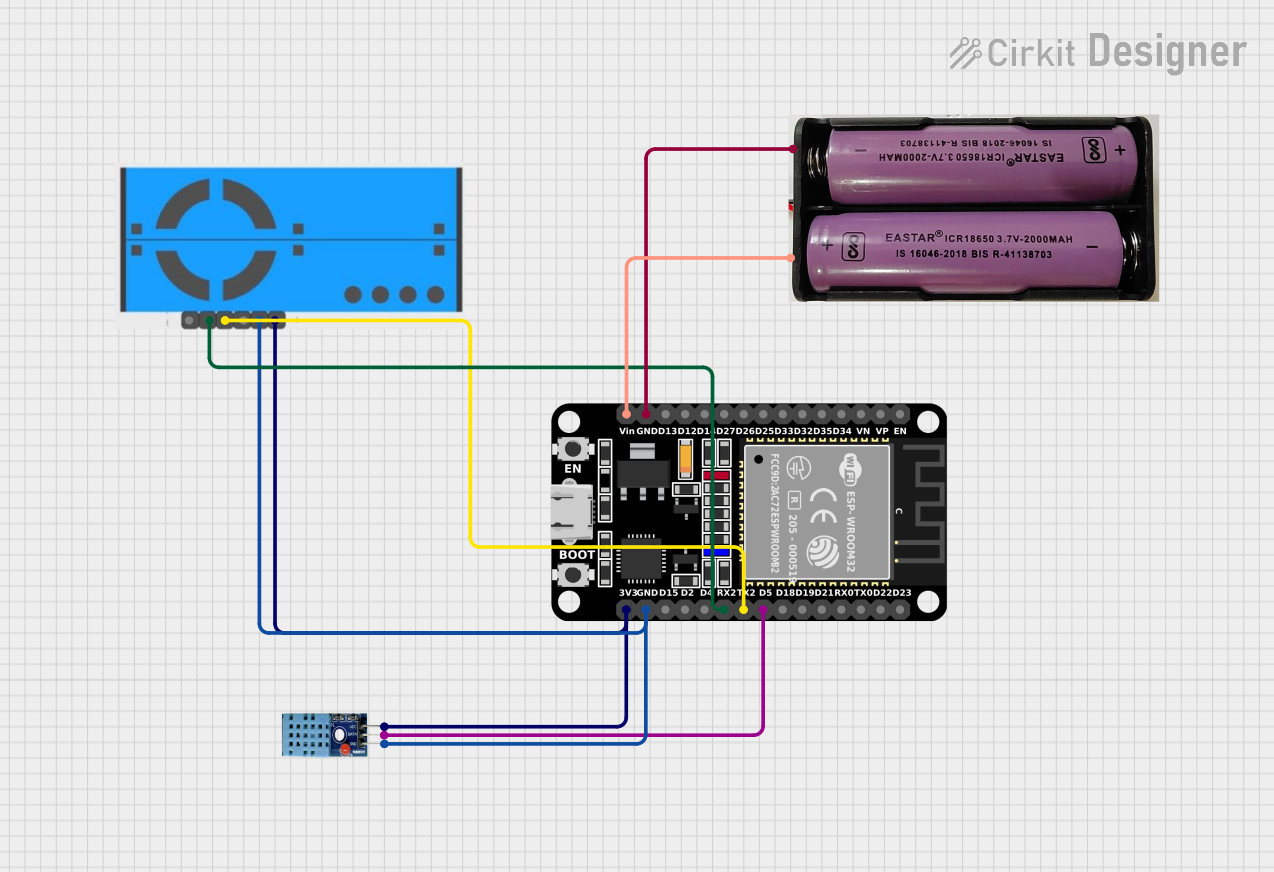
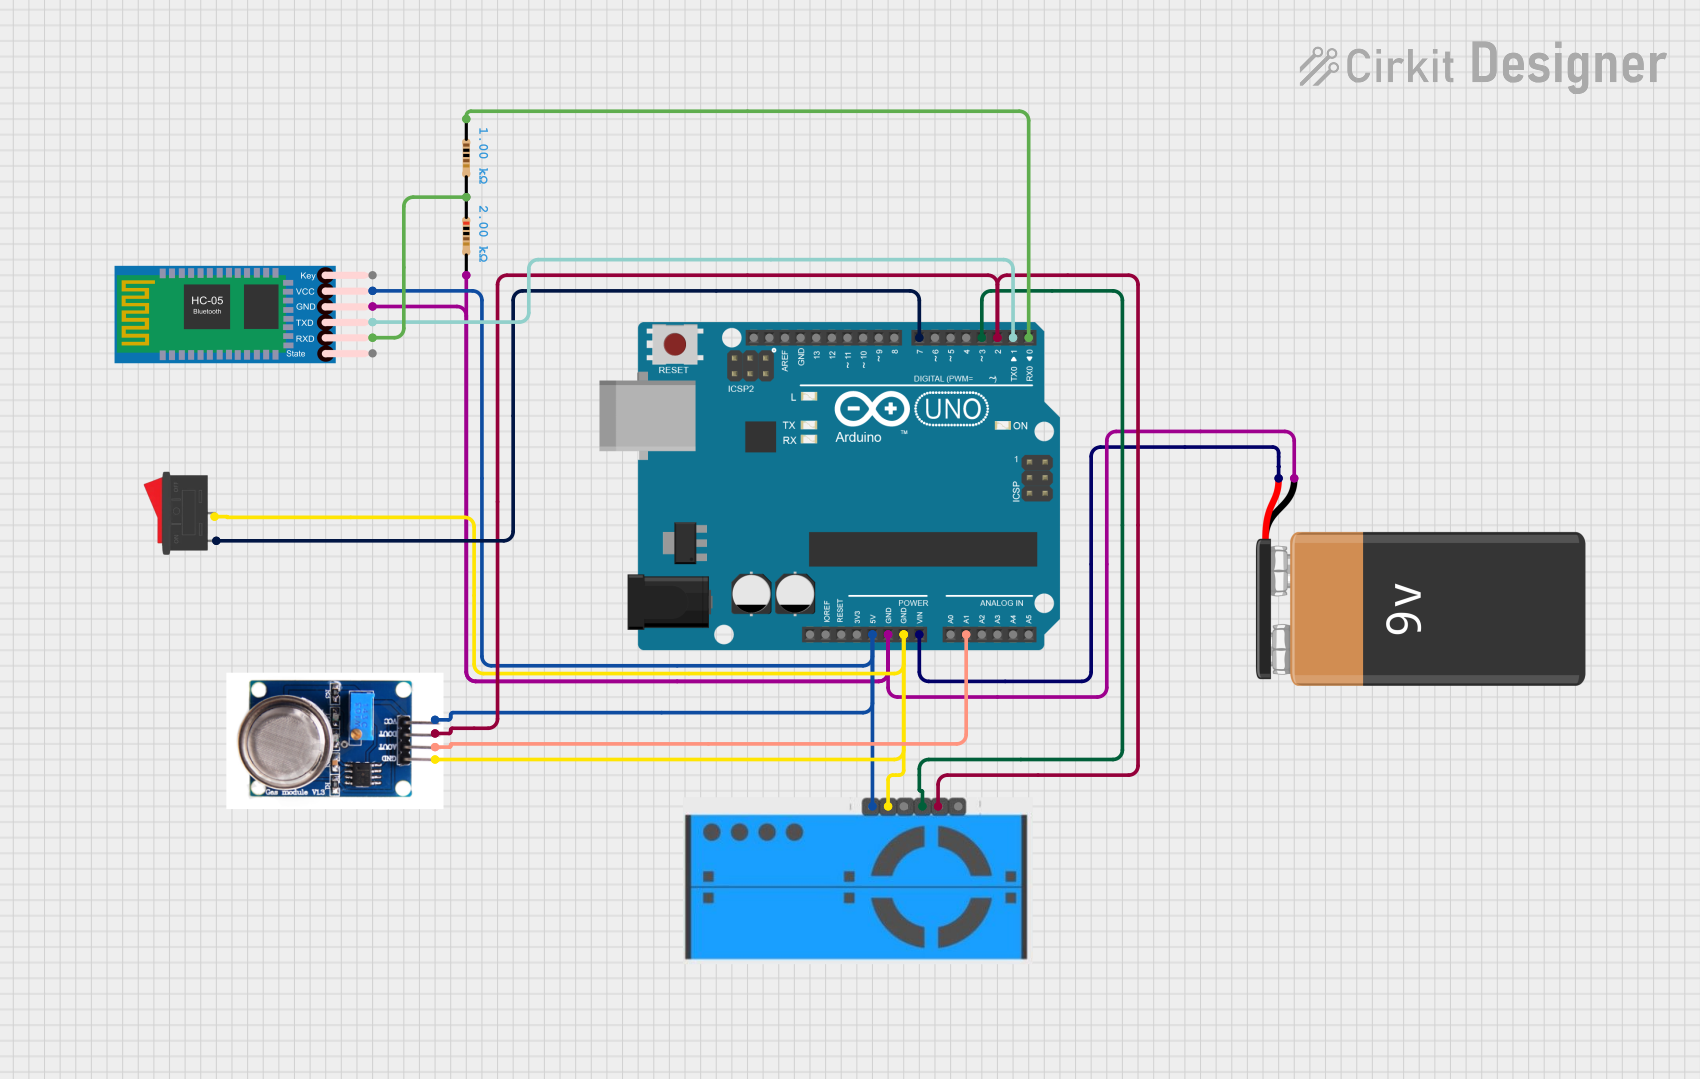
Explore Projects Built with PMS5003 Board
Common Applications and Use Cases
- Air quality monitoring devices
- Air purifiers and air conditioners
- Environmental monitoring stations
- Smart home devices
Technical Specifications
Key Technical Details
- Supply Voltage (Vcc): 4.5 - 5.5 V
- Working Current: 100 mA (during measurement), 200 uA (in sleep mode)
- Measuring Range: 0.3 - 1.0, 1.0 - 2.5, 2.5 - 10 μm particle diameter
- Output Data: PM1.0, PM2.5, PM10 concentrations (μg/m³)
- Interface: Serial (TTL level)
- Operating Temperature Range: -10 to 50°C
- Storage Temperature Range: -40 to 60°C
- Maximum Operating Humidity: 0-99% RH, non-condensing
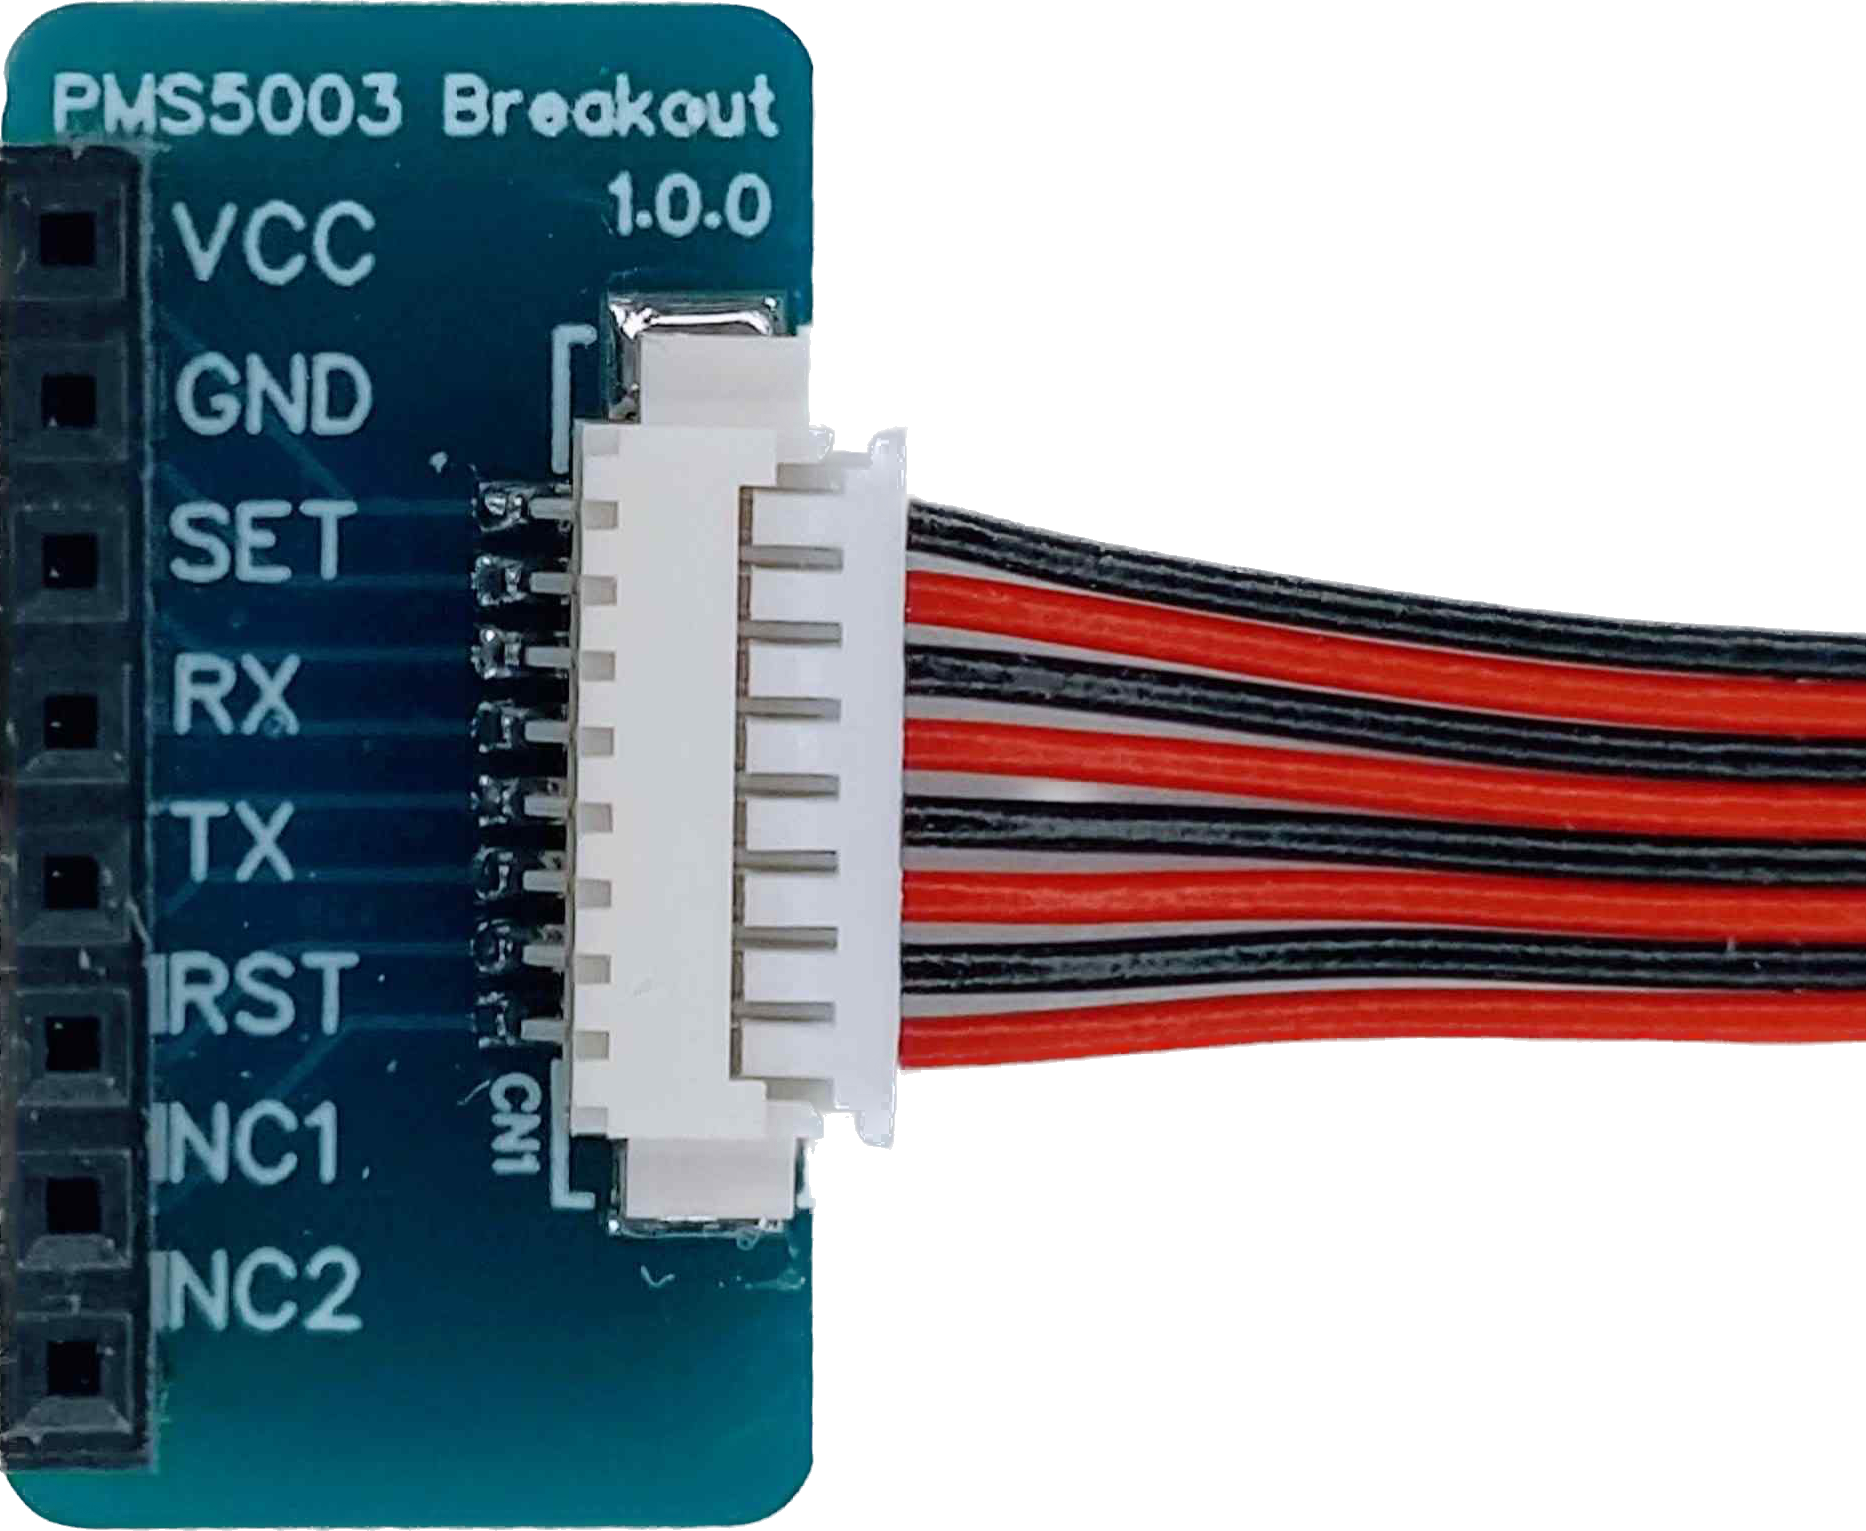
Pin Configuration and Descriptions
| Pin Number | Name | Description |
|---|---|---|
| 1 | VCC | Power supply (4.5-5.5V) |
| 2 | GND | Ground |
| 3 | SET | Set pin (Low level: sleep mode, High level: working mode) |
| 4 | RX | Serial data input (TTL level) |
| 5 | TX | Serial data output (TTL level) |
| 6 | RESET | Reset pin (Low level: reset) |
| 7 | NC | Not connected |
| 8 | NC | Not connected |
Usage Instructions
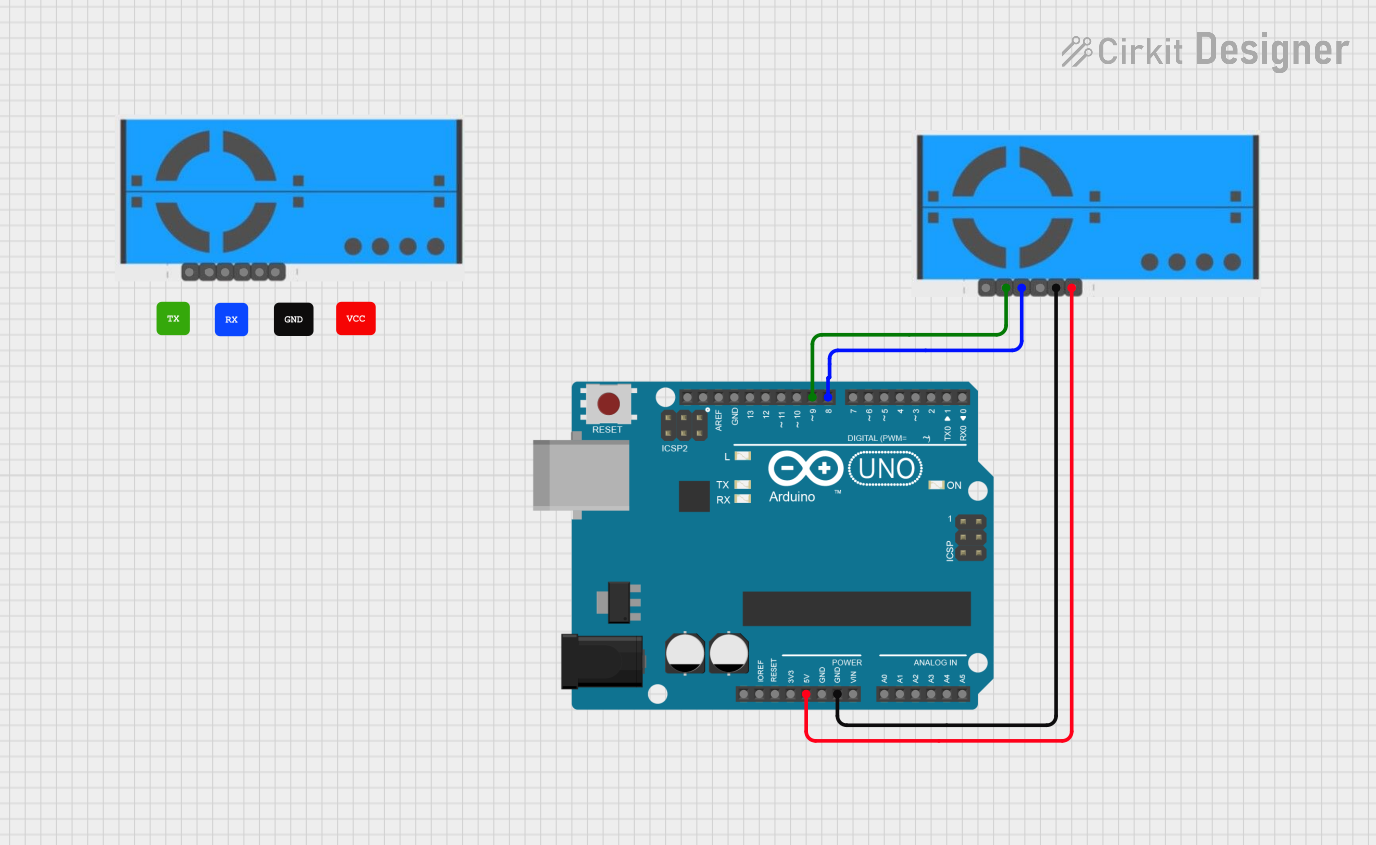
How to Use the PMS5003 in a Circuit
- Power Supply: Connect the VCC pin to a 5V power source and the GND pin to the ground.
- Serial Communication: Connect the TX pin of the PMS5003 to the RX pin of your microcontroller (e.g., Arduino UNO) and the RX pin of the PMS5003 to the TX pin of the microcontroller.
- Set and Reset: The SET pin can be left unconnected if continuous operation is desired. Connect the RESET pin to a digital pin on the microcontroller if you wish to control the reset function programmatically.
Important Considerations and Best Practices
- Ensure that the power supply is stable and within the specified voltage range.
- Avoid placing the sensor in environments with high concentrations of corrosive gases.
- The sensor should be given at least 30 seconds to warm up after power-on before taking measurements.
- For accurate readings, the sensor should be calibrated in clean air.
Example Arduino Code
#include <SoftwareSerial.h>

SoftwareSerial pmsSerial(10, 11); // RX, TX

void setup() {
  Serial.begin(9600);
  pmsSerial.begin(9600);
}

void loop() {
  if (pmsSerial.available()) {
    // Read data from the sensor
    char ch = pmsSerial.read();
    Serial.write(ch);
    // Process the data as per the PMS5003 datasheet
  }
  // Add your code to handle the sensor data and output it
}
Troubleshooting and FAQs
Common Issues Users Might Face
- No Data Output: Ensure that the sensor is correctly powered and that the serial connections are correct.
- Inaccurate Readings: Verify that the sensor has been calibrated and that it has had sufficient time to warm up.
- Sensor Not Responding: Check the connections and make sure the RESET and SET pins are not inadvertently being driven low.
Solutions and Tips for Troubleshooting
- Power Cycle: If the sensor is unresponsive, try power cycling the sensor by disconnecting and reconnecting the power supply.
- Check Connections: Loose or incorrect connections can cause various issues. Double-check all wiring.
- Avoid Contaminants: Keep the sensor away from dust and smoke during storage and operation to prevent contamination.
FAQs
Q: Can the PMS5003 be used outdoors? A: Yes, but it should be protected from direct sunlight, rain, and condensation.
Q: How often should the sensor be calibrated? A: Calibration frequency depends on the usage environment. In general, calibration should be performed periodically to ensure accuracy.
Q: What is the lifespan of the PMS5003 sensor? A: The sensor has a lifespan of at least 3 years when used as recommended.
Q: Can I use the PMS5003 with a 3.3V system? A: The PMS5003 requires a 5V power supply, but the serial communication can be adapted for 3.3V logic with a level shifter.
Q: How can I extend the life of the sensor? A: Avoid exposure to high concentrations of particles and corrosive gases, and operate the sensor within the recommended temperature and humidity ranges.