How to Use L76X: Examples, Pinouts, and Specs

 Design with L76X in Cirkit Designer
Introduction
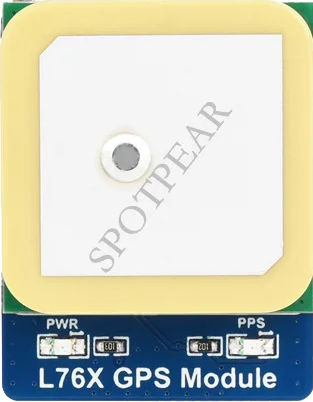
The L76X is a compact, high-efficiency, low-dropout voltage regulator (LDO) that provides a stable output voltage with minimal voltage difference between the input and output. It is designed to maintain a constant voltage level, making it an essential component in various electronic devices where voltage regulation is critical for performance and stability. Common applications include battery-powered devices, portable electronics, and microcontroller power supplies.
Explore Projects Built with L76X

 Open Project in Cirkit Designer
 Open Project in Cirkit Designer
 Open Project in Cirkit Designer
 Open Project in Cirkit Designer
Explore Projects Built with L76X

 Open Project in Cirkit Designer
 Open Project in Cirkit Designer
 Open Project in Cirkit Designer
 Open Project in Cirkit Designer
Technical Specifications
Key Features
- Low dropout voltage
- High output voltage accuracy
- Over-current and over-temperature protection
- Low quiescent current
- Wide range of output voltages available
Electrical Characteristics
| Parameter | Min | Typ | Max | Unit |
|---|---|---|---|---|
| Input Voltage (VIN) | 2.5 | 7.0 | V | |
| Output Voltage (VOUT) | 1.2 | 5.0 | V | |
| Dropout Voltage (VDO) | 0.1 | 0.3 | V | |
| Output Current (IOUT) | 1.5 | A | ||
| Quiescent Current (IQ) | 0.05 | 0.1 | mA | |
| Line Regulation | 0.2 | 1.0 | % | |
| Load Regulation | 0.4 | 1.0 | % |
Pin Configuration and Descriptions
| Pin Number | Name | Description |
|---|---|---|
| 1 | VIN | Input voltage. Connect to the power source. |
| 2 | GND | Ground. Connect to the system ground. |
| 3 | VOUT | Regulated output voltage. |
| 4 | ADJ | Adjustment pin for output voltage (if applicable). |
| 5 | EN | Enable pin. Drive high to enable the regulator. |
Note: The pin configuration may vary depending on the package type. Always refer to the manufacturer's datasheet for the exact pinout.
Usage Instructions
Basic Connection
- Connect the VIN pin to your power source, ensuring it does not exceed the maximum input voltage rating.
- Connect the GND pin to the common ground in your circuit.
- The VOUT pin will provide the regulated voltage. Connect this to the power input of your load.
- If the L76X variant includes an ADJ pin, you can adjust the output voltage by connecting a resistor network to this pin.
- The EN pin can be tied directly to VIN if always-on operation is desired. Otherwise, control it with a logic signal to enable or disable the regulator.
Best Practices
- Use capacitors on the input and output for stability. Typically, a 1µF ceramic capacitor on the input and a 10µF tantalum or ceramic capacitor on the output are recommended.
- Keep the input and output leads as short as possible to minimize noise and voltage drops.
- Ensure adequate heat sinking if the regulator is expected to dissipate significant power due to a high dropout voltage and load current.
Example Connection with Arduino UNO
// No specific code is required for the L76X as it is a hardware component.
// However, ensure that the Arduino's power requirements match the L76X's output.

void setup() {
  // Initialize digital pins, serial communication, etc.
}

void loop() {
  // Your code here to perform tasks.
}
Note: When using the L76X with an Arduino UNO, ensure that the output voltage of the L76X matches the operating voltage of the Arduino (typically 5V or 3.3V depending on the model).
Troubleshooting and FAQs
Common Issues
- Voltage Output is Too Low or Unstable: Check that the input voltage is sufficient and that the capacitors are correctly installed. Also, verify that the load current does not exceed the maximum rating.
- Regulator Overheating: Ensure that the input voltage is not too high and that the power dissipation is within the L76X's limits. Consider adding a heat sink if necessary.
- Regulator Not Enabling: Confirm that the EN pin is receiving an appropriate logic level signal.
FAQs
Q: Can I adjust the output voltage of the L76X? A: Some L76X variants have an adjustable output voltage feature via the ADJ pin. Consult the datasheet for details on how to set the desired voltage.
Q: What is the maximum current the L76X can handle? A: The L76X can typically handle up to 1.5A of output current. However, always refer to the datasheet for the exact specifications of your particular model.
Q: How does the enable pin work? A: The EN pin allows you to turn the regulator on or off using a digital signal. When the EN pin is high, the regulator is active; when it is low, the regulator is turned off.
For further assistance, consult the manufacturer's datasheet or contact technical support.