How to Use Salinitas: Examples, Pinouts, and Specs
Introduction
The Salinitas sensor is a specialized electronic component designed to measure the salinity levels in water. It is widely used in applications such as environmental monitoring, aquaculture, hydroponics, and water quality testing. By providing accurate and reliable salinity readings, the Salinitas sensor helps users maintain optimal water conditions for various biological and industrial processes.
Common use cases for the Salinitas sensor include:
- Monitoring salinity in aquariums and aquaculture systems to ensure the health of aquatic life.
- Measuring salinity in natural water bodies for environmental research and conservation.
- Maintaining proper salinity levels in hydroponic systems for optimal plant growth.
- Testing water quality in industrial and municipal water treatment facilities.
Explore Projects Built with Salinitas

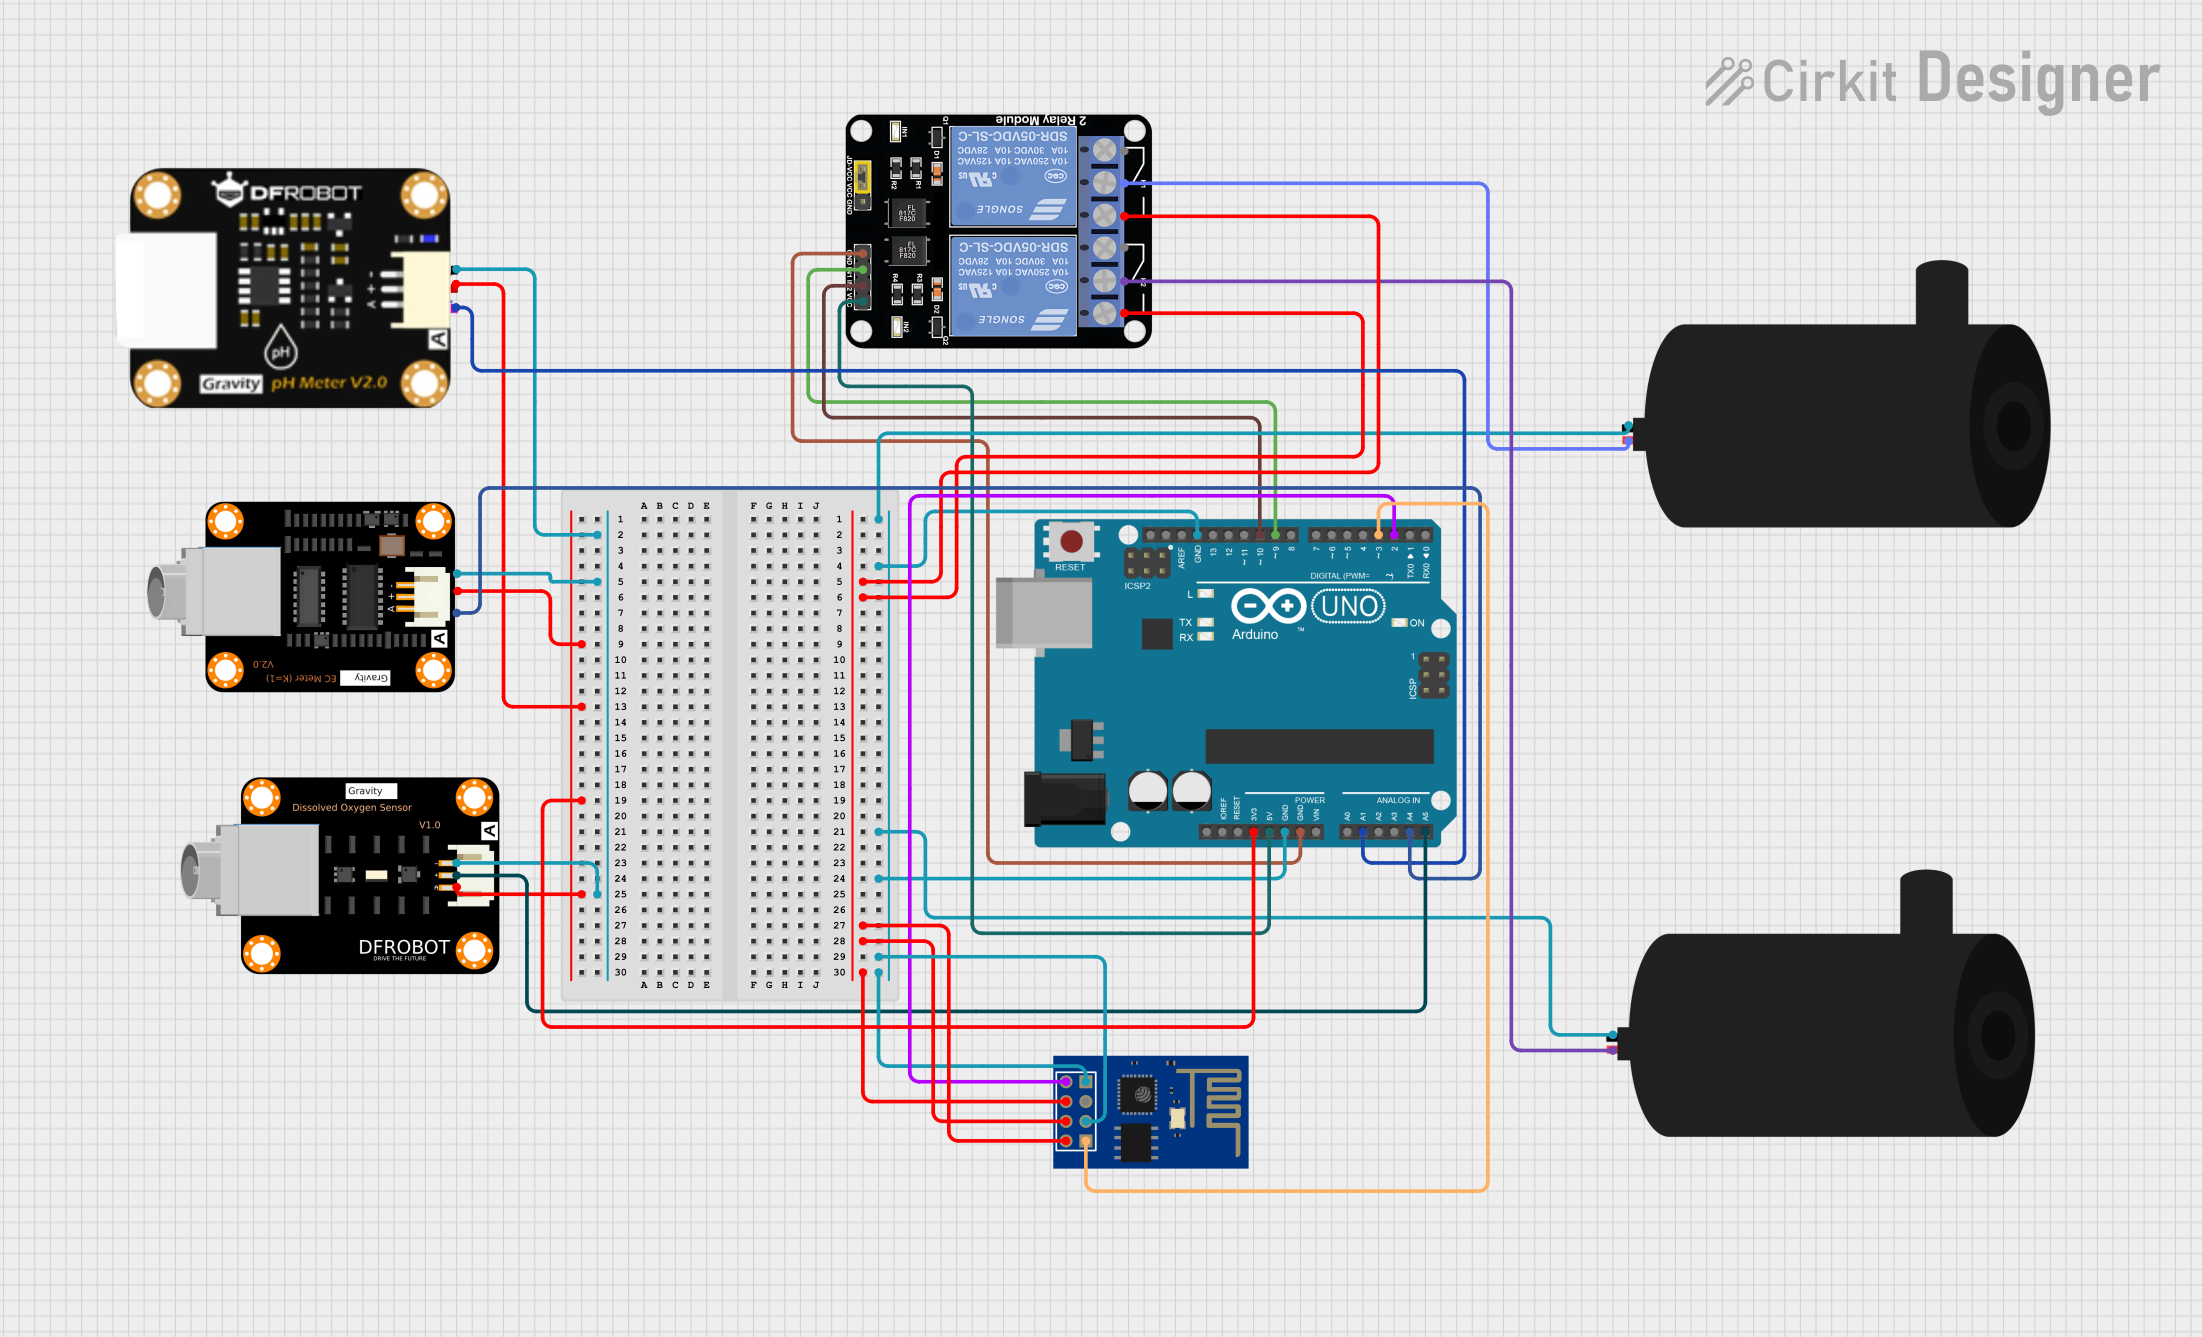
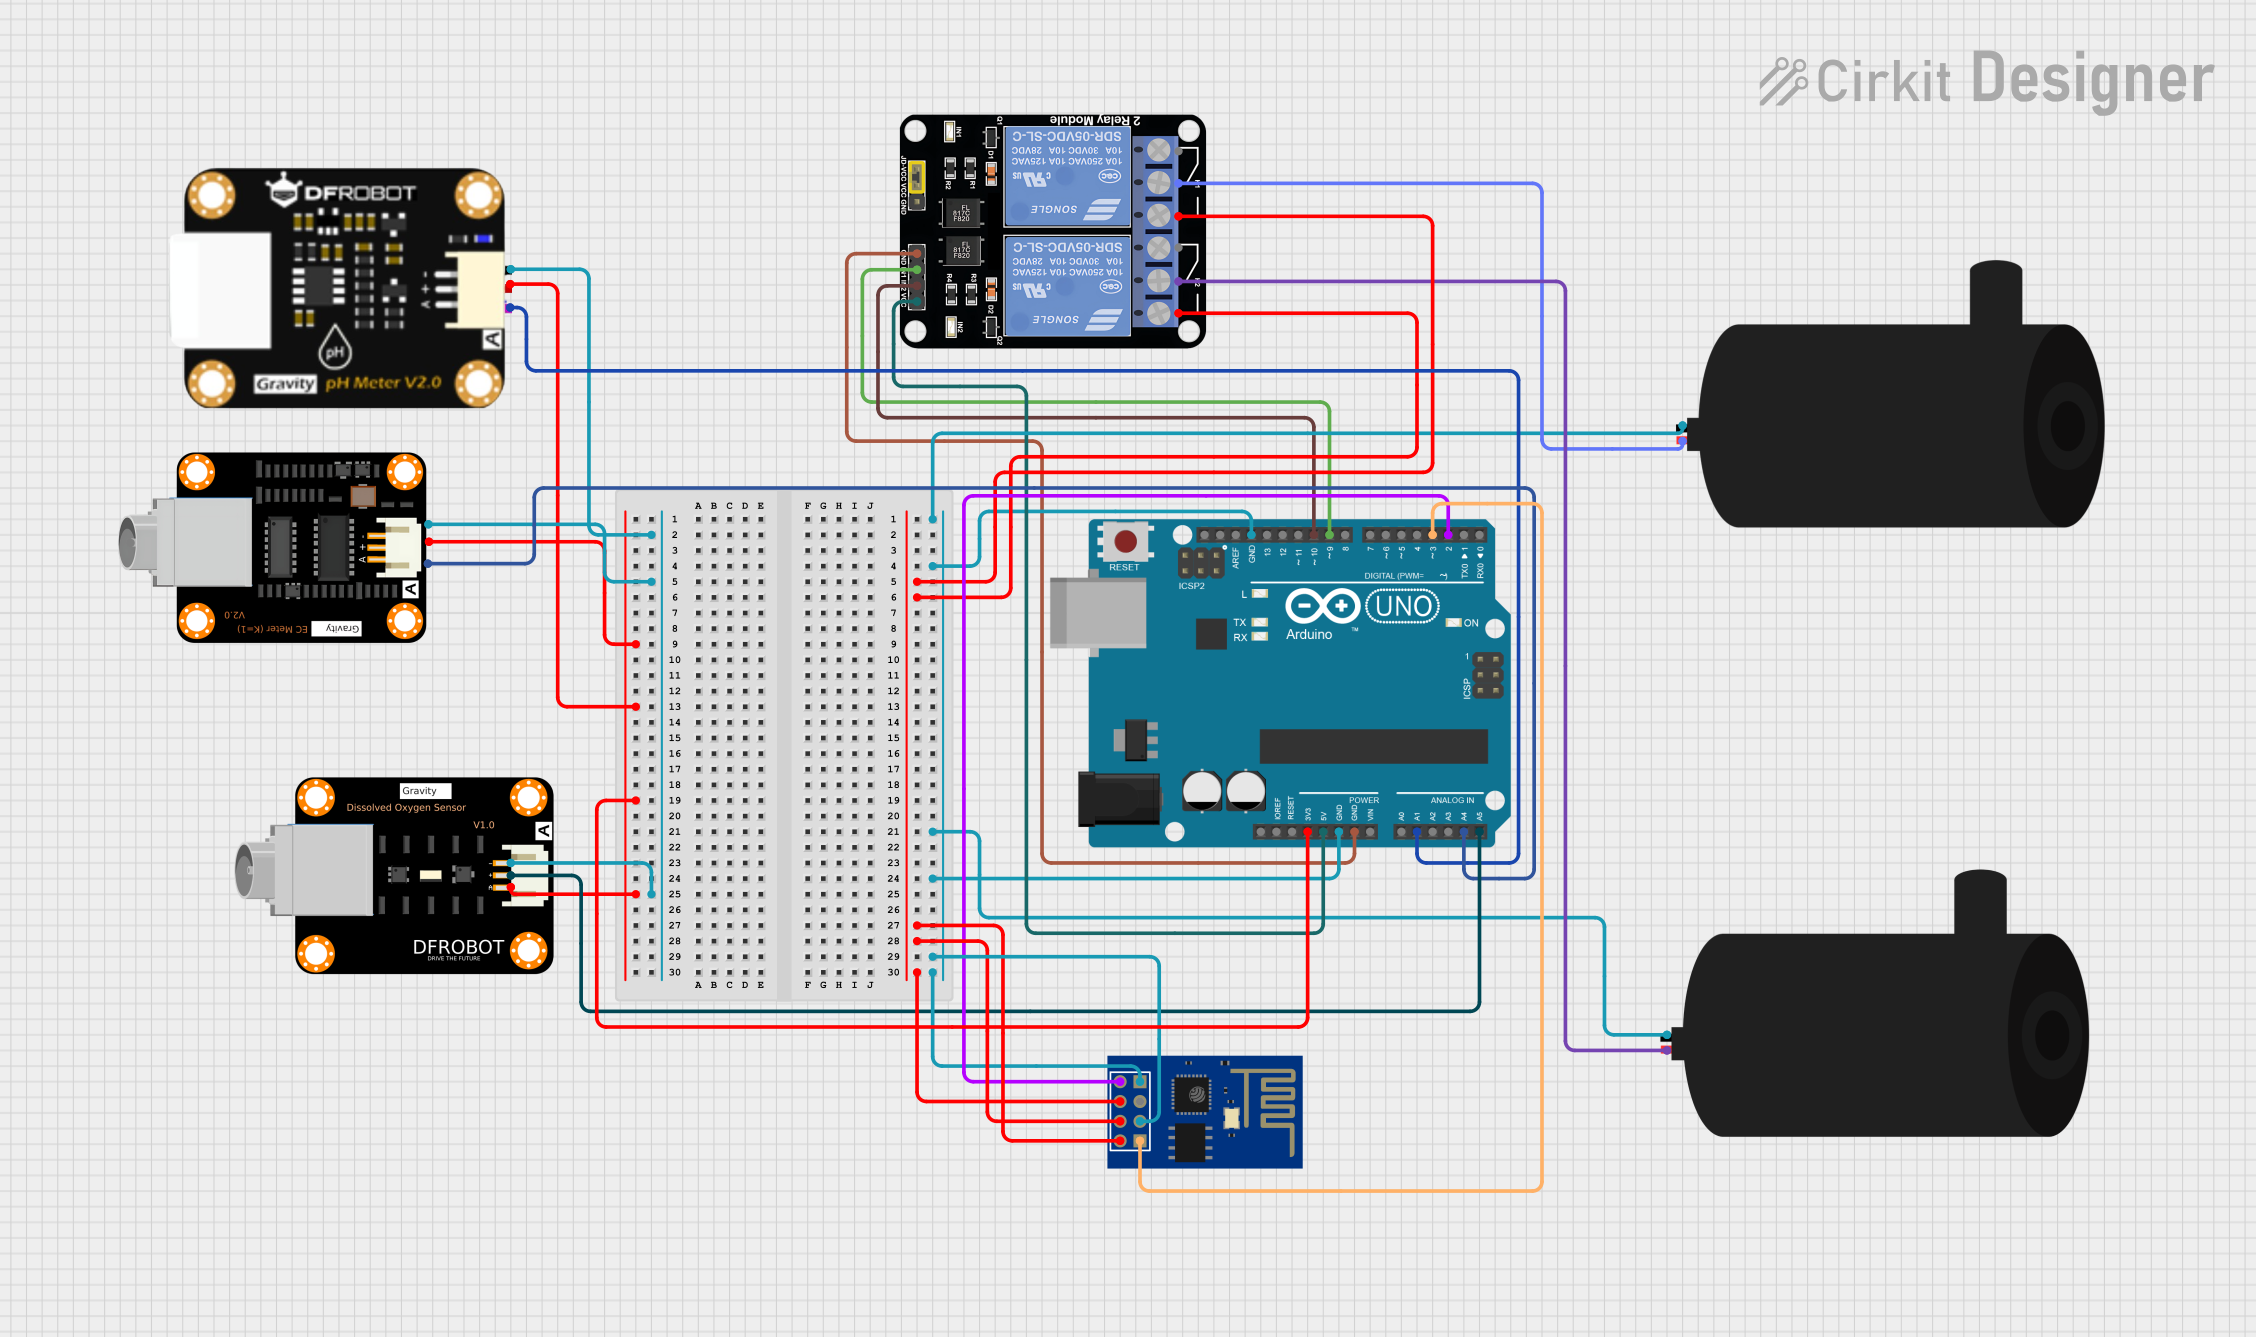
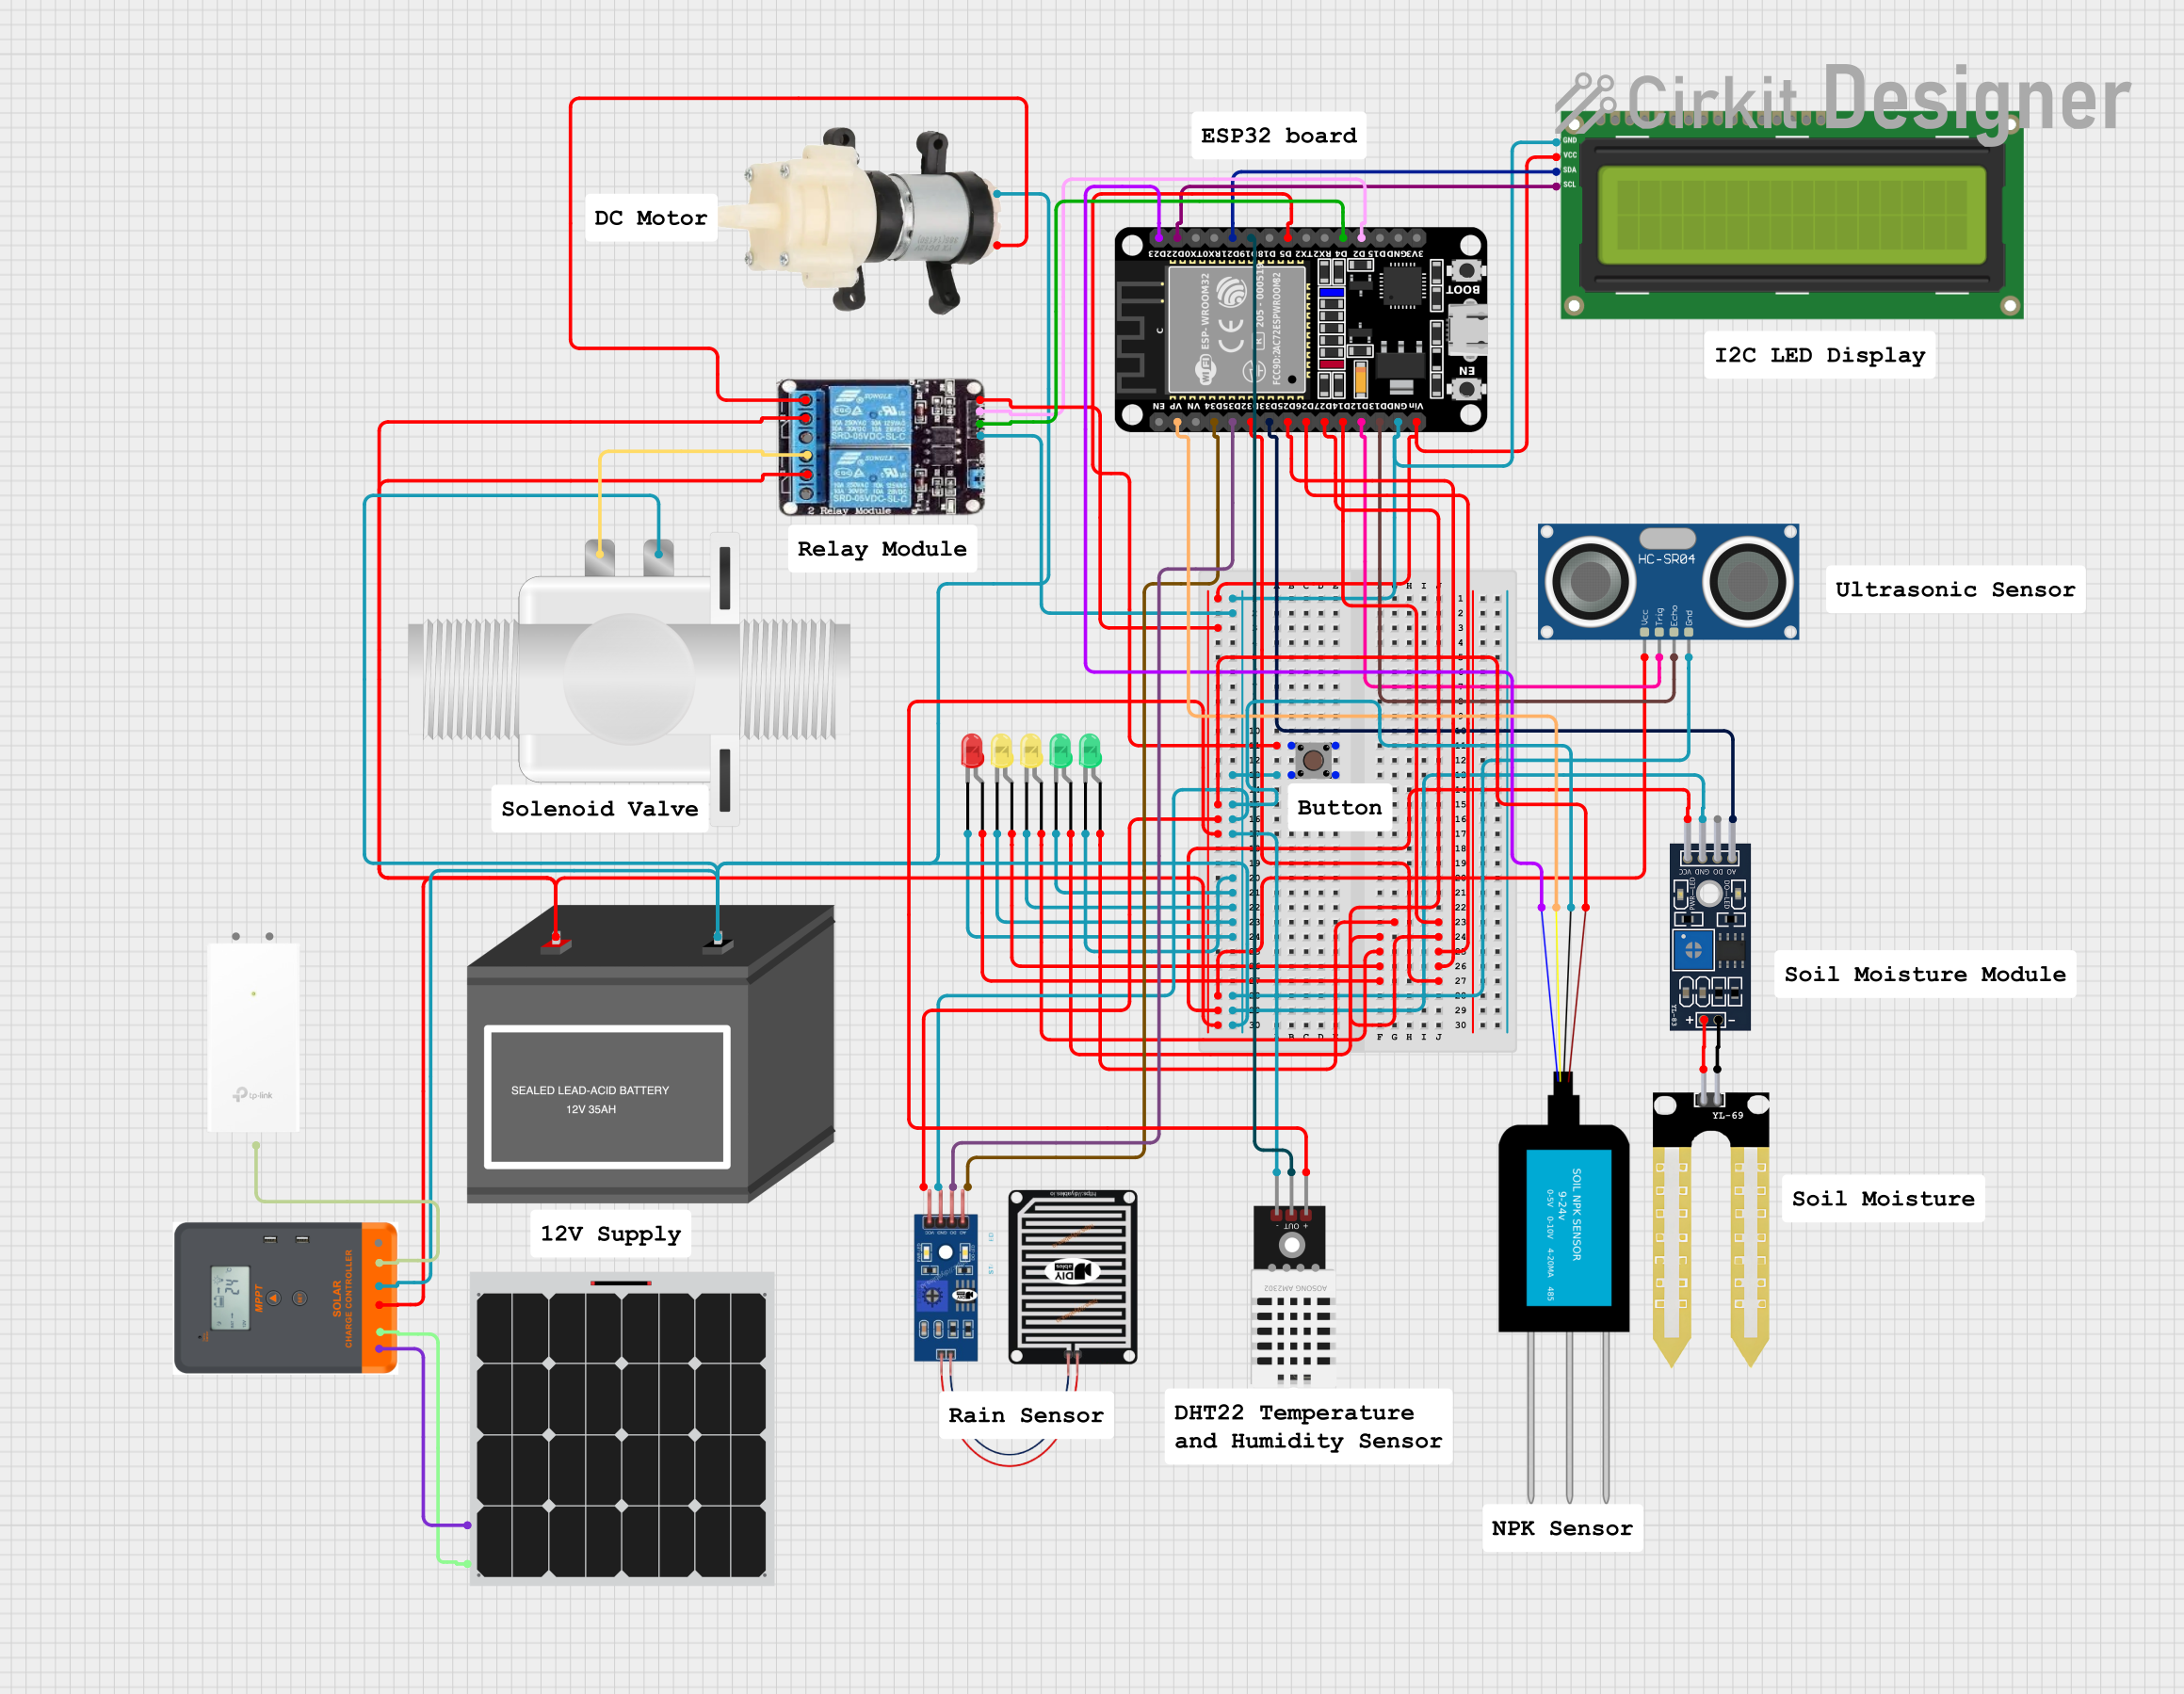
Explore Projects Built with Salinitas
Technical Specifications
The Salinitas sensor is designed for ease of use and compatibility with a wide range of microcontrollers and data acquisition systems. Below are its key technical specifications:
| Parameter | Value |
|---|---|
| Operating Voltage | 3.3V to 5V |
| Operating Current | ≤ 20mA |
| Measurement Range | 0 to 50 PSU (Practical Salinity Unit) |
| Accuracy | ±0.5 PSU |
| Output Signal | Analog voltage (0-3.3V) |
| Operating Temperature | 0°C to 50°C |
| Sensor Material | Corrosion-resistant electrodes |
| Dimensions | 50mm x 20mm x 10mm |
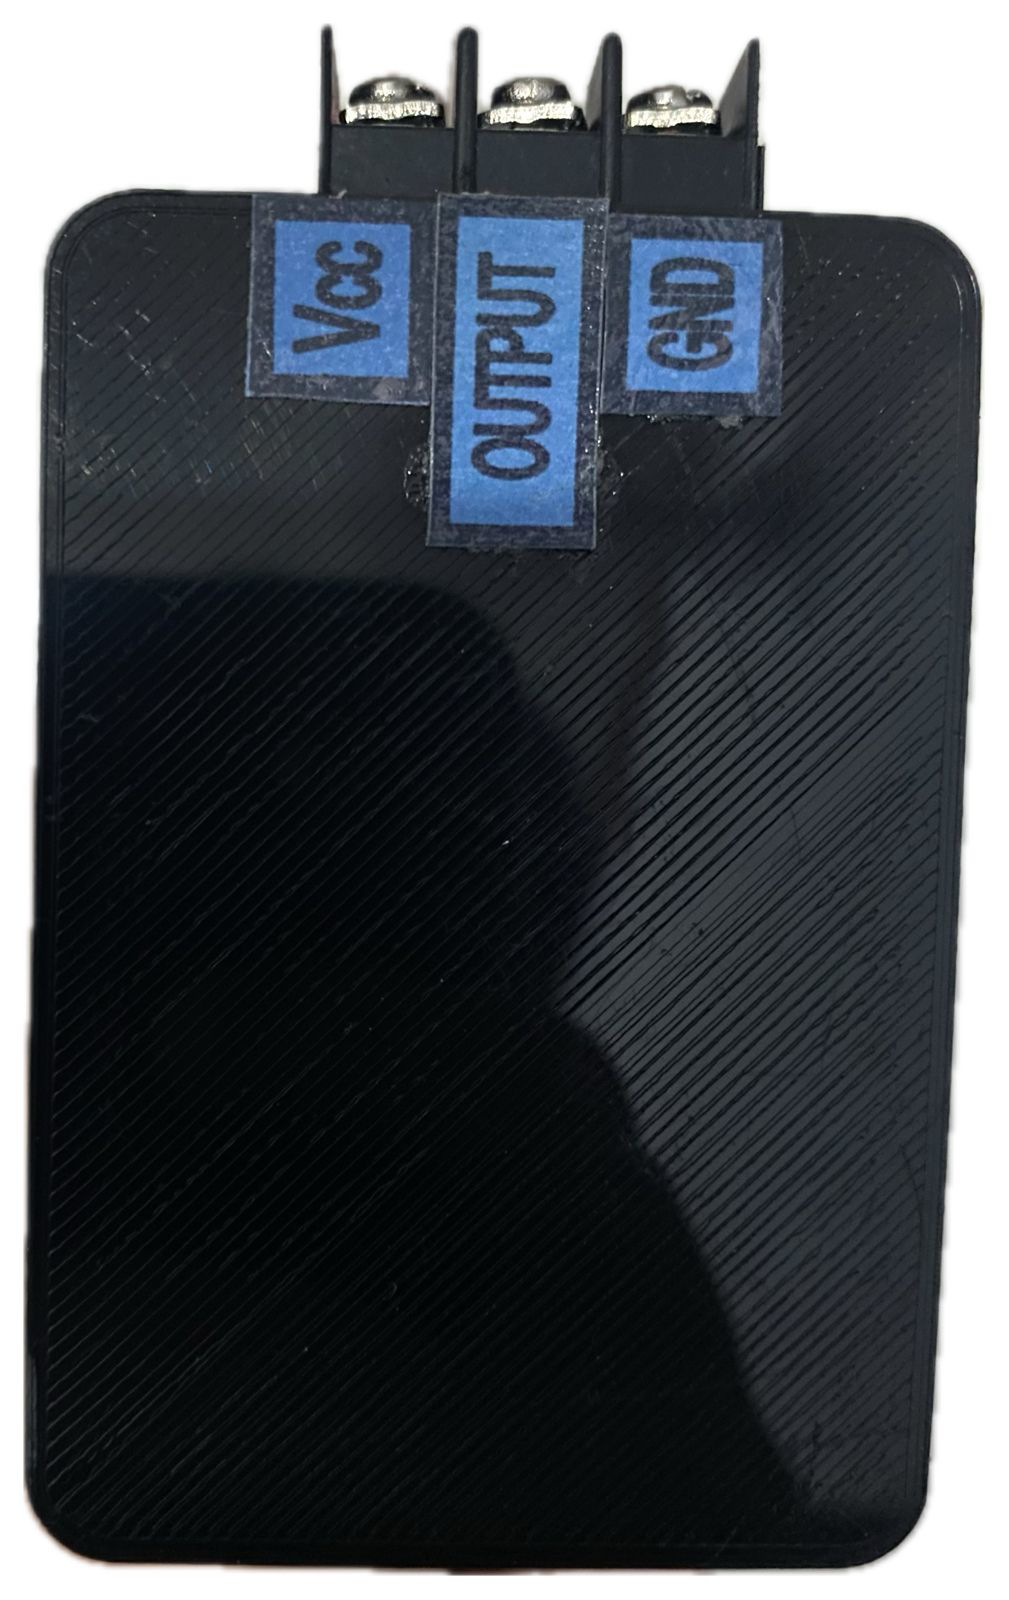
Pin Configuration and Descriptions
The Salinitas sensor typically comes with a 3-pin interface for easy integration into circuits. The pin configuration is as follows:
| Pin | Name | Description |
|---|---|---|
| 1 | VCC | Power supply input (3.3V to 5V) |
| 2 | GND | Ground connection |
| 3 | OUT | Analog output signal proportional to salinity level |
Usage Instructions
How to Use the Salinitas Sensor in a Circuit
- Power the Sensor: Connect the VCC pin to a 3.3V or 5V power source and the GND pin to the ground of your circuit.
- Read the Output: Connect the OUT pin to an analog input pin on your microcontroller or data acquisition system.
- Calibrate the Sensor: For accurate readings, calibrate the sensor using a known salinity solution. Adjust your code or circuit to account for any offsets.
- Place the Sensor in Water: Submerge the sensor's electrodes in the water sample to measure its salinity. Ensure the sensor is fully immersed but avoid submerging the entire module.
Important Considerations and Best Practices
- Avoid Corrosion: Rinse the sensor with fresh water after use, especially if used in saltwater, to prevent corrosion.
- Temperature Compensation: Salinity readings can vary with temperature. Use a temperature sensor alongside the Salinitas sensor for more accurate results.
- Avoid Air Bubbles: Ensure no air bubbles are trapped around the sensor's electrodes, as this can affect the accuracy of the readings.
- Use in Clean Water: Avoid using the sensor in water with heavy sediment or debris, as this can damage the electrodes or interfere with readings.
Example: Using Salinitas with Arduino UNO
Below is an example of how to connect and use the Salinitas sensor with an Arduino UNO:
Circuit Connections
- Connect the VCC pin of the Salinitas sensor to the 5V pin on the Arduino.
- Connect the GND pin of the sensor to the GND pin on the Arduino.
- Connect the OUT pin of the sensor to the A0 analog input pin on the Arduino.
Arduino Code
// Salinitas Sensor Example Code
// This code reads the analog output from the Salinitas sensor and converts it
// to a salinity value in PSU (Practical Salinity Units).

const int sensorPin = A0; // Analog pin connected to the sensor's OUT pin
float voltage;            // Variable to store the sensor's output voltage
float salinity;           // Variable to store the calculated salinity

void setup() {
  Serial.begin(9600); // Initialize serial communication at 9600 baud
}

void loop() {
  // Read the analog value from the sensor (0-1023)
  int sensorValue = analogRead(sensorPin);

  // Convert the analog value to voltage (assuming 5V Arduino)
  voltage = sensorValue * (5.0 / 1023.0);

  // Convert the voltage to salinity (example formula, adjust as needed)
  salinity = voltage * 15.15; // Scale factor depends on sensor calibration

  // Print the salinity value to the Serial Monitor
  Serial.print("Salinity: ");
  Serial.print(salinity);
  Serial.println(" PSU");

  delay(1000); // Wait 1 second before the next reading
}
Troubleshooting and FAQs
Common Issues and Solutions
No Output or Incorrect Readings
- Cause: Improper wiring or loose connections.
- Solution: Double-check all connections and ensure the sensor is powered correctly.
Fluctuating or Unstable Readings
- Cause: Air bubbles around the sensor or electrical noise.
- Solution: Ensure the sensor is fully submerged without air bubbles. Use shielded cables or add capacitors to reduce noise.
Corrosion or Damage to Electrodes
- Cause: Prolonged exposure to saltwater without cleaning.
- Solution: Rinse the sensor with fresh water after each use and store it in a dry place.
Inaccurate Readings
- Cause: Lack of calibration or temperature variations.
- Solution: Calibrate the sensor using a known salinity solution and consider temperature compensation.
FAQs
Q: Can the Salinitas sensor be used in seawater?
A: Yes, the sensor is designed to measure salinity in seawater. However, it is important to rinse the sensor with fresh water after use to prevent corrosion.
Q: How do I calibrate the Salinitas sensor?
A: Use a solution with a known salinity level. Submerge the sensor in the solution, record the output voltage, and adjust your code or circuit to match the known salinity value.
Q: Can I use the Salinitas sensor with a 3.3V microcontroller?
A: Yes, the sensor operates within a voltage range of 3.3V to 5V, making it compatible with 3.3V microcontrollers like the ESP32.
Q: What is the lifespan of the Salinitas sensor?
A: With proper care and maintenance, the sensor can last for several years. Regular cleaning and proper storage are essential for longevity.