How to Use LDR: Examples, Pinouts, and Specs
Introduction
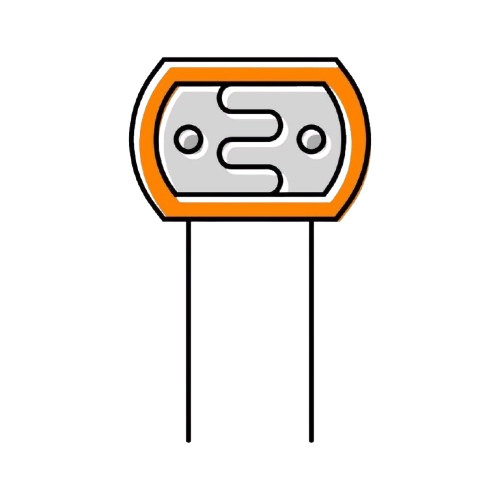
The LDR Photoresistor by Elegoo is a light-sensitive electronic component that changes its resistance based on the intensity of incident light. As the light intensity increases, the resistance of the LDR decreases, making it an ideal choice for light-sensing applications. This component is widely used in projects such as automatic lighting systems, light meters, and other devices requiring light detection.
Explore Projects Built with LDR
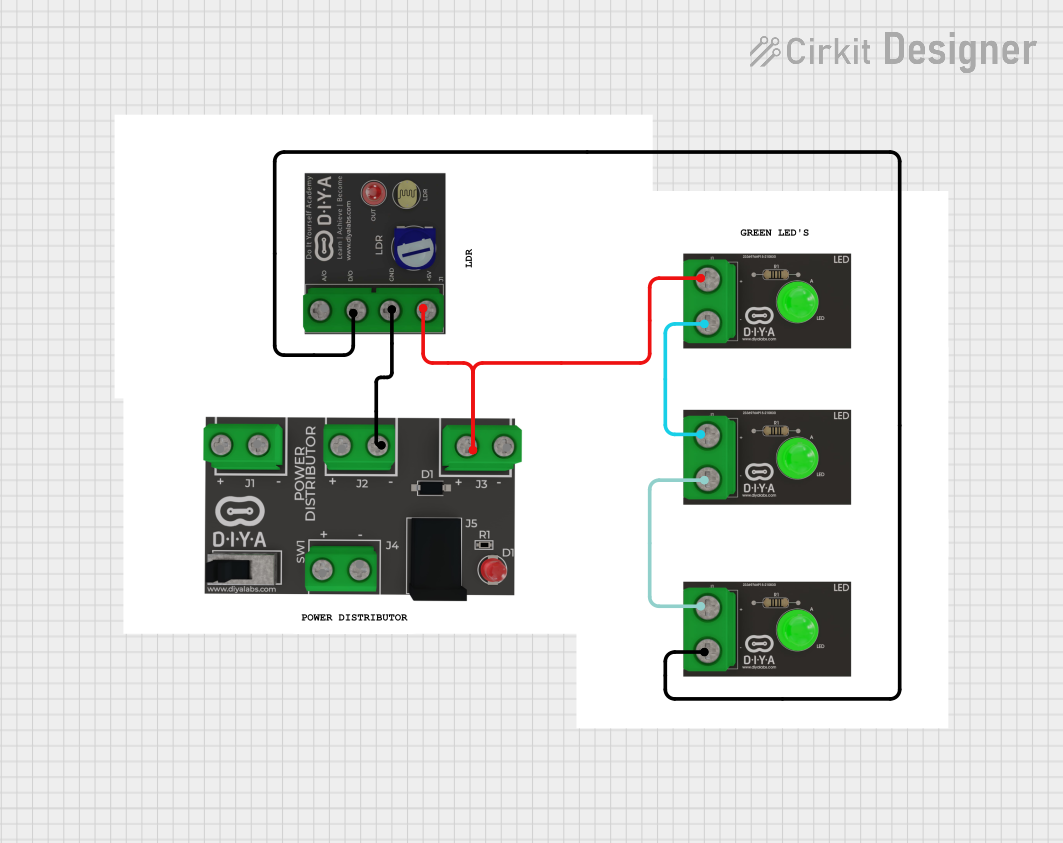
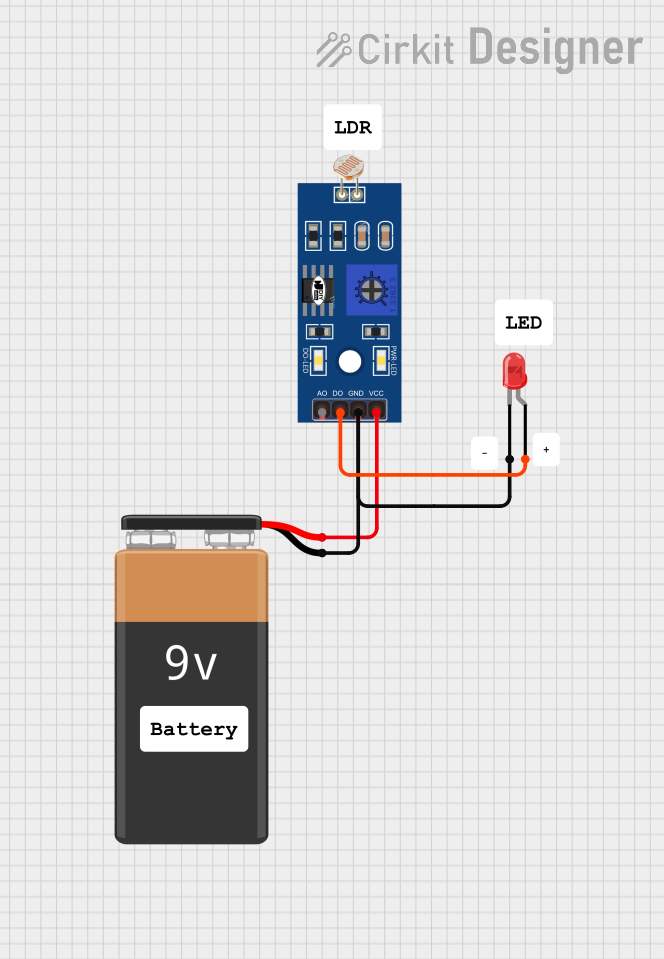
Explore Projects Built with LDR
Common Applications and Use Cases
- Automatic streetlights
- Light intensity meters
- Solar tracking systems
- Alarm systems triggered by light changes
- DIY electronics projects with Arduino or other microcontrollers
Technical Specifications
The following table outlines the key technical details of the Elegoo LDR Photoresistor:
| Parameter | Value |
|---|---|
| Manufacturer | Elegoo |
| Part ID | LDR Photoresistor |
| Resistance (Dark) | 1 MΩ (typical) |
| Resistance (Bright) | 10 kΩ to 20 kΩ (typical) |
| Maximum Voltage | 150 V |
| Maximum Power | 100 mW |
| Response Time (Rise) | 20 ms |
| Response Time (Fall) | 30 ms |
| Operating Temperature | -30°C to +70°C |
Pin Configuration and Descriptions
The LDR is a two-terminal device with no polarity. The terminals can be connected in either direction. Below is a description of the pins:
| Pin | Description |
|---|---|
| Pin 1 | Connects to one side of the circuit (e.g., VCC) |
| Pin 2 | Connects to the other side of the circuit (e.g., GND or input pin) |
Usage Instructions
How to Use the LDR in a Circuit
Basic Circuit Setup:
- Connect one terminal of the LDR to a voltage source (e.g., 5V).
- Connect the other terminal to a pull-down resistor (typically 10 kΩ) and then to ground.
- The junction between the LDR and the resistor serves as the output voltage, which varies with light intensity.
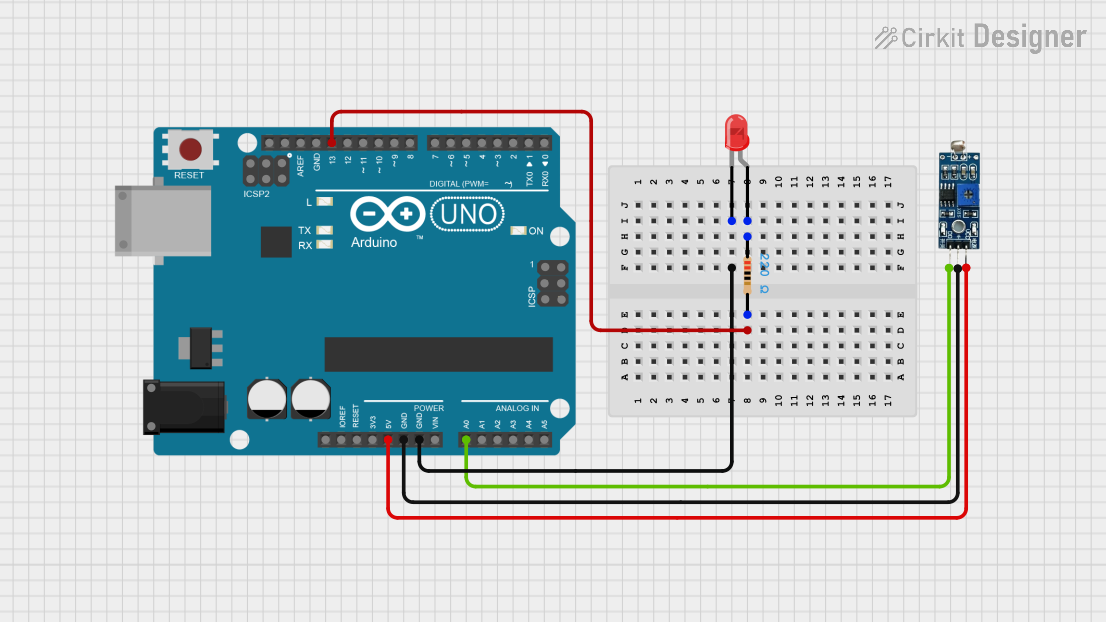
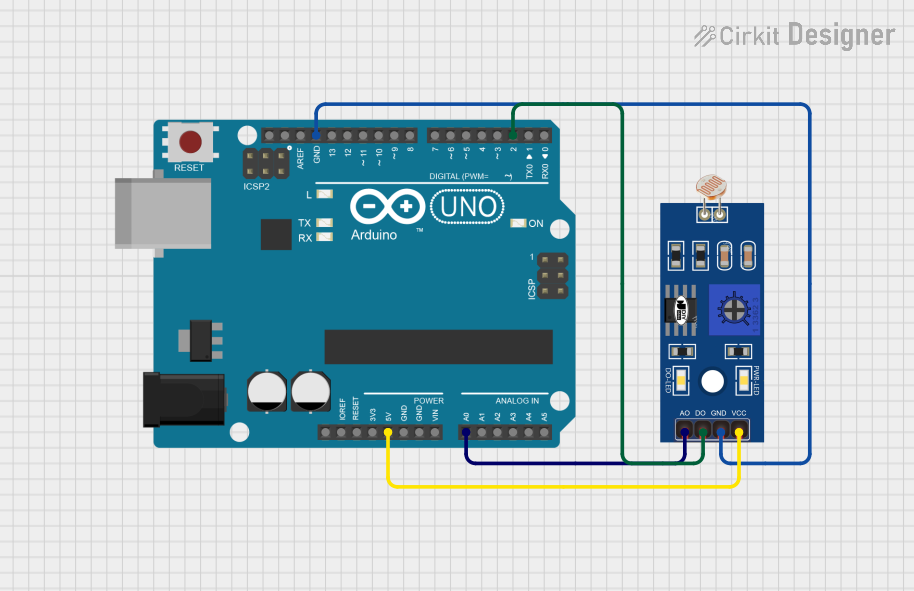
Interfacing with Arduino UNO:
- Connect the LDR-resistor junction to an analog input pin on the Arduino (e.g., A0).
- Use the Arduino's
analogRead()function to measure the voltage and determine light intensity.
Important Considerations:
- Avoid exposing the LDR to excessive light or heat, as this may degrade its performance.
- Use a resistor value that matches your application's sensitivity requirements.
- Shield the LDR from electrical noise for accurate readings.
Sample Arduino Code
Below is an example of how to use the Elegoo LDR Photoresistor with an Arduino UNO:
// Define the analog pin connected to the LDR
const int ldrPin = A0;

// Variable to store the LDR reading
int ldrValue;

void setup() {
  // Initialize serial communication for debugging
  Serial.begin(9600);
}

void loop() {
  // Read the analog value from the LDR
  ldrValue = analogRead(ldrPin);

  // Print the LDR value to the Serial Monitor
  Serial.print("LDR Value: ");
  Serial.println(ldrValue);

  // Add a small delay to avoid flooding the Serial Monitor
  delay(500);
}
Best Practices
- Use a voltage divider circuit with the LDR for consistent and reliable readings.
- Calibrate the LDR for your specific application by testing it under different lighting conditions.
- If using the LDR outdoors, consider adding a protective cover to shield it from environmental factors like rain or dust.
Troubleshooting and FAQs
Common Issues and Solutions
| Issue | Possible Cause | Solution |
|---|---|---|
| No change in output voltage | Incorrect wiring or damaged LDR | Verify connections and replace the LDR if needed. |
| Unstable or noisy readings | Electrical noise or improper resistor value | Use a capacitor to filter noise or adjust the resistor value. |
| LDR not responding to light changes | LDR exposed to excessive light or heat | Replace the LDR and avoid extreme conditions. |
FAQs
Can the LDR detect infrared light?
- LDRs are primarily sensitive to visible light. For infrared detection, use an IR sensor.
What resistor value should I use with the LDR?
- A 10 kΩ resistor is commonly used, but you can adjust the value based on your desired sensitivity.
Can I use the LDR with a digital input pin?
- Yes, but you will need to set a threshold voltage and use a comparator circuit or the Arduino's
digitalRead()function.
- Yes, but you will need to set a threshold voltage and use a comparator circuit or the Arduino's
By following this documentation, you can effectively integrate the Elegoo LDR Photoresistor into your projects and troubleshoot any issues that arise.