How to Use JST XH Socket 4pin: Examples, Pinouts, and Specs

 Design with JST XH Socket 4pin in Cirkit Designer
Introduction
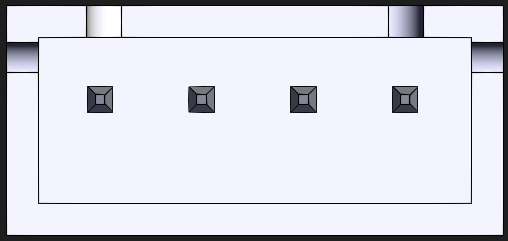
The JST XH Socket 4-Pin (B4B-XH-AM) is a compact and reliable connector designed for connecting wires to printed circuit boards (PCBs). Manufactured by JST, this connector is known for its secure connection and ease of use. It is widely used in various electronic applications, including consumer electronics, industrial equipment, and hobbyist projects.
Explore Projects Built with JST XH Socket 4pin

 Open Project in Cirkit Designer
 Open Project in Cirkit Designer
 Open Project in Cirkit Designer
 Open Project in Cirkit Designer
Explore Projects Built with JST XH Socket 4pin

 Open Project in Cirkit Designer
 Open Project in Cirkit Designer
 Open Project in Cirkit Designer
 Open Project in Cirkit Designer
Common Applications and Use Cases
- Consumer Electronics: Used in devices such as cameras, drones, and handheld gadgets.
- Industrial Equipment: Employed in machinery for secure and reliable connections.
- Hobbyist Projects: Popular among DIY enthusiasts for connecting sensors, motors, and other components to microcontrollers like the Arduino UNO.
Technical Specifications
Key Technical Details
| Parameter | Value |
|---|---|
| Manufacturer | JST |
| Part ID | B4B-XH-AM |
| Number of Pins | 4 |
| Pitch | 2.5 mm |
| Current Rating | 3 A |
| Voltage Rating | 250 V AC/DC |
| Operating Temp | -25°C to +85°C |
| Contact Material | Phosphor Bronze |
| Insulation Material | Nylon 66 (UL94V-0) |
Pin Configuration and Descriptions
| Pin Number | Description | Function |
|---|---|---|
| 1 | VCC | Power Supply (Positive) |
| 2 | GND | Ground |
| 3 | Signal/Data | Data or Signal Line |
| 4 | NC (No Connection) | Not Connected (Optional Use) |
Usage Instructions
How to Use the Component in a Circuit
- Identify the Pins: Refer to the pin configuration table to identify the VCC, GND, Signal/Data, and NC pins.
- Soldering: Carefully solder the JST XH Socket onto the PCB, ensuring that the pins are correctly aligned with the corresponding pads.
- Connecting Wires: Use a compatible JST XH 4-pin connector with crimped wires to connect to the socket. Ensure that the wires are correctly inserted into the connector housing.
- Secure Connection: Insert the connector into the socket until it clicks into place, ensuring a secure and reliable connection.
Important Considerations and Best Practices
- Polarity: Always double-check the polarity of the VCC and GND pins to avoid damaging your components.
- Current Rating: Ensure that the current passing through the connector does not exceed the rated 3 A to prevent overheating.
- Environmental Conditions: Operate within the specified temperature range (-25°C to +85°C) to maintain optimal performance.
Troubleshooting and FAQs
Common Issues Users Might Face
Loose Connection:
- Solution: Ensure that the connector is fully inserted into the socket until it clicks. Check for any bent pins or debris that might obstruct the connection.
Incorrect Pin Configuration:
- Solution: Double-check the pin configuration table and ensure that the wires are connected to the correct pins.
Overheating:
- Solution: Verify that the current passing through the connector does not exceed the rated 3 A. Consider using a heat sink or cooling mechanism if necessary.
FAQs
Q1: Can I use the JST XH Socket 4-Pin with an Arduino UNO?
- A1: Yes, the JST XH Socket 4-Pin can be used with an Arduino UNO. You can connect sensors, motors, or other components to the Arduino using this connector.
Q2: What type of wire should I use with the JST XH Socket 4-Pin?
- A2: It is recommended to use 22-28 AWG wires with the JST XH Socket 4-Pin for optimal performance.
Q3: How do I remove the connector from the socket?
- A3: To remove the connector, gently press the release tab on the connector housing and pull it out from the socket.
Example Code for Arduino UNO
// Example code to read data from a sensor connected via JST XH Socket 4-Pin
// Connect VCC to 5V, GND to GND, and Signal/Data to A0 on the Arduino UNO

const int sensorPin = A0; // Pin connected to the sensor's data line
int sensorValue = 0;      // Variable to store the sensor value

void setup() {
  Serial.begin(9600); // Initialize serial communication at 9600 baud
  pinMode(sensorPin, INPUT); // Set the sensor pin as an input
}

void loop() {
  sensorValue = analogRead(sensorPin); // Read the value from the sensor
  Serial.print("Sensor Value: "); // Print the sensor value to the serial monitor
  Serial.println(sensorValue);
  delay(1000); // Wait for 1 second before reading again
}
This documentation provides a comprehensive overview of the JST XH Socket 4-Pin (B4B-XH-AM), including its technical specifications, usage instructions, and troubleshooting tips. Whether you are a beginner or an experienced user, this guide will help you effectively utilize this component in your electronic projects.