How to Use Adafruit FTDI Friend: Examples, Pinouts, and Specs
Introduction
The Adafruit FTDI Friend is a versatile, compact USB to serial converter based on the FT232RL chip from FTDI. This component is essential for interfacing microcontrollers and other serial devices with a computer, enabling programming, debugging, and serial communication through a USB port. It is particularly useful for devices that do not have a built-in USB-to-serial converter, such as older Arduino boards or custom microcontroller projects.
Explore Projects Built with Adafruit FTDI Friend


Explore Projects Built with Adafruit FTDI Friend
Common Applications and Use Cases
- Programming microcontrollers without onboard USB-to-serial conversion
- Debugging and serial communication with microcontrollers
- General USB to RS232 conversion for legacy devices
- Bridging a USB connection to TTL serial devices
Technical Specifications
Key Technical Details
- Chipset: FT232RL
- Operating Voltage: 5V (VCCIO is set to 5V)
- I/O Logic Level: 3.3V or 5V (selectable via solder jumper)
- USB Standard: USB 2.0 Full Speed
- Max Data Rate: 3 Mbps
- Connectivity: Mini-B USB connector
- Dimensions: 1.8" x 0.6" x 0.2" (45.7mm x 15.2mm x 5mm)
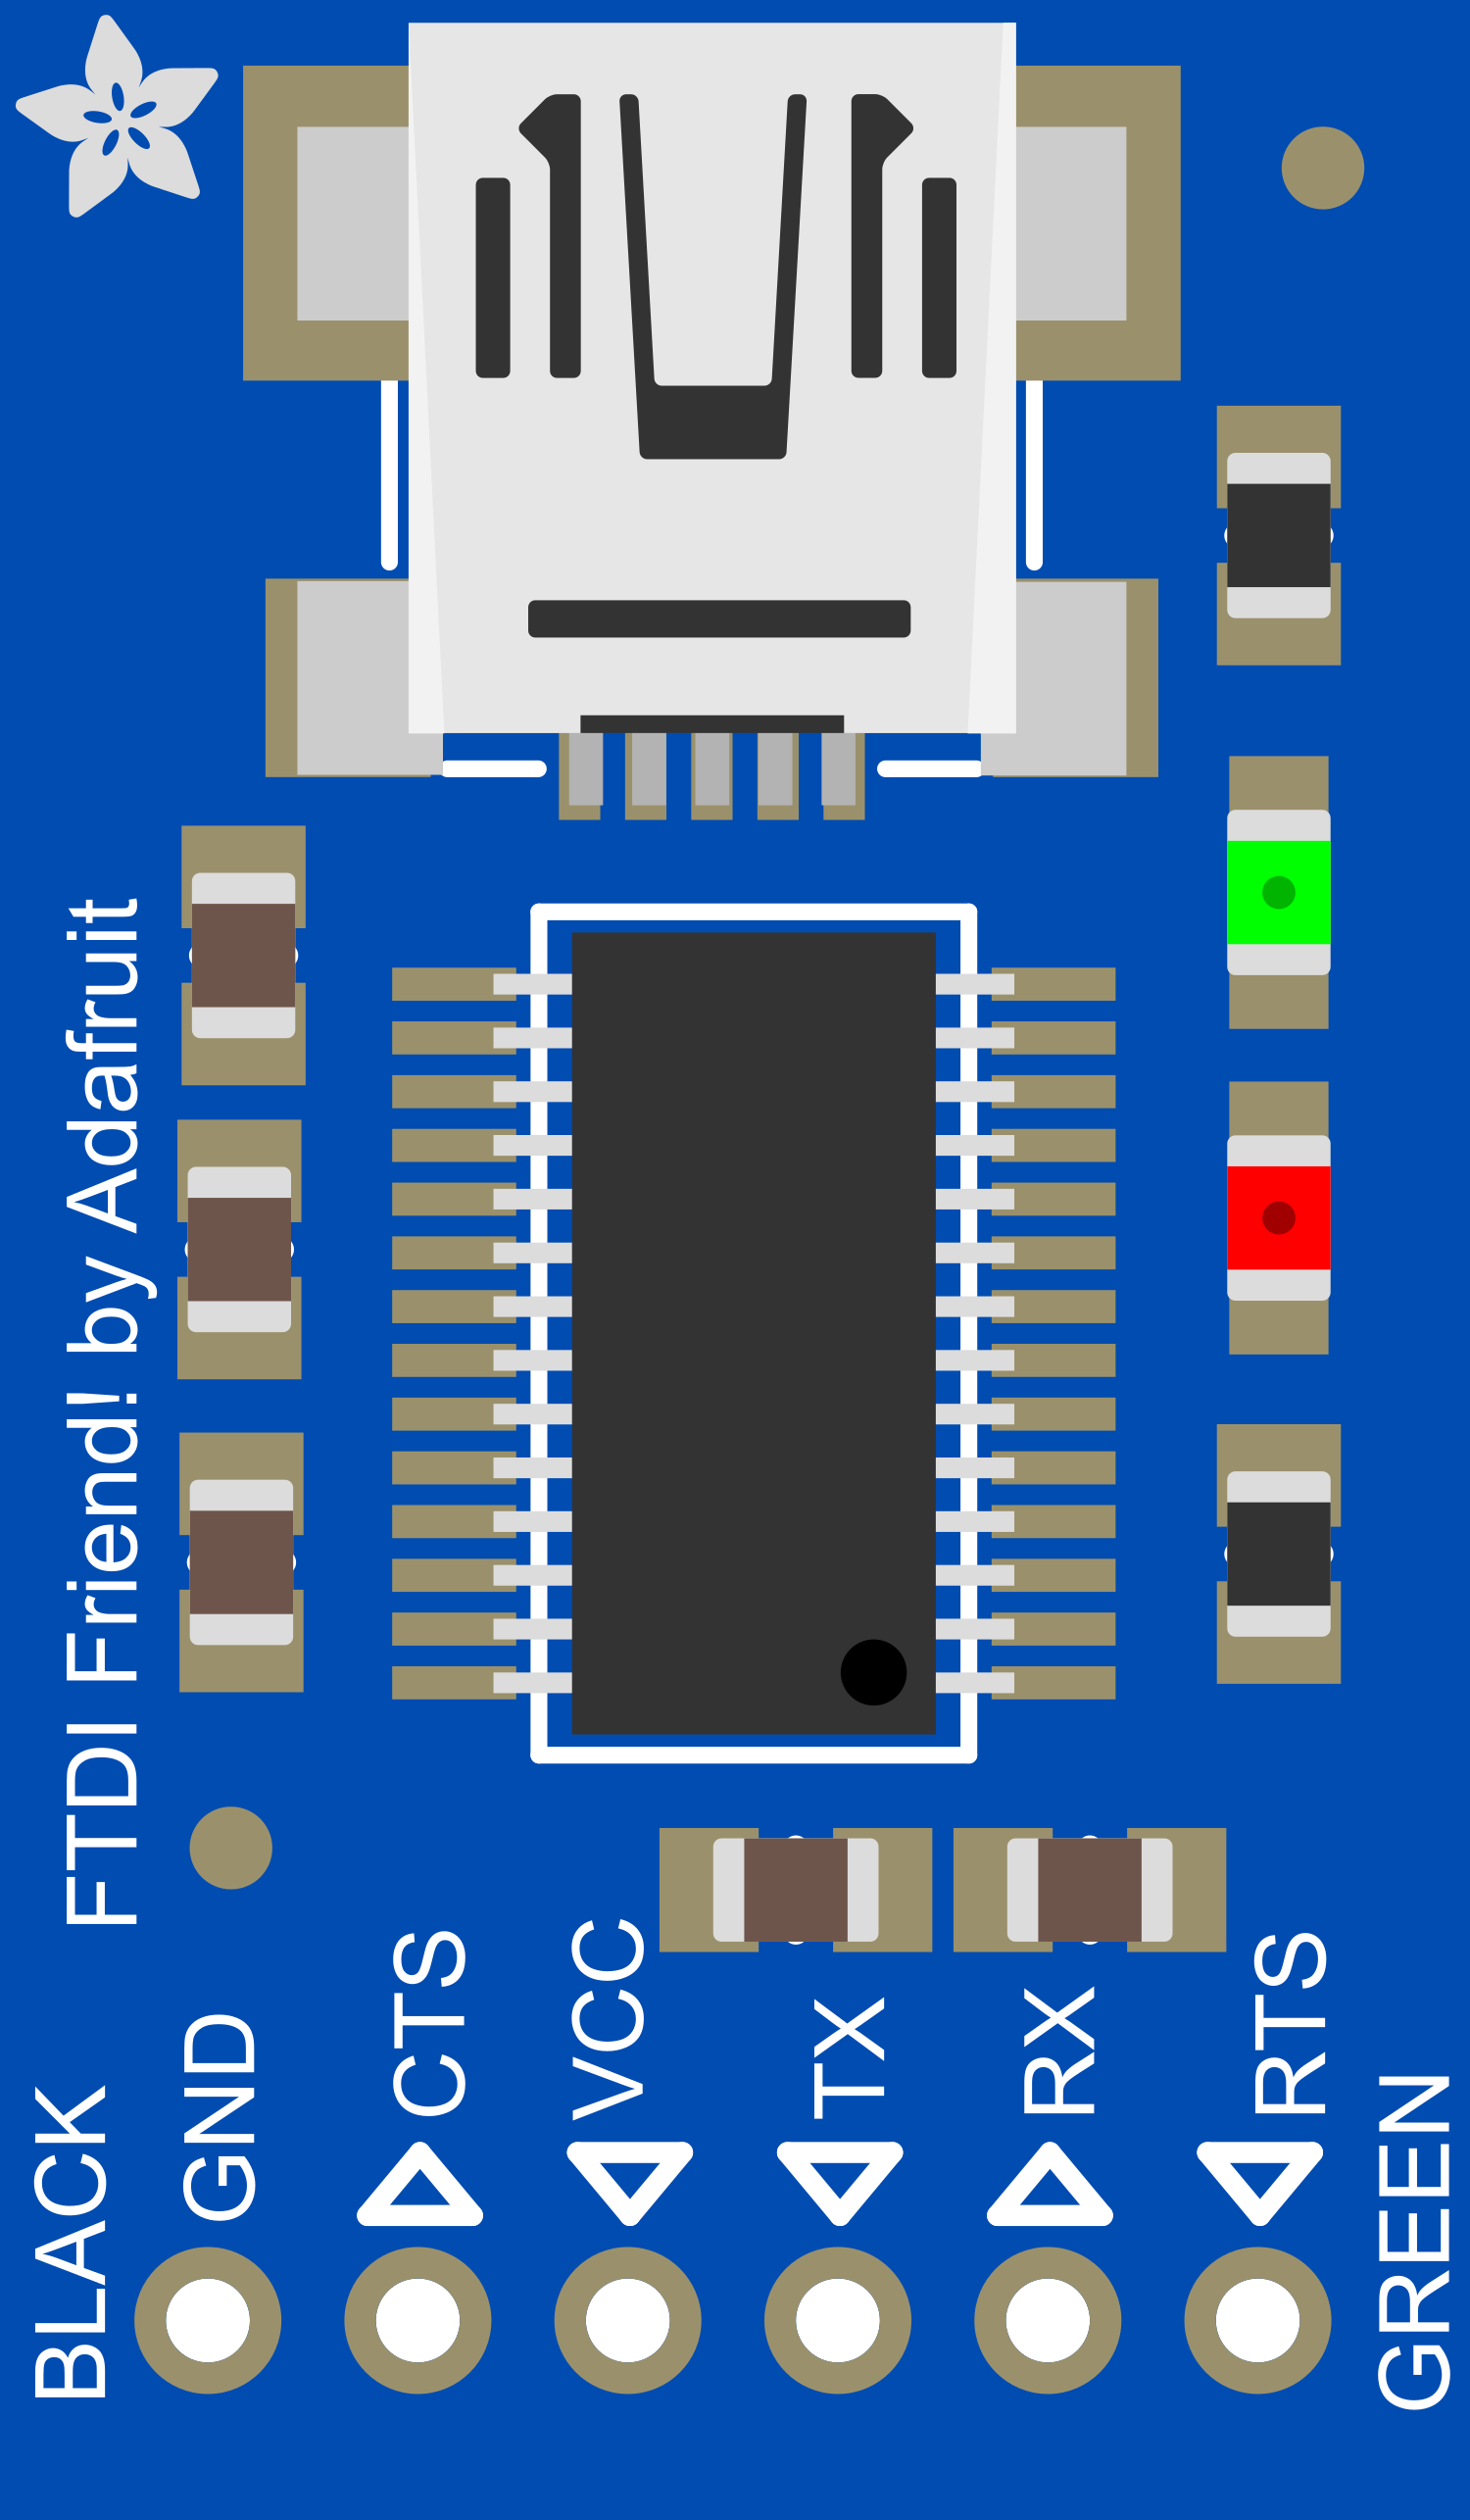
Pin Configuration and Descriptions
| Pin Number | Name | Description |
|---|---|---|
| 1 | GND | Ground connection |
| 2 | CTS | Clear to Send, input to FTDI Friend |
| 3 | VCC | Power supply (5V from USB) |
| 4 | TX | Transmit Data, output from FTDI Friend |
| 5 | RX | Receive Data, input to FTDI Friend |
| 6 | RTS | Request to Send, output from FTDI Friend |
| 7 | DTR | Data Terminal Ready, output from FTDI Friend |
Usage Instructions
How to Use the Component in a Circuit
Connecting to a Microcontroller:
- Connect the FTDI Friend's TX pin to the microcontroller's RX pin.
- Connect the FTDI Friend's RX pin to the microcontroller's TX pin.
- Ensure that the GND pin is connected to the microcontroller's ground.
- Optionally, connect the DTR pin to the microcontroller's reset pin through a 0.1uF capacitor to enable auto-reset for programming.
Powering the Device:
- The FTDI Friend can be powered directly from the USB connection.
- Ensure that the VCC pin is connected if the microcontroller requires 5V power from the FTDI Friend.
Logic Level Selection:
- The default I/O logic level is 5V, but it can be changed to 3.3V by adjusting the onboard solder jumper.
Important Considerations and Best Practices
- Always verify the logic level compatibility of the FTDI Friend with the target device to prevent damage.
- Use proper ESD precautions when handling the FTDI Friend to avoid static damage to the chip.
- When using the DTR pin for auto-reset, ensure the capacitor is correctly placed to avoid incorrect reset behavior.
Troubleshooting and FAQs
Common Issues Users Might Face
Device not recognized by the computer:
- Check the USB cable and connections.
- Ensure that the correct drivers are installed for the FT232RL chip.
No communication with the microcontroller:
- Verify that the TX and RX pins are not swapped.
- Check the logic level settings and ensure compatibility.
Microcontroller not auto-resetting:
- Ensure the DTR pin is connected through a 0.1uF capacitor to the reset pin of the microcontroller.
Solutions and Tips for Troubleshooting
- If the device is not recognized, download and install the latest FTDI drivers from the FTDI website.
- Use a multimeter to check for continuity and correct voltage levels on the pins.
- For auto-reset issues, check the polarity and value of the capacitor connected to the DTR pin.
FAQs
Q: Can the FTDI Friend be used with 3.3V devices? A: Yes, the logic level can be set to 3.3V by adjusting the onboard solder jumper.
Q: Does the FTDI Friend come with a USB cable? A: No, a USB Mini-B cable must be purchased separately.
Q: How can I change the serial baud rate? A: The baud rate can be set through the serial communication software on your computer, such as the Arduino IDE's Serial Monitor.
Example Code for Arduino UNO
// This example demonstrates basic serial communication between the FTDI Friend
// and an Arduino UNO. The Arduino will echo any received characters.

void setup() {
  // Start the serial communication with a baud rate of 9600
  Serial.begin(9600);
}

void loop() {
  // Check if data is available to read
  if (Serial.available() > 0) {
    // Read the incoming byte
    char incomingByte = Serial.read();

    // Echo the incoming byte back to the serial port
    Serial.write(incomingByte);
  }
}
Remember to select the correct COM port and board configuration when uploading code to the Arduino using the FTDI Friend.