
How to Use Adafruit Bluefruit LE UART Friend: Examples, Pinouts, and Specs
 Design with Adafruit Bluefruit LE UART Friend in Cirkit Designer
Introduction
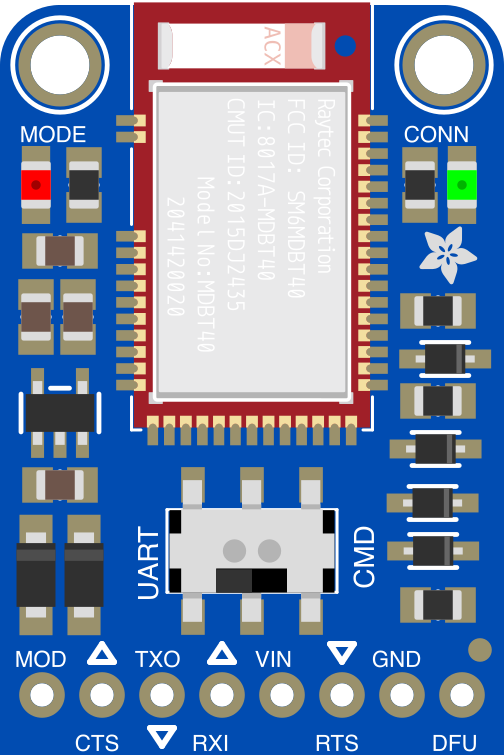
The Adafruit Bluefruit LE UART Friend (Part ID: 2479) is a Bluetooth Low Energy (BLE) module designed for seamless integration with microcontrollers. It enables wireless communication with smartphones, tablets, and other BLE-enabled devices. This module is particularly well-suited for Internet of Things (IoT) projects, wearable devices, and remote control applications. Its UART interface simplifies data exchange, making it accessible for both beginners and advanced users.
Explore Projects Built with Adafruit Bluefruit LE UART Friend
 Open Project in Cirkit Designer
 Open Project in Cirkit Designer
 Open Project in Cirkit Designer
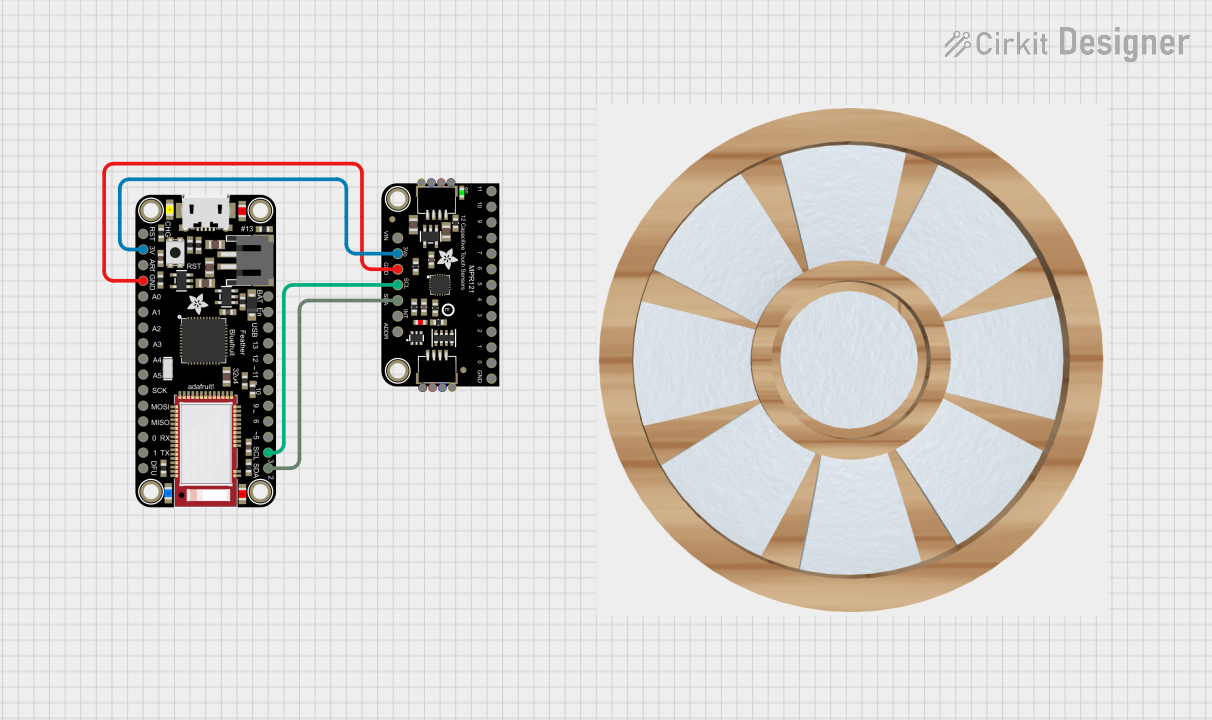 Open Project in Cirkit Designer
Explore Projects Built with Adafruit Bluefruit LE UART Friend
Open Project in Cirkit DesignerOpen Project in Cirkit DesignerOpen Project in Cirkit DesignerOpen Project in Cirkit DesignerCommon Applications
- Wireless data transmission for IoT devices
- Smartphone-controlled robotics
- Wearable technology
- Remote monitoring and control systems
- BLE-based sensor networks
Technical Specifications
The Adafruit Bluefruit LE UART Friend is packed with features that make it versatile and easy to use. Below are its key technical details:
Key Specifications
| Parameter | Value |
|---|---|
| Bluetooth Version | Bluetooth Low Energy (BLE) 4.0 |
| Communication Interface | UART (3.3V logic level) |
| Operating Voltage | 3.3V to 5V |
| Current Consumption | ~10mA (active), ~1.5mA (idle) |
| Transmission Range | Up to 10 meters (line of sight) |
| Data Throughput | Up to 128 kbps |
| Dimensions | 21mm x 32mm x 5mm |
| Weight | 3g |
Pin Configuration
The module has a simple pinout for easy integration with microcontrollers. Below is the pin configuration:
| Pin Name | Description |
|---|---|
| VIN | Power input (3.3V to 5V) |
| GND | Ground |
| TX | UART Transmit (3.3V logic level) |
| RX | UART Receive (3.3V logic level) |
| CTS | Clear to Send (optional, for hardware flow control) |
| RTS | Ready to Send (optional, for hardware flow control) |
| DFU | Data Firmware Update (used for updating the module's firmware) |
| MODE | Mode selection pin (used to switch between Command and Data modes) |
Usage Instructions
The Adafruit Bluefruit LE UART Friend is designed for ease of use. Follow the steps below to integrate it into your project:
Connecting to a Microcontroller
- Power the Module: Connect the
VINpin to a 3.3V or 5V power source and theGNDpin to ground. - UART Communication: Connect the
TXpin of the module to theRXpin of your microcontroller, and theRXpin of the module to theTXpin of your microcontroller. - Optional Flow Control: If using hardware flow control, connect the
CTSandRTSpins to the corresponding pins on your microcontroller. - Mode Selection: Use the
MODEpin to toggle between Command mode (for configuration) and Data mode (for communication).
Important Considerations
- Logic Level Compatibility: The UART pins operate at 3.3V logic levels. If your microcontroller uses 5V logic, use a level shifter to avoid damaging the module.
- Antenna Placement: Ensure the onboard antenna has a clear line of sight for optimal signal strength.
- Firmware Updates: Use the
DFUpin to update the module's firmware when necessary. Refer to Adafruit's official documentation for detailed instructions.
Example: Connecting to an Arduino UNO
Below is an example of how to connect and use the Adafruit Bluefruit LE UART Friend with an Arduino UNO:
Wiring Diagram
| Bluefruit Pin | Arduino Pin |
|---|---|
| VIN | 5V |
| GND | GND |
| TX | RX (Pin 0) |
| RX | TX (Pin 1) |
Arduino Code Example
#include <Adafruit_BluefruitLE_UART.h>
#include <SoftwareSerial.h>

// Define RX and TX pins for SoftwareSerial
#define BLUEFRUIT_RX 10
#define BLUEFRUIT_TX 11

// Create a SoftwareSerial instance for communication
SoftwareSerial bluefruitSerial(BLUEFRUIT_TX, BLUEFRUIT_RX);

// Create an instance of the Bluefruit library
Adafruit_BluefruitLE_UART ble(bluefruitSerial, -1, -1); // No CTS/RTS used

void setup() {
  // Initialize Serial Monitor
  Serial.begin(9600);
  while (!Serial); // Wait for Serial Monitor to open
  Serial.println("Adafruit Bluefruit LE UART Friend Example");

  // Initialize Bluefruit module
  bluefruitSerial.begin(9600);
  if (!ble.begin(false)) { // No hardware flow control
    Serial.println("Failed to initialize Bluefruit module!");
    while (1);
  }
  Serial.println("Bluefruit module initialized!");

  // Set module name (optional)
  ble.sendCommandCheckOK(F("AT+GAPDEVNAME=BluefruitUART"));
  Serial.println("Module name set to 'BluefruitUART'");
}

void loop() {
  // Check for incoming data from Bluefruit
  if (ble.available()) {
    char c = ble.read();
    Serial.print(c); // Print received data to Serial Monitor
  }

  // Send data to Bluefruit from Serial Monitor
  if (Serial.available()) {
    char c = Serial.read();
    ble.write(c); // Send data to Bluefruit
  }
}
Notes
- Replace
BLUEFRUIT_RXandBLUEFRUIT_TXwith the appropriate pins if using different connections. - Ensure the baud rate matches the module's default (9600 bps).
Troubleshooting and FAQs
Common Issues
No Response from the Module
- Ensure the module is powered correctly (check
VINandGNDconnections). - Verify the UART connections (
TXandRX) are not swapped. - Check if the
MODEpin is set correctly for the desired operation.
- Ensure the module is powered correctly (check
Poor Signal Strength
- Ensure the onboard antenna is not obstructed by metal objects or enclosures.
- Reduce the distance between the module and the BLE device.
Firmware Update Fails
- Ensure the
DFUpin is correctly connected during the update process. - Use the latest firmware files from Adafruit's official website.
- Ensure the
Data Transmission Issues
- Verify the baud rate settings on both the module and the microcontroller.
- If using hardware flow control, ensure
CTSandRTSare properly connected.
FAQs
Q: Can I use the module with a 5V microcontroller?
A: Yes, but you must use a logic level shifter for the UART pins to avoid damaging the module.
Q: How do I reset the module to factory settings?
A: Send the AT+FACTORYRESET command in Command mode. The module will reset and restart.
Q: What is the maximum range of the module?
A: The module has a maximum range of approximately 10 meters in line-of-sight conditions.
Q: Can I use the module without hardware flow control?
A: Yes, hardware flow control is optional. You can leave the CTS and RTS pins unconnected if not used.
For additional support, refer to Adafruit's official documentation and forums.