Cirkit Designer Logo
Cirkit Designer
Your all-in-one circuit design IDE
Home / 
Component Documentation

How to Use Adafruit NeoPixel Jewel: Examples, Pinouts, and Specs

Image of Adafruit NeoPixel Jewel
Cirkit Designer LogoDesign with Adafruit NeoPixel Jewel in Cirkit Designer

Introduction

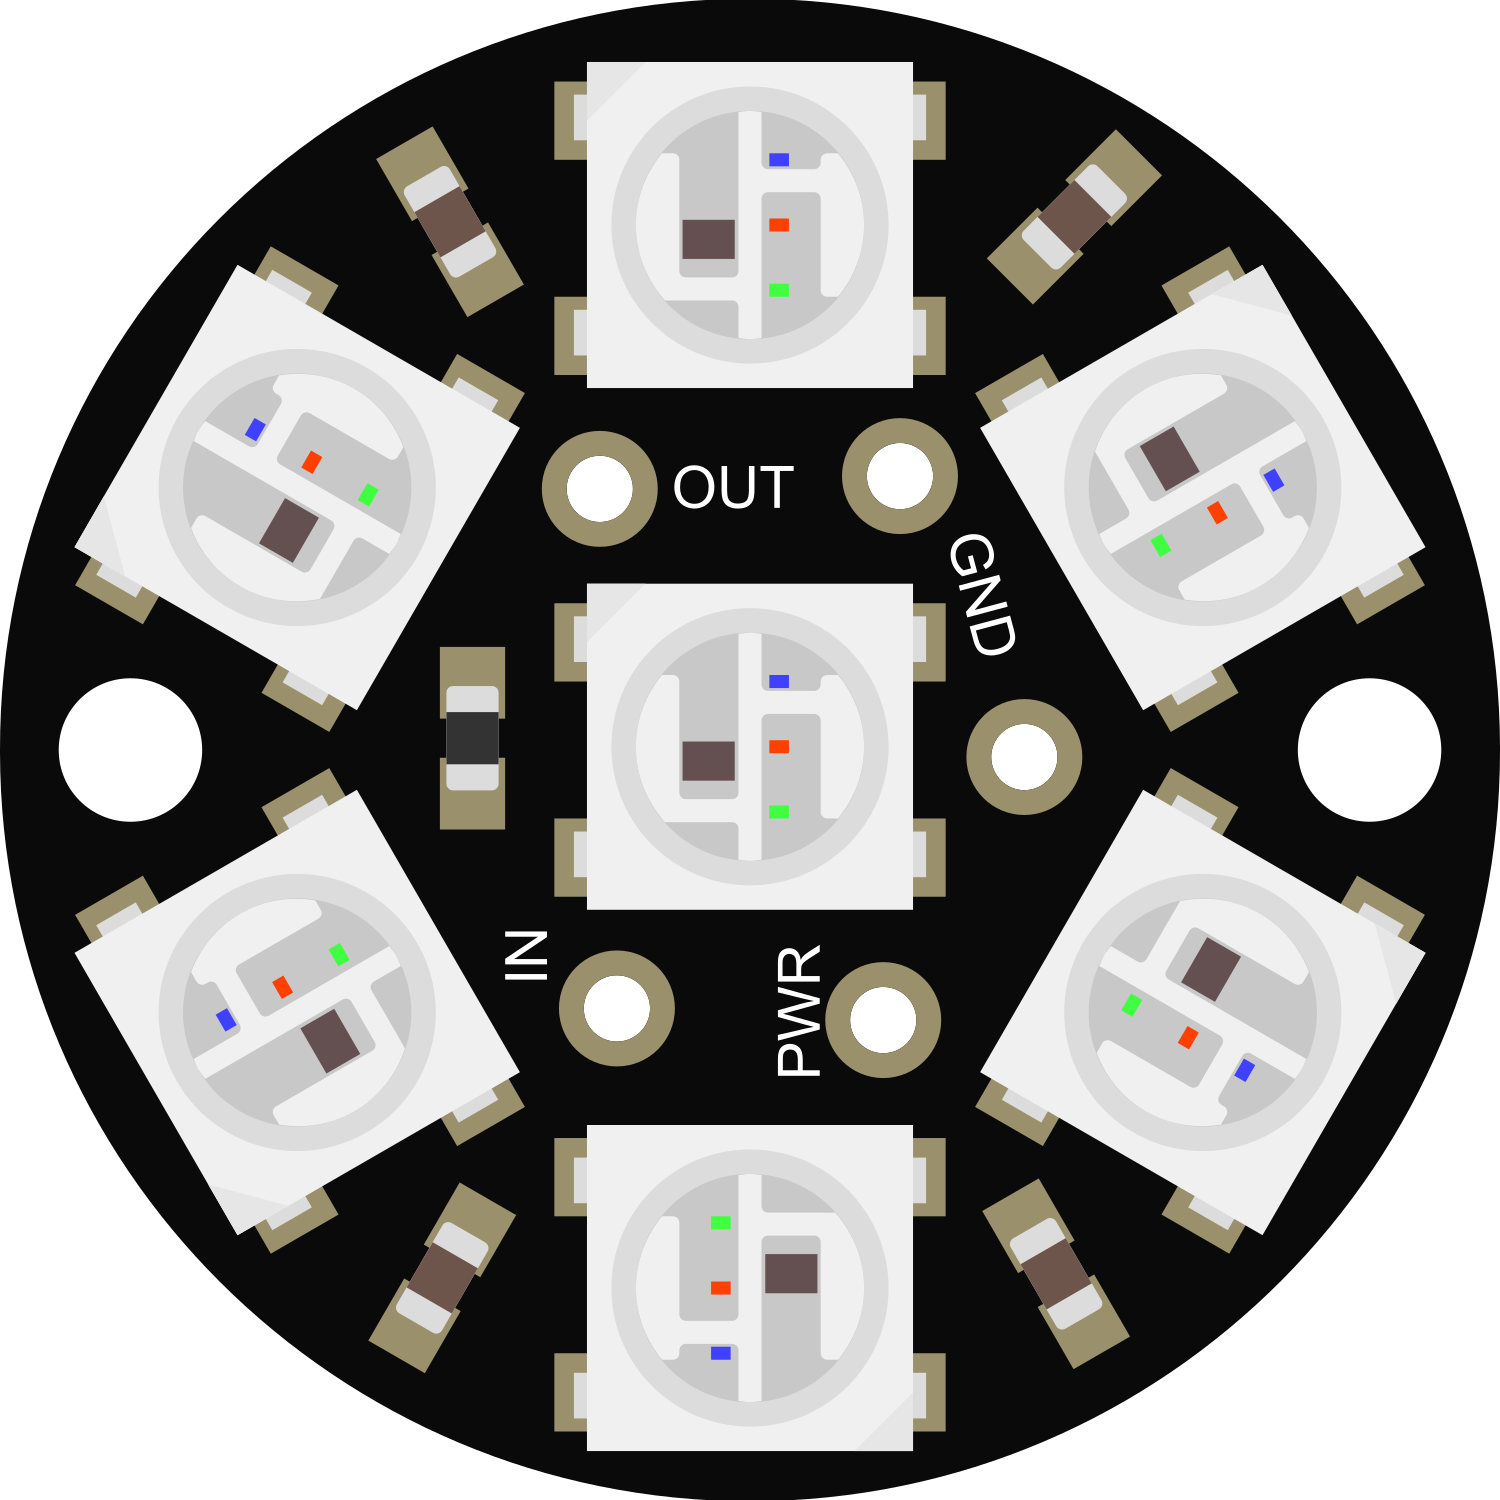
The Adafruit NeoPixel Jewel is a compact, circular LED module that features seven individually addressable RGB LEDs. These LEDs are based on the WS2812 or the upgraded WS2812B, which integrate the control circuit and RGB chip into a single 5050 (5mm x 5mm) package. The NeoPixel Jewel's unique arrangement and individual addressability make it ideal for creating intricate lighting effects, wearable electronics, and decorative projects. Its compatibility with platforms like Arduino makes it accessible for hobbyists and professionals alike.

Explore Projects Built with Adafruit NeoPixel Jewel

Use Cirkit Designer to design, explore, and prototype these projects online. Some projects support real-time simulation. Click "Open Project" to start designing instantly!
Arduino Nano Controlled Sound and Light Effects System with NeoPixel LEDs
Image of Proton Pack: A project utilizing Adafruit NeoPixel Jewel in a practical application
This circuit features an Arduino Nano microcontroller connected to a series of WS2812B LEDs, Adafruit NeoPixel Jewels, and Sticks, forming an addressable LED array. The Arduino controls the LED patterns and sequences, and interfaces with an Adafruit Audio FX Mini Sound Board for audio playback, which is amplified by an Adafruit PAM8302 amplifier connected to piezo speakers. The circuit includes toggle and push switches for user interaction, and uses a lipo battery with MP1584EN power regulators for power management. The embedded code on the Arduino facilitates complex lighting effects and sound playback, responding to switch states and button presses to create an interactive experience.
Cirkit Designer LogoOpen Project in Cirkit Designer
Battery-Powered Adafruit Flora RGB NeoPixel Light Show
Image of FloraTest: A project utilizing Adafruit NeoPixel Jewel in a practical application
This circuit consists of an Adafruit Flora v3 microcontroller connected to a Breadboard-friendly RGB Smart NeoPixel and powered by a 3xAAA battery pack. The microcontroller runs code to control the NeoPixel, displaying various colors and patterns.
Cirkit Designer LogoOpen Project in Cirkit Designer
Arduino UNO Controlled NeoPixel Ring Light Show
Image of 6 Ring Series: A project utilizing Adafruit NeoPixel Jewel in a practical application
This circuit consists of an Arduino UNO microcontroller connected to six Adafruit 12 NeoPixel Rings, each with 12 LEDs, for a total of 72 LEDs. The Arduino controls the LEDs to display a yellow color with varying brightness, creating a pulsating effect.
Cirkit Designer LogoOpen Project in Cirkit Designer
Arduino-Controlled NeoPixel LED Display with Voltage Regulation
Image of KK project: A project utilizing Adafruit NeoPixel Jewel in a practical application
This circuit features an Arduino 101 controlling multiple individually addressable Adafruit NeoPixel LED rings, with power regulation and decoupling provided by 7805 voltage regulators and electrolytic capacitors, all powered by a 12V battery.
Cirkit Designer LogoOpen Project in Cirkit Designer

Explore Projects Built with Adafruit NeoPixel Jewel

Use Cirkit Designer to design, explore, and prototype these projects online. Some projects support real-time simulation. Click "Open Project" to start designing instantly!
Image of Proton Pack: A project utilizing Adafruit NeoPixel Jewel in a practical application
Arduino Nano Controlled Sound and Light Effects System with NeoPixel LEDs
This circuit features an Arduino Nano microcontroller connected to a series of WS2812B LEDs, Adafruit NeoPixel Jewels, and Sticks, forming an addressable LED array. The Arduino controls the LED patterns and sequences, and interfaces with an Adafruit Audio FX Mini Sound Board for audio playback, which is amplified by an Adafruit PAM8302 amplifier connected to piezo speakers. The circuit includes toggle and push switches for user interaction, and uses a lipo battery with MP1584EN power regulators for power management. The embedded code on the Arduino facilitates complex lighting effects and sound playback, responding to switch states and button presses to create an interactive experience.
Cirkit Designer LogoOpen Project in Cirkit Designer
Image of FloraTest: A project utilizing Adafruit NeoPixel Jewel in a practical application
Battery-Powered Adafruit Flora RGB NeoPixel Light Show
This circuit consists of an Adafruit Flora v3 microcontroller connected to a Breadboard-friendly RGB Smart NeoPixel and powered by a 3xAAA battery pack. The microcontroller runs code to control the NeoPixel, displaying various colors and patterns.
Cirkit Designer LogoOpen Project in Cirkit Designer
Image of 6 Ring Series: A project utilizing Adafruit NeoPixel Jewel in a practical application
Arduino UNO Controlled NeoPixel Ring Light Show
This circuit consists of an Arduino UNO microcontroller connected to six Adafruit 12 NeoPixel Rings, each with 12 LEDs, for a total of 72 LEDs. The Arduino controls the LEDs to display a yellow color with varying brightness, creating a pulsating effect.
Cirkit Designer LogoOpen Project in Cirkit Designer
Image of KK project: A project utilizing Adafruit NeoPixel Jewel in a practical application
Arduino-Controlled NeoPixel LED Display with Voltage Regulation
This circuit features an Arduino 101 controlling multiple individually addressable Adafruit NeoPixel LED rings, with power regulation and decoupling provided by 7805 voltage regulators and electrolytic capacitors, all powered by a 12V battery.
Cirkit Designer LogoOpen Project in Cirkit Designer

Common Applications and Use Cases

  • Wearable electronics and fashion accessories
  • Decorative lighting
  • Custom PC case modding
  • Props and costumes for cosplay
  • Small-scale art installations
  • Educational projects teaching about LEDs and color mixing

Technical Specifications

Key Technical Details

  • Diameter: 23mm / 0.9"
  • Thickness: 2.5mm / 0.1"
  • Weight: 2.5g / 0.09oz
  • LED Count: 7 individually addressable RGB LEDs
  • LED Model: WS2812 or WS2812B
  • Operating Voltage: 4-7V DC
  • Maximum Current: 100mA per LED at full brightness
  • Communication Protocol: Single-wire (data) control (800 KHz protocol)

Pin Configuration and Descriptions

Pin Description
VDD Power supply (4-7V DC)
GND Ground connection
DIN Data input from microcontroller
DOUT Data output to the next LED/input of another NeoPixel

Usage Instructions

How to Use the Component in a Circuit

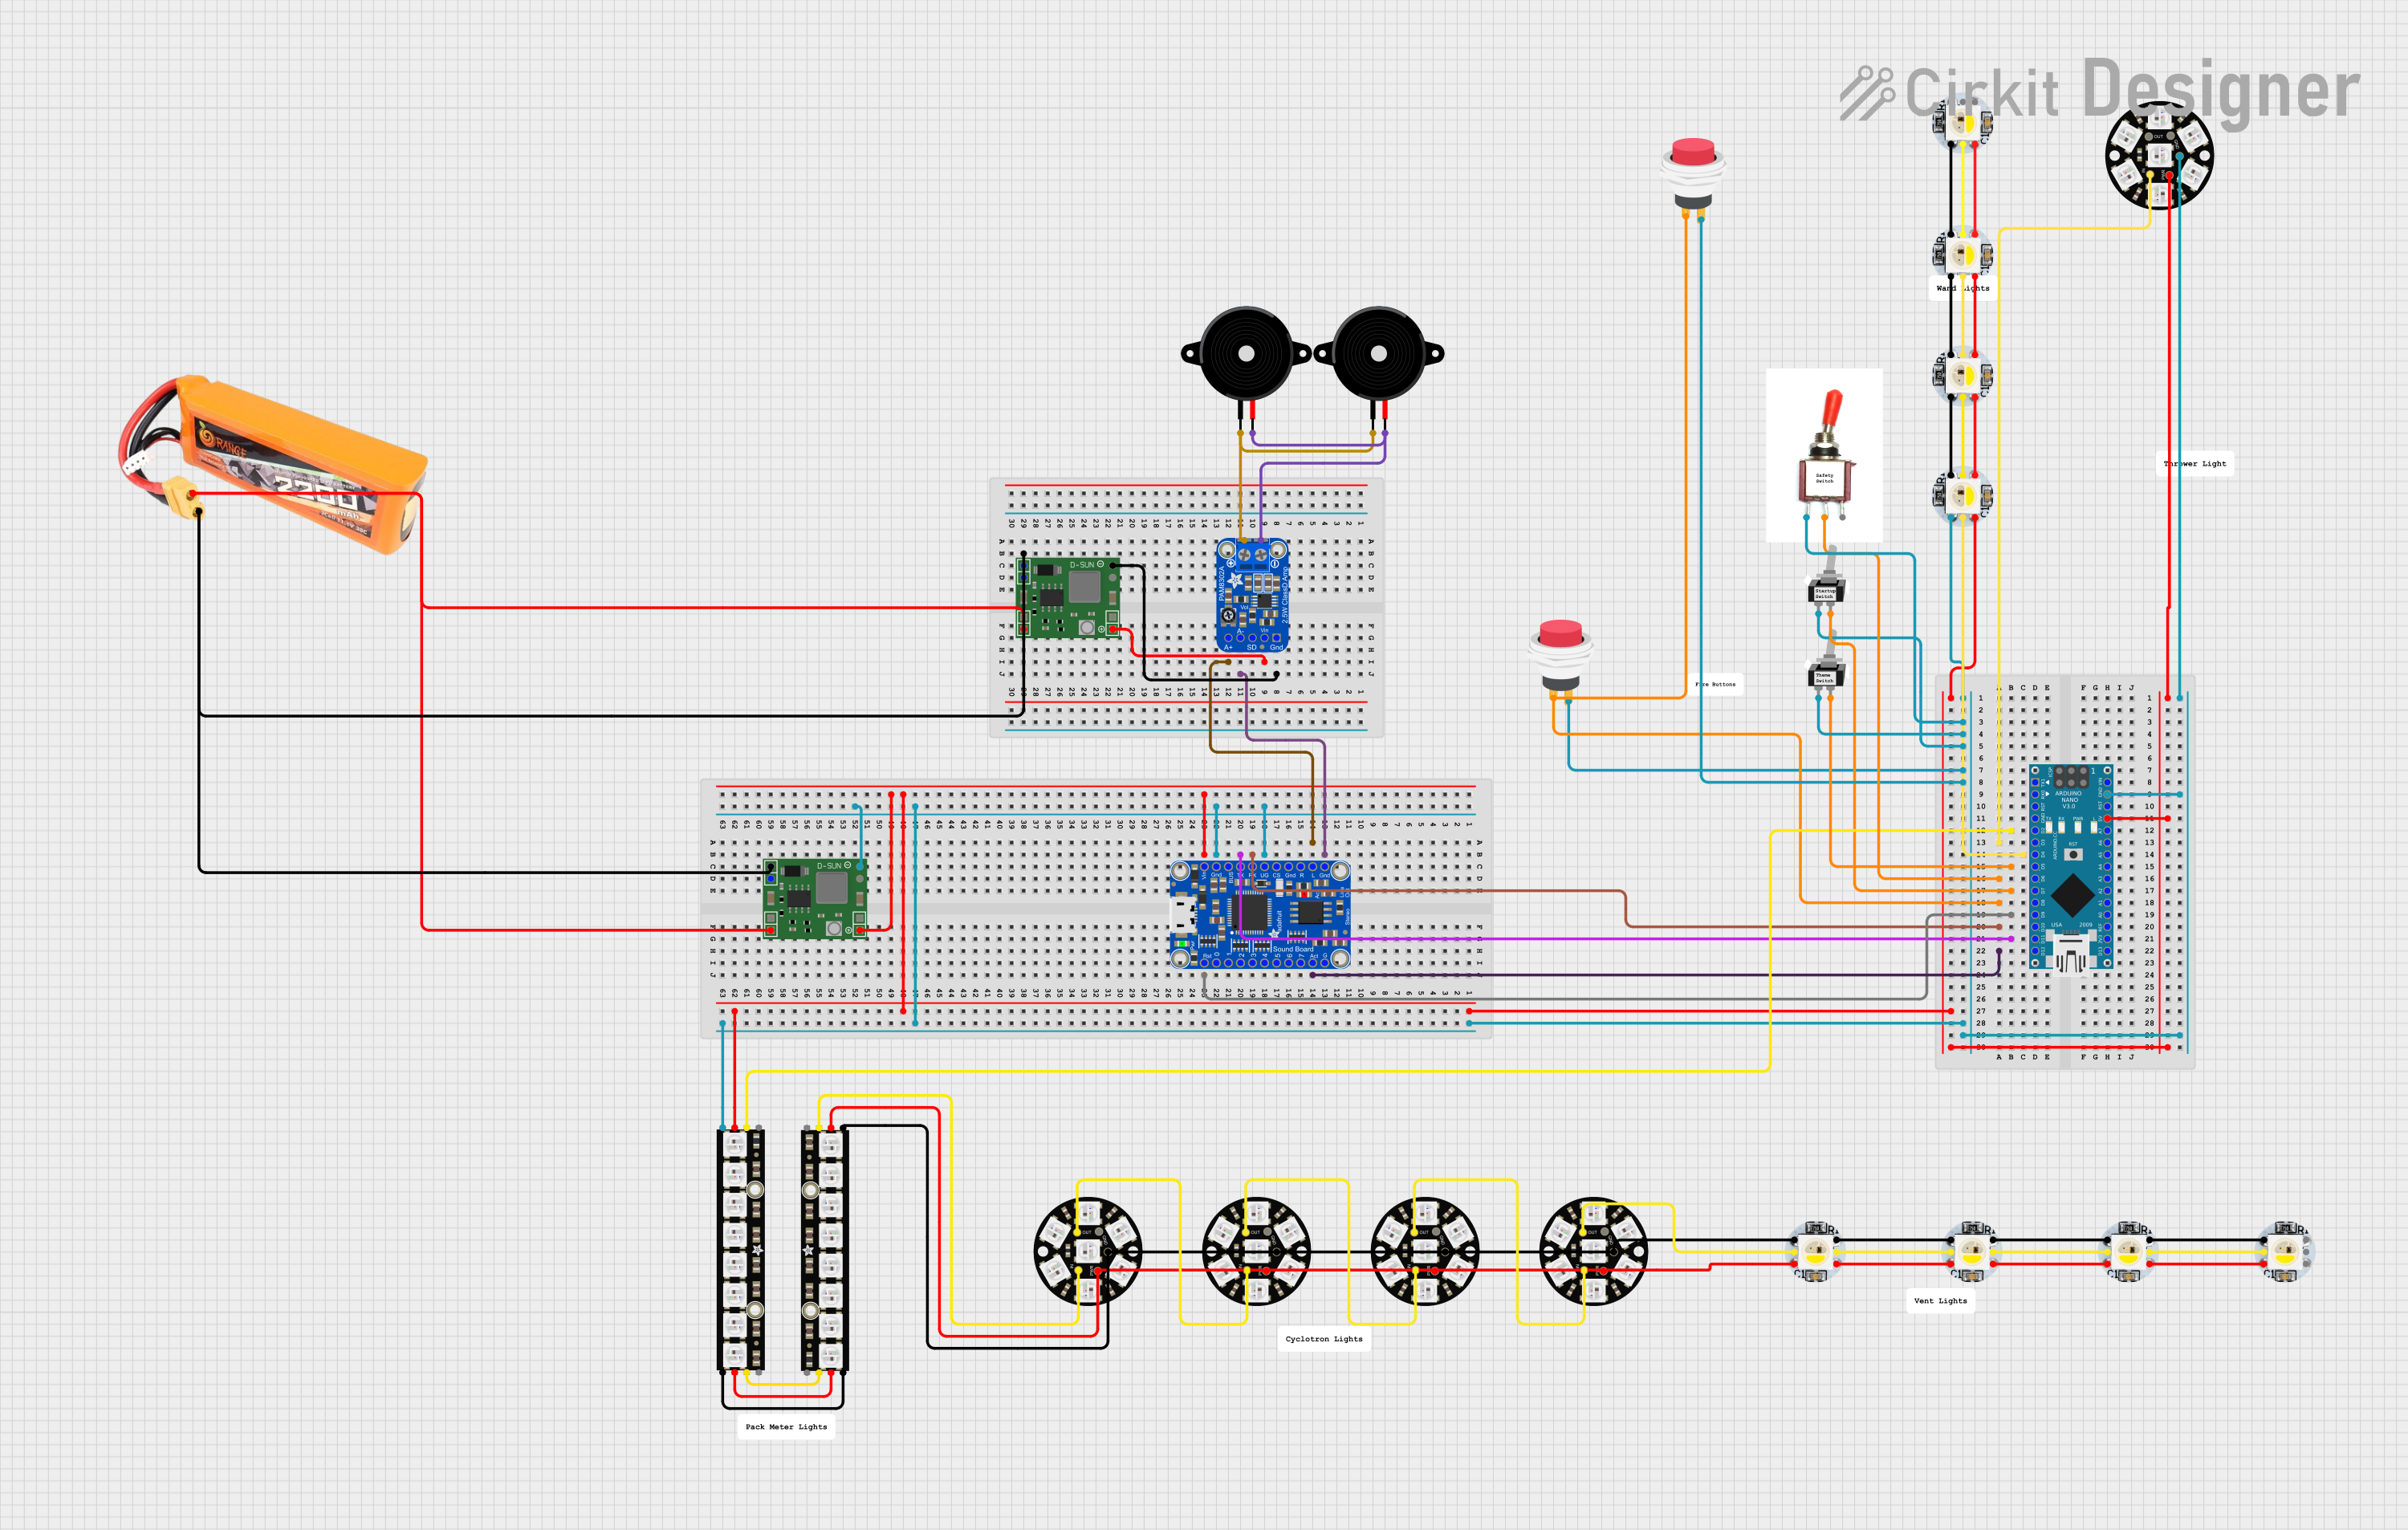
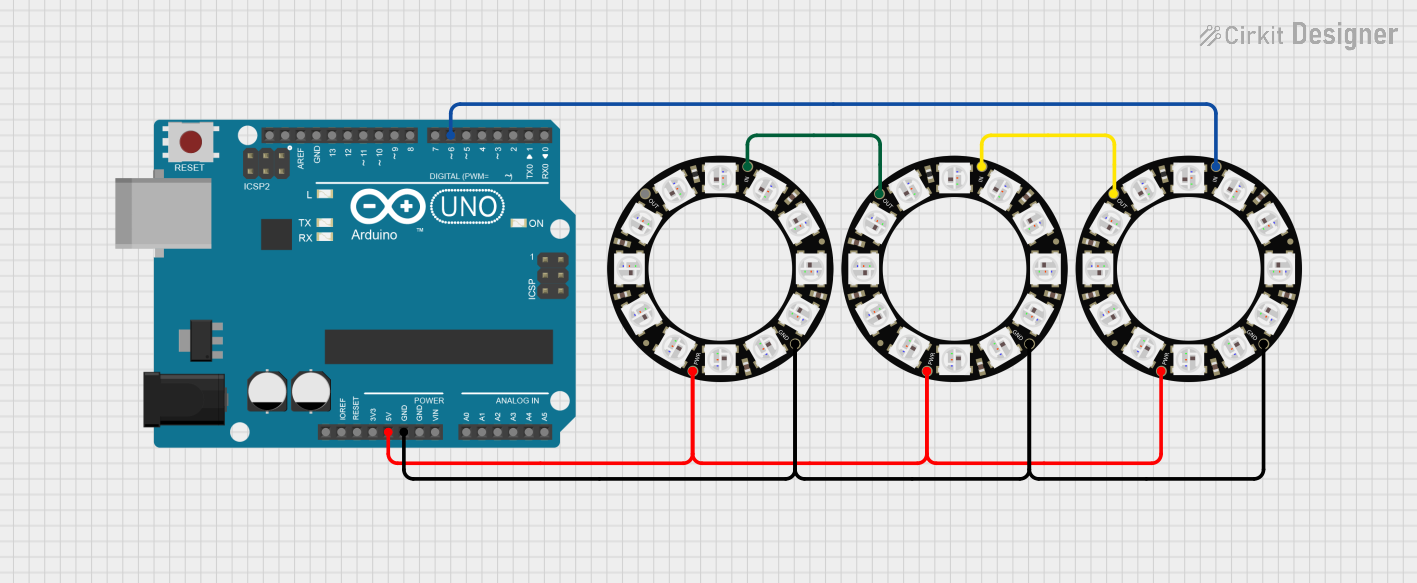
  1. Power Supply: Connect the VDD pin to a suitable power supply (4-7V DC) and the GND pin to the ground. Ensure that the power supply can handle the current requirements if multiple NeoPixel Jewels are chained together.

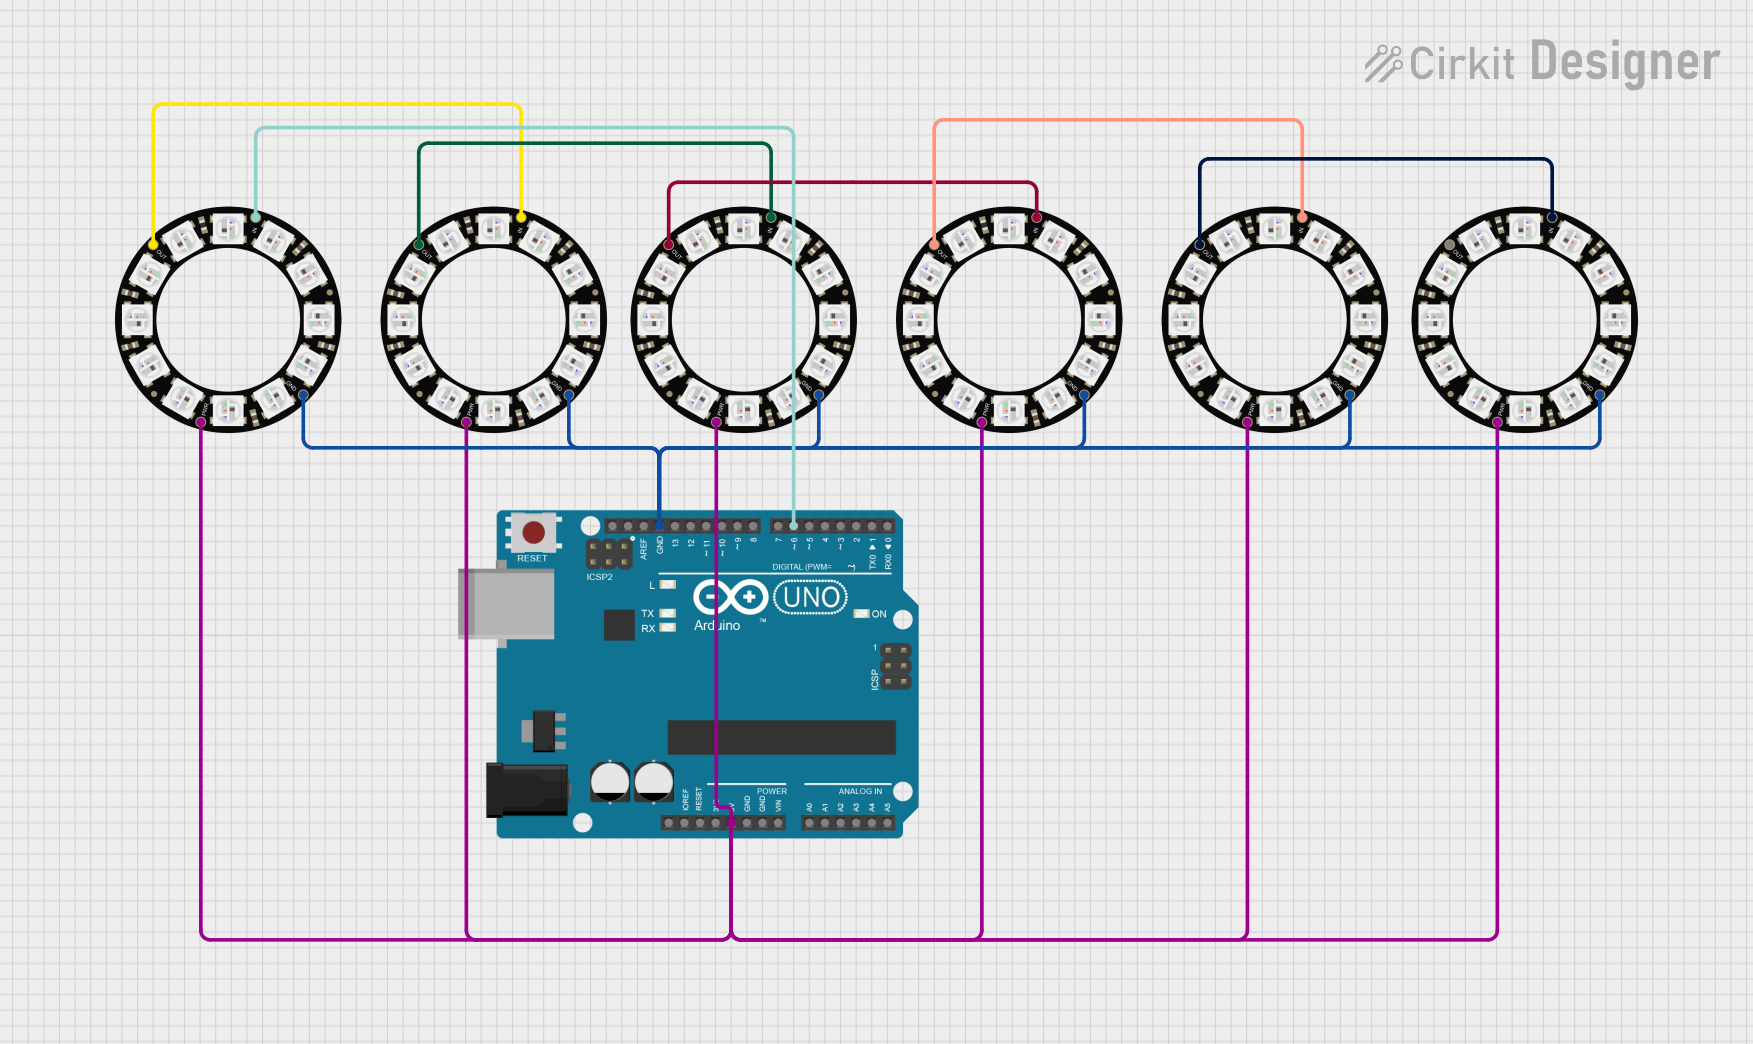
  2. Data Connection: Connect the DIN pin to a digital output pin on your microcontroller (e.g., an Arduino UNO). If chaining multiple NeoPixel Jewels, connect the DOUT pin of the first to the DIN pin of the next.

  3. Programming: Use the Adafruit NeoPixel library to control the LEDs. Install the library through the Arduino Library Manager and include it in your sketches to create custom lighting effects.

Important Considerations and Best Practices

  • Always use a current-limiting resistor (e.g., 330-470 ohms) on the data input line to prevent spikes that could damage the first pixel.
  • Include a large capacitor (e.g., 1000µF, 6.3V or higher) across the power supply lines to smooth out power supply fluctuations.
  • Do not exceed 5V as it may damage the LEDs.
  • Minimize voltage drop by providing power at both ends of a long chain of Jewels.
  • Avoid running the LEDs at full brightness to prevent overheating and reduce power consumption.

Example Code for Arduino UNO

#include <Adafruit_NeoPixel.h>

#define PIN            6 // Define the pin connected to the NeoPixel data input
#define NUMPIXELS      7 // Number of LEDs in the NeoPixel Jewel

Adafruit_NeoPixel pixels(NUMPIXELS, PIN, NEO_GRB + NEO_KHZ800);

void setup() {
  pixels.begin(); // Initialize the NeoPixel Jewel
}

void loop() {
  for(int i=0; i<NUMPIXELS; i++) {
    pixels.setPixelColor(i, pixels.Color(150, 0, 150)); // Set color to purple
    pixels.show(); // Update the Jewel with set colors
    delay(500);
    pixels.setPixelColor(i, pixels.Color(0, 0, 0)); // Turn off the LED
  }
}

Troubleshooting and FAQs

Common Issues Users Might Face

  • LEDs not lighting up: Check connections, ensure the power supply is adequate, and verify that the correct pin is defined in the code.
  • Incorrect colors displayed: Ensure the data line has a current-limiting resistor and that the ground of the NeoPixel is connected to the microcontroller ground.
  • Flickering LEDs: This could be due to power fluctuations. Use a capacitor across the power supply lines and check for loose connections.

Solutions and Tips for Troubleshooting

  • Double-check wiring, especially the direction of data flow from DIN to DOUT.
  • Ensure that the library and board definitions in your development environment are up to date.
  • Reduce the brightness in your code to lower the current draw if you're experiencing power issues.
  • If using multiple NeoPixel Jewels, provide power injection at various points to prevent voltage drop.

FAQs

Q: Can I chain multiple NeoPixel Jewels together? A: Yes, you can chain them by connecting DOUT of one Jewel to DIN of the next. Ensure your power supply can handle the increased current draw.

Q: How do I control each LED individually? A: Use the setPixelColor() function in the Adafruit NeoPixel library, specifying the LED index and color.

Q: What is the maximum number of NeoPixel Jewels I can control with an Arduino? A: It depends on the Arduino's RAM and your power supply. Each LED requires 3 bytes of RAM, so calculate based on your Arduino's specifications.

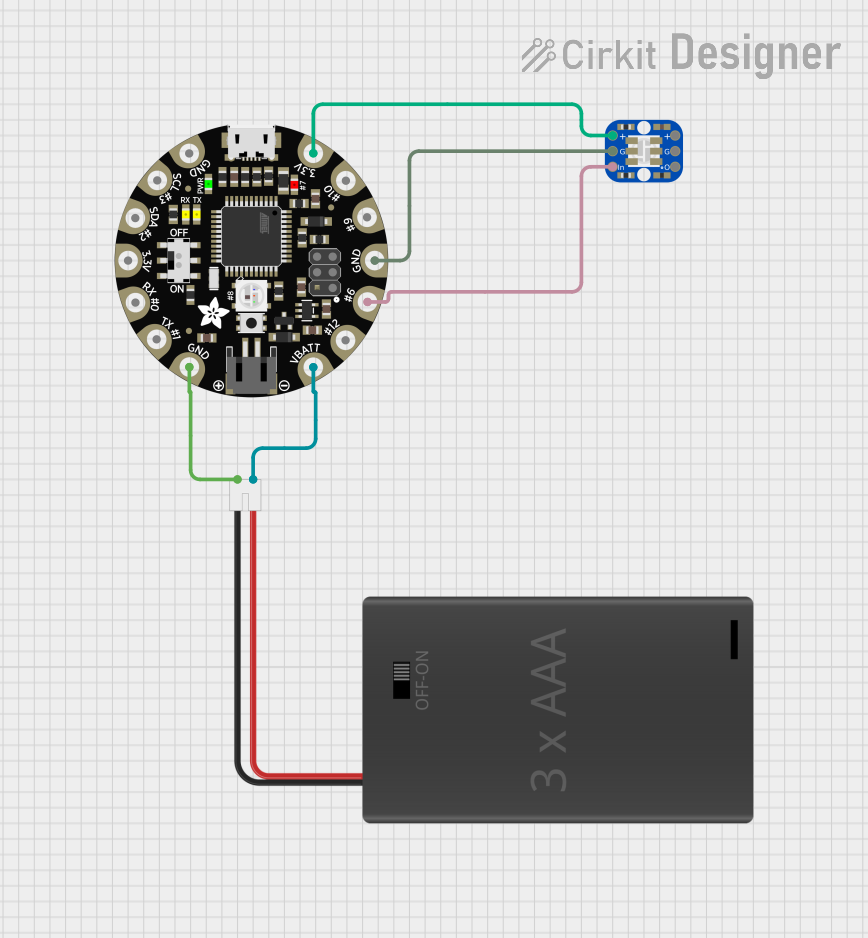
Q: Can I use the NeoPixel Jewel with a 3.3V microcontroller? A: While the NeoPixel Jewel operates at 4-7V, many 3.3V microcontrollers can still control it. However, for reliable operation, level shifting to 5V for the data line is recommended.