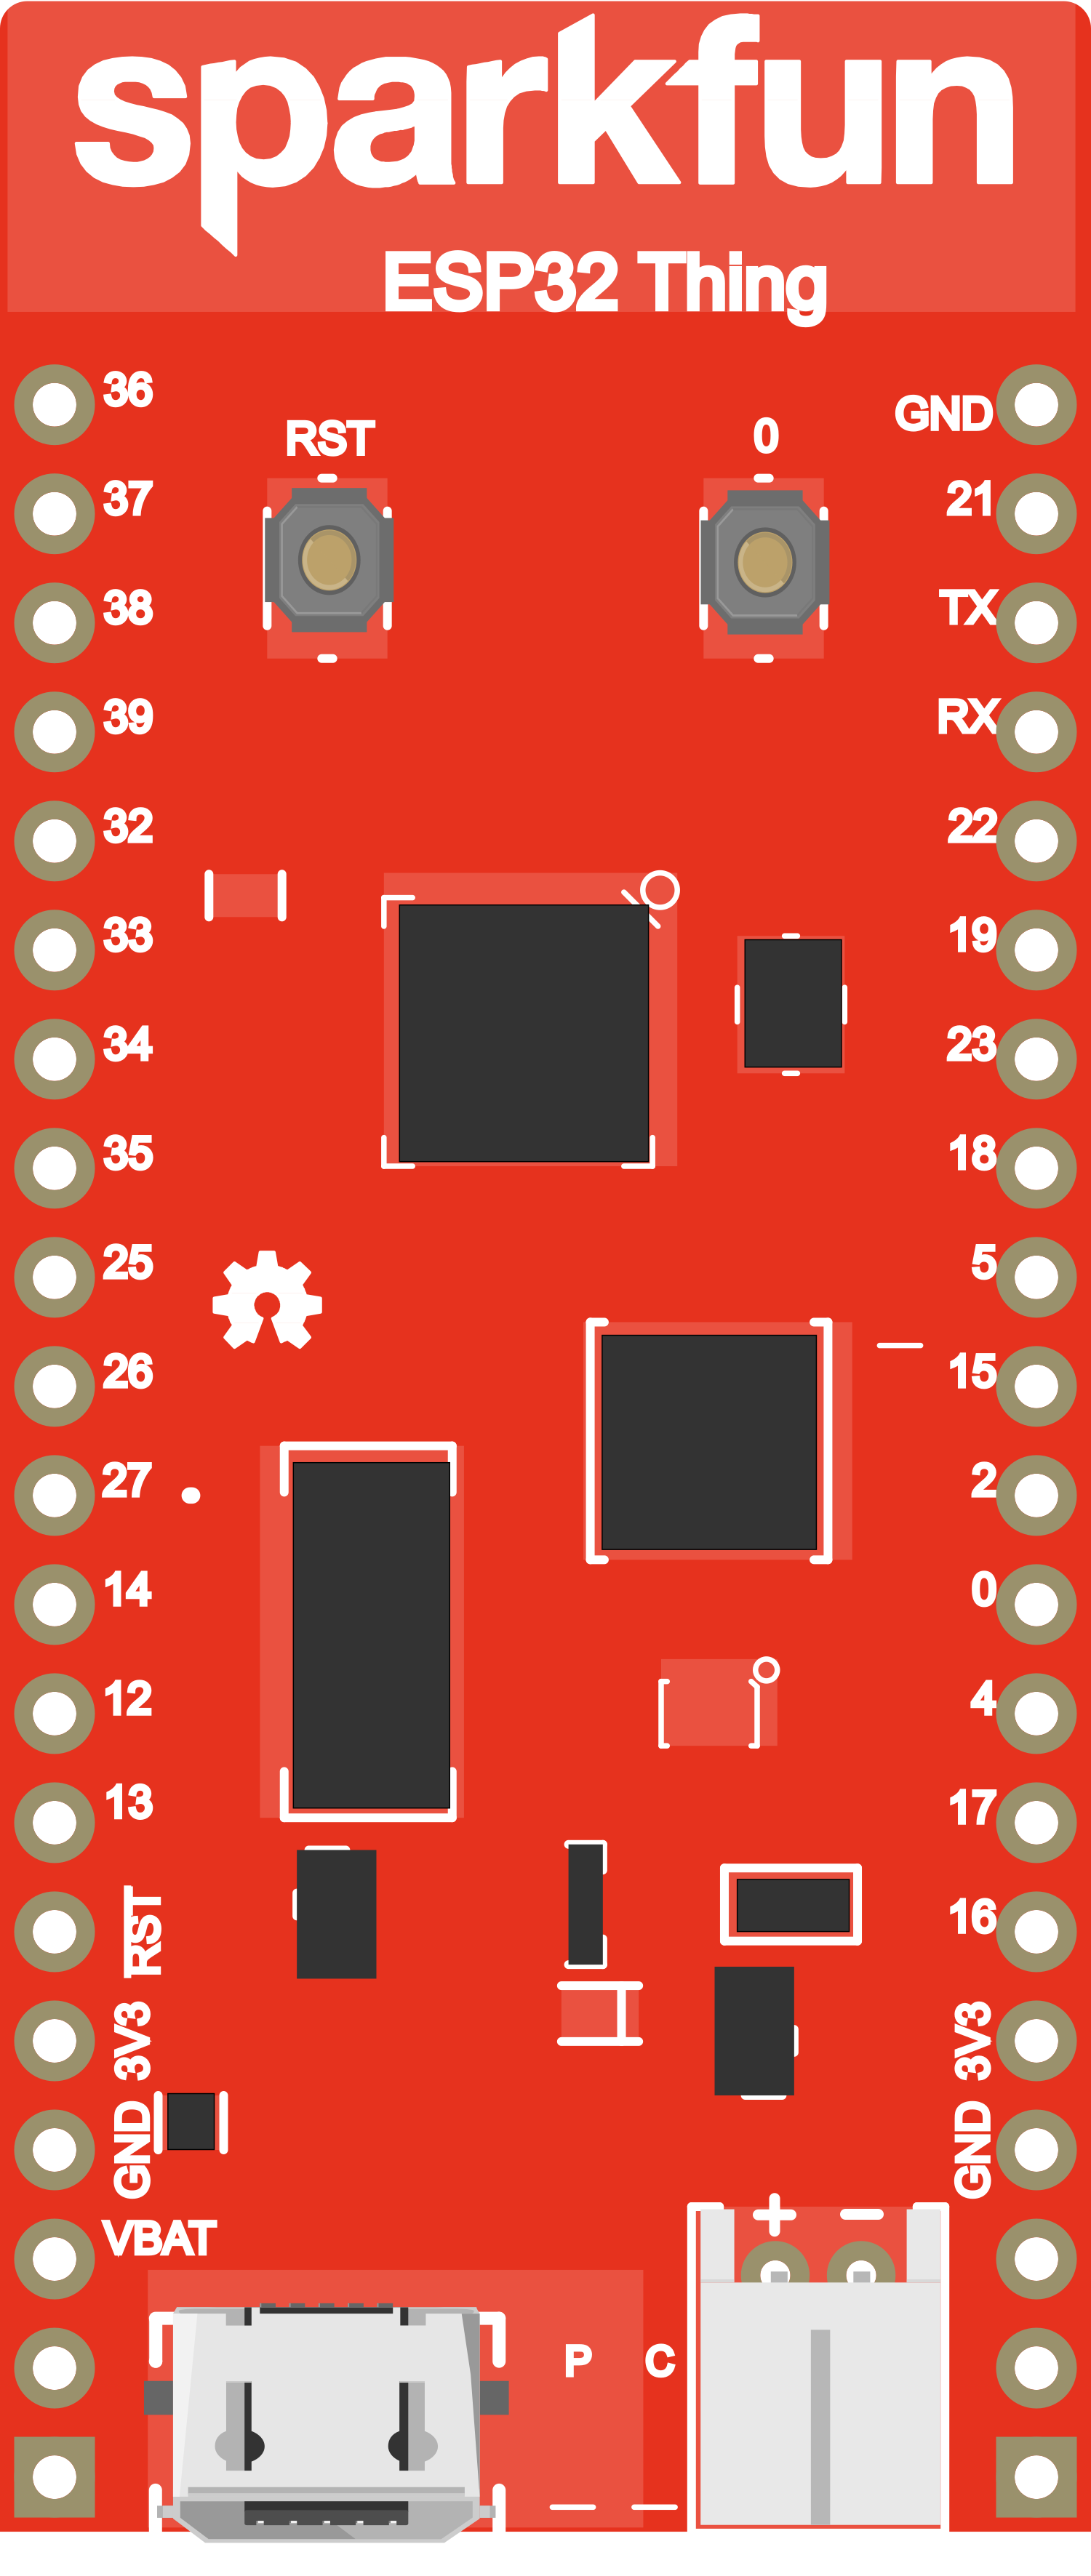
The SparkFun ESP32 Thing is a comprehensive development platform for Espressif's ESP32, their super-charged version of the popular ESP8266. Like the 8266, the ESP32 offers a variety of WiFi and Bluetooth connectivity options, but it also boasts a wide array of additional features. The ESP32 Thing equips the ESP32 with everything necessary to program, run, and develop on the wonderchip. In addition to the WiFi/BLE SoC, the Thing includes an FTDI FT231x, which converts USB to serial, and allows your computer to program and communicate with the microcontroller. It also features a LiPo battery charger, so your ESP32 project can be truly wireless. Additionally, the board includes a handful of LEDs and buttons to aid in your development.
Common applications for the SparkFun ESP32 Thing include:
Internet of Things (IoT) devices
Wearable electronics
Wireless sensor networks
Home automation
Mobile devices
Explore Projects Built with SparkFun ESP32 Thing
Use Cirkit Designer to design, explore, and prototype these projects online. Some projects support real-time simulation. Click "Open Project" to start designing instantly!
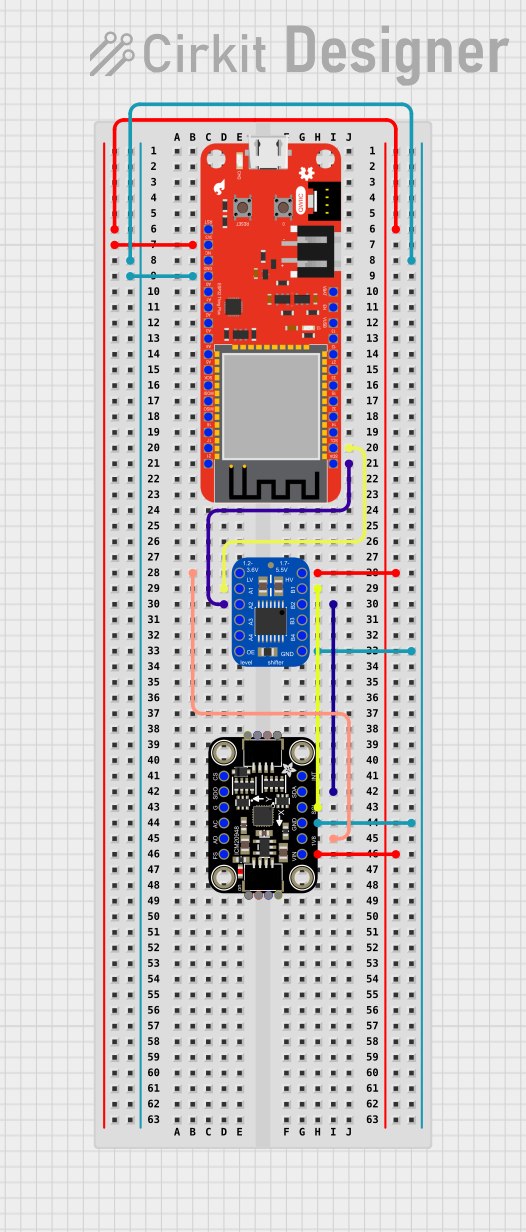
This circuit features a SparkFun ESP32 Thing Plus microcontroller interfaced with an Adafruit ICM20948 9-axis motion sensor via an Adafruit TXB0104 4-channel bi-directional level shifter. The ESP32 reads data from the ICM20948 sensor, calculates orientation angles such as pitch, roll, yaw, and azimuth, and outputs these values to the serial monitor. The level shifter ensures compatibility between the 3.3V logic levels of the ESP32 and the 1.8V logic levels required by the ICM20948.
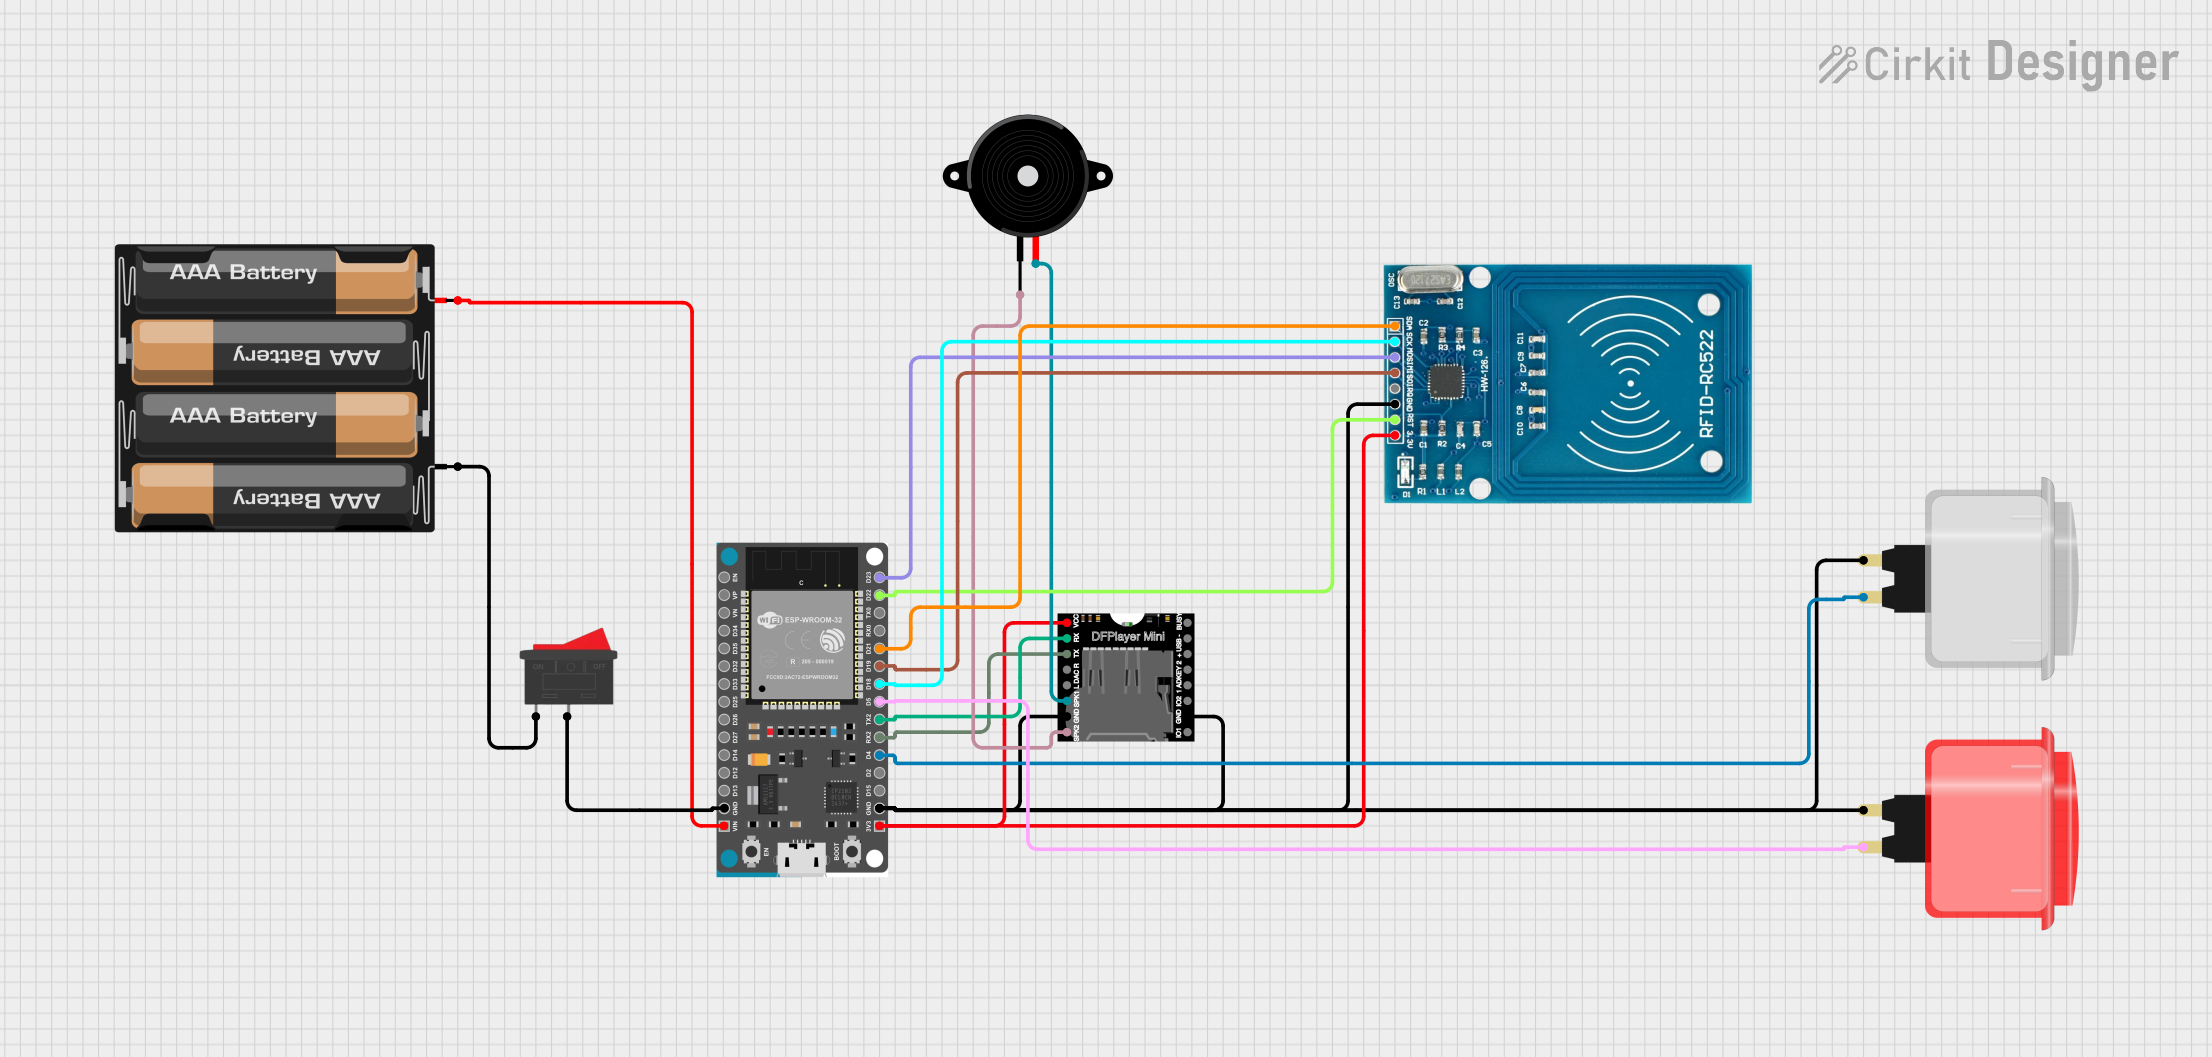
This circuit features an ESP32 Devkit V1 microcontroller interfaced with a DFPlayer Mini MP3 player module, an RFID-RC522 reader, a piezo speaker, and two arcade buttons. The ESP32 controls audio playback through the DFPlayer Mini, which is connected to the speaker, and uses the RFID reader to trigger specific audio tracks based on RFID tag data. The arcade buttons are used to control playback and adjust volume, while a rocker switch and battery mount provide power management.
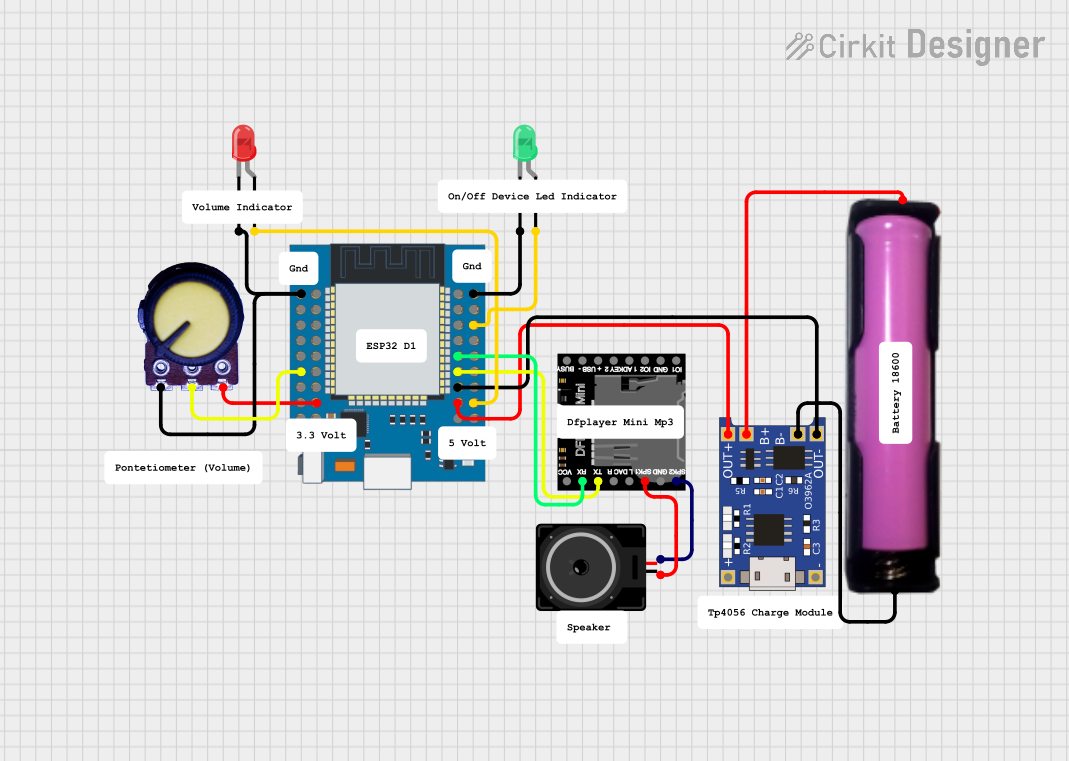
This circuit features an ESP32 Mini microcontroller connected to a DFPlayer Mini MP3 module for audio playback, with a loudspeaker attached for sound output. The ESP32 controls two LEDs (green and red) and reads an analog value from a potentiometer. Power management is handled by a TP4056 charging module connected to an 18650 battery, providing power to the ESP32 and other components.
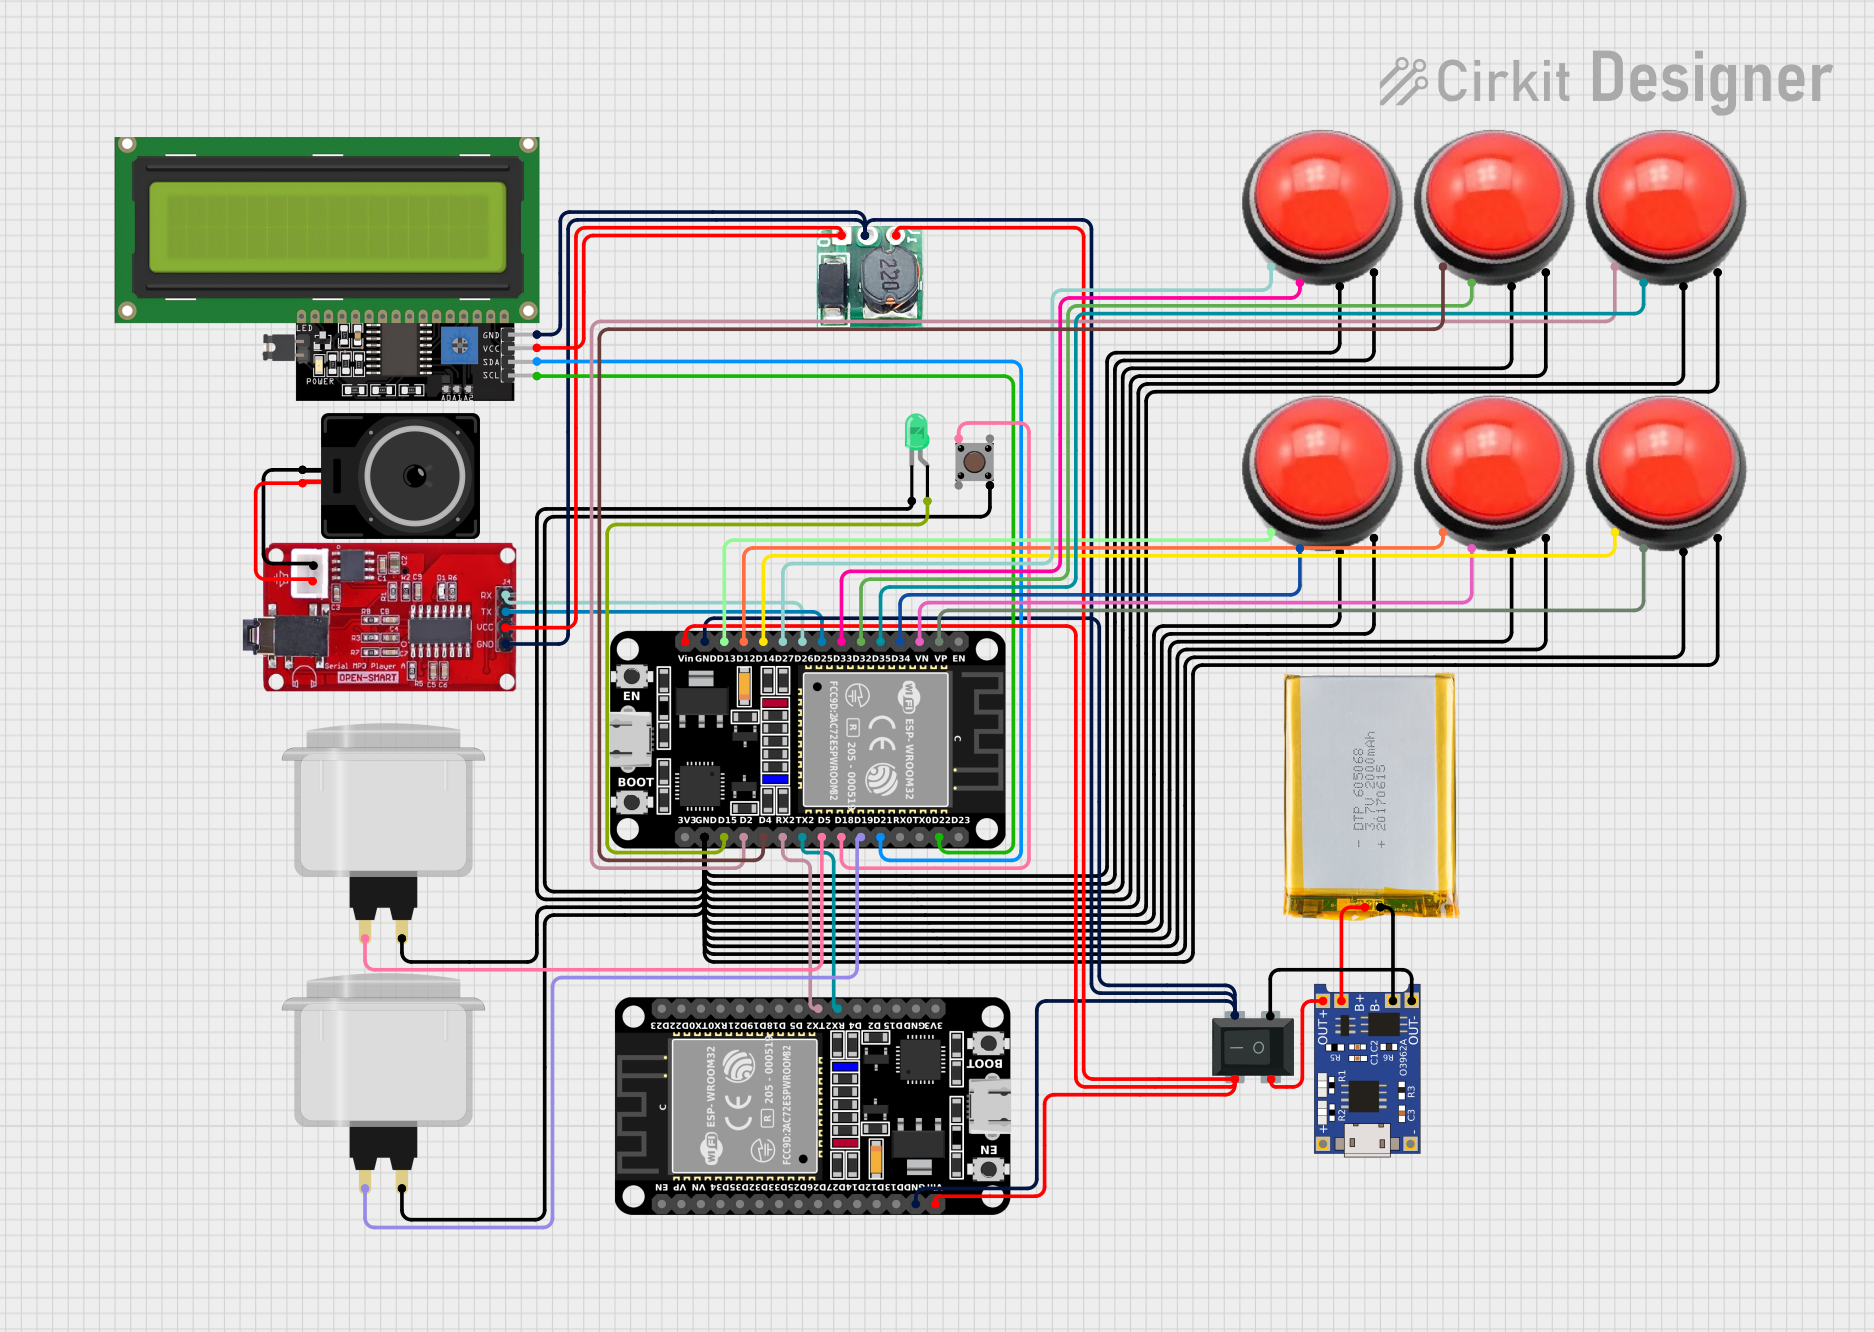
This is a microcontroller-based interactive device featuring an ESP32 for control, a Serial MP3 Player for audio output, an LCD display for user interface, and various buttons for input. It includes a battery with a charging module and voltage regulation, and uses a rocker switch for power control. The system's functionality is determined by the embedded code, which is currently a placeholder for future development.
Note: This is a simplified representation of the pin configuration. Please refer to the official datasheet for a complete pinout and function list.
Usage Instructions
How to Use the Component in a Circuit
To use the SparkFun ESP32 Thing in a circuit:
Connect the micro USB cable to the board and your computer to provide power and programming capability.
Ensure that the board's drivers are installed on your computer.
Use the GPIO pins to connect sensors, actuators, and other components.
Program the board using the Arduino IDE or other compatible development environments.
Important Considerations and Best Practices
Always ensure that the power supply is within the recommended limits to prevent damage.
When connecting external components, make sure they are compatible with the board's operating voltage.
Use a current limiting resistor when connecting LEDs to GPIO pins.
Avoid drawing more than 12 mA from any GPIO pin.
To reduce noise and power consumption, disable WiFi/BLE when not in use.
Example Code for Arduino UNO
#include "WiFi.h"

// Replace with your network credentials
const char* ssid = "your_SSID";
const char* password = "your_PASSWORD";

void setup() {
  Serial.begin(115200);

  // Connect to Wi-Fi
  WiFi.begin(ssid, password);
  while (WiFi.status() != WL_CONNECTED) {
    delay(500);
    Serial.println("Connecting to WiFi...");
  }
  Serial.println("Connected to WiFi");
}

void loop() {
  // Put your main code here, to run repeatedly:
}
Troubleshooting and FAQs
Common Issues
Board not recognized by computer: Ensure that the USB cable is properly connected and that the drivers are installed.
Unable to connect to WiFi: Verify that the SSID and password are correct and that the WiFi signal is within range.
GPIO pin not functioning: Check that the pin is not being used by another process and that it is configured correctly in your code.
Solutions and Tips for Troubleshooting
If the board is not recognized, try using a different USB cable or port.
For WiFi issues, ensure that the antenna is not obstructed and that the board is not enclosed in a metal case.
Use the Serial.print() function to debug and track down issues in your code.
FAQs
Q: Can the ESP32 Thing be powered by a battery?
A: Yes, it has an onboard LiPo battery charger.
Q: Is the ESP32 Thing compatible with Arduino IDE?
A: Yes, it can be programmed using the Arduino IDE with the appropriate board package installed.
Q: How many GPIO pins does the ESP32 Thing have?
A: It has 21 digital I/O pins and 18 analog input pins.
Q: What is the maximum voltage that can be applied to the GPIO pins?
A: The maximum voltage for any I/O pin is 3.3V.
Q: Can the ESP32 Thing be used for Bluetooth applications?
A: Yes, it supports Bluetooth v4.2 BR/EDR and BLE.
Remember to always refer to the official SparkFun ESP32 Thing documentation for the most accurate and detailed information.

 Open Project in Cirkit Designer