How to Use mmWave Human Static Presence Sensor: Examples, Pinouts, and Specs
Introduction
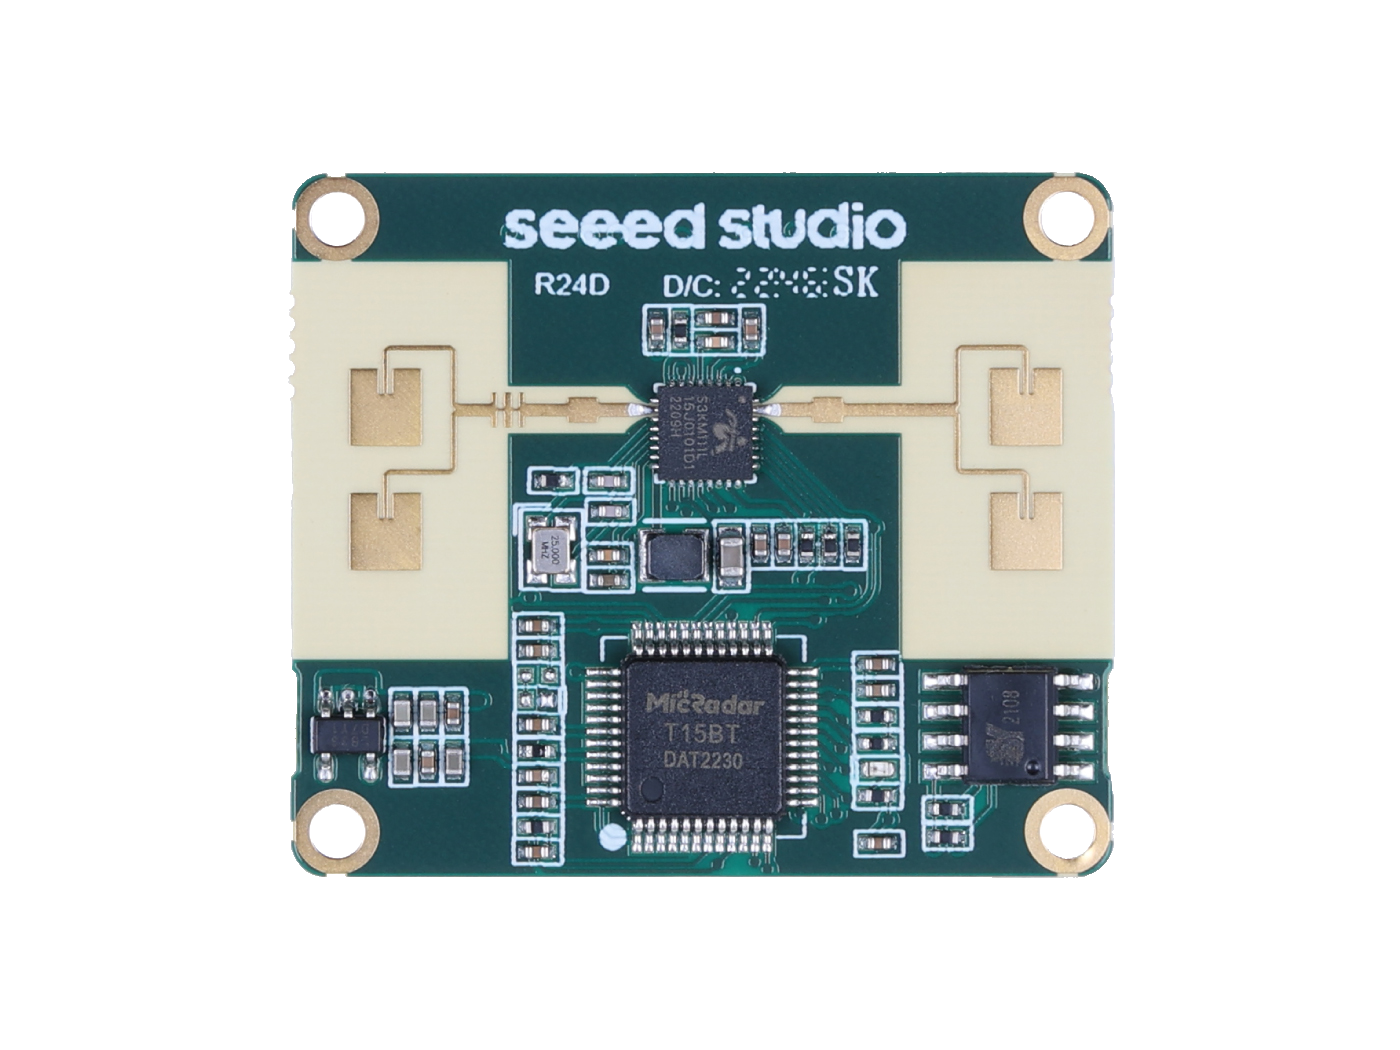
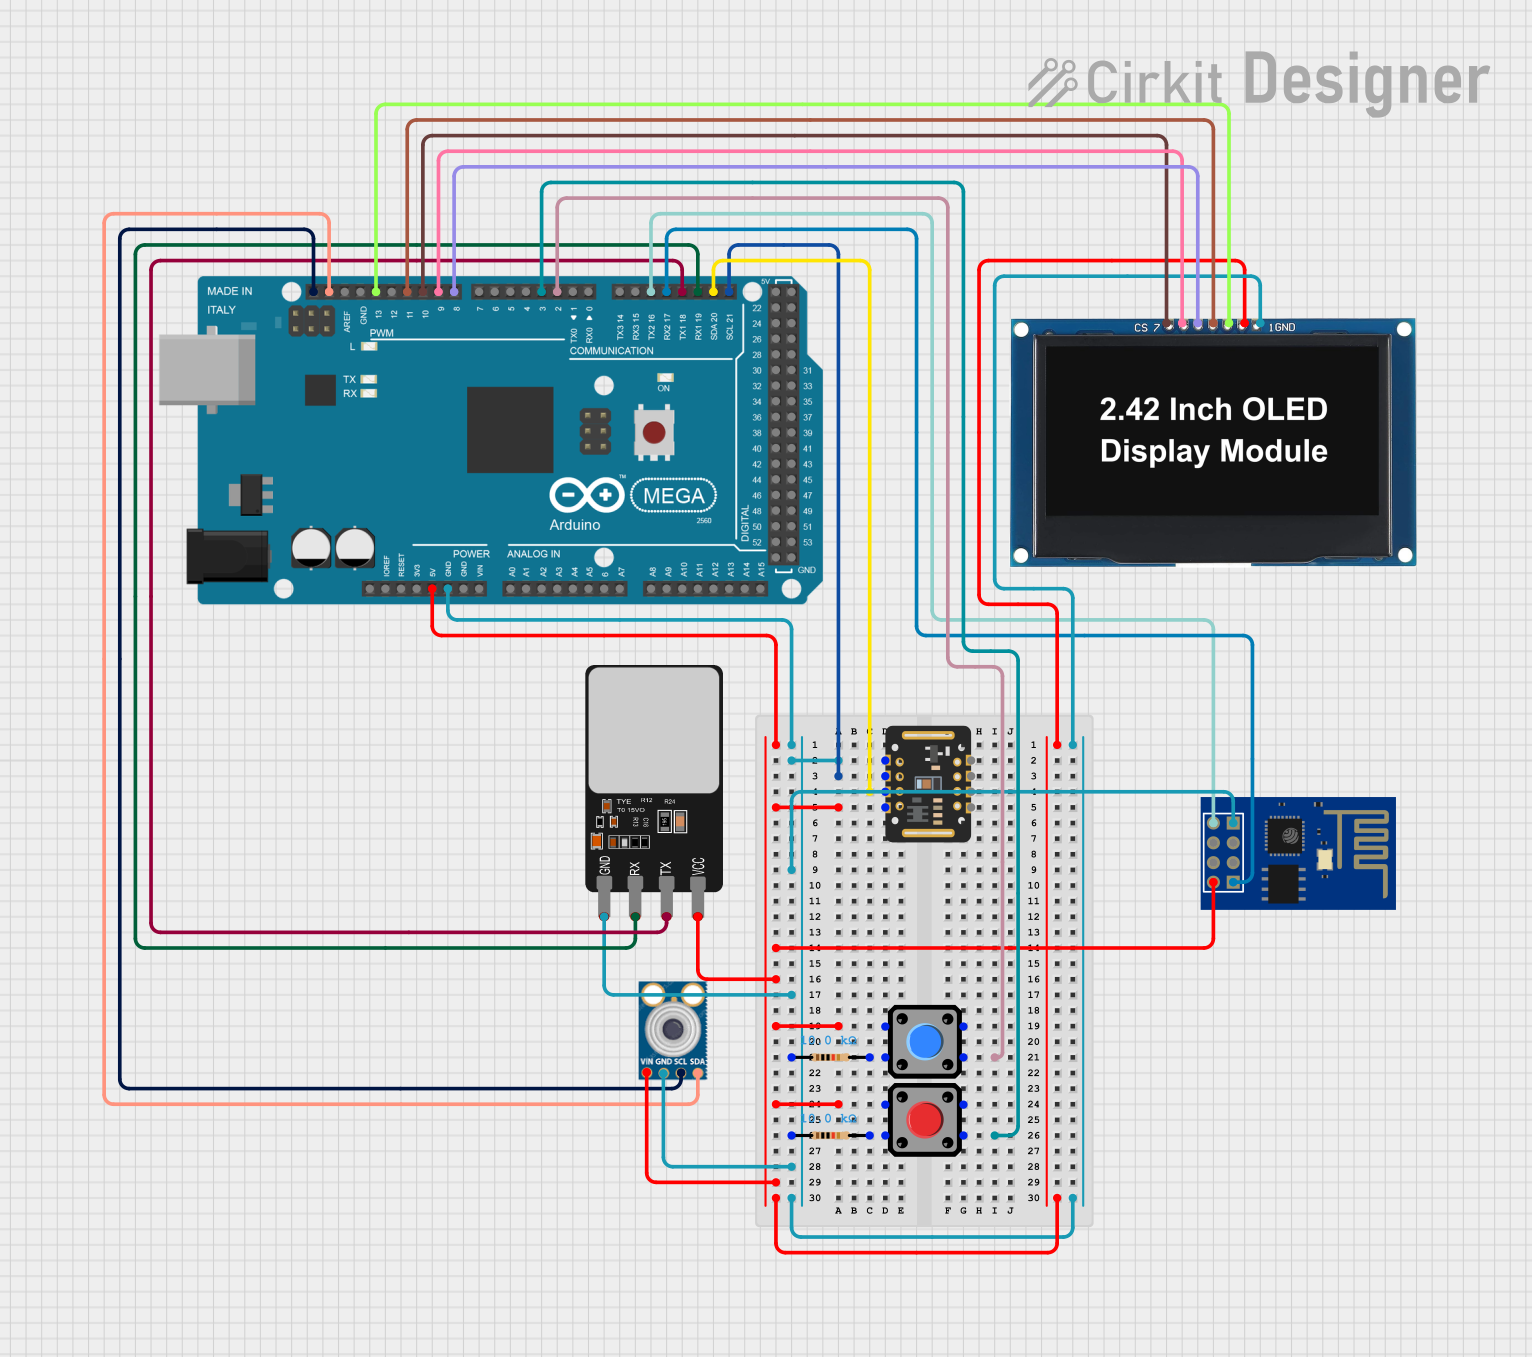
The Grove - mmWave Human Static Presence Sensor (MR24HPC1) is a highly sensitive sensor that utilizes millimeter-wave (mmWave) technology to detect the presence of humans, even when they are stationary. Unlike traditional motion sensors, this sensor can identify static human presence, making it ideal for applications where detecting subtle human presence is critical.
Explore Projects Built with mmWave Human Static Presence Sensor
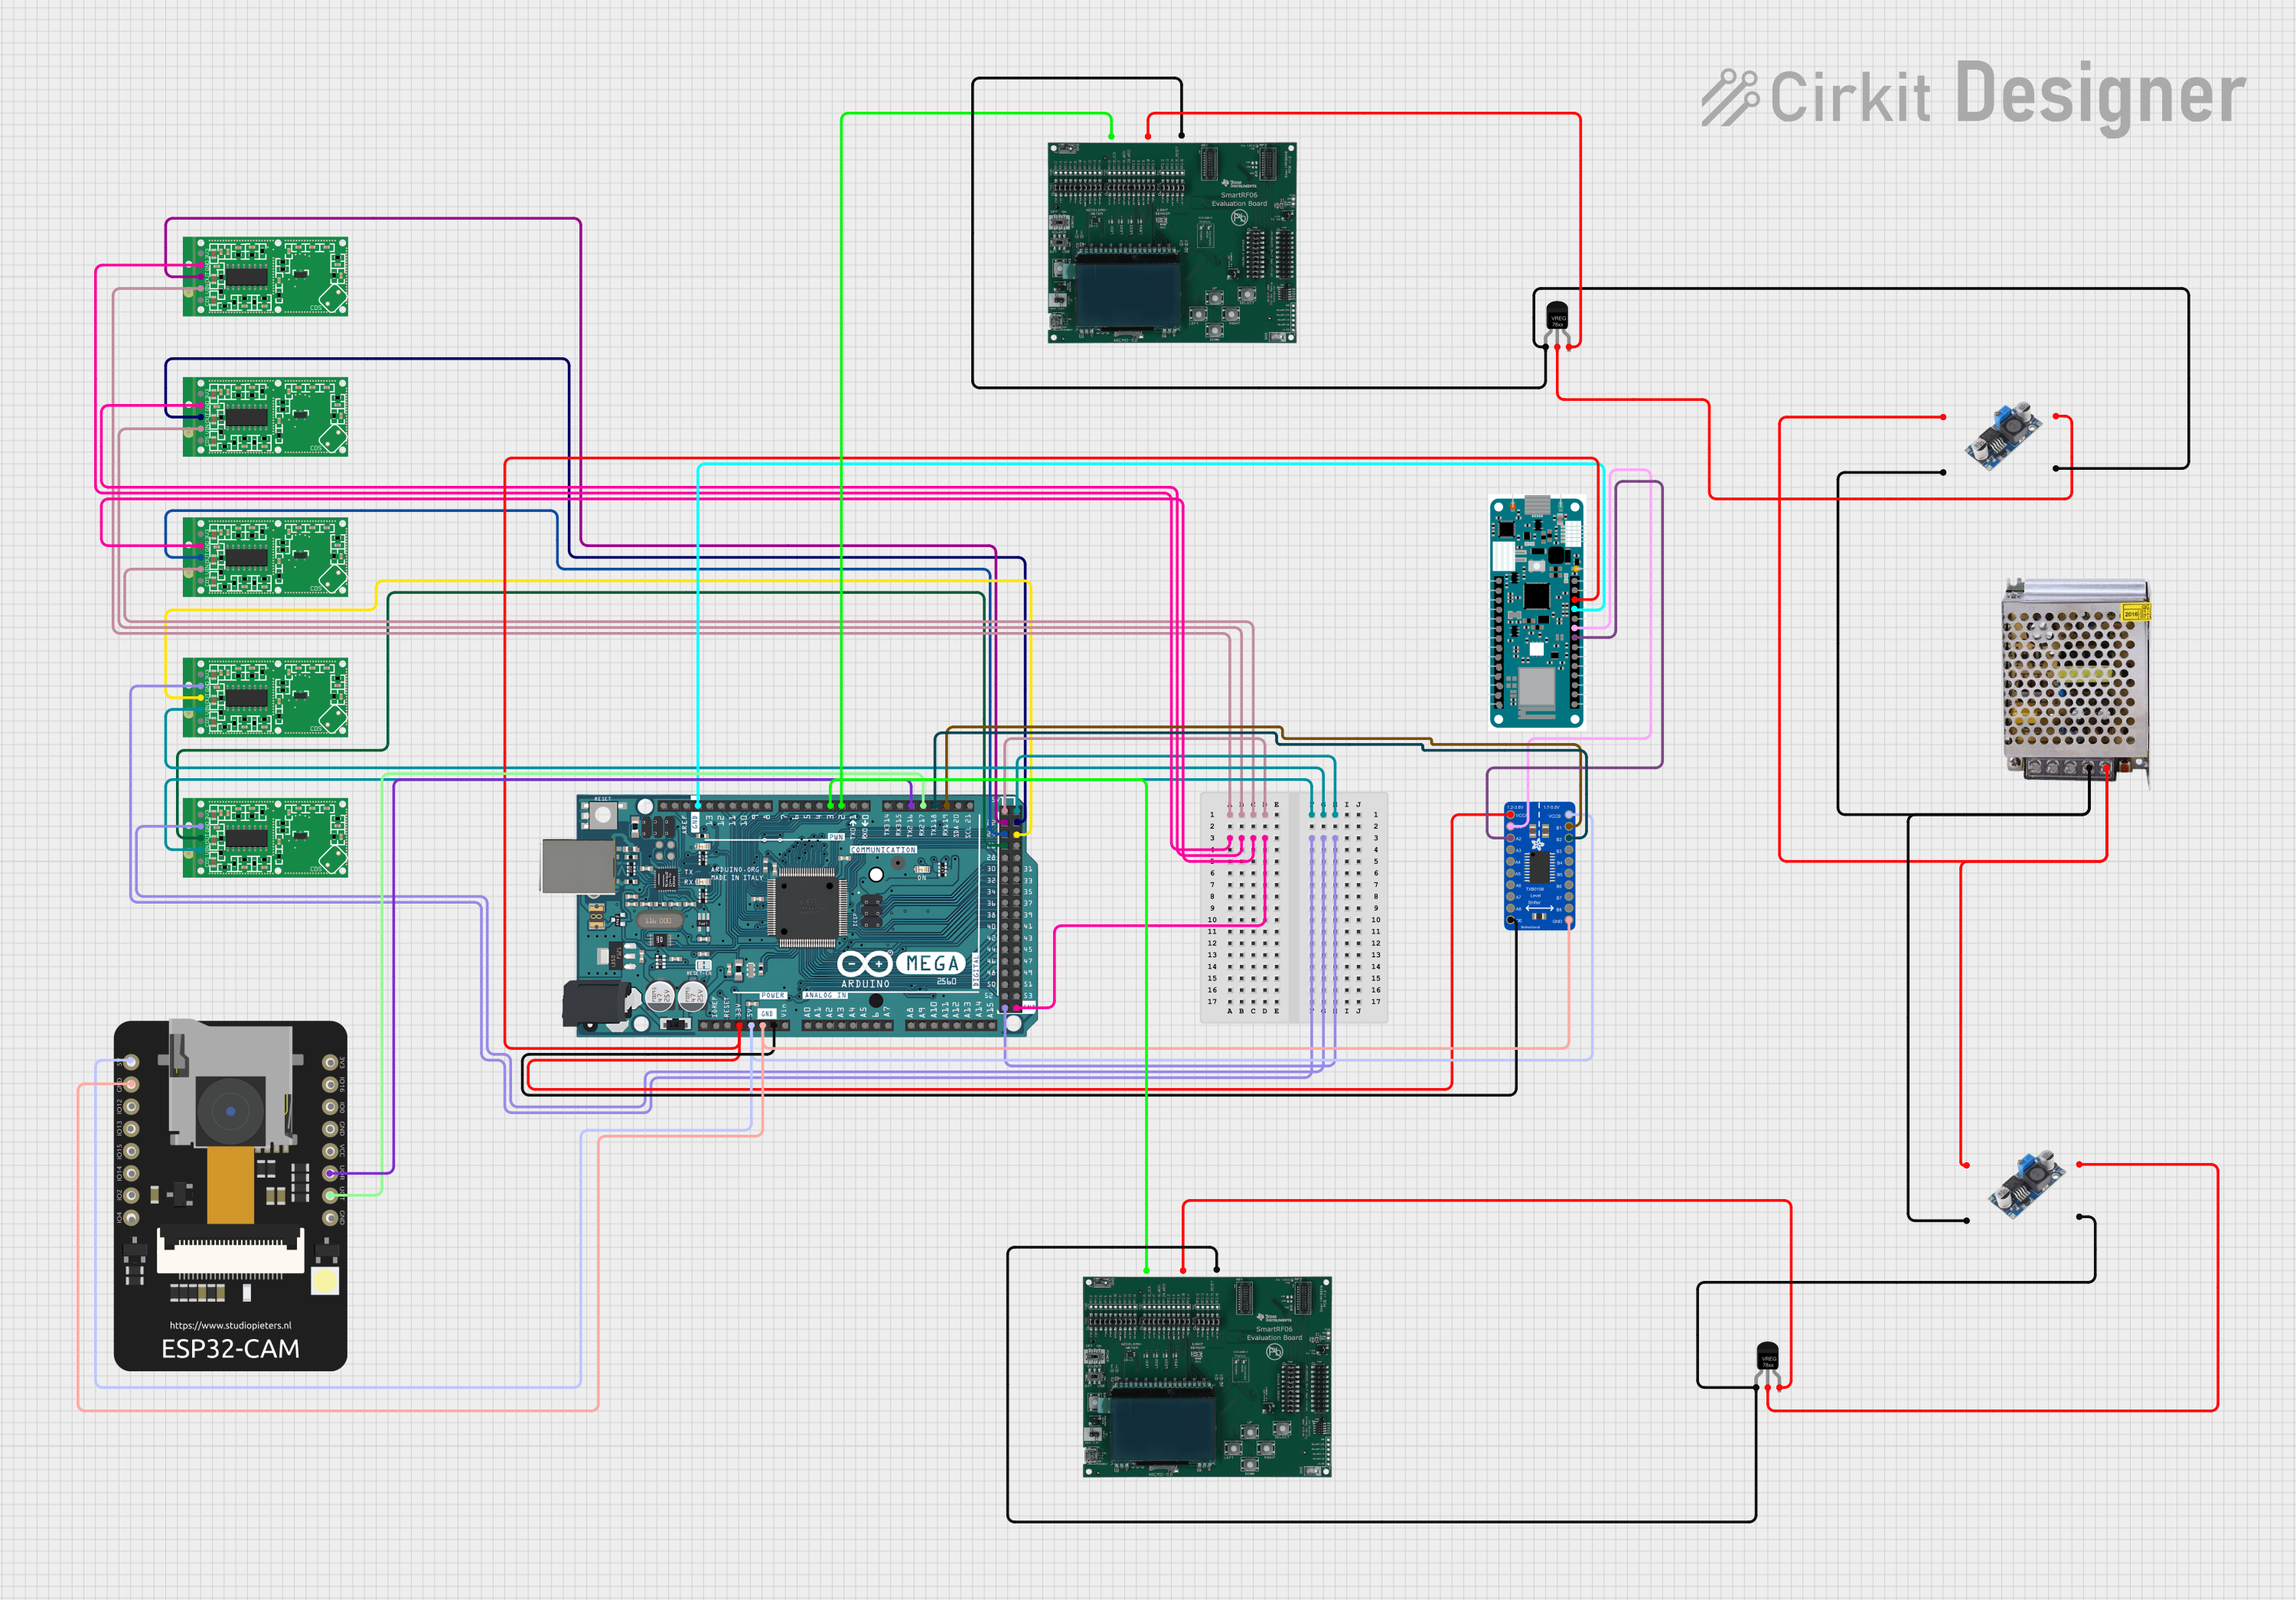
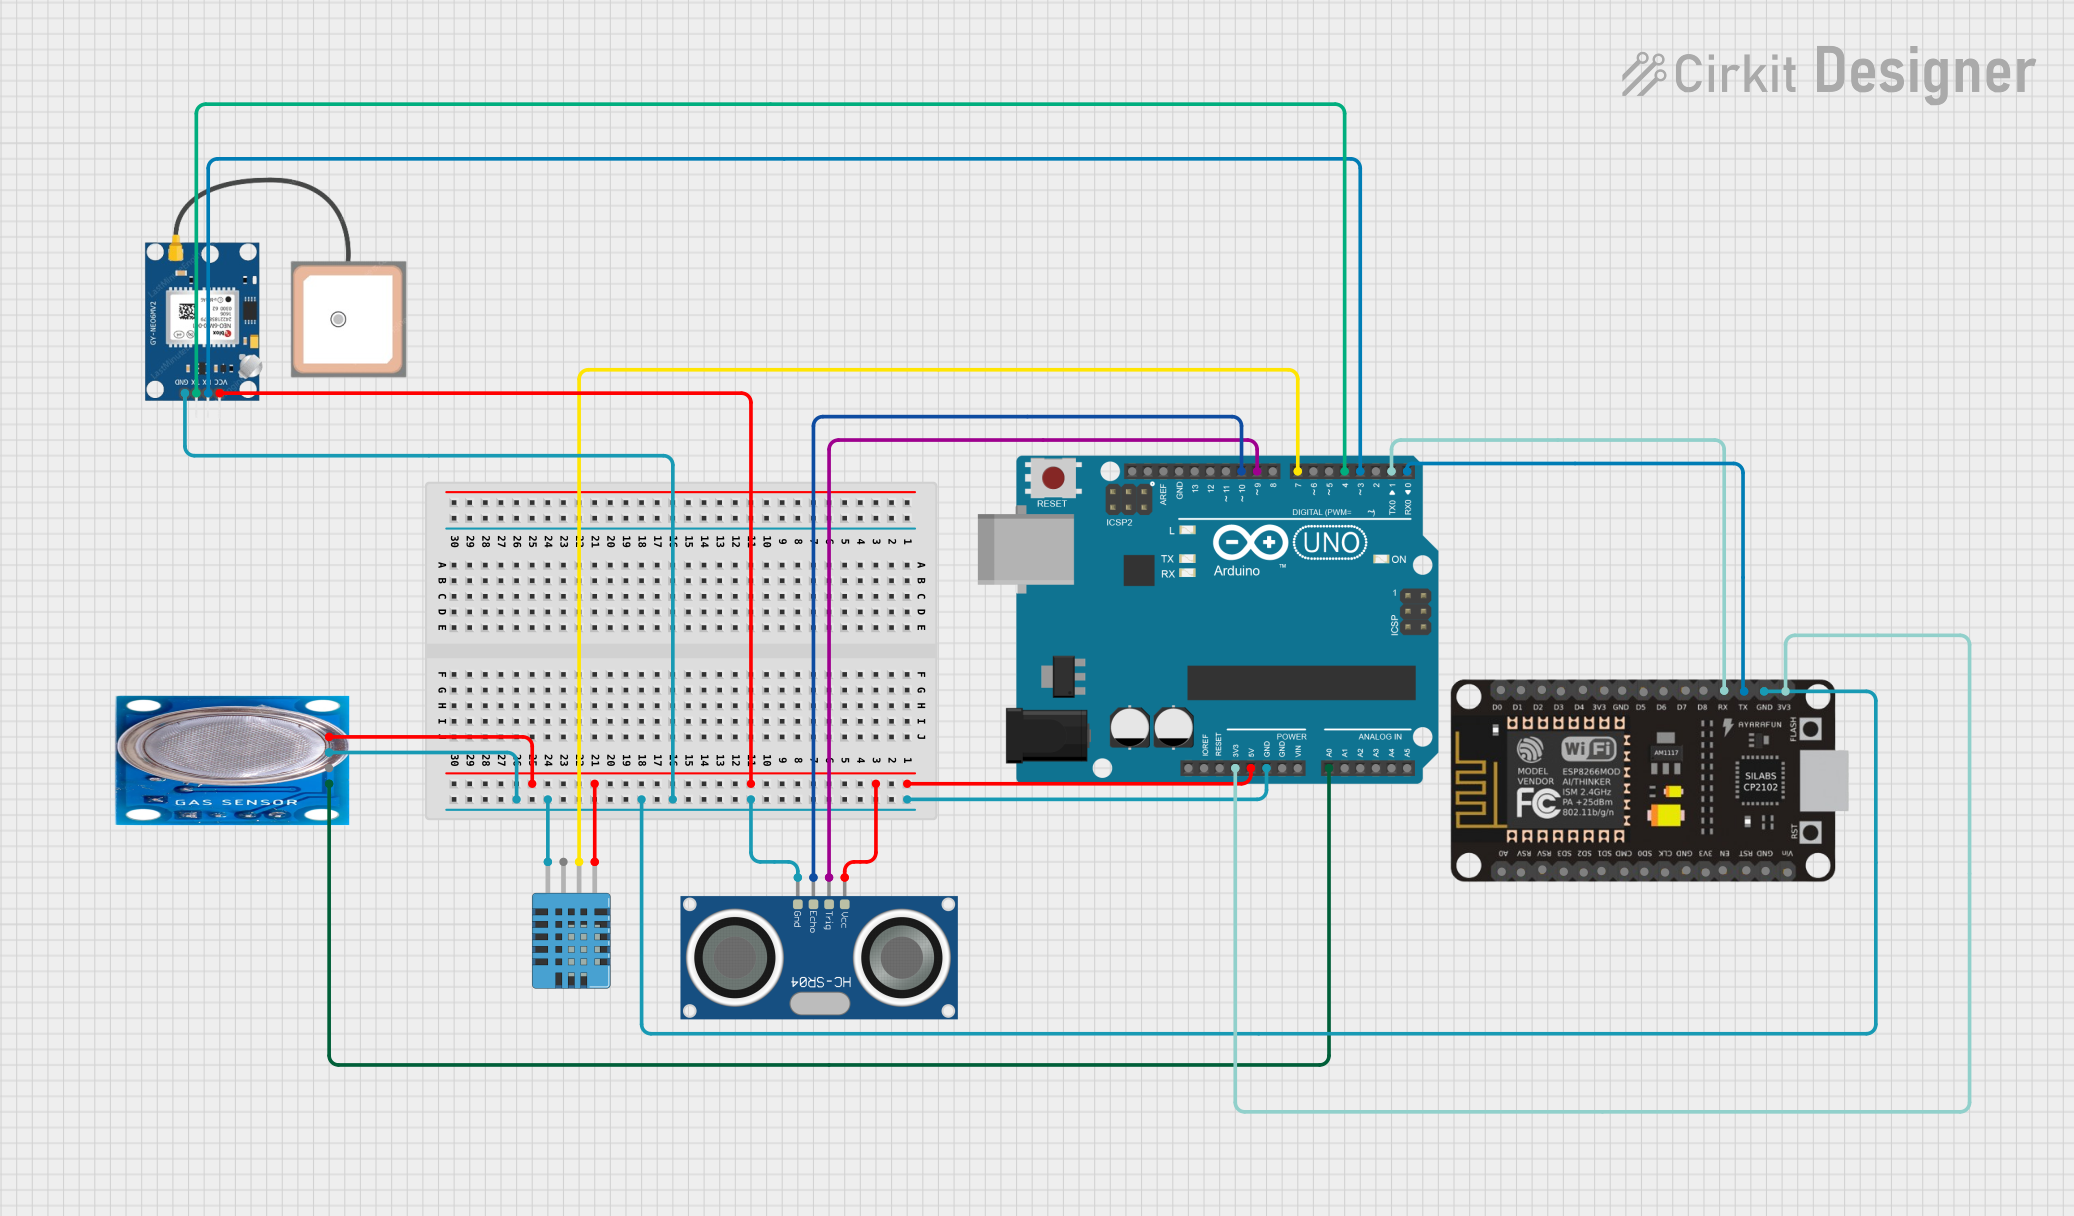
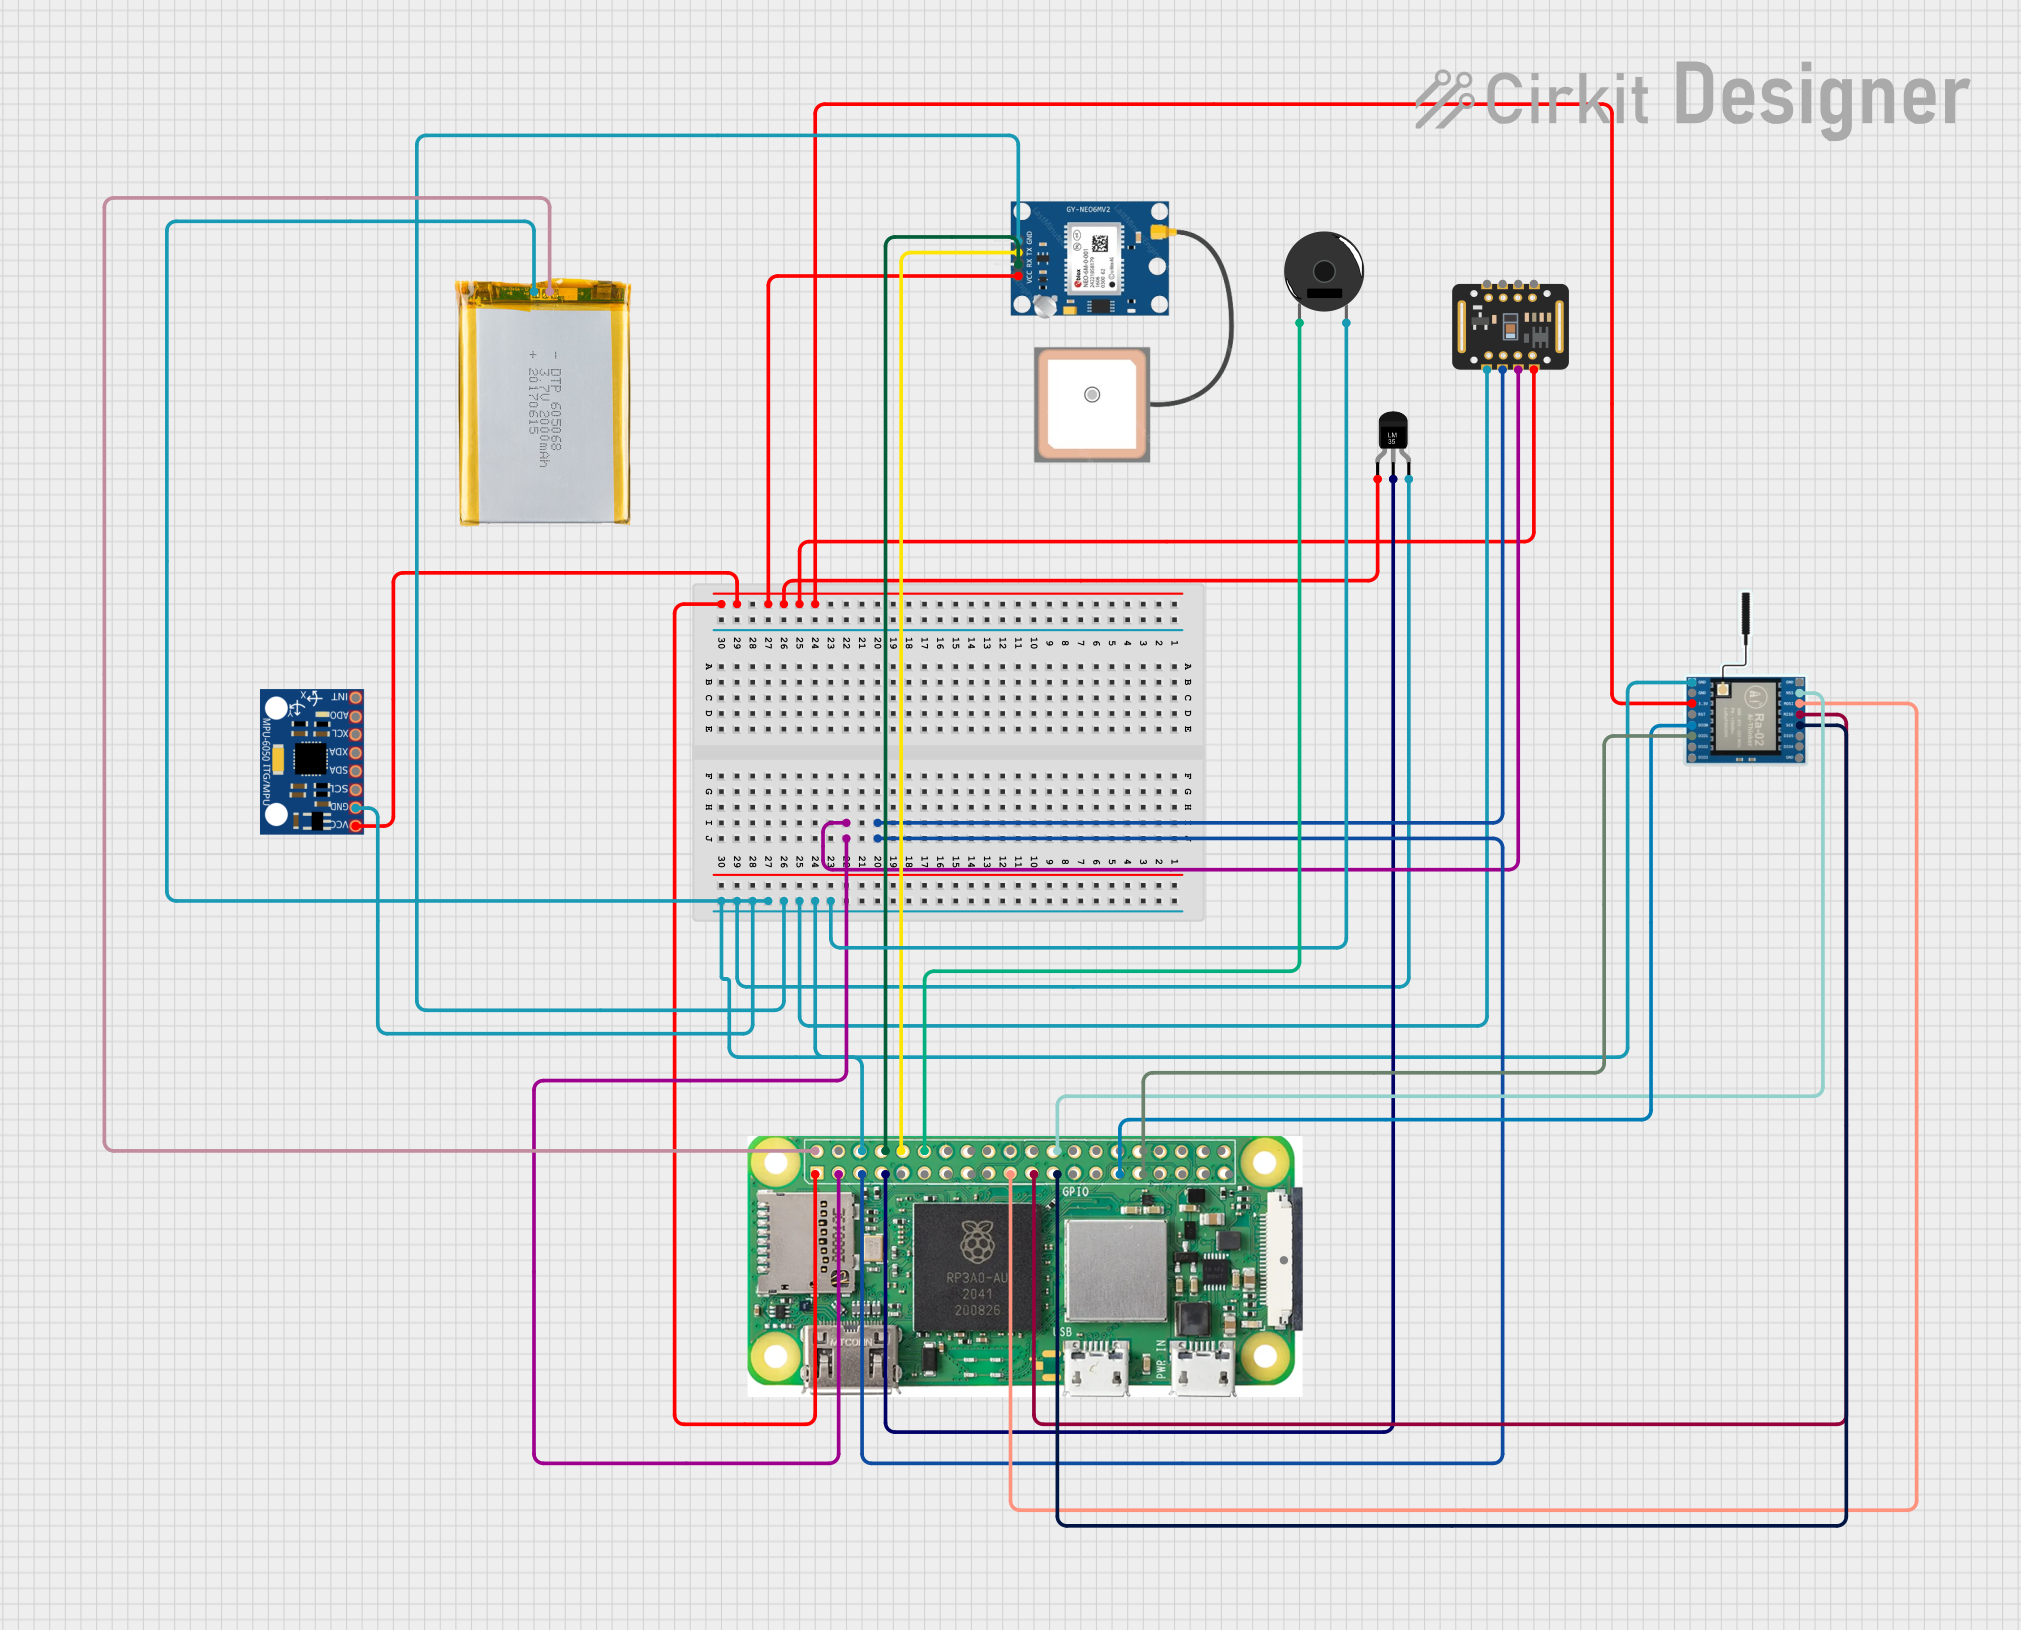
Explore Projects Built with mmWave Human Static Presence Sensor
Common Applications and Use Cases
- Smart Home Automation: Automatically control lighting, HVAC systems, or appliances based on human presence.
- Security Systems: Detect intruders or monitor restricted areas for unauthorized presence.
- Energy Management: Optimize energy usage by detecting occupancy in rooms or buildings.
- Healthcare Monitoring: Monitor patients or elderly individuals for safety and well-being.
- Office Automation: Enable smart workspaces by detecting occupancy for resource allocation.
Technical Specifications
The following table outlines the key technical details of the MR24HPC1 sensor:
| Parameter | Value |
|---|---|
| Operating Voltage | 5V DC |
| Operating Current | ≤ 60mA |
| Detection Range | 0.5m to 9m |
| Detection Angle | 120° (Horizontal), 100° (Vertical) |
| Communication Interface | UART (3.3V TTL) |
| Operating Frequency | 24GHz |
| Operating Temperature | -40°C to 85°C |
| Dimensions | 20mm x 20mm |
Pin Configuration and Descriptions
The MR24HPC1 sensor has a 4-pin Grove interface. The pinout is as follows:
| Pin | Name | Description |
|---|---|---|
| 1 | VCC | Power supply input (5V DC) |
| 2 | GND | Ground |
| 3 | RX | UART Receive pin (3.3V TTL) |
| 4 | TX | UART Transmit pin (3.3V TTL) |
Usage Instructions
How to Use the Sensor in a Circuit
- Power the Sensor: Connect the VCC pin to a 5V power source and the GND pin to ground.
- Connect UART Interface: Use the RX and TX pins to communicate with a microcontroller or computer. Ensure the UART voltage level is 3.3V to avoid damaging the sensor.
- Mount the Sensor: Place the sensor in a location with a clear line of sight to the area you want to monitor. Avoid obstructions that may interfere with mmWave signals.
- Read Data: Use a microcontroller (e.g., Arduino UNO) or a UART-to-USB converter to read the sensor's output. The sensor provides presence detection data via the UART interface.
Important Considerations and Best Practices
- Avoid Interference: Keep the sensor away from metal objects or other mmWave devices to minimize signal interference.
- Optimal Placement: Mount the sensor at a height of 1.5m to 2.5m for best detection performance.
- Power Supply: Use a stable 5V power source to ensure reliable operation.
- UART Voltage Levels: If using a 5V microcontroller, use a level shifter to convert the UART signals to 3.3V.
Example Code for Arduino UNO
Below is an example of how to interface the MR24HPC1 sensor with an Arduino UNO:
#include <SoftwareSerial.h>

// Define RX and TX pins for SoftwareSerial
SoftwareSerial mmWaveSerial(2, 3); // RX = Pin 2, TX = Pin 3

void setup() {
  Serial.begin(9600); // Initialize Serial Monitor at 9600 baud
  mmWaveSerial.begin(115200); // Initialize mmWave sensor at 115200 baud

  Serial.println("mmWave Human Static Presence Sensor Initialized");
}

void loop() {
  // Check if data is available from the sensor
  if (mmWaveSerial.available()) {
    String sensorData = ""; // Variable to store sensor data

    // Read all available data from the sensor
    while (mmWaveSerial.available()) {
      char c = mmWaveSerial.read();
      sensorData += c;
    }

    // Print the received data to the Serial Monitor
    Serial.println("Sensor Data: " + sensorData);
  }

  delay(100); // Small delay to avoid overwhelming the Serial Monitor
}
Notes on the Code
- The
SoftwareSeriallibrary is used to create a secondary UART interface on pins 2 and 3 of the Arduino UNO. - The sensor communicates at a baud rate of 115200, so ensure the correct baud rate is set in the code.
- The received data can be parsed further based on the sensor's communication protocol.
Troubleshooting and FAQs
Common Issues and Solutions
No Data Received from the Sensor
- Solution: Check the UART connections (RX and TX). Ensure the RX pin of the Arduino is connected to the TX pin of the sensor and vice versa.
- Solution: Verify that the sensor is powered correctly (5V on VCC and GND connected).
Incorrect or Garbled Data
- Solution: Ensure the baud rate in the code matches the sensor's default baud rate (115200).
- Solution: Check for loose or faulty connections in the UART interface.
Sensor Not Detecting Presence
- Solution: Ensure the sensor is mounted in a location with a clear line of sight to the monitored area.
- Solution: Verify that the detection range (0.5m to 9m) and angle (120° horizontal, 100° vertical) are appropriate for your application.
FAQs
Q: Can the sensor detect multiple people in the same area?
A: The sensor is optimized for detecting human presence but does not differentiate between multiple individuals.
Q: Is the sensor affected by environmental conditions?
A: The sensor is designed to operate in a wide temperature range (-40°C to 85°C) and is generally unaffected by lighting or weather conditions. However, large metal objects or other mmWave devices may cause interference.
Q: Can I use the sensor with a 5V UART interface?
A: No, the sensor's UART interface operates at 3.3V. Use a level shifter if connecting to a 5V microcontroller.
By following this documentation, you can effectively integrate the Grove - mmWave Human Static Presence Sensor (MR24HPC1) into your projects for reliable human presence detection.