Cirkit Designer LogoCirkit DesignerYour all-in-one circuit design IDE Launch Cirkit Designer App

How to Use LC Studio SD Card Module: Examples, Pinouts, and Specs

Image of LC Studio SD Card ModuleDesign with LC Studio SD Card Module in Cirkit Designer

Introduction

The LC Studio SD Card Module is an electronic component designed to facilitate easy interfacing between a microcontroller, such as an Arduino UNO, and an SD card. This module is commonly used in data logging applications, multimedia projects, and any scenario where large amounts of data need to be stored and accessed by a microcontroller.

Explore Projects Built with LC Studio SD Card Module

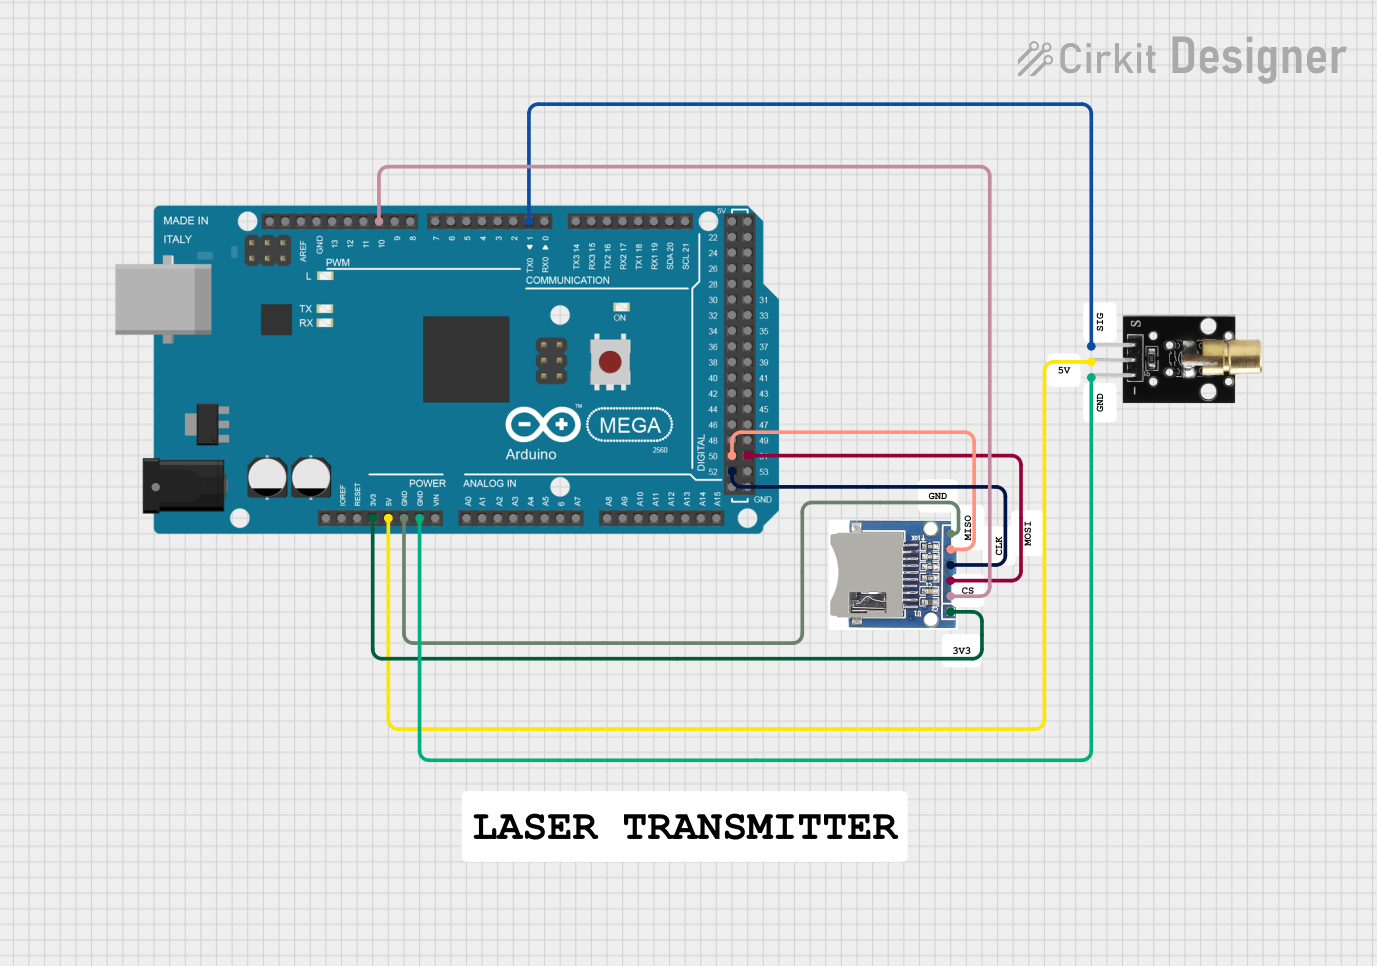
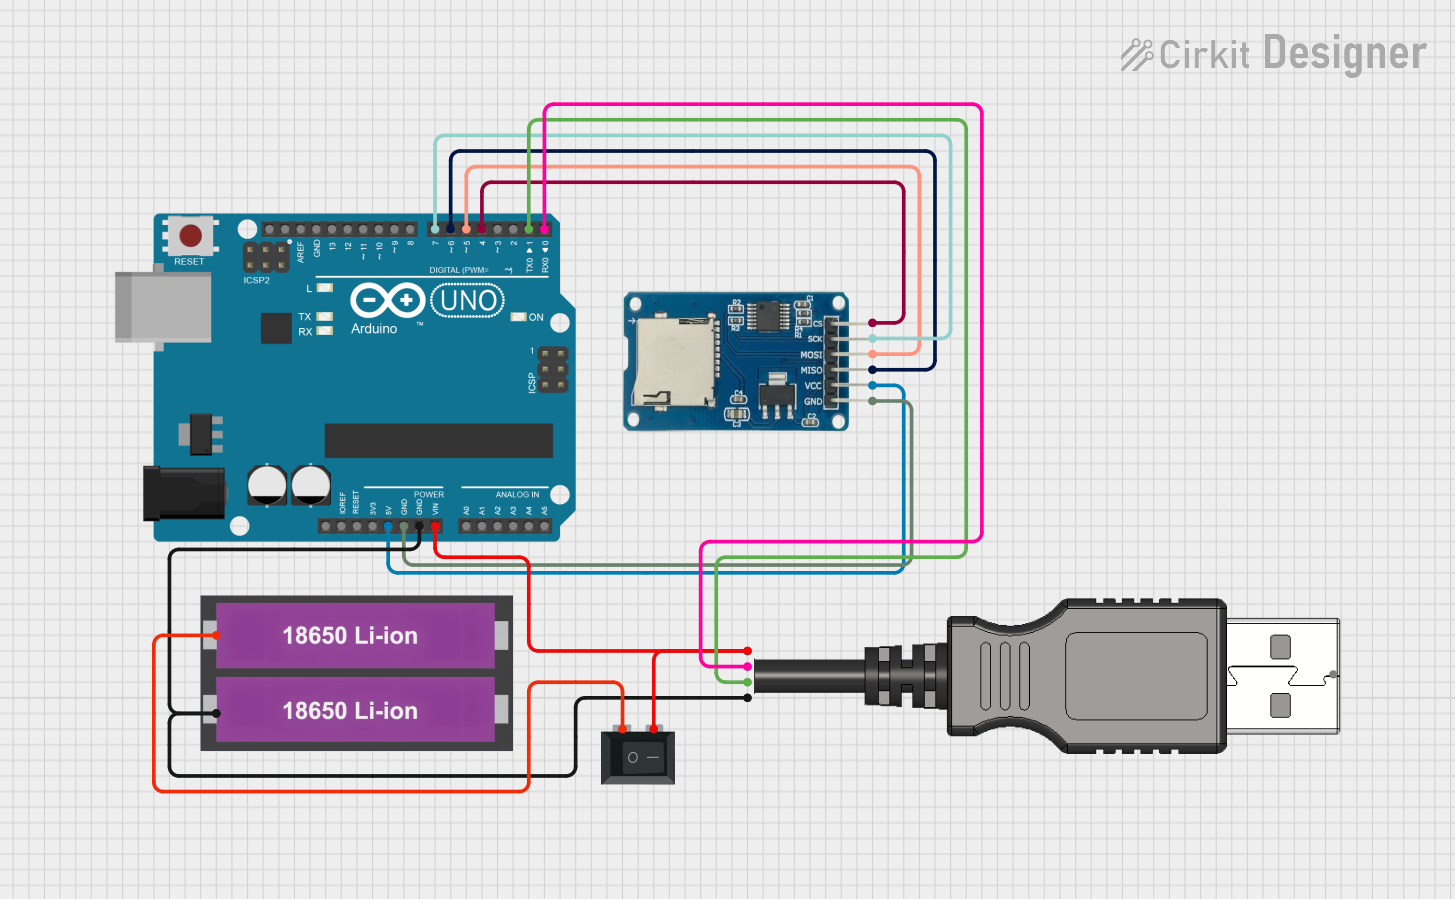
Use Cirkit Designer to design, explore, and prototype these projects online. Some projects support real-time simulation. Click "Open Project" to start designing instantly!
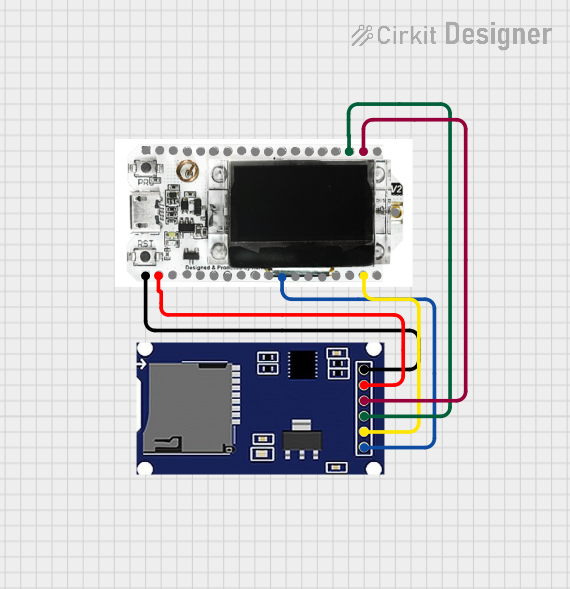
Image of Heltec LoRa V2 with SD Card Data Logging: A project utilizing LC Studio SD Card Module in a practical application
Heltec LoRa V2 with SD Card Data Logging

This circuit connects an SD card module to a Heltec LoRa V2 microcontroller for data storage and retrieval. The SD module is interfaced with the microcontroller via SPI communication, utilizing the CS, SCK, MOSI, and MISO pins. Power is supplied to the SD module from the microcontroller's 5V output, and both modules share a common ground.

Open Project in Cirkit Designer

Common Applications and Use Cases

Technical Specifications

Key Technical Details

Pin Configuration and Descriptions

Pin Label Description
CS Chip Select (Active Low)
MOSI Master Out Slave In
MISO Master In Slave Out
SCK Serial Clock
VCC Supply Voltage (3.3V to 5V)
GND Ground

Usage Instructions

How to Use the Component in a Circuit

  1. Connect the VCC pin to the 5V output on the Arduino UNO.
  2. Connect the GND pin to one of the GND pins on the Arduino UNO.
  3. Connect the CS, MOSI, MISO, and SCK pins to the corresponding SPI pins on the Arduino UNO.
  4. Insert an SD card into the module's card slot.

Important Considerations and Best Practices

Example Code for Arduino UNO

#include <SPI.h>
#include <SD.h>

// Pin configuration
const int chipSelect = 4; // Change as per your CS pin connection

void setup() {
  Serial.begin(9600);
  while (!Serial) {
    ; // Wait for serial port to connect.
  }

  Serial.print("Initializing SD card...");

  // On the Ethernet Shield, CS is pin 4. Set the CS pin
  // to be an output and to be HIGH:
  pinMode(chipSelect, OUTPUT);

  if (!SD.begin(chipSelect)) {
    Serial.println("Card failed, or not present");
    // Don't do anything more:
    return;
  }
  Serial.println("Card initialized.");
}

void loop() {
  // Nothing here for now.
}

Troubleshooting and FAQs

Common Issues Users Might Face

Solutions and Tips for Troubleshooting

FAQs

Q: Can I use this module with a 3.3V microcontroller? A: Yes, the module includes a level shifter, making it compatible with both 3.3V and 5V systems.

Q: What is the maximum size of SD card supported by this module? A: The module supports SD cards up to 32GB in size.

Q: How do I format the SD card for use with the module? A: The SD card should be formatted as FAT16 or FAT32. This can typically be done on a computer using standard disk formatting tools.