How to Use Raspberry Pi 4b: Examples, Pinouts, and Specs
Introduction
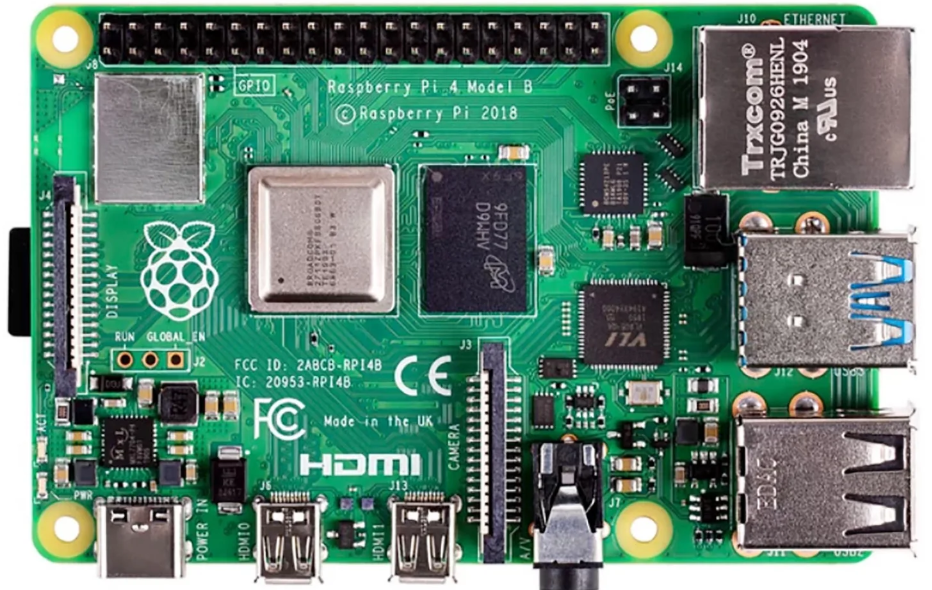
The Raspberry Pi 4B is a small, affordable computer designed for a variety of electronics projects and programming tasks. It features a quad-core ARM Cortex-A72 CPU, up to 8GB of RAM, and various connectivity options including USB, HDMI, and Ethernet. This versatile device is ideal for hobbyists, educators, and professionals looking to explore computing and electronics.
Explore Projects Built with Raspberry Pi 4b
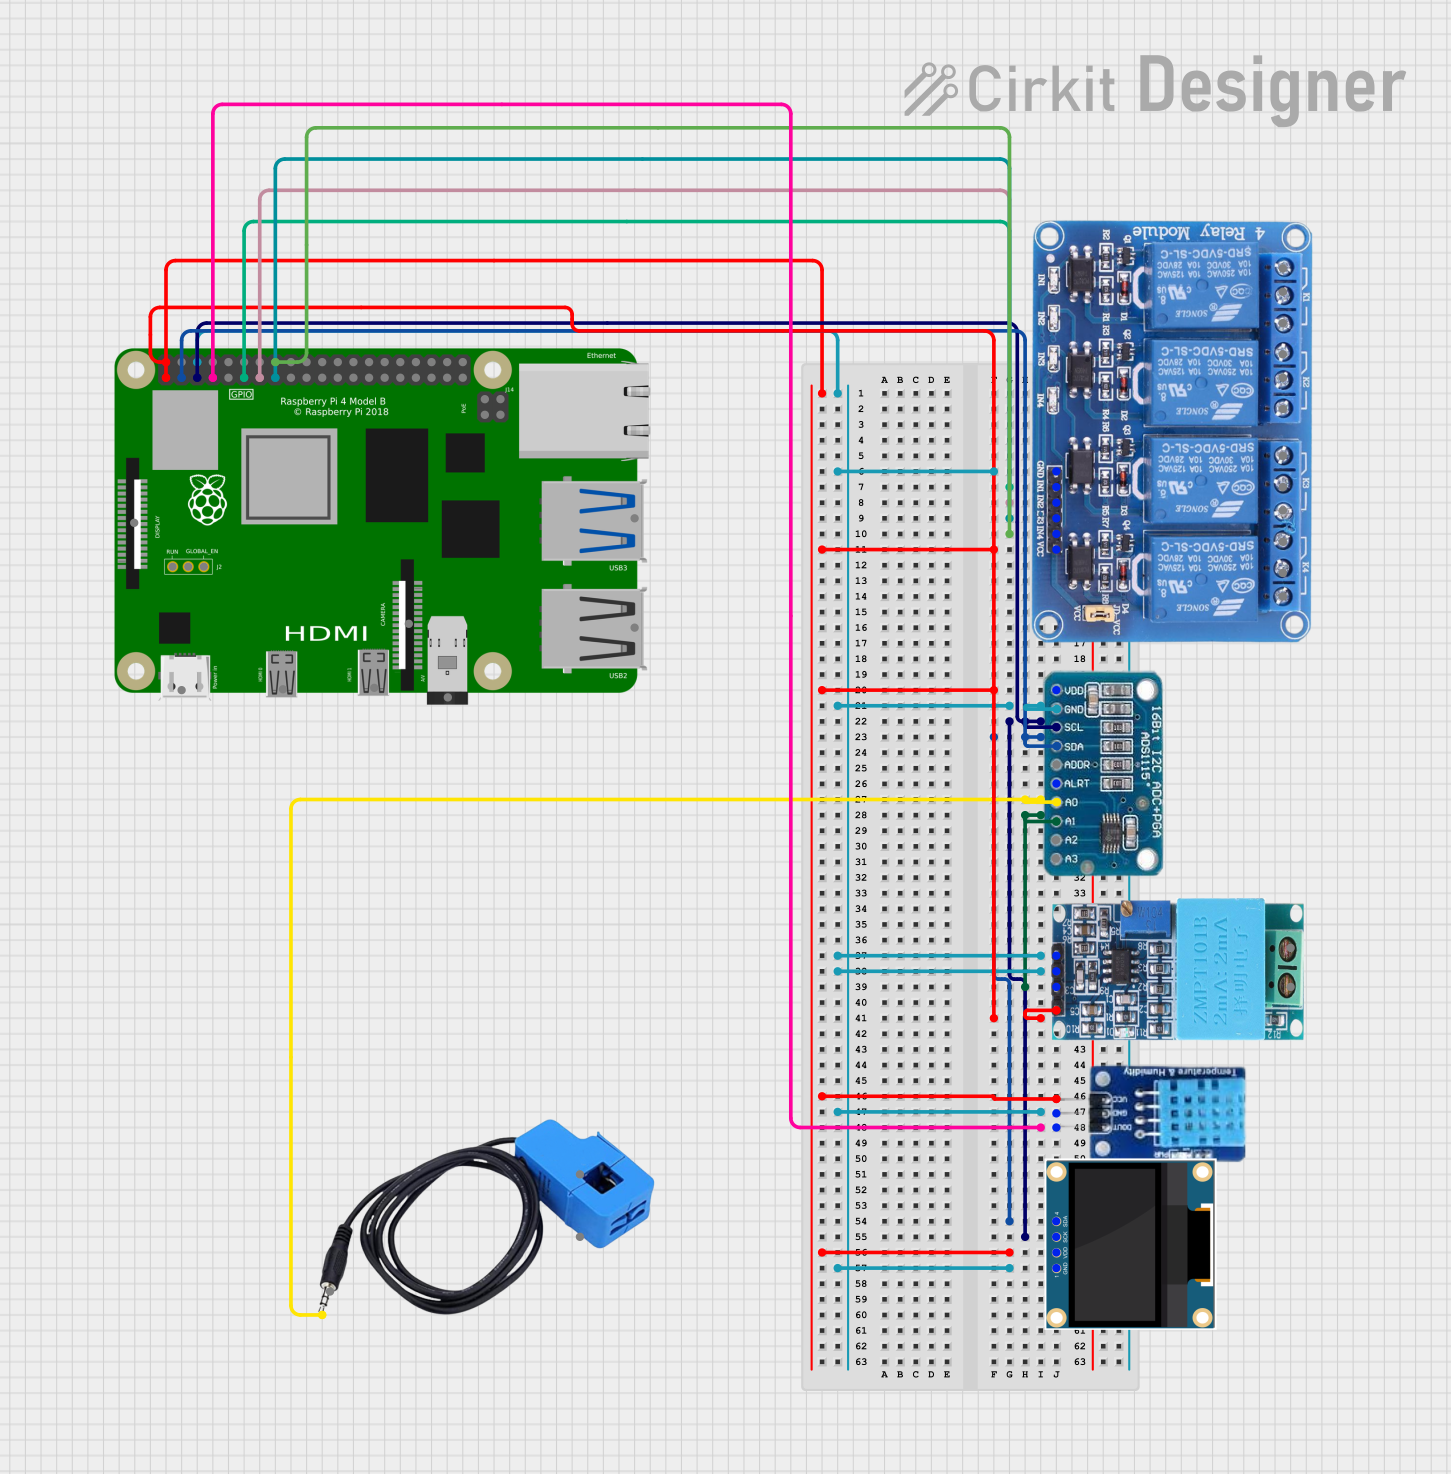
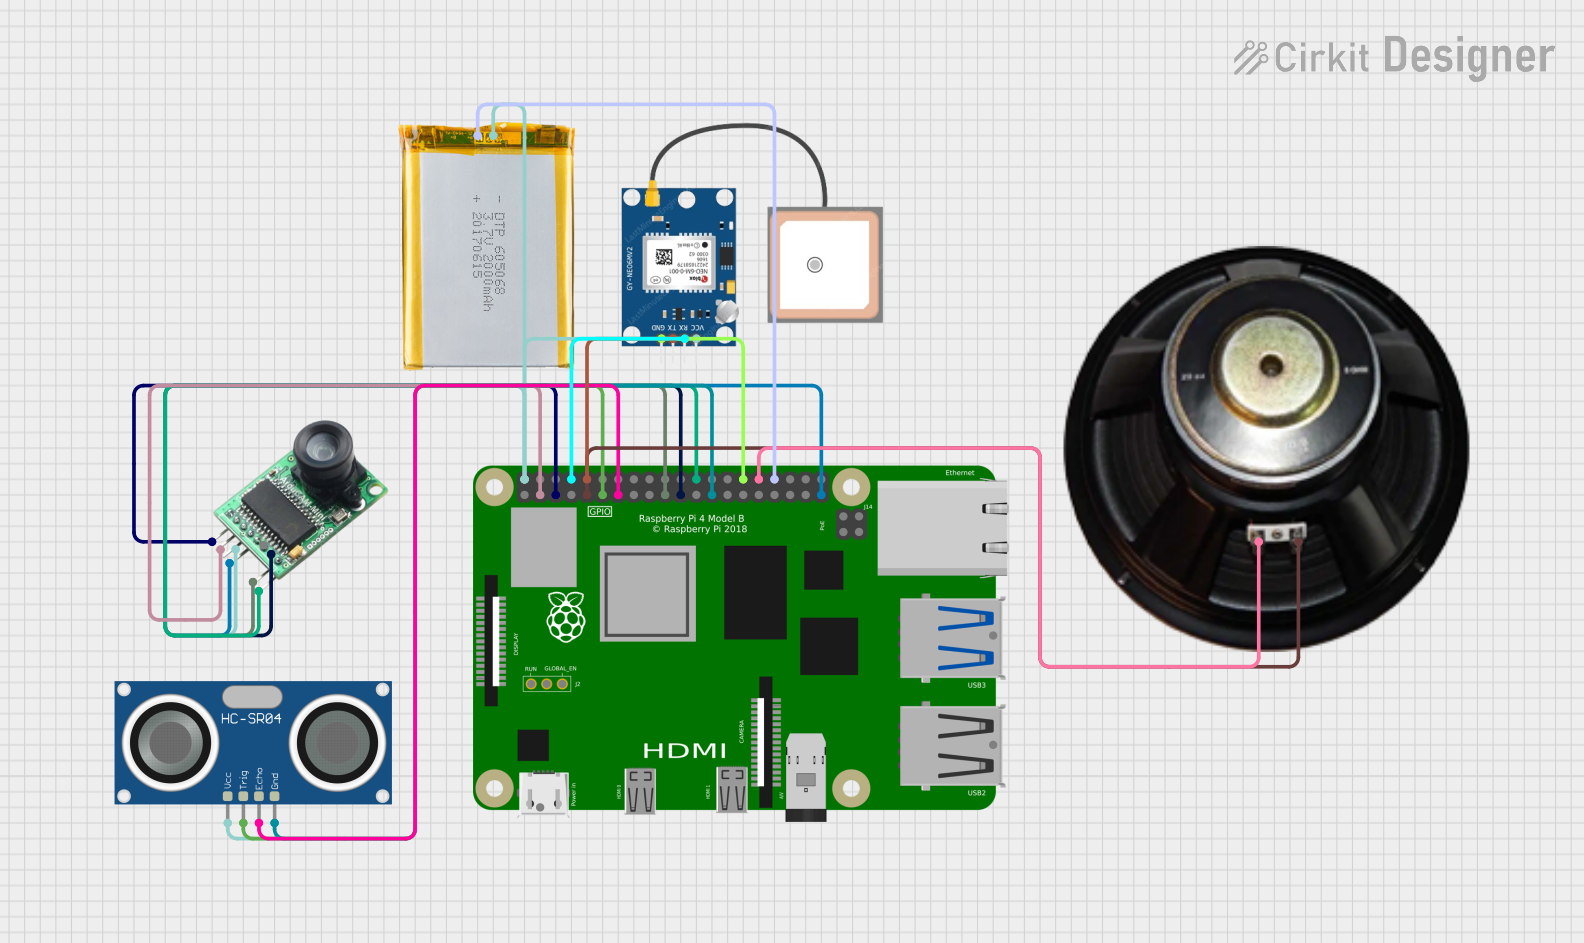
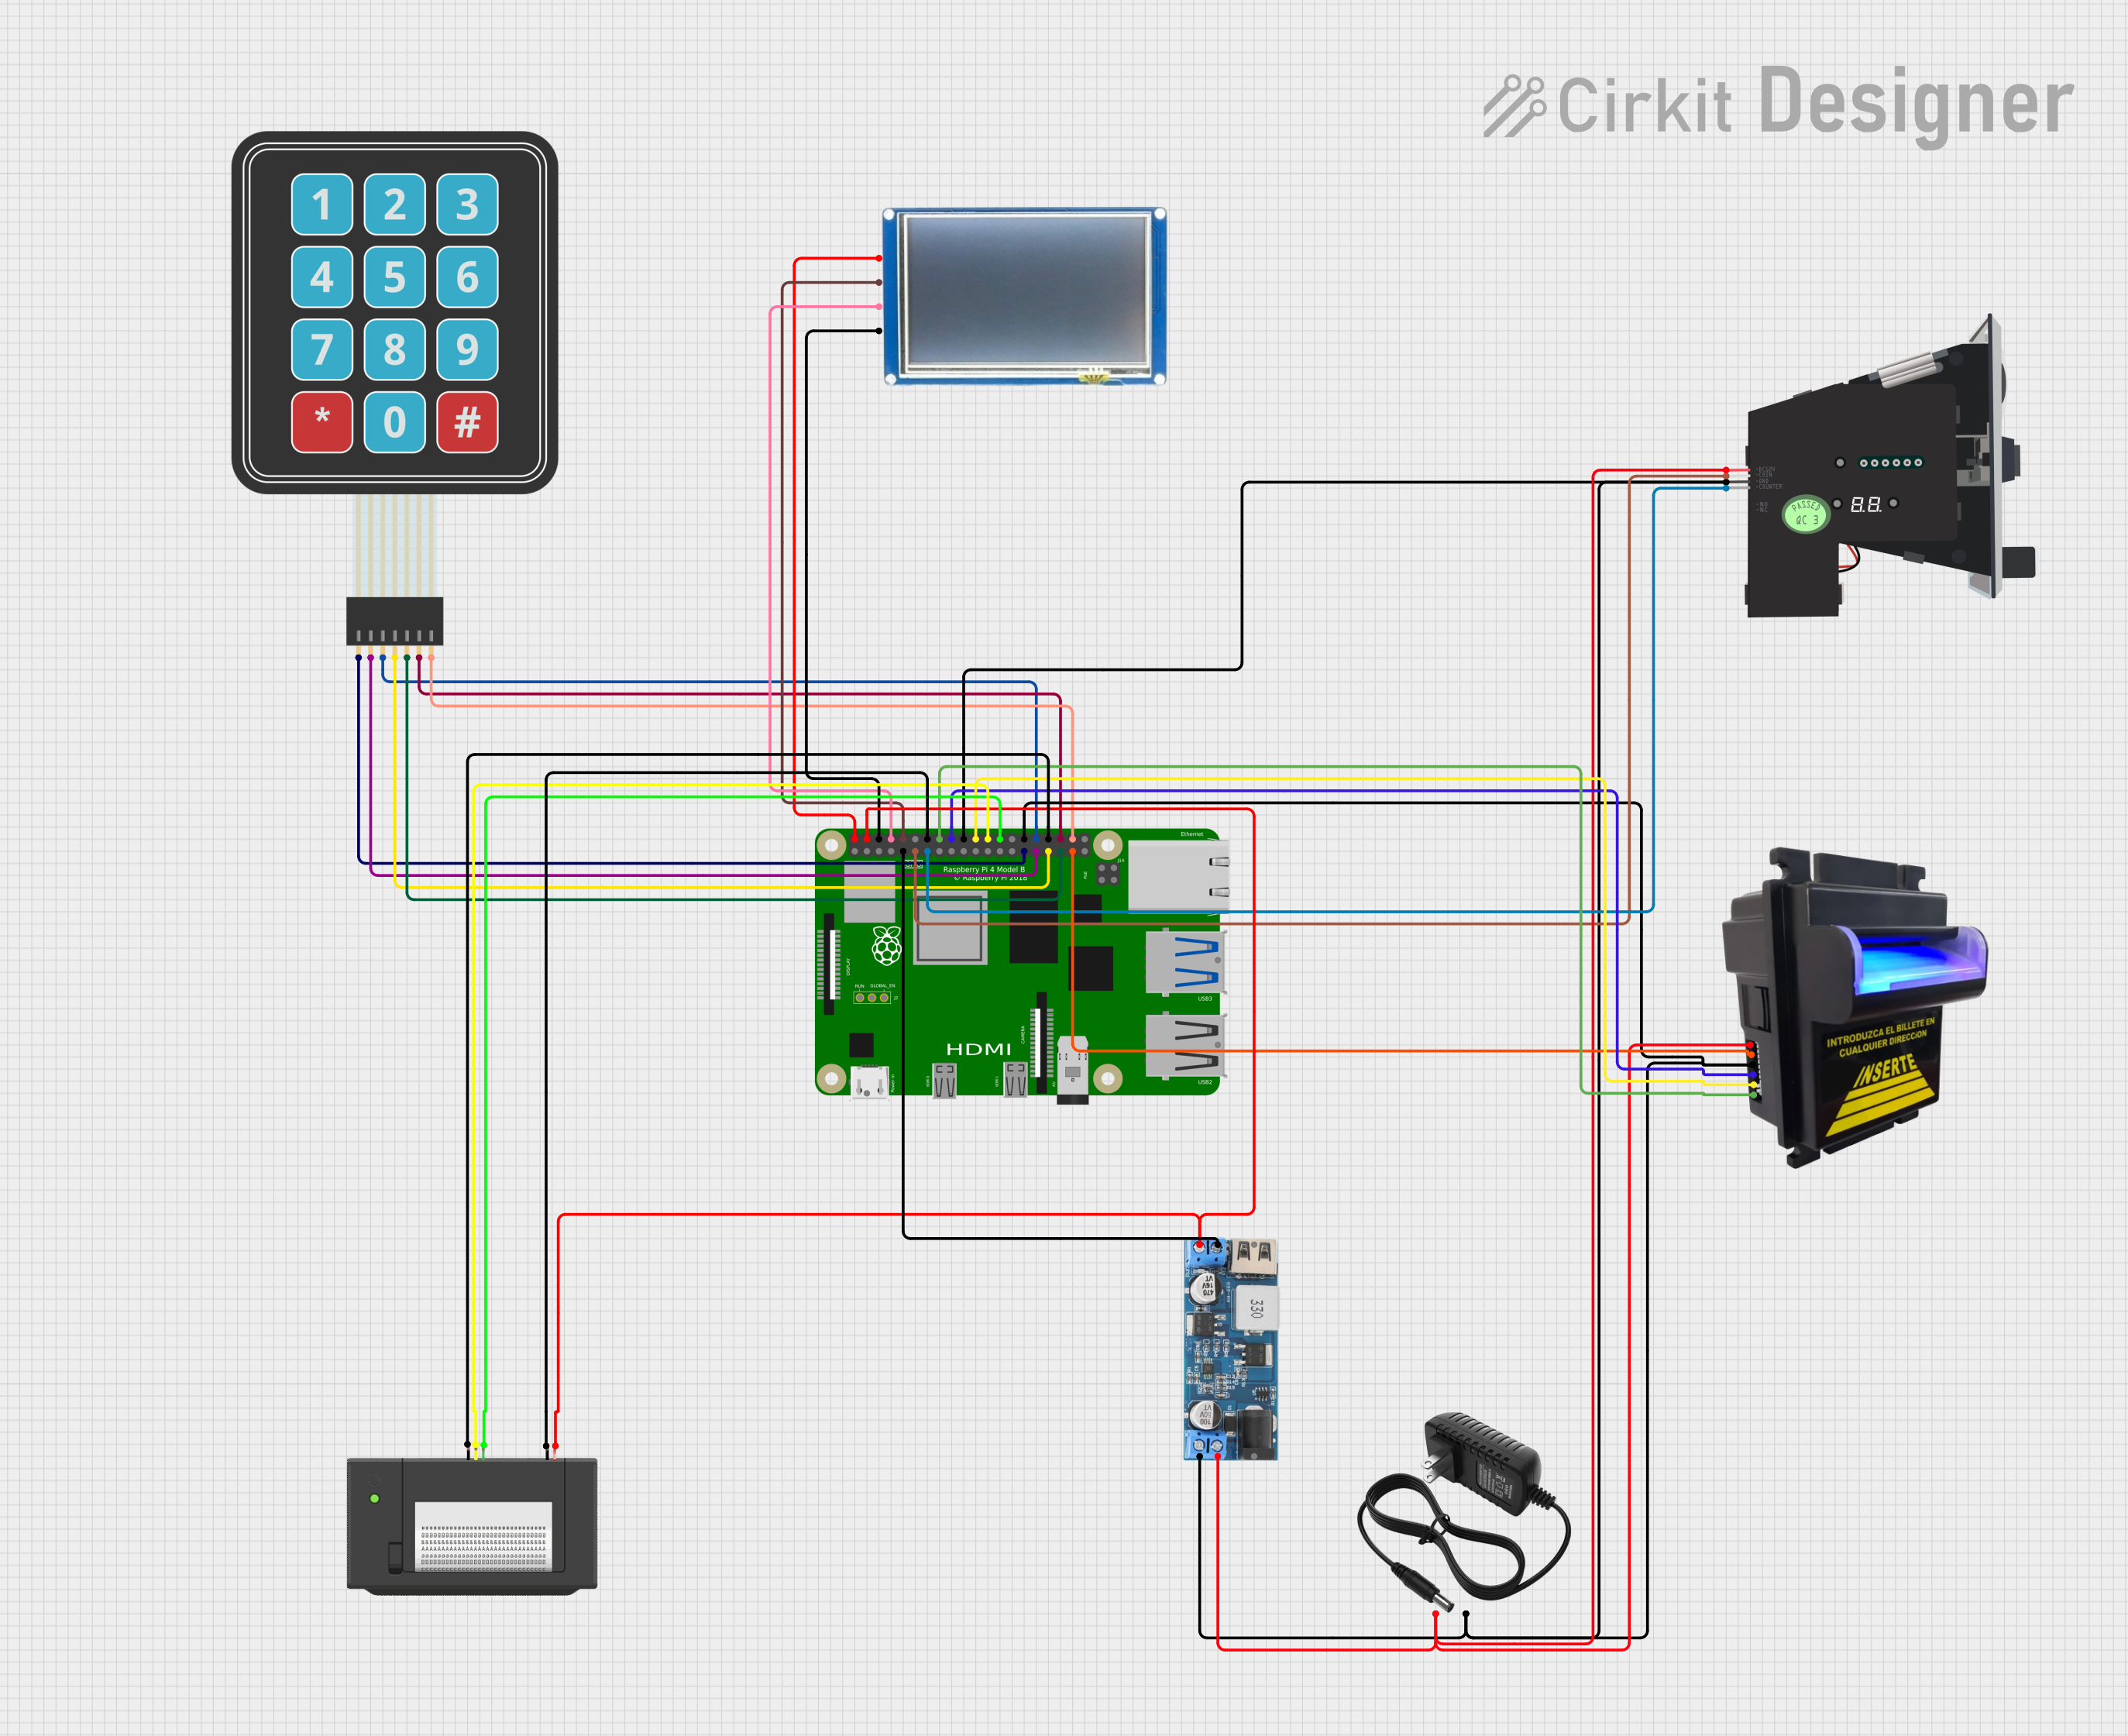
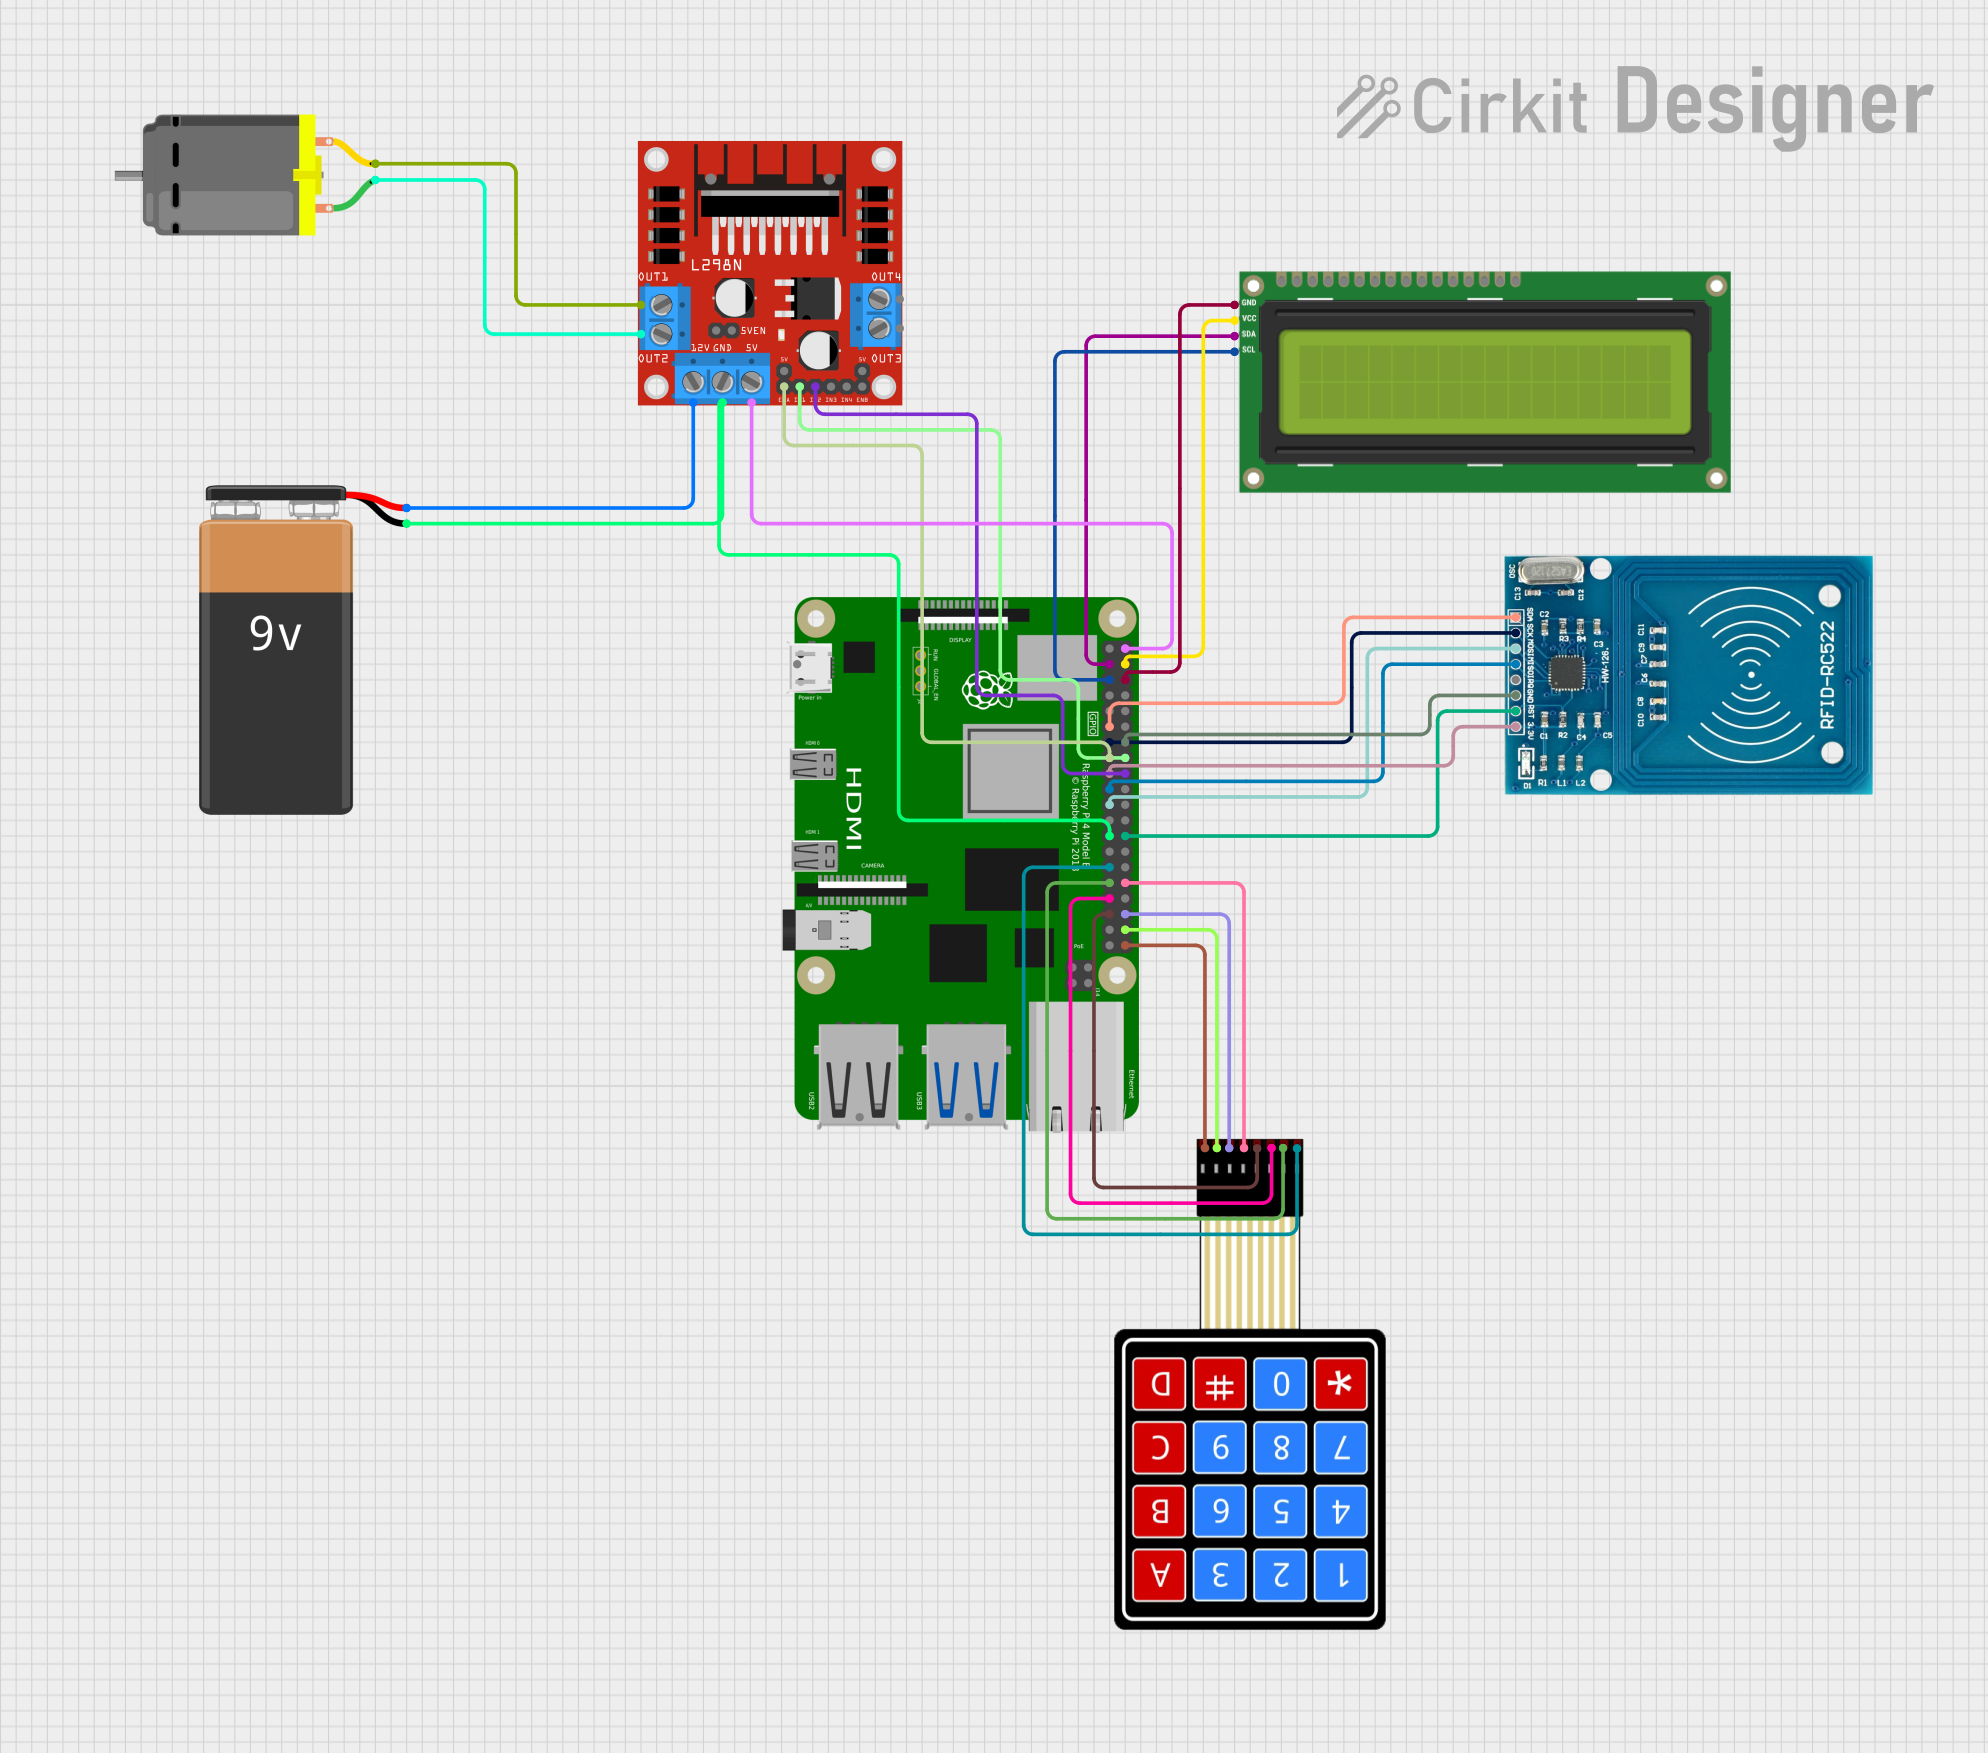
Explore Projects Built with Raspberry Pi 4b
Common Applications and Use Cases
- Home Automation: Control and monitor home devices.
- Media Center: Stream and play media content.
- Educational Tool: Teach programming and electronics.
- IoT Projects: Develop Internet of Things applications.
- Retro Gaming: Emulate classic gaming consoles.
- Web Server: Host websites and web applications.
Technical Specifications
Key Technical Details
| Specification | Details |
|---|---|
| CPU | Quad-core ARM Cortex-A72 @ 1.5GHz |
| RAM | 2GB, 4GB, or 8GB LPDDR4 |
| Storage | microSD card slot |
| USB Ports | 2x USB 3.0, 2x USB 2.0 |
| HDMI Ports | 2x micro HDMI (up to 4K resolution) |
| Ethernet | Gigabit Ethernet |
| Wireless | 802.11ac Wi-Fi, Bluetooth 5.0 |
| GPIO Pins | 40-pin header |
| Power Supply | 5V/3A via USB-C |
| Operating System | Raspberry Pi OS (and others) |
Pin Configuration and Descriptions
| Pin Number | Name | Description |
|---|---|---|
| 1 | 3.3V | 3.3V Power |
| 2 | 5V | 5V Power |
| 3 | GPIO 2 (SDA) | I2C Data |
| 4 | 5V | 5V Power |
| 5 | GPIO 3 (SCL) | I2C Clock |
| 6 | GND | Ground |
| 7 | GPIO 4 | General Purpose I/O |
| 8 | GPIO 14 (TX) | UART Transmit |
| 9 | GND | Ground |
| 10 | GPIO 15 (RX) | UART Receive |
| ... | ... | ... |
| 39 | GND | Ground |
| 40 | GPIO 21 | General Purpose I/O |
Usage Instructions
How to Use the Raspberry Pi 4B in a Circuit
Power Supply:
- Connect a 5V/3A power supply to the USB-C port.
Storage:
- Insert a microSD card with the Raspberry Pi OS installed into the microSD card slot.
Display:
- Connect a monitor using one of the micro HDMI ports.
Peripherals:
- Connect a keyboard and mouse to the USB ports.
Network:
- Connect to the internet via Ethernet or Wi-Fi.
Important Considerations and Best Practices
- Cooling: Use a heatsink or fan to prevent overheating during intensive tasks.
- Power Supply: Ensure a stable 5V/3A power supply to avoid power-related issues.
- Static Electricity: Handle the Raspberry Pi 4B with care to avoid static discharge.
- Software Updates: Regularly update the operating system and software packages.
Troubleshooting and FAQs
Common Issues and Solutions
No Display Output:
- Ensure the HDMI cable is properly connected.
- Check if the monitor is set to the correct input source.
- Verify the microSD card is correctly inserted and has a valid OS image.
Power Issues:
- Use a reliable 5V/3A power supply.
- Check the power cable for any damage.
Wi-Fi Connectivity Problems:
- Ensure the Wi-Fi network credentials are correct.
- Reboot the Raspberry Pi and router.
Overheating:
- Use a heatsink or fan.
- Ensure proper ventilation around the Raspberry Pi.
FAQs
Q: Can I use any microSD card with the Raspberry Pi 4B? A: It is recommended to use a Class 10 microSD card with at least 16GB capacity for optimal performance.
Q: How do I update the Raspberry Pi OS? A: Open a terminal and run the following commands:
sudo apt update
sudo apt full-upgrade
Q: Can I connect the Raspberry Pi 4B to an Arduino UNO? A: Yes, you can use the GPIO pins to interface with an Arduino UNO. Ensure proper voltage levels and use level shifters if necessary.
Q: How do I enable SSH on the Raspberry Pi 4B?
A: Create an empty file named ssh (without any extension) in the boot partition of the microSD card.
Example Code
Blinking an LED with GPIO
Here is an example of how to blink an LED connected to GPIO pin 17 using Python:
import RPi.GPIO as GPIO
import time
Set up GPIO using BCM numbering
GPIO.setmode(GPIO.BCM) GPIO.setup(17, GPIO.OUT)
try: while True: GPIO.output(17, GPIO.HIGH) # Turn on LED time.sleep(1) # Wait for 1 second GPIO.output(17, GPIO.LOW) # Turn off LED time.sleep(1) # Wait for 1 second except KeyboardInterrupt: pass finally: GPIO.cleanup() # Clean up GPIO settings
This code sets up GPIO pin 17 as an output and toggles the LED on and off every second. Ensure you have the `RPi.GPIO` library installed by running `sudo apt install python3-rpi.gpio`.

---

This documentation provides a comprehensive overview of the Raspberry Pi 4B, including its technical specifications, usage instructions, troubleshooting tips, and example code. Whether you are a beginner or an experienced user, this guide will help you make the most of your Raspberry Pi 4B.